This post may contain affiliate links. Please read our disclosure policy.
Soft pillowy bread features a crusty, crackly, and irresistibly crunchy exterior, making it a beloved choice for sandwich enthusiasts worldwide. The recipe is also available in sourdough version.
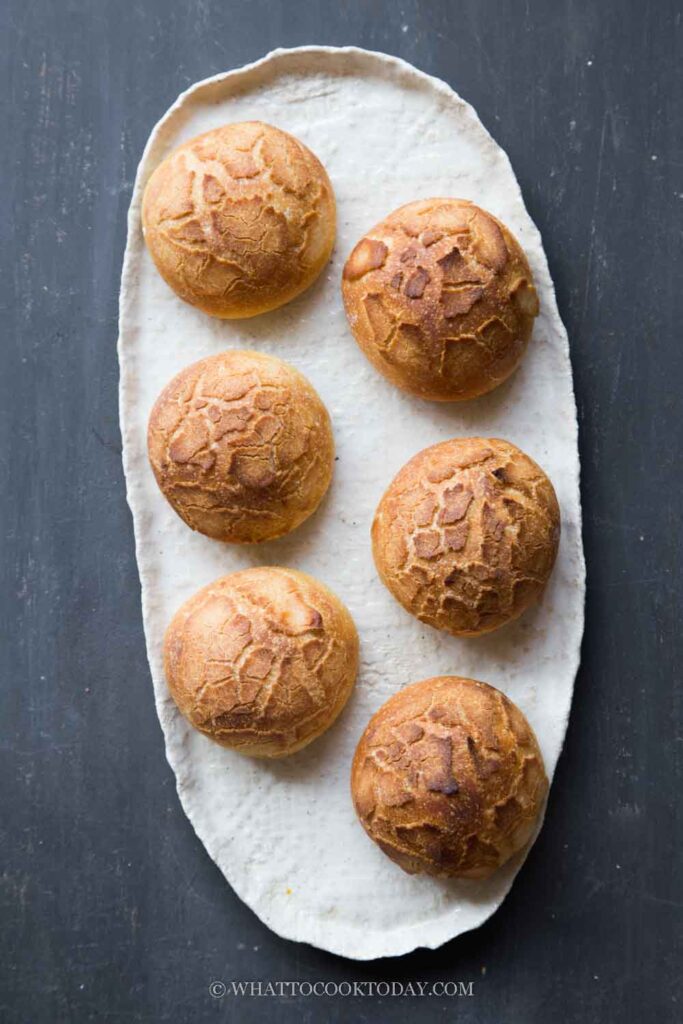
What is Dutch crunch bread or tiger bread?
Dutch Crunch bread, also known as Tiger Bread or Giraffe Bread, originated in the Netherlands. The name “Tiger Bread” comes from the distinct crackled pattern on the bread’s surface, resembling a tiger’s stripes. While its exact origins remain uncertain, it is believed to have been introduced in the early 20th century. What sets Dutch Crunch bread apart is its signature crust. The exterior is typically adorned with a rice flour paste that forms a crackly, crunchy topping after baking. This paste, which consists of rice flour, yeast, sugar, salt, and oil, creates a stunning contrast to the soft and fluffy interior of the bread. The topping is not only visually appealing but also adds a pleasant textural element, making each bite an exciting experience.
What to serve Dutch crunch bread with
We eat it for breakfast, spread with some jam and/or butter. The kids love it. We make sandwiches with them too. Dutch Crunch bread provides an excellent base that enhances the flavors and textures of the fillings. Beyond sandwiches, Dutch Crunch bread can also be enjoyed with various spreads, dips, or soups. Its distinctive texture and visual appeal make it a standout addition to any bread basket, offering a delightful alternative to traditional baguettes or rolls.
Soft Dutch Crunch Bread/ Tiger Bread (Tijgerbrood)
Ingredients
If using commercial yeast:
- 350 g bread flour (12.7% protein content)
- 200 g whole milk or more as needed
- 40 g sugar
- 6 g salt
- 4 g instant yeast
- 35 g unsalted butter softened
If using sourdough
Prepare sweet stiff starter:
- 55 g active starter (100% hydration)
- 165 g bread flour (12.7% protein content)
- 65 g water
- 30 g sugar
For the final dough:
- 158 g bread flour (12.7% protein content)
- 105 g whole milk or more as needed
- 20 g sugar
- 6 g salt
- 35 g unsalted butter softened
Crunch topping:
- 45 g rice flour
- 1 tsp instant yeast
- ¼ tsp salt
- 5 g brown sugar
- 30 g water or more as needed
- 5 g sesame oil or neutral-tasting oil
Instructions
If using sourdough starter:
- Mix all ingredients for sweet stiff starter. Cover loosely with a plastic wrap or a lid. It takes about 10-12 hours to triple
Prepare the dough:
- Add all ingredients for the dough except for the butter. Tear the sweet stiff starter into pieces and add into the dough for sourdough version. Use the dough hook to stir the mixture a bit so the flour won't fly around when you start the mixer. Knead on the lowest speed for 2-3 minutes and then increase to speed 2 and knead for 3 minutes and then speed 4 for another 3 minutes or until it forms a dough that clears the side of the bowl, but not smooth yet
- Add the softened butter and knead on speed 2 for about 2-3 minutes and then increase speed to 4 and knead for 5 minutes or until the dough is soft, smooth, elastic, and slightly sticky to the touch. If you stretch a small portion of the dough thinly and gently, it shouldn't break. This is a windowpane stage
- It is important that the dough is soft, meaning, enough hydration. This will ensure you get a soft fluffy bread texture for more than 24 hours. If the dough feels firm, don't be afraid to add a bit more milk, one teaspoon at a time and knead until you get a soft smooth dough.
First proofing:
- Lightly oil the bowl, cover with a kitchen towel or loosely with plastic wrap, and let rise in a warm place for about 45 minutes to 1 hour, or until double in volume. if it's colder, it may take longer to proof the dough
- For sourdough version, proof for 2 hours at 82 F (28 C). The dough will not double and that's okay
Shaping:
- Line the baking sheet with parchment paper
- Knock out all the gas by giving it some kneading. Divide the dough into 6 equal portions. Cover and let them rest for 5 minutes to relax the gluten
- Take one piece of dough and keep the rest covered. Flatten the dough slightly with your palm and then stretch the edge towards the center and round it up into a taut dough ball. Put on a prepared baking sheet, about 2 inches apart. Repeat with the rest
- To bake as a bread loaf, please see notes
Final proofing:
- Let them proof at a warm place until they are really puffy. This may take about 45 minutes to 1 hour. If it is colder where you are, it may take longer
- For sourdough version, this may take 3-4 hours, depending on the temperature and the strength of your starter
Prepare the rice paste:
- 30 minutes before the end of the final proofing, prepare the rice paste. Combine all ingredients for the rice paste. The consistency should be thick but spreadable. You don't want it to be too thin that it runs all over the place when you apply it on the dough later. If it's too thick you can add a bit more water, one teaspoon at a time. If it's too runny, you can add a bit more rice flour, one teaspoon at a time too. Cover and let it proof for about 20-30 minutes until you are done with the dough proofing
- 10 minutes before the end of proofing, preheat the oven to 425 F (220 C) for conventional oven. For convection oven, lower the temperature by 20 F (15 C)
Apply the rice paste on the dough
- Spoon some of the rice paste on the dough and then gently use a pastry brush or the back of the spoon to spread the paste to cover the dough. Take care not to deflate the dough. It doesn't have to be neat. This paste will crack during baking, creating the beautiful tiger/giraffe pattern. Use all the paste if possible, don't be shy with it
Baking:
- Put the baking sheet on the middle rack and bake for 20 minutes or until dark golden brown. Internal temperature should be at least 190 F (88 C). Rotate the pan halfway through baking for even coloring
- Let the bread cool down on the cooling rack
RECOMMEDED TOOLS
Marv’s Recipe Notes
*Nutrition facts are just estimates and calculated using online tools*
How to bake Dutch crunch bread
1. If using sourdough starter, mix all ingredients for sweet stiff starter. Cover loosely with a plastic wrap or a lid. It takes about 10-12 hours to triple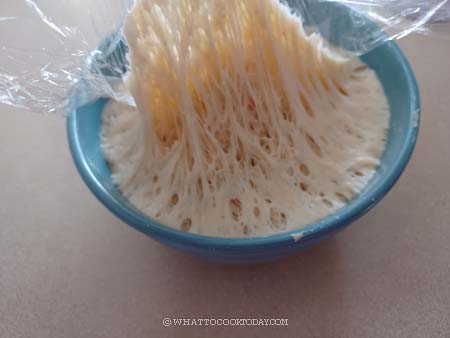
2. Add all ingredients for the dough except for the butter. Tear the sweet stiff starter into pieces and add into the dough for sourdough version. Use the dough hook to stir the mixture a bit so the flour won’t fly around when you start the mixer. Knead on the lowest speed for 2-3 minutes and then increase to speed 2 and knead for 3 minutes and then speed 4 for another 3 minutes or until it forms a dough that clears the side of the bowl, but not smooth yet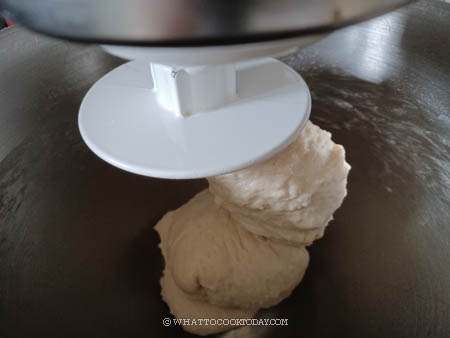
3. Add the softened butter and knead on speed 2 for about 2-3 minutes and then increase speed to 4 and knead for 5 minutes or until the dough is soft, smooth, elastic, and slightly sticky to the touch. If you stretch a small portion of the dough thinly and gently, it shouldn’t break. This is a windowpane stage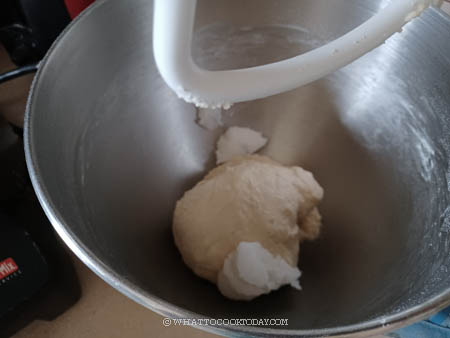
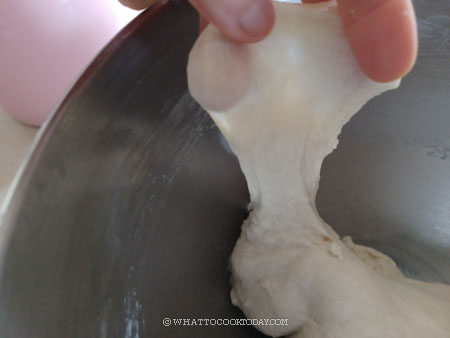
4. It is important that the dough is soft, meaning, enough hydration. This will ensure you get a soft fluffy bread texture for more than 24 hours. If the dough feels firm, don’t be afraid to add a bit more milk, one teaspoon at a time and knead until you get a soft smooth dough.
5. Lightly oil the bowl, cover with a kitchen towel or loosely with plastic wrap, and let rise in a warm place for about 45 minutes to 1 hour, or until double in volume. if it’s colder, it may take longer to proof the dough. For sourdough version, proof for 2 hours at 82 F (28 C). The dough will not double and that’s okay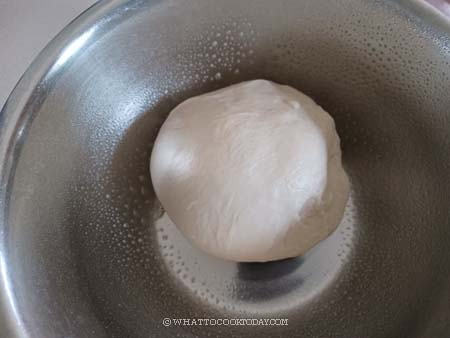

6. Line the baking sheet with parchment paper. Knock out all the gas by giving it some kneading. Divide the dough into 6 (or 8 if you want smaller buns) equal portions. Cover and let them rest for 5 minutes to relax the gluten. Take one piece of dough and keep the rest covered. Flatten the dough slightly with your palm and then stretch the edge towards the center and round it up into a taut dough ball. Put on a prepared baking sheet, about 2 inches apart. Repeat with the rest
7. Let them proof at a warm place until they are really puffy. This may take about 45 minutes to 1 hour. If it is colder where you are, it may take longer. For sourdough version, this may take 3 hours or 4 hours for bread loaf, depending on the temperature and the strength of your starter
8. 30 minutes before the end of the final proofing, prepare the rice paste. Combine all ingredients for the rice paste. The consistency should be thick but spreadable. You don’t want it to be too thin that it runs all over the place when you apply it on the dough later. Cover and let it proof for about 20-30 minutes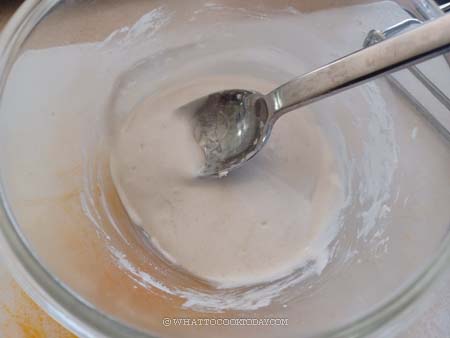
9. 10 minutes before the end of proofing, preheat the oven to 400 F (200 C) for conventional oven. For convection oven, lower the temperature by 20 F (15 C). Spoon some of the rice paste on the dough and then gently use a pastry brush or the back of the spoon to spread the paste to cover the dough. Take care not to deflate the dough. It doesn’t have to be neat. This paste will crack during baking, creating the beautiful tiger/giraffe pattern. Use all the paste if possible, don’t go skimpy on it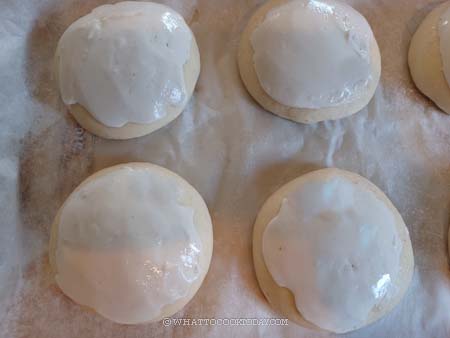
10. Put the baking sheet on the middle rack and bake for 20 minutes or until dark golden brown. Internal temperature should be at least 190 F (88 C). Rotate the pan halfway through baking for even coloring.
11. Let the bread cool down on the cooling rack
How to bake it as a bread loaf
To bake as a bread loaf, simply shape the dough into a loaf shape and put in a 8 1/2 x 4 1/2 loaf pan and let it proof until it reaches the rim of the pan, then brush the rice flour paste on top and bake at 375 F (190 C) for 30 minutes or until the top is golden brown and the internal temperature of the center of the loaf is at least 190 F (88 C). Then remove from the loaf pan and cool down on the rack completely before slicing


