This post may contain affiliate links. Please read our disclosure policy.
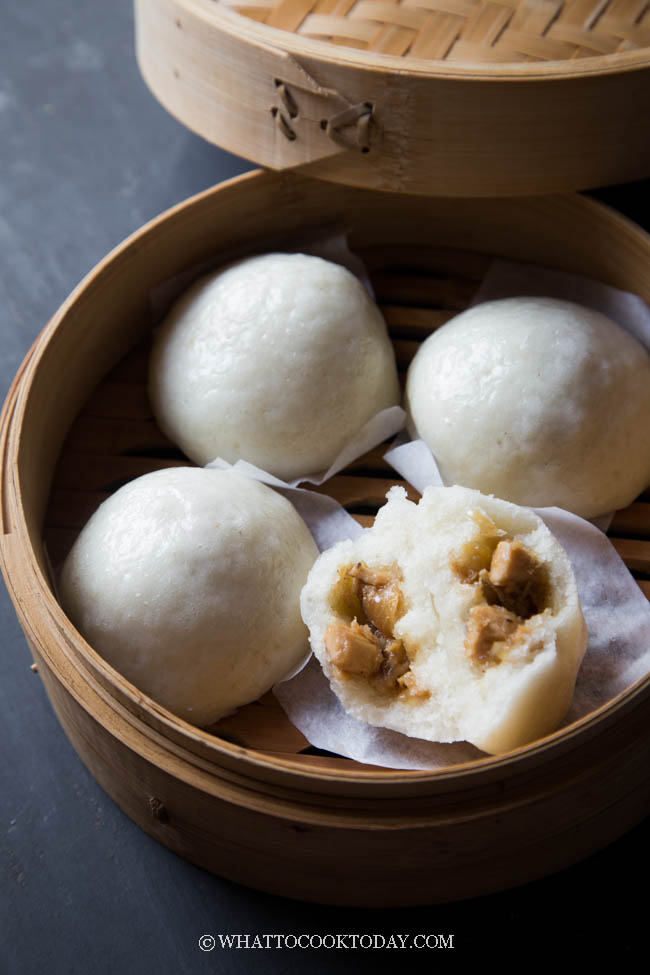
If you are longing for soft fluffy Chinese steamed buns without gluten, you have to try these gluten-free Chinese steamed buns (mantou/baozi) with their delicious gluten-free meat filling. They were soft and fluffy and no xanthan gum is used. All the tips you need to know to get really good gluten-free steamed buns.

I don’t have to be on a gluten-free diet, but gluten-free steamed buns have been on my list to tackle for quite some time. Some of you have asked for it and I wasn’t comfortable sharing it yet without really testing all kinds of possibilities and combinations I could think of.
After months and many rounds of testing out different gluten-free steamed buns recipes, I am so happy to finally able to share with you these really good gluten-free Chinese steamed buns with meat filling (or whatever filling you choose to use). It’s been quite a journey since last year. I was about to throw in the towel on this and forget about it. Then I decided to pick it back up again and started on the experiment again and finally, the family agrees that this is the best gluten-free steamed buns they’ve ever tasted so far.
The recipe rundown
Taste: It tastes very decent like regular steamed buns. It’s not 100% like regular steamed buns (it can’t be when there’s no gluten!), but it certainly is very close and I’m happy with the result
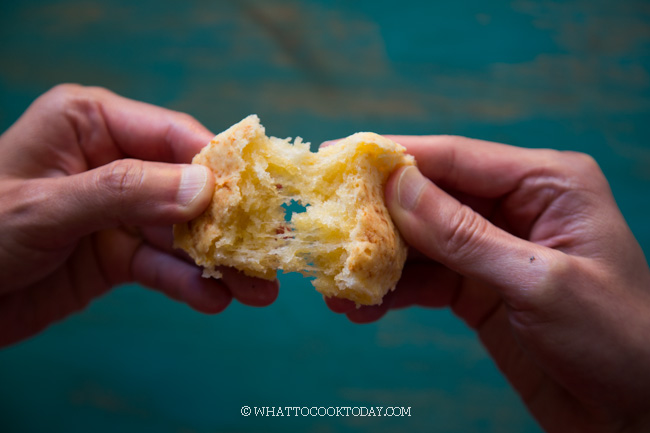
Texture: Finally it has that soft and fluffy texture where I can tear the buns without it breaking apart because it was so hard and dry
Difficulty level: Medium
Pros:
1. No xanthan gum is used. This thing is pricey too!!
2. You don’t need premix gluten-free flour (which varies brand by brand and the result won’t be consistent)
3. Not much kneading: Unlike regular steamed buns made with wheat flour, a breadmaker or stand mixer helps a lot in kneading the dough until it is smooth and elastic. You don’t need much kneading with gluten-free dough at all (yay!)
4. You can use the basic dough and fill it with different sweet or savory filling or no filling. Your call!
Cons: It may be a bit tricky to get the dough to the right consistency, especially if you are doing it for the first time, but I hope the step-by-step instructions and video will help you out
This recipe is adapted from Victoria Glass at The Great British Chefs with some modifications.
Gluten-free flour/starch I use in this recipe
These gluten-free steamed buns are made with 4 widely available gluten-free starch/flour. You don’t have to spend an arm and leg trying to get these flours.
1. Cornstarch
Cornstarch is cheap and available pretty much in any grocery store, Asian or not. The cornstarch contributes to softness and somehow keeps everything stick together without having to use xanthan gum. Some readers have tried substituting cornstarch with tapioca starch with success (I haven’t tried it myself).
2. Potato starch (NOT potato flour)
Potato starch is a starch extracted from the potato whereas potato flour is the whole potato being dried and ground up into a flour. So there is a huge difference here. We want to use only the starch of the potato. So make sure you get the right one.
3. Glutinous rice flour (mochiko flour)
Glutinous rice flour or sometimes known as sweet rice flour or mochiko flour gives the steamed buns the stretchable and “tearable” texture that gluten yields in regular steamed buns. This is also widely available these days. Glutinous rice flour does NOT contain gluten. It’s just the name glutinous that means being stretchy and filling.
4. Rice flour
Rice flour is made with regular white rice being dried and blend into flour. Rice flour contributes to the softness of the gluten-free steamed buns. I heard there is also rice starch, which is a starch being extracted from the rice. We don’t want the starch, we want the flour.
Can I use premix gluten-free all-purpose or bread flour?
NOT with this recipe anyway. I have tried several different brands and each brand has different ingredients that go in it. Each brand needs different modifications and I couldn’t get a consistent result. So I decided to ditch that. You may not be able to get the same brand of gluten-free flour I use or I don’t know about the one you use, so it’s too many variables here. Even though it says that gluten-free all-purpose flour or bread flour can replace regular flour cup by cup, I found that it’s not always the case though, at least not when it comes to making gluten-free steamed buns. So, I won’t try to replace the flours/starches I used in this recipe with premix gluten-free all-purpose flour, it won’t turn out right!

Other Ingredients for the dough
1. Yeast
You can use instant yeast or active dry yeast
2. Baking powder
I usually don’t use baking powder in my regular steamed buns recipe, but for gluten-free dough, it is “denser” and the baking powder helps to leaven the dough more, making it fluffier
3. Oil
You can use any neutral-tasting cooking oil. The recipe doesn’t call for much, but oil keeps the dough moist, which is especially important in the gluten-free dough, which usually tends to be drier
4. Liquid
You can use dairy or non-dairy milk here or water. I have tried both and they turned out well with either one
5. Salt and sugar
A pinch of salt and sugar does bring out the flavor in the steamed buns, so I recommend not omitting these
Okay so now we’ve got those out of the way, we should dive right into how to make these gluten-free steamed buns!!
Soft Fluffy Chinese Gluten-Free Meat Bao Buns (Mantou/Baozi)
Ingredients
To activate the yeast:
- 5 gr instant yeast
- 1 tsp sugar
- 2 Tbsp warm water (not hot)
Dry ingredients for the dough (I highly recommend using a measuring scale):
- 88 gr cornstarch plus more for dusting as needed. See notes
- 43 gr potato starch
- 45 gr glutinous rice flour
- 50 gr rice flour
- 1 tsp baking powder
- ¼ tsp salt
- 30 gr sugar
Wet ingredients for the dough:
- 80 ml water or dairy/non-dairy milk start with this amount. I used about 130 ml
- 30 ml cooking oil
For the gluten-free meat filling (you can use whatever filling you like):
- 1 Tbsp cooking oil
- 1 large onion peeled and finely chopped
- 120 gr leftover chicken meat (diced or shredded) (4.2 oz) or you can use about 200 grams (7 oz) raw chicken or pork
- 1 Tbsp tamari or coconut aminos. More or less to your taste
- 2 Tbsp brown sugar or more to your taste
- 1 tsp sesame oil
- ¼ tsp ground black pepper
To thicken the filling:
- 2 tsp cornstarch
- 1 Tbsp water
Instructions
Prepare the filling (can be done few days before and keep in the fridge):
- Preheat a skillet or wok. Add cooking oil and saute onion until they are soft and aromatic, about 3 minutes or so. Add chicken meat and the rest of the ingredients. If you use raw meat, continue to cook until the meat is cooked through. Have a taste. The filling should be savory and sweet. Adjust by adding more tamari/coconut aminos and/or brown sugar to your taste
- When you are happy with the taste. Mix the cornstarch with water and pour it into the skillet/wok to thicken the filling. Remove from the heat and let the filling cools down completely before wrapping or store in the fridge if not using it immediately
Activate the yeast:
- Put all ingredients in the bowl and stir to mix. Let it sits for 10 minutes. The mixture should be foamy and bubbly, which indicates that the yeast is still active. If it doesn't after 10 minutes, the yeast is no longer working and you need to get a new one before proceeding with the recipe
Prepare the dough:
- Stir all the dry ingredients in a large mixing bowl to mix them up. Add the yeast mixture. Then gradually add the water/milk and oil and stir to roughly mix. Don't add all the water/milk yet, start with about 80 ml of it and gradually add. This is important as different brand of flour may have slightly different liquid absorption capacity. Use one of your clean hands to knead it into a dough. The dough should feel a bit wet and moist but not sticky to your fingers. If the dough feels dry , cracking, and falls apart, add a bit more liquid, a teaspoon at a time until it comes together. It should feel like a "playdoh". The dough doesn't have any elasticity
First proofing until doubles in size:
- Cover and put the dough in a warm place. I put mine in the oven and use the "bread proof" function. It took a bit over 1 hour for the dough to double in size. Don't go by time. It may be faster or longer depending on the temperature
Shape and fill the dough:
- Scoop the proofed dough out onto a working surface, lightly dusted with cornstarch. Use your clean hands to gather the dough back into one large dough and then divide into 8 equal portions. Keep them covered and work with one dough at a time
- Prepare a small cup of water next to you in case you need it to help you shape the dough. Roll the dough into a round ball and then use your thumb to gently press it in and then to the side to form a bowl (as shown in the photo and video). Put the filling inside the cavity. Gently mold the dough to seal the filling. If at any point the dough feels dry and crackly, dab the dough with a bit of water and then roll it into a smooth round ball. Place this on parchment paper and cover with a damp towel. Repeat with the rest of the dough balls.
Second proofing:
- Place the shaped buns at a warm place again to let them proof until they are about 50% of their original size (they won't double in size). This round will be faster, about15-30 minutes, but please don't go by time. The dough needs to feel somewhat lighter when you lift them up and about 50% puffy
Steaming:
- Get the steamer ready by bringing the water in the steamer to a rolling boil. Place the shaped buns inside a steaming basket or on a steaming rack. If you have a 3-tiered steamer, you can steam them all at once. Otherwise, you need to steam in batches. Lower the heat to medium and let the buns steamed for 8 minutes. After 8 minutes, turn off the heat and wait for 1 minute before opening the lid
- Remove the steamed buns from the steamer and place them on a cooling rack. This is to prevent the bottom of the steamed buns from getting soggy from trapped condensation at the bottom
Serve:
- Gluten-free steamed buns (or any steamed buns gluten-free or not) are best served warm. Gluten-free steamed buns will harden considerably when they have cooled down completely and after refrigeration. Simply reheat in a microwave or in the steamer and they will be as good as new
- There are many tips and other information about this gluten-free steamed bun recipe in the post that hopefully you find useful. So be sure to read them, they might answer some of the questions you have that is not covered in the recipe card
Marv’s Recipe Notes
How to make really good gluten-free steamed buns
1. Prepare the filling
Preheat a skillet or wok. Add cooking oil and saute onion until they are soft and aromatic, about 3 minutes or so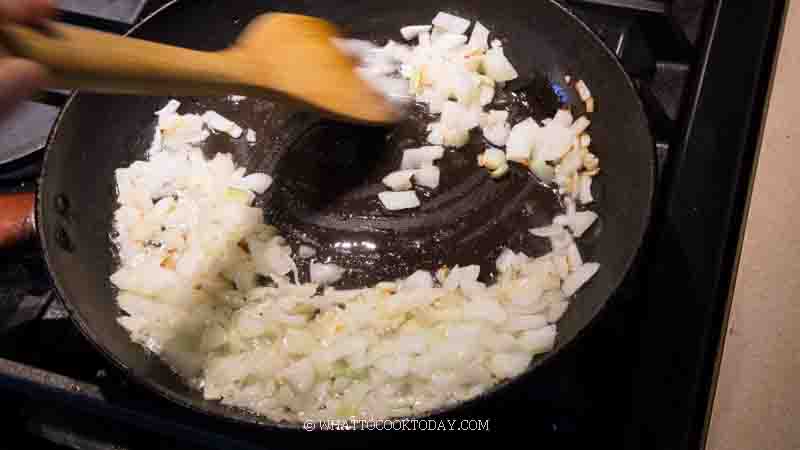
Add chicken meat and the rest of the ingredients. If you use raw meat, continue to cook until the meat is cooked through. Have a taste. The filling should be savory and sweet. Adjust by adding more tamari/coconut aminos and/or brown sugar to your taste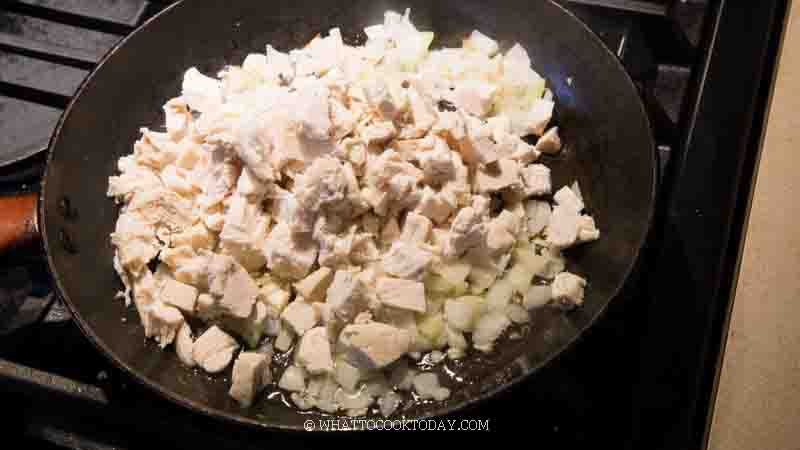
When you are happy with the taste. Mix the cornstarch with water and pour it into the skillet/wok to thicken the filling. Remove from the heat and let the filling cools down completely before wrapping or store in the fridge if not using it immediately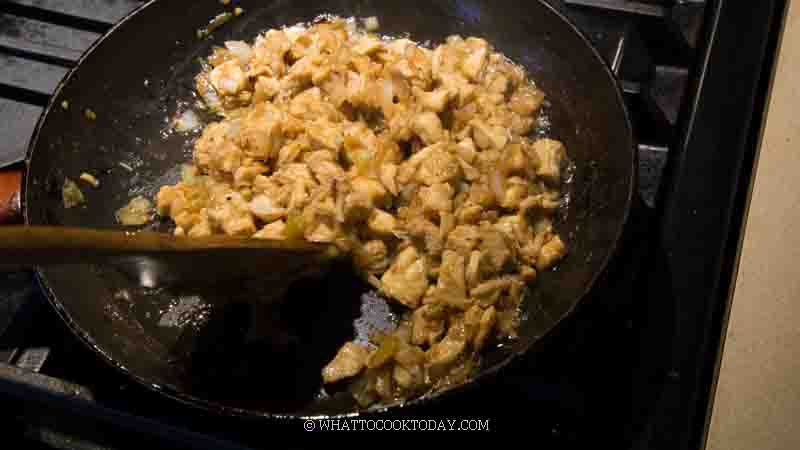
2. Activate the yeast
Put all ingredients in the bowl and stir to mix. Let it sits for 10 minutes. The mixture should be foamy and bubbly, which indicates that the yeast is still active. If it doesn’t after 10 minutes, the yeast is no longer working and you need to get a new one before proceeding with the recipe
3. Prepare the dough
Stir all the dry ingredients in a large mixing bowl to mix them up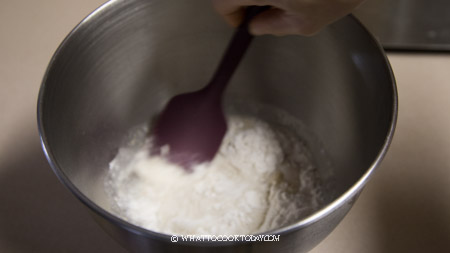
Then add the yeast mixture, and gradually add in water/milk and oil and stir to roughly mix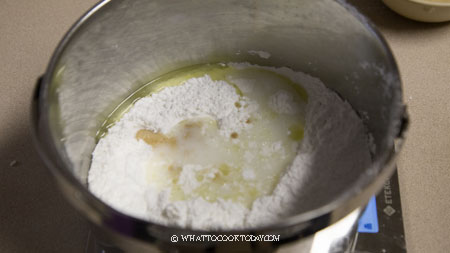
Use one of your clean hands to knead it into a dough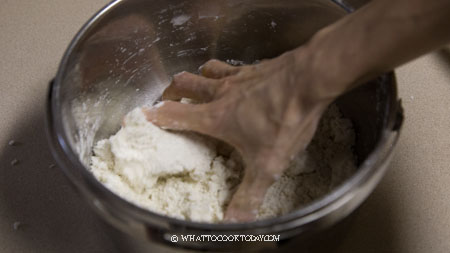
The dough should feel a bit wet and moist but not sticky to your fingers. If the dough feels dry , cracking, and falls apart, add a bit more liquid, a teaspoon at a time until it comes together. It should feel like a “playdoh”. The dough doesn’t have any elasticity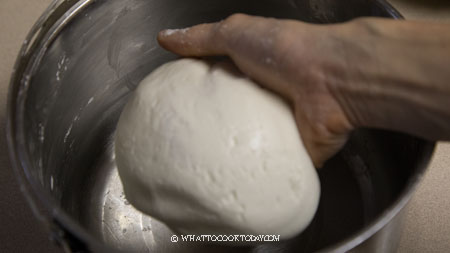
4. First proofing until doubles in size
Cover and put the dough in a warm place. I put mine in the oven and use the “bread proof” function. It took a bit over 1 hour for the dough to double in size. Don’t go by the time. It may be faster or longer depending on the temperature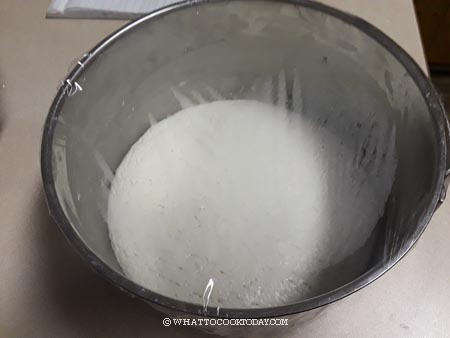
5. Shape and fill the dough
Scoop the proofed dough out onto a working surface, lightly dusted with cornstarch or tapioca starch (if you replace cornstarch with tapioca starch). Use your clean hands to gather the dough back into one large dough and then divide it into 8 equal portions. Keep them covered and work with one dough at a time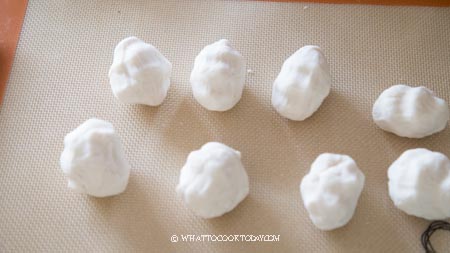
Prepare a small cup of water next to you in case you need it to help you shape the dough. Roll the dough into a round ball and then use your thumb to gently press it in and then to the side to form a bowl (as shown in the photo and video)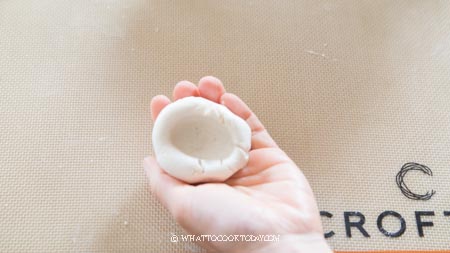
Put the filling inside the cavity. Gently mold the dough to seal the filling. If at any point the dough feels dry and crackly, dab the dough with a bit of water and then roll it into a smooth round ball. Place this on parchment paper and cover it with a damp towel. Repeat with the rest of the dough balls.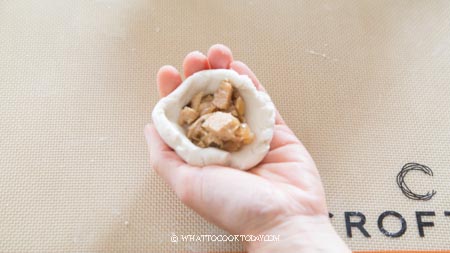
6. Second proofing
Place the shaped buns at a warm place again to let them proof until they are about 50% of their original size (they won’t double in size). This round will be faster, about15-30 minutes, but please don’t go by the time. The dough needs to feel somewhat lighter when you lift them up and about 50% puffy
7. Steaming
Get the steamer ready by bringing the water in the steamer to a rolling boil. Place the shaped buns inside a steaming basket or on a steaming rack. Lower the heat to medium and steam for 8 minutes and then wait for 1 minute before opening the lid to remove the steamed buns. Let them cool down on the cooling rack so the bottom won’t get soggy and wet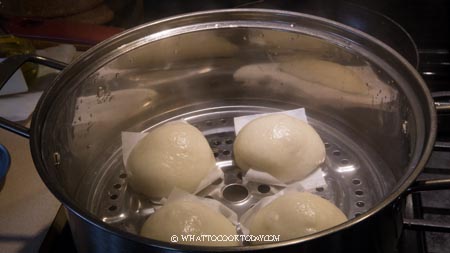
What to expect from this gluten-free steamed buns recipe
1. Steamed buns should be soft and fluffy while they are warm and they are best served while they are still warm
2. The steamed buns will harden slightly once they have cooled down completely. They will be quite tough after refrigeration and that’s normal. Simply reheat in the steamer or microwave and they will be as good as new
Other filling ideas for these gluten-free steamed buns
Red bean paste, mung bean paste (simply replace all-purpose flour with cornstarch or tapioca starch, black sesame paste
Can I make the dough ahead?
Yes, you can. I have tried making the dough 24 hours ahead. Here’s how:
1. Prepare the dough up to first proofing
2. Let the dough proofs in a warm place for one hour and then transfer to a fridge
3. When you are ready to work with the dough, get them out from the fridge and let sit for about 1 hour at room temperature, and then continue to shaping and the rest of the instruction
Why gluten-free steamed buns are tough after steaming?
The dough might be too dry and/or it is not proofed long enough. Make sure it doubles in size the first time you proof and then about 50% puffy the second time you proof them
Why the gluten-free dough is dry and cracking?
The gluten-free dough needs more moisture compared to the regular dough. At any time during shaping, you can always dab the dough with some water to help you roll it into a smooth dough
How to store and reheat gluten-free steamed buns
1. Let the steamed buns cooled down completely and then place them on a baking sheet, not touching each other, and then put the entire tray inside the freezer for about 1 hour. They will harden, but not completely frozen yet. Transfer to a freezer bag and they will not stick to each other anymore. Try not to keep for more than 1 month
2. They can go straight from freezer to steamer when you ready to eat them. Steam on high heat for 5 minutes or until they are heated through and they are as good as new
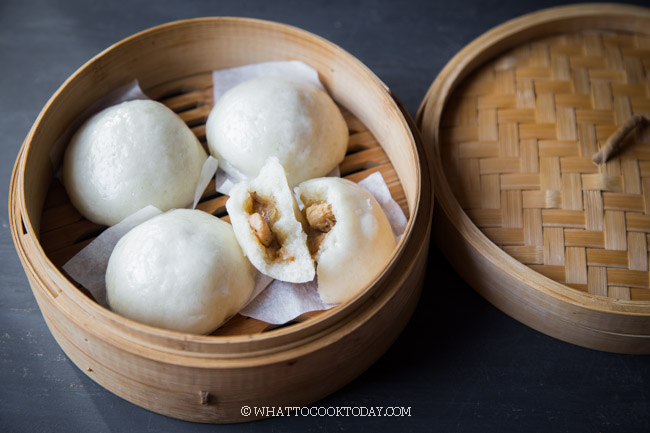
I have to admit that gluten-free steamed buns were one of the toughest “projects” for me. It made me realized when you took out something as important as gluten in bread or buns making, you have to come up with something to replace that to give you the almost similar texture and taste, and man…that was NOT an easy task. This recipe tastes very close to the regular steamed buns. I cannot expect it to be 100% the same because it is not the same without the gluten. It just cannot be. But, I can tell you that I think you will enjoy the texture and taste. There’s always room for improvement and as for now, I will settle with this until something better comes up 😉
You may like these gluten-free recipes too
Did you make this gluten-free meat steamed buns recipe?
I love it when you guys snap a photo and tag to show me what you’ve made 🙂 Simply tag me @WhatToCookToday #WhatToCookToday on Instagram and I’ll be sure to stop by and take a peek for real!



102 comments
Can I use the dough in this recipe as a replacement for any of your recipes that call for “basic steamed buns recipe”?
Hi Jordan, yes absolutely!
Thank you for your reply! Another question: I’d like to double this recipe because my family eats a lot. Would you recommend making two separate doughs, or would it be okay to make one big dough?
Hi Jordan, yes, I think you can safely double batch since it’s not a huge dough. I highly recommend weighing with a scale if possible instead of using volume measurement.
I am sure I did something wrong, but all I got after letting it proof was a crumbly mess.
oh no! did you measure the ingredients by weight?
Made this today with my own filling and my GF son enjoyed it. He has already declared I can make it again. He just had 1 for snack and has decided he wants it for breakfast tomorrow. Thank you!!!!
Hi Kelly, yay…so happy to know that your son approved of this 🙂
Thank you so much for this recipe! Made this today and my son is absolutely thrilled with this!
Do you need the 2 different rice flours? Is one more important to have than the other? I have rice flour but not glutinous rice flour.
Hi Amy, yes, you need both. Even though they are both rice flours, they behave differently. Rice flour can be drying if used too much, while glutinous rice flour provides that “stretchy” texture that regular rice flour doesn’t.