This post may contain affiliate links. Please read our disclosure policy.
Soft and fluffy milk buns baked in the shape of a heart and filled with delicious matcha milk powder filling. Whether it is enjoyed as a treat or given as a gift, Valentine’s heart-shaped bread is sure to bring a smile to the face of anyone who receives or eats it.

Valentine’s day is approaching and my kids usually would ask me what kind of valentine’s theme food I would make every year. Well, I can’t say I keep up with the theme every year, but this year I thought I can make these heart-shaped milk buns (since I’m totally into bread-baking these days LOL!). My kids love it when they come home to see something in heart shape for their after-school snacks!
What is this matcha milk filling?
The two main ingredients of this filling basically are milk powder and butter and just lightly sweetened with powdered sugar, flavored with matcha powder and a little bit of egg to bring everything together. It’s like a cross between a crispy cookie and a streusel topping! sort of!
Ingredients and substitutions
The bread is made with a basic enriched dough. They are soft, airy, and buttery
1. Bread flour
I use bread flour with 12.7% protein content. Use any strong bread flour you have available to you
2. Yeast
Both instant yeast and active dry yeast work here
3. Egg
I usually use a large size egg, about 58-60 grams when weigh with the shell
4. Sugar
You can use either granulated sugar or caster sugar or other sugar of your choice
5. Whole milk
You can use non-dairy milk too. Just know that if you use low-fat or skim milk, the dough won’t be as rich in taste
6. Unsalted butter
The butter needs to be softened at room temperature. You can also use the same amount of softened coconut oil
How to make heart-shaped milk buns with matcha milk filling
1. Combine all the ingredients for the filling. It should be a paste-like consistency, but not too sticky. Divide into 8 portions and roll into round balls for easier wrapping. Cover and set aside until you are ready to use it.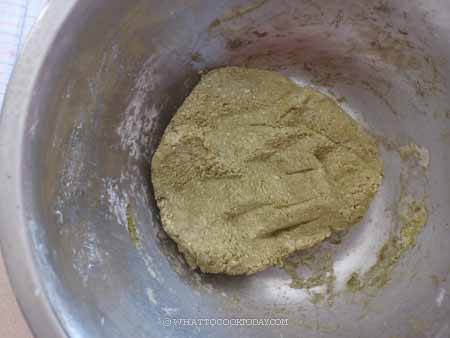
2. Combine all ingredients for the dough, except for the butter in a mixing bowl of a stand mixer fitted with a dough hook attachment. Knead until it forms a rough dough. Add the softened butter and continue to knead until the dough is smooth and elastic. If you slowly stretch a small amount of the dough thinly, it won’t break. It has reached a window-pane stage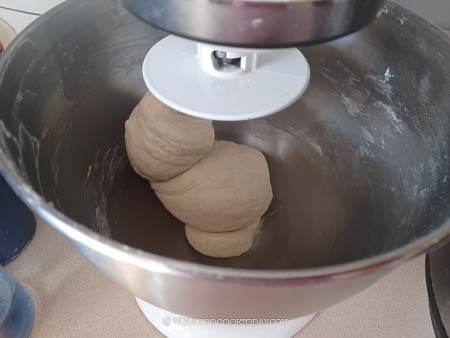

3. Oil a large bowl and transfer the dough into the bowl. Cover and let it proof at a warm place for about 1 hour or until it doubles in size. Don’t go by the time. It may take longer if the temperature is colder where you are. When you press on the dough, the indentation stays, which means the dough is done proofing. Transfer to a work surface lightly dusted with some flour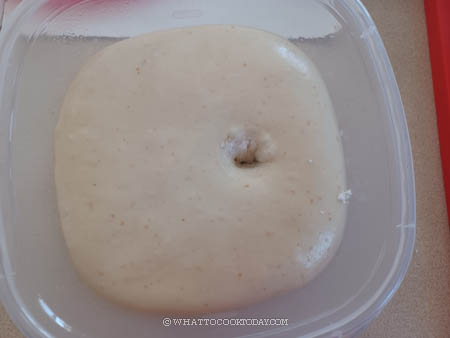
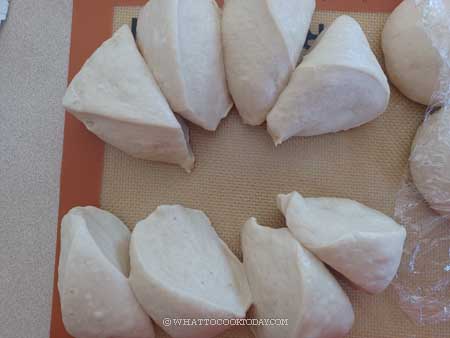
4. Punch all the air out and give it a few kneads. Divide the dough into 10 equal pieces. Flatten the dough slightly into a disc and then pull the edges of the dough and tuck to form a round shape. Roll it into a smooth round dough ball. Cover and let them rest for 10 minutes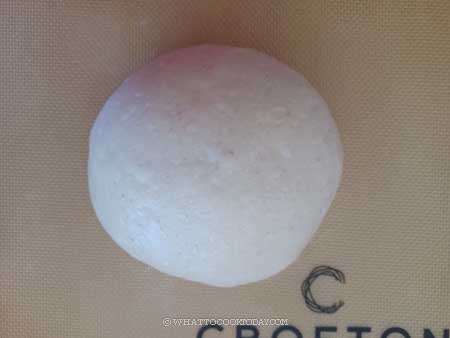
5. I did 3 slightly different heart shapes. Work with one dough at a time, Flatten the dough a bit and then roll it into about 4-inches circle. Put one filling in the middle. Wrap the dough around the filling. Pinch the seam to seal. Do this to all the dough and filling and keep them covered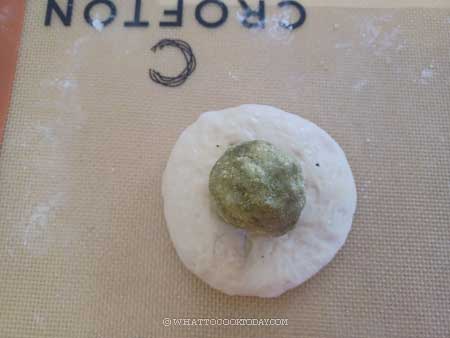

6. Shape 1: Flatten the dough slightly with your palm and you can use a rolling pin to help you roll it out into a disc shape. Use a knife or a bench scraper to make a cut halfway in the middle and then turn the cut-side up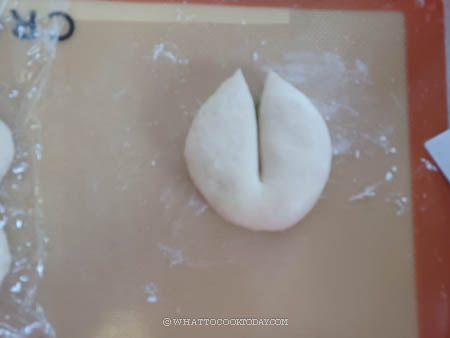
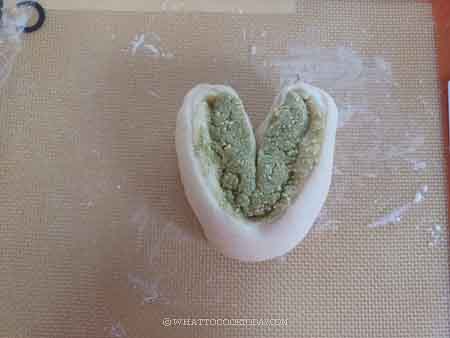
7. Shape 2: Roll the dough out into about 7-inch long oval. Fold into half and then half again to form a quarter. 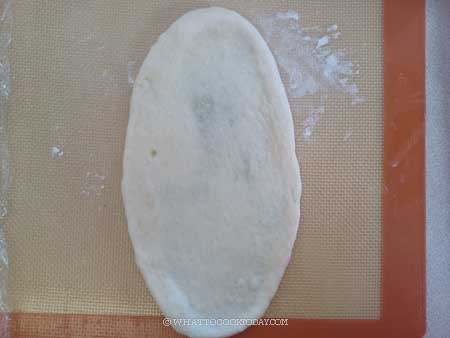
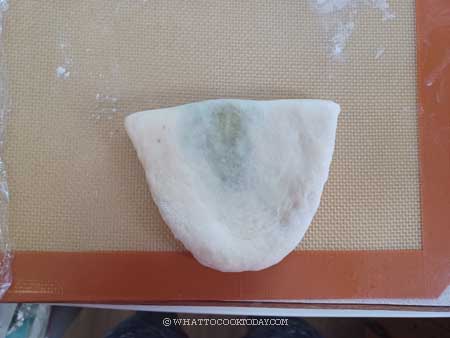
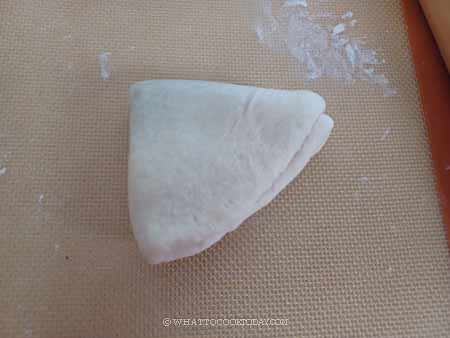
8. Use a knife or a bench scraper to make a cut halfway at the curve side and then turn the cut-side up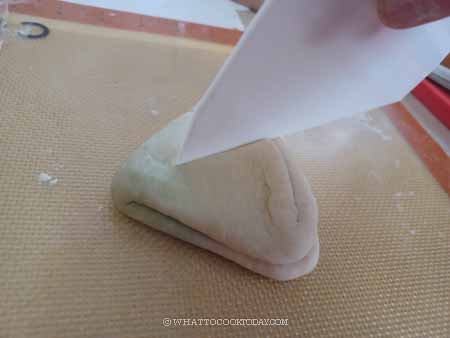
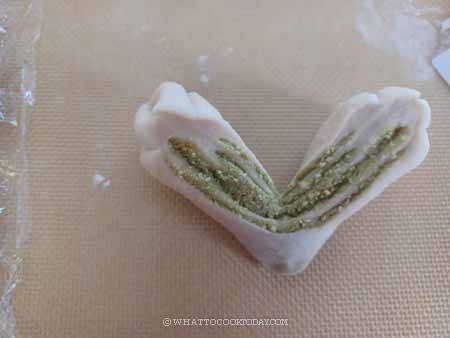
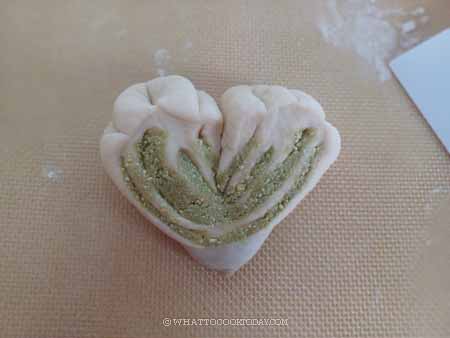
9. Shape 3: It’s very similar to shape 2. The difference is where we make the cut. Roll the dough out into about 7-inch long oval. Fold into half and then half again to form a quarter. Use a knife or a bench scraper to make a cut halfway at the folded side and then turn the cut-side up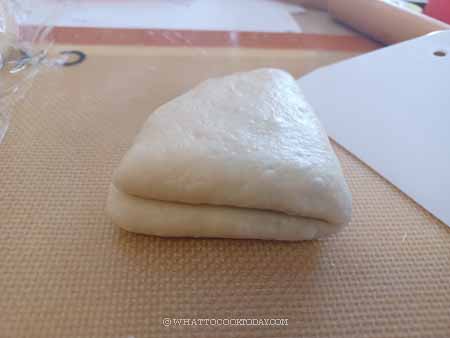
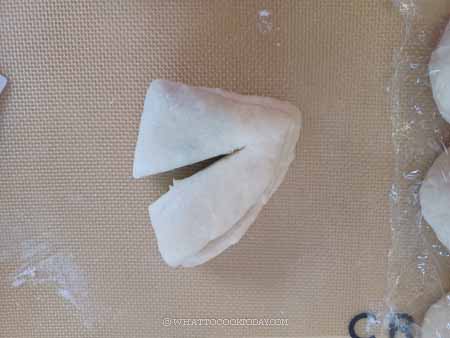
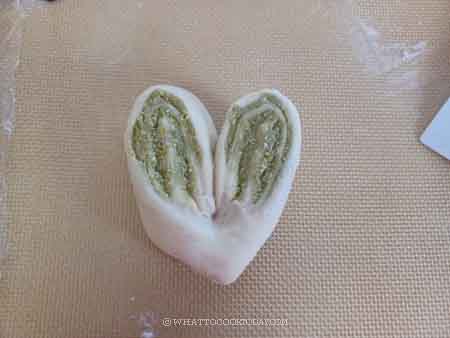
10. Place them on a baking sheet lined with parchment paper, about 2 inches apart. Let them proof at a warm place until puffy. When you gently press on the dough, it slowly springs back and leaves a bit of indentation. This takes about 45 minutes to 1 hour at a warm place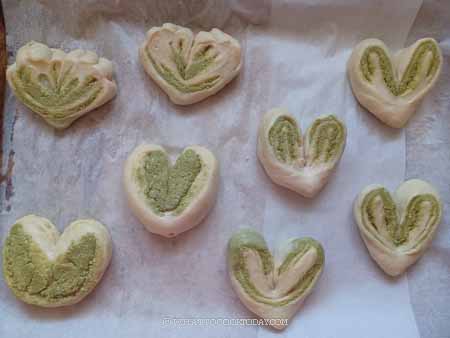
11. Towards the end of proofing, about 10 minutes before, preheat the oven to 375 F (180 C) for convection oven and 355 F (180 C) for convection oven. Brush the surface of the dough with eggwash 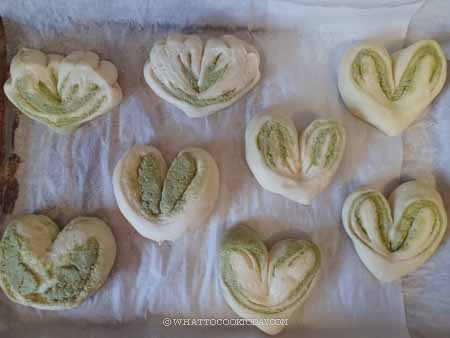
12. Put the baking sheet in the middle of the oven and bake for 15 minutes or until golden brown. Do not overbake. If you insert a thermometer into the dough, it should read at least 190 F (88 C)
13. Let the buns cool down on the pan for 1-2 minutes and then transfer them to a cooling rack to let them cool down completely

Did you make this heart-shaped milk bun with matcha milk filling recipe?
I love it when you guys snap a photo and tag it to show me what you’ve made. Simply tag me @WhatToCookToday #WhatToCookToday on Instagram and I’ll be sure to stop by and take a peek for real!

Heart-shaped Milk Buns/Bread with Matcha Milk Filling
Ingredients
For the dough:
- 250 g bread flour
- 35 g sugar
- 1 tsp yeast
- 55 g egg one large egg
- 170 g whole milk
- ½ tsp salt
- 40 g unsalted butter softened
For the filling:
- 5 g matcha powder
- 80 g unsalted butter softened
- 30 g powdered sugar
- 25 g egg
- 85 g dry milk powder
Egg wash:
- 1 large egg
- ½ tsp milk
Instructions
Prepare the filling:
- Combine all the ingredients for the filling. It should be a paste-like consistency.
- Divide into 8 portions and roll into round balls for easier wrapping. Cover and set aside until you are ready to use it.
Prepare the dough:
- Combine all ingredients for the dough, except for the butter in a mixing bowl of a stand mixer fitted with a dough hook attachment. Knead until it forms a rough dough. Add the softened butter and continue to knead until the dough is smooth and elastic. If you slowly stretch a small amount of the dough thinly, it won't break. It has reached a window-pane stage
First proofing:
- Oil a large bowl and transfer the dough into the bowl. Cover and let it proof at a warm place for about 1 hour or until it doubles in size. Don't go by the time. It may take longer if the temperature is colder where you are
- When you press on the dough, the indentation stays, which means the dough is done proofing. Transfer to a work surface lightly dusted with some flour
Shaping:
- Punch all the air out and give it a few kneads. Divide the dough into 10 equal pieces. Flatten the dough slightly into a disc and then pull the edges of the dough and tuck to form a round shape. Roll it into smooth round dough ball. Cover and let them rest for 10 minutes
- I did 3 slightly different heart shapes. Work with one dough at a time, Flatten the dough a bit and then roll it into about 4-inches circle. Put one filling in the middle. Wrap the dough around the filling. Pinch the seam to seal. Do this to all the dough and filling and keep them covered
- Shape 1: Flatten the dough slightly with your palm and you can use a rolling pin to help you roll it out into a disc shape. Use a knife or a bench scraper to make a cut halfway in the middle and then turn the cut-side up
- Shape 2: Roll the dough out into about 7-inch long oval. Fold into half and then half again to form a quarter. Use a knife or a bench scraper to make a cut halfway at the curve side and then turn the cut-side up
- Shape 3: It's very similar to shape 2. The difference is where we make the cut. Roll the dough out into about 7-inch long oval. Fold into half and then half again to form a quarter. Use a knife or a bench scraper to make a cut halfway at the folded side and then turn the cut-side up
Final proofing:
- Place them on a baking sheet lined with parchment paper, about 2 inches apart. Let them proof at a warm place until puffy. When you gently press on the dough, it slowly springs back and leaves a bit of indentation. This takes about 45 minutes to 1 hour at a warm place
- Towards the end of proofing, about 10 minutes before, preheat the oven to 375 F (180 C) for convection oven and 355 F (180 C) for convection oven
Baking:
- Brush the surface of the dough with egg wash and put the baking sheet in the middle of the oven and bake for 15 minutes or until golden brown. Do not overbake. If you insert a thermometer into the dough, it should read at least 190 F (88 C)
Cooling down:
- Let the buns cool down on the pan for 1-2 minutes and then transfer to a cooling rack to let them cool down completely
How to store:
- Once they have cooled down completely, store them in an air-tight container for 3 days at room temperature. For longer storage, wrap them in plastic wrap individually and then put inside a freezer-durable bag, push all the air out and seal. Keep them frozen for one month max. Simply thaw at room temperature before serving. You can reheat briefly in the microwave oven or in the oven at 350 F (180 C) for 8 minutes or until just warm


