This post may contain affiliate links. Please read our disclosure policy.
This honey multigrain bread is hearty yet soft, packed with whole wheat flour and seeds, and perfect for toast or sandwiches.
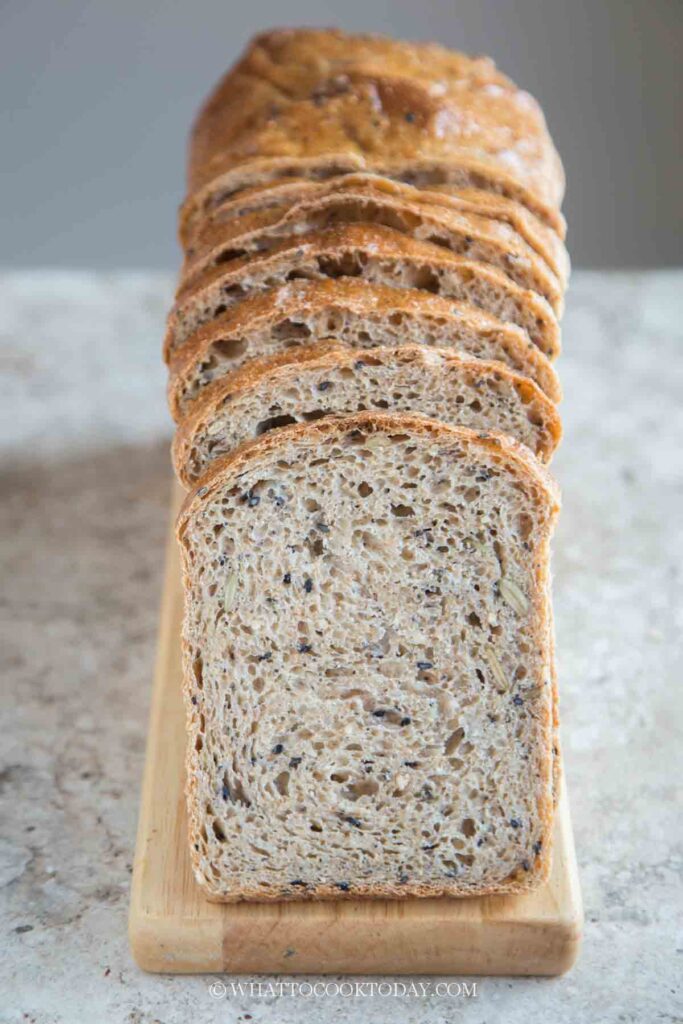
This Honey Multigrain and Seeds Bread is one of our family’s favorite homemade breads. It is wholesome, hearty, and packed with whole wheat flour and seeds, but surprisingly light and soft for a multigrain loaf.
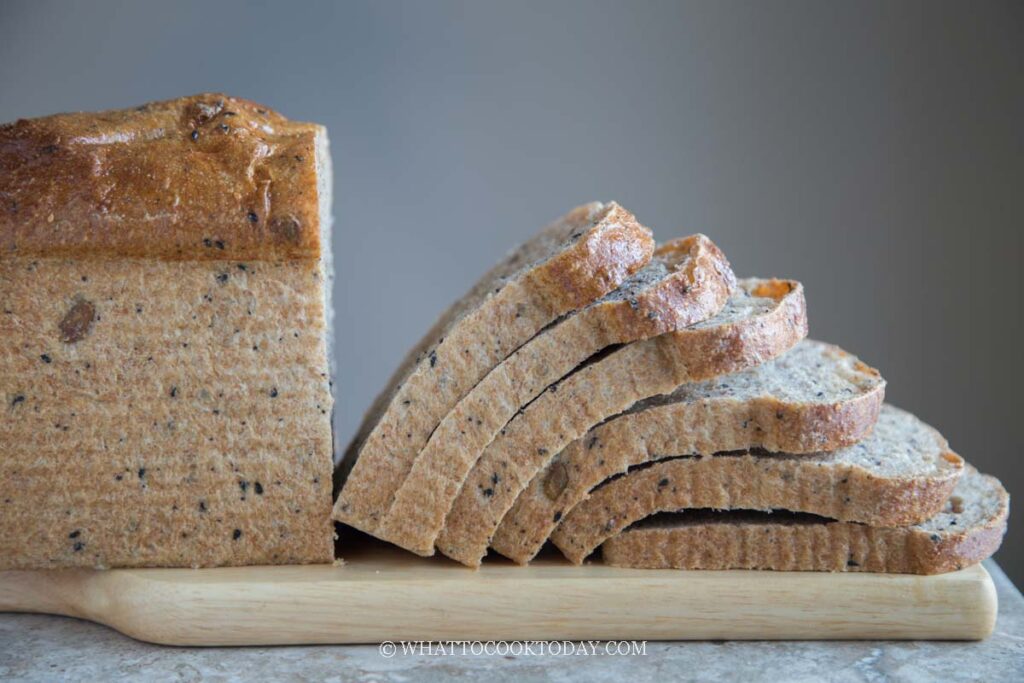
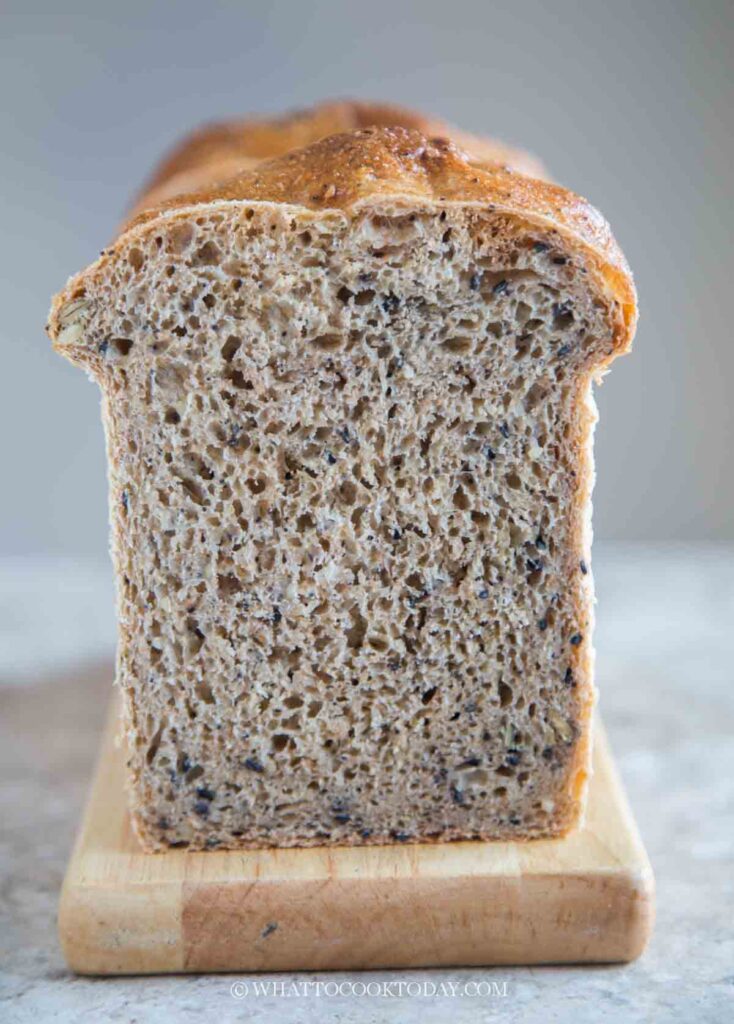
I love that this bread doesn’t have that dense, heavy texture you might expect from a loaf made with a substantial amount of whole wheat flour. The bread has a soft, slightly chewy crumb with plenty of texture from the cornmeal, poppy seeds, sesame seeds, and pumpkin seeds. A little honey gives it just enough sweetness without making it taste like a sweet bread.
It is especially good toasted for breakfast with butter, nut butter, or your favorite spread. It also makes wonderful sandwiches because the slices are substantial enough to hold up to fillings without being overly dense.
And if you enjoy baking homemade bread, this is a great everyday loaf to have on hand. The dough is quite soft and sticky, but don’t let that tempt you into adding extra flour. A sticky dough is part of what helps give this bread its surprisingly tender crumb.
Why You’ll Love This Bread
- Hearty but not dense: The combination of bread flour and whole wheat flour gives you the nutrition and flavor of whole wheat bread while keeping the texture pleasantly light.
- Packed with seeds: Poppy seeds, sesame seeds, and pumpkin seeds add texture, nuttiness, and a little crunch.
- Naturally sweetened with honey: The honey adds a subtle sweetness that complements the whole grains without making the bread taste sweet.
- Great for sandwiches: The crumb is sturdy enough for sandwiches but soft enough to make excellent toast.
- Easy to make: There is no need to cook grains or prepare a separate soaker. Everything goes into the mixer and the dough comes together relatively quickly.
- Makes two loaves: Bake one loaf for the week and freeze the other for later.
Ingredients and Substitutions
- Bread flour: You can substitute all-purpose flour, but bread flour is preferable because it provides more gluten strength. If using all-purpose flour, the dough may be slightly softer and the finished bread may not rise quite as high.
- Whole wheat flour: I recommend using whole wheat flour as written. You can replace part of it with white whole wheat flour for a milder flavor, but replacing all of it will give you a less hearty loaf.
- Cornmeal: If you don’t have yellow cornmeal, white cornmeal can be used. Fine polenta can also work, although the texture may be slightly different. Avoid very coarse cornmeal because it can make the crumb feel gritty.
- Poppy seeds: Chia seeds or additional sesame seeds can be used, although they will change the texture. You can also simply omit them.
- Sesame seeds: Use white, black, or a combination of both. Sunflower seeds are another good option if you don’t have sesame seeds.
- Pumpkin seeds: Sunflower seeds make the closest substitute. You can also use chopped walnuts or pecans, although nuts will give the bread a different texture and flavor.
- Honey: Maple syrup can be substituted for honey. You can also use granulated or brown sugar, although honey contributes moisture to the dough, so the consistency may change slightly.
- Instant yeast: Active dry yeast can be used, although I prefer instant yeast for this recipe. If using active dry yeast, dissolve it in a little of the recipe’s water first and allow it to sit briefly before adding it to the dough.
- Water: You can substitute part or all of the water with milk for a slightly richer and softer loaf. Keep in mind that milk can make the crust brown more quickly.
The Dough Will Be Sticky
Don’t be alarmed when you see the dough. This is a very soft and sticky dough, especially because of the whole wheat flour and relatively high hydration. Resist the temptation to keep adding flour during mixing or shaping. Adding too much flour can make the finished bread dense and dry, which is exactly what we’re trying to avoid with this recipe.
Instead, use an oiled bowl, an oiled bench scraper, and lightly oiled or floured hands when necessary. The dough becomes much easier to handle after the first rise.
Choosing the Right Loaf Pan
This recipe works well in either two 8½ x 4½-inch loaf pans or two 9 x 5-inch loaf pans. The difference is mainly in the shape of the finished bread.
8½ x 4½-inch pans: These produce taller, more substantial sandwich loaves.
9 x 5-inch pans: These produce wider and shorter loaves, which can be preferable if you like larger sandwich slices. If you use the 9 x 5-inch pans, begin checking the bread around 35 minutes rather than automatically baking for the full 40 minutes.
Tips for Success
- Don’t add extra flour. This is the most important tip. The dough is supposed to be soft and sticky. Adding too much flour will give you a heavier loaf.
- Use a bench scraper. It makes transferring and handling this sticky dough much easier.
- Oil your hands when handling the dough. A little oil makes a surprisingly big difference during the first proof and shaping.
- Watch the dough, not just the clock. Proofing times depend heavily on room temperature. A warm kitchen may require less time, while a cool kitchen can take considerably longer.
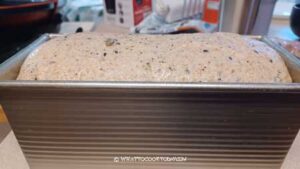
- Don’t overproof. If the dough rises too far above the rim before baking, it may collapse in the oven or produce a loaf with a weak structure.
- Use a thermometer if you have one. A temperature of at least 190°F (88°C) in the center is a useful indicator that the bread is fully baked.
- Let it cool completely. This is especially important with whole wheat bread. The crumb needs time to set before slicing.
How to Serve Honey Multigrain and Seeds Bread
This bread is incredibly versatile. Of course, you don’t need to do anything complicated with it. A warm slice with a little butter is sometimes all you need.
For breakfast, toast a slice and spread it with butter, peanut butter, almond butter, or your favorite jam.
For a savory breakfast, try avocado, a fried egg, or cottage cheese with a sprinkle of salt and pepper. It also makes excellent sandwiches. Try it with:
Turkey and cheese, Chicken salad, Tuna salad, Egg salad, Ham and cheese, Avocado and vegetables, Peanut butter and banana, Hummus and roasted vegetables.
How to Store the Bread
- Once completely cool, store the bread in an airtight container or bread bag at room temperature for several days.
- Avoid refrigerating homemade bread unless necessary. The refrigerator can make bread stale more quickly.
- For longer storage, freeze the bread. You can freeze the loaves whole or slice them first. I prefer slicing the bread before freezing so I can take out only what I need. Place parchment paper between slices if you don’t want them sticking together, then store the slices in a freezer-safe bag or container. You can toast the slices directly from frozen.
Frequently Asked Questions
1. Why is my dough so sticky?
This recipe has a high amount of water relative to the flour, along with a substantial amount of whole wheat flour. The dough is supposed to be very soft and sticky. Avoid adding lots of extra flour because it can make the finished bread dense.
2. Can I knead this bread by hand?
Yes, but it will be more challenging because the dough is quite sticky. I recommend using a stand mixer if you have one. If kneading by hand, use lightly oiled hands and a bench scraper rather than continually adding flour.
3. Can I use all-purpose flour instead of bread flour?
Yes. Bread flour is preferred because its higher protein content provides better gluten development, but all-purpose flour can work. The dough may be softer and the loaf may not rise quite as high.
4. Can I use active dry yeast instead of instant yeast?
Yes. Dissolve the active dry yeast in some of the recipe’s water before adding it to the other ingredients. You may also need slightly more time for the dough to rise.
5. Can I use different seeds?
Absolutely. This recipe is very flexible. Sunflower seeds, flaxseeds, chia seeds, or additional pumpkin or sesame seeds can be used. Keep in mind that different seeds absorb water differently, so changing a large portion of the seeds may slightly affect the dough consistency.
6. Can I leave out the pumpkin seeds?
Yes. You can omit them or replace them with sunflower seeds, additional sesame seeds, or another seed or nut of your choice.
7. Can I make this bread less sweet?
Yes. The honey provides some sweetness, but the bread is not particularly sweet. You can reduce the honey slightly if you prefer a more savory loaf, although I wouldn’t eliminate it completely because it also contributes moisture and flavor.
8. Why did my bread turn out dense?
The most common reasons are adding too much flour, insufficient kneading, underproofing, or using yeast that is no longer active. Because this is a soft dough, adding extra flour is especially easy to do. Try to resist that temptation and instead use oil and a bench scraper to handle the dough.
9. How do I know when the bread is done?
The loaf should be golden brown and sound somewhat hollow when tapped. For a more reliable test, use an instant-read thermometer. The center should reach at least 190°F (88°C).
10. Can I bake this in one large loaf pan?
I recommend using two loaf pans as written because the recipe makes a substantial amount of dough. A single pan would need to be large enough to accommodate the entire quantity and allow enough room for the dough to rise.
11. Can I make this bread without a stand mixer?
Yes. It can be kneaded by hand, but expect a sticky dough. Use a bench scraper and lightly oiled hands to make the process easier.
12. Can I freeze this bread?
Yes. This bread freezes very well. Slice it before freezing if you want to take out individual slices as needed. The frozen slices can go straight into the toaster.
The combination of honey, whole wheat flour, cornmeal, sesame, poppy seeds, and pumpkin seeds makes every slice flavorful and substantial, while the bread flour keeps the crumb soft enough for everyday sandwiches and toast. If you’re looking for a homemade sandwich bread that feels wholesome enough for breakfast but is still genuinely enjoyable to eat, this is a loaf worth making.
Honey Multigrains and Seeds Bread
Ingredients
Dry ingredients:
- 345 g bread flour (12.7% protein content) plus more for dusting
- 280 g whole wheat flour
- 20 g yellow corn meal
- 20 g poppy seeds
- 20 g sesame seeds black and/or white works
- 10 g instant yeast
- 10 g fine sea salt
Wet ingredients:
- 85 g honey
- 500 g water
To add last:
- 20 g pumpkin seeds
Instructions
- This recipe can be baked using two 8 1/2 x 4 1/2 inch loaf pan or two 9 x 5 inch loaf pan. The latter yields wider and shorter loaves
Prepare the dough:
- Combine the dry ingredients in a mixing bowl of a standmixer. Add water and honey and use a dough hook to stir everything just to roughly combine them
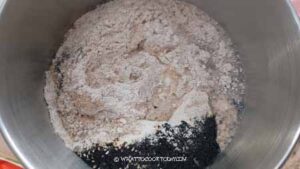
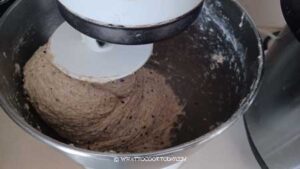
- Start kneading at the lowest speed for 2-3 minutes until a rough dough forms. Increase the speed to medium and continue to knead until the dough barely clears the sides of the bowl, about 5 minutes or so. The dough still sticks to the bottom of the bowl
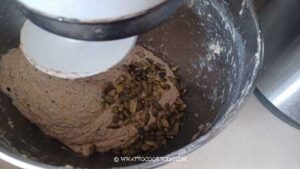
- Add the pumpkin seeds and continue to knead on the low speed until they are evenly distributed as much as possible, about 2-3 minutes
First proofing:
- The dough is very soft and sticky, so don't be alarmed and be tempted to add more flour. Oil a large container. Use a bench scraper to scrape the dough into the container. Oil your hands and fold the dough onto itself several times to round it up and place the smooth side up.
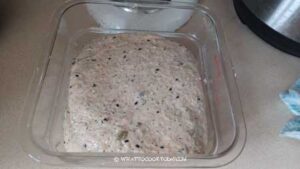
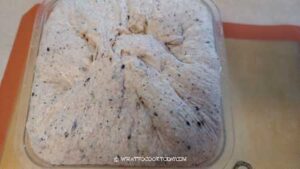
- Cover the container and let the dough proof until it is doubled in volume, about 1-2 hours depending on the temperature
Shaping:
- Prepare two loaf pans by coating the sides with oil. Line the long side of the pan with parchment paper
- Lightly dust your work surface. Use a bench scraper to scrape the dough onto the work surface. Divide the dough into two equal portions. Keep one covered with a cling wrap and work with one dough at a time
- Gently deflate the dough by flattening and pushing it into a rectangle (It won't be a perfect rectangle).
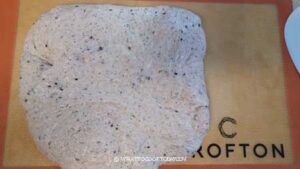
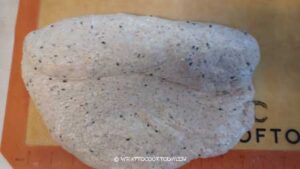
- Fold the dough on the long side until you form a log. Pinch the seams together to seal.
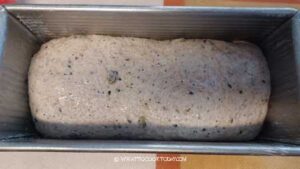
- Place the shaped dough into one loaf pan. Repeat with the other dough
Final proofing:
- Let the dough proof at a warm place until it crown about 1-inch above the rim of the loaf pan.This may take 45 minutes to 1 hour, or longer, depending on the temperature
- 15 minutes before the end of the proofing time, preheat the oven to 375 F (190 C) if you use a conventional oven. For a convection oven, please lower the temperature by 20 F (15 C). Position the oven rack in the middle of the oven
Baking:
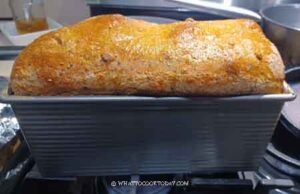
- Place both pans side by side and bake for about 40 minutes for 8 1/2 x 4 1/2 inch loaf pan. If you use 9 x 5 inch loaf pan, start checking at 35 minutes. The dough should be golden brown and if you have a digital thermometer, the center of the dough should be at least 190 F (88 C)
Cooling:
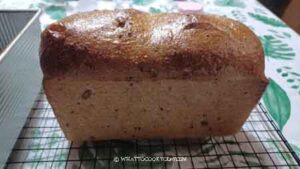
- Place the pans on a cooling rack and loosen the bread from the loaf pan and grab the parchment paper to lift the bread out of the pan and place on a cooling rack to let the bread cool down completely



2 comments
I wish this recipe used US measurements.
Hi Doug, Sorry I forgot to include the U.S. measurement. I usually do. It’s in the recipe now. I hope that helps!