This post may contain affiliate links. Please read our disclosure policy.
Learn how to make quick puff pastry without investing the time and effort required for classic puff pastry. It can be used in sweet and savory pastries.

What is a quick puff pastry ?
Quick puff pastry or sometimes known as rough puff pastry is a simplified version of traditional puff pastry that is quicker and easier to make. While it doesn’t achieve the same level of layering and flakiness as classic puff pastry, it is a good alternative for home cooks looking for a less time-consuming option.
Quick puff pastry vs. traditional/classic puff pastry
The dough is laminated in the traditional puff pastry by folding and rolling it multiple times with layers of butter in between. This results in hundreds of fine layers of dough, separated by the thinnest of layers of butter. When this is baked, the steam given off as the butter melts, makes the layer separate and the dough puff up.
In rough puff pastry, the process is simplified by cutting cold butter into the flour, creating larger and more irregular butter pieces. The dough is then mixed with cold water to form a rough, shaggy mass. The dough is rolled out and folded a few times to create layers, but the process is less intricate than that of classic puff pastry. The resulting pastry is flaky and puffed, but not as high. Rough puff is great for simple tarts, both sweet and savory. It’s lush to bite into and airy in the mouth and it’s a handy and practical item to have in the freezer.
Why make your own puff pastry
1. It’s more economical
I saw boxes and boxes of puff pastry sheets being sold at the grocery stores now. Well, it’s December! People are busy baking cookies, cakes, bread, pastries, and whatnot. One box of puff pastry (comes in two sheets, about 1.1 lbs/490 grams) is about $7.00. (kinda pricey if you ask me!). Puff pastry is made with flour, butter, salt, and water—are often pantry staples, making it an economical choice for home bakers.
2. Quality ingredients
When you make your own, you have control over the ingredients you use. You can choose high-quality butter and flour, ensuring that your final product is free from preservatives and additives commonly found in commercial versions.
2. Simplified version
It’s true that making the classic puff pastry does require a bit of work, but fear not! Rough puff pastry comes to the rescue, offering a simplified version that retains the flakiness of its classic counterpart while saving you precious time in the kitchen.
How To Make Easy Quick Puff Pastry
Ingredients
- 190 g all-purpose flour plus more for dusting
- 38 g cake flour
- ½ tsp salt
- 240 g unsalted butter cold
- 120 g ice water , or as needed (Have more ready as you may need more to pull the dough together)
Instructions
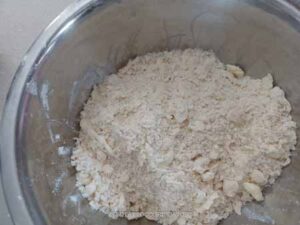
- Grate the butter or cut butter into small cubes and chill in the fridge. Actually, grating works better IMHO. Mix the flour, salt, butter pieces. Don't need to rub them in. Just toss to combine

- Add ice water and just stir to combine until all flour are hydrated and no bits of dry flour remains. If the dough seems too dry, add a bit more ice water, a small drop at a time.
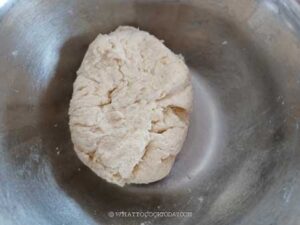
- Don't overwork the dough too much. We don't want the butter to melt. The butter should remain visible
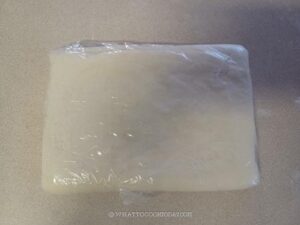
- Place the rough dough in a plastic bag, flatten to a disk, and seal well. Chill in the refrigerator for at least 1 hour
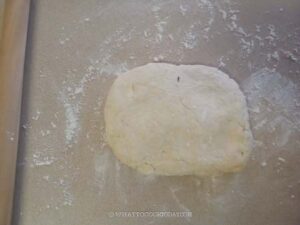
- Place the dough on a lightly floured surface.
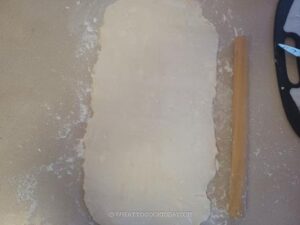
- Roll the dough out to a rectangle about 6 x 18 inches. The dough might be moist after being chilled, you can lightly dust some flour to keep it from sticking to the surface and your hand
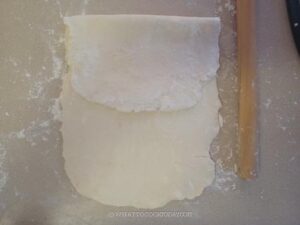
- Fold the long side of the dough, the top third over, toward the center
- Fold the bottom third over that.
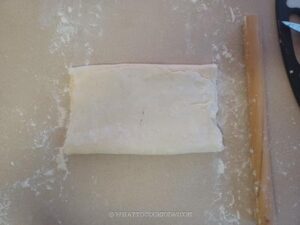
- Dust very lightly with flour and rotate 90 degrees, so that once more a short end is facing you.
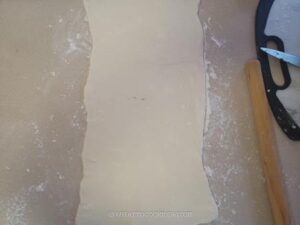
- Roll the dough out from the center outward, until once again the rectangle measures about 6 x 18 inches. Dust off any excess flour. Fold the third top and the bottom over. Repeat this process 4 more times. A total of 6 times. If the dough is getting too warm and butter starts to melt, refrigerate the dough for 10-15 minutes and then resume working on it again
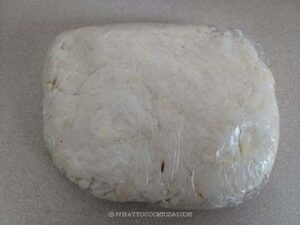
- Wrap in a plastic wrap and chill for at least 1 hour before using
- You can refrigerate the dough for up to 3 days or in the freezer for up to two months. Just make sure the dough lies flat and that the edges do not get bent over. To thaw, place frozen pastry in the refrigerator overnight


When ready to use it:
- Dust the work surface with a little flour, because the dough will be moist. Use a lightly floured rolling pin to flatten the dough, then roll it out, rolling just to the edges, not over them
- Roll it out according to the size calls for in the recipe. One of this recipe can make about 12 medium puff pastry squares or 24 small ones
RECOMMEDED TOOLS

*Nutrition facts are just estimates and calculated using online tools*
How to store homemade quick puff pastry
1. To store in the fridge: After making rough puff pastry, if you’re not using it immediately, wrap it tightly in plastic wrap or place it in an airtight container. Refrigerate it for up to 2-3 days. The cold temperature will help slow down any potential bacterial growth and keep the butter in the pastry firm.
2. Freezer: for longer storage, freezing is an excellent option. Shape the rough puff pastry into a flat block or rectangle for easier thawing and rolling later and wrap it tightly in a plastic wrap to prevent freezer burn. I would put it in another layer of freezer bag for extra protection. It can be kept frozen for 2-3 months.
Thawing: When you’re ready to use the frozen rough puff pastry, transfer it from the freezer to the refrigerator. Allow it to thaw slowly for several hours or overnight. Avoid thawing at room temperature, as this is too warm and can affect the result of your baked puff pastry. Once the rough puff pastry has thawed, handle it with care. Be gentle when rolling it out, and if it becomes too soft, you can briefly chill it in the refrigerator to firm up the butter.
Recipes using puff pastry
Quick puff pastry can be used in any sweet or savory recipe that calls for puff pastry. Here are a few recipes that you might be interested in:
Turkey Curry Puff
Baked Nian Gao Puff Pastry
Char Siu Sou
Hong Kong Mille-Feuille Napoleon Walnut Cake
Pate Chaud


2 comments
How much total butter in above recipe? 1 stick for dough making then other for Step 5? My 1st step has the dough already a fait accompli!
Hi Linda, somehow the early steps of the recipe instructions were not there after I converted my recipe to a different platform. Anyway, I have updated it accordingly and I hope that helps to clear some confusion.