This post may contain affiliate links. Please read our disclosure policy.
Creamy, tangy, and lightly spiced, these Kabocha Squash Yogurt Bars are a lighter twist on pumpkin cheesecake bars, made with Greek yogurt and homemade kabocha puree.

You know that feeling when someone gives you a huge home-grown kabocha squash, and suddenly you find yourself baking, steaming, roasting, and pureeing your way through all sorts of recipes? That’s exactly what happened to me! I couldn’t let this beautiful squash go to waste, and these Kabocha Squash Yogurt Bars were one of my favorite experiments that turned into a keeper.
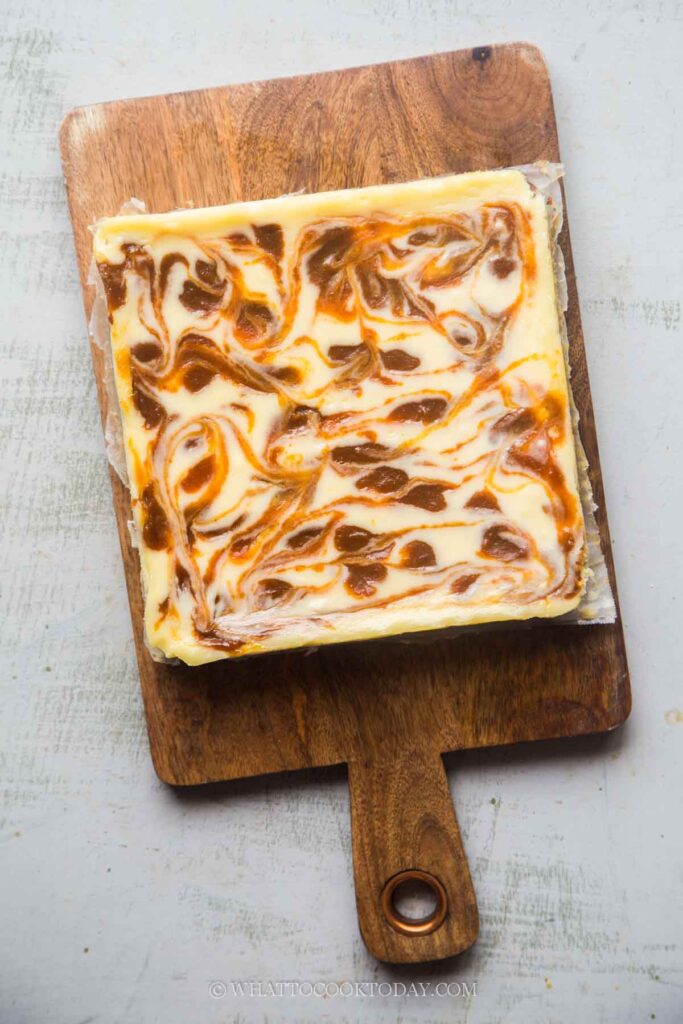
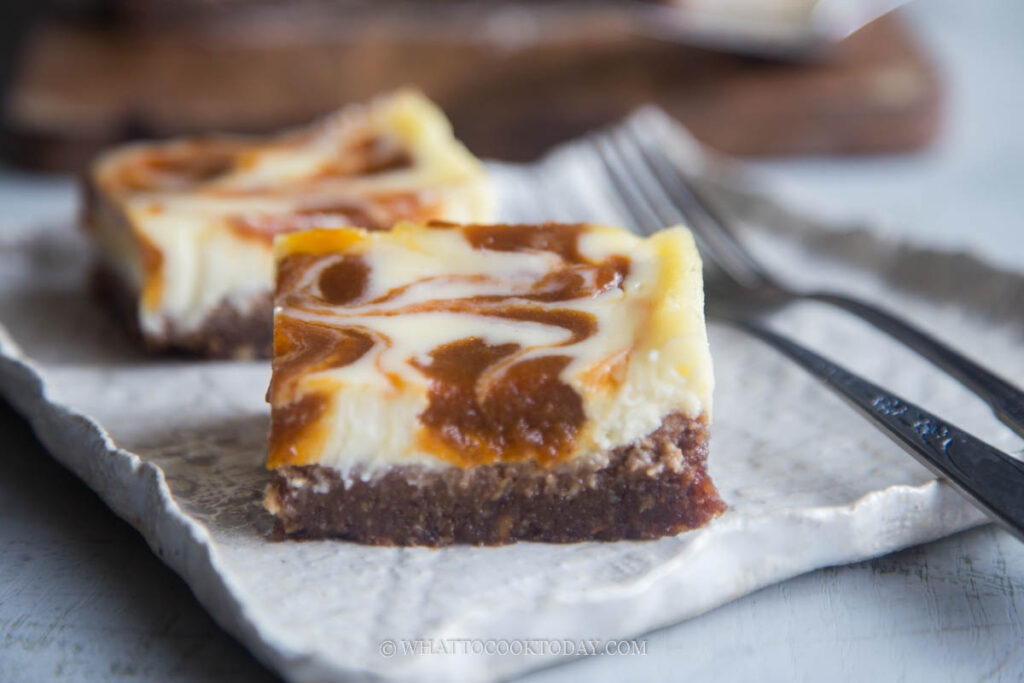
These bars are inspired by the popular pumpkin cheesecake bars — but a little lighter, tangier, and naturally creamy thanks to Greek yogurt. They have a buttery graham cracker crust, a rich swirl of kabocha squash puree, and that lovely yogurt “cheesecake” layer that makes them so satisfying.
Why You’ll Like This Recipe
- A lighter take on cheesecake bars – made with Greek yogurt instead of cream cheese, but still creamy and luscious.
- Uses kabocha squash instead of pumpkin – slightly firmer, naturally sweet, and rich in color.
- Simple ingredients, big flavor – warm spices, pure kabocha puree, and just the right touch of tang.
- Freezer-friendly – perfect for make-ahead desserts or snacks.
- Two easy ways to make the puree – bake or steam, depending on what’s common in your kitchen.
Ingredients and Substitutions
For the Graham Cracker Crust:
1. Graham cracker crumbs — You can substitute with digestive biscuits or Biscoff for a twist. I actually used Biscoff in the photo (so the crust is darker in color)
2. Unsalted butter — Melted; helps bind the crumbs.
3. Sugar — Adds a bit of sweetness.
4. Ground cinnamon and ginger — Adds warmth to the crust. You can omit if using Biscoff
For the kabocha layer:
1. Kabocha squash puree — Use homemade puree (instructions below). Pumpkin puree can be used if you must, but the texture will be slightly looser.
2. Brown sugar — Adds moisture and depth.
3. Egg — Room temperature is key for smooth mixing.
4. Spices — Cinnamon, ginger, nutmeg, and a pinch of salt for balance.
For the yogurt layer:
1. Whole milk plain Greek yogurt — Do not use low-fat or fat-free. It affects texture and stability.
2. Sugar — Sweetens the tangy yogurt.
3. Eggs — Binds and helps it set.
4. Vanilla extract — Adds aroma and flavor.
5. Salt — Enhances everything.
Tips for Success
- Room temperature ingredients are key — especially yogurt and eggs.
- Don’t use low-fat or fat-free Greek yogurt — it will affect texture and cause cracks or weeping.
- Drain the Greek yogurt – this helps to remove excess liquid that may affect the texture
- Pack the crust tightly — to prevent it from crumbling when sliced.
- Don’t over-swirl — you want pretty marbling, not a muddy mix.
- Cool slowly — this prevents cracks and helps the bars set beautifully.
Frequently Asked Questions
- Can I use canned pumpkin instead of kabocha puree?
Yes, you can, but the texture will be softer and more moist. Reduce any added liquid slightly if using pumpkin puree. - Can I make this gluten-free?
Yes, use gluten-free graham crackers or almond meal crust as a substitute. - Can I use non-dairy yogurt?
Whole milk Greek yogurt gives the best results. Non-dairy options can work, but texture and flavor may differ.
Storage
- Refrigerator: Store in an airtight container for up to 3–4 days.
- Freezer: Wrap individually and freeze for up to 1 month. Thaw in the fridge overnight before serving.
If you love pumpkin cheesecake bars, you’re going to fall in love with these kabocha squash yogurt bars. They’re creamy, fragrant, and just the right balance between indulgent and light. And since kabocha is naturally sweet and full of beta carotene, it’s the perfect seasonal treat that’s also a little good for you.
So, the next time you’re gifted a giant kabocha squash (or spot one at the store), give this recipe a try — you might just find yourself baking and snacking your way through the whole squash too!
Kabocha Squash Yogurt Bar
Ingredients
Graham cracker crust:
- 85 g graham cracker crumbs or use biscoff or digestive biscuits
- 1 Tbsp sugar
- ⅛ tsp ground cinnamon
- ⅛ tsp ground ginger
- 50 g unsalted butter melted
For the kabocha layer:
- 112 g kabocha squash
- 60 g brown sugar
- 50 g egg from 1 large egg, room temperature
- ¼ tsp ground cinnamon
- ⅛ tsp ground ginger
- ⅛ tsp ground nutmeg
- ⅛ tsp salt
For yogurt layer:
- 480 g whole-milk plain Greek yogurt room temperature
- 100 g egg from 2 large eggs, room temperature
- 150 g sugar
- ½ tsp vanilla extract
- ⅛ tsp salt
Instructions
Prepare kabocha squash puree with oven (if you haven't already):
- Preheat oven to 400 F (200 C) for conventional oven. If you are using a convection oven, reduce temperature by 20 F (15 C). I used about 5 lbs of whole kabocha squash. I wash the squash well and pat dry. Pierce the skin with fork all over and place it on a baking sheet
- Bake in the oven for 45 minutes or until you can easily pierce with a fork. If your squash is smaller, you may not need to bake for that long. You can start checking at 30 minutes
- Let it cool down for about 10 minutes before cutting. Cut the baked squash in half with a very sharp knife. Scoop out all the seeds and stringy bits. Scoop out the flesh into a blender or a food processor.
- You may need to add 1-2 Tbsp of water to help you puree the squash. Kabocha squash is at a "drier" side and more firm in texture compared to other squash and pumpkin. You want to get that thick but creamy consistency
- Let it cool down completely. Store in freezer-friendly containers or bags in smaller portions. Freeze for 3 months. You can use them whenever you need them
Prepare kabocha squash puree using a steamer: (If you haven't already)
- I use this method when I have a small squash like 2-3 lbs. Wash the kabocha squash clean and pat dry. Cut into half and scoop out all the seeds and strings. Cut into wedges and then cut into smaller cubes.
- Arrange the squash on the steaming basket. Steam for 10-15 minutes (depending on the size). If you can easily pierce with a fork. If you can, it's done steaming. If it's still too firm, steam another 5 minutes and check again
- Scoop out the flesh into a blender or a food processor. You may need to add 1-2 Tbsp of water to help you puree the squash. Kabocha squash is at a "drier" side and more firm in texture compared to other squash and pumpkin. You want to get that thick but creamy consistency
30 minutes before you plan to bake:
- Before you start preparing the crumbs, get eggs and yogurt out of the fridge to let them come to a room temperature.
Prepare cookie crumbs:
- Preheat the oven to 350 F (180 C) for conventional oven. If you are using a convection oven, reduce temperature by 20 F (15 C)
- Line a 8 x 8 square metal pan with parchment paper sling for easy removal
- Place the graham crackers in a food processor and pulse into fine crumbs. Add melted butter, sugar, cinnamon, ginger, nutmeg, and salt and pulse a few times to combine into a "wet sand" texture
- Press the graham cracker crumbs evenly onto the base of the pan. Make sure you really pack it down so it won't crumble when you cut it later. Place in the middle rack of the oven and bake for 10-13 minutes. Let it cool down when you prepare other things

- Lower the oven temperature to 325 F (16 C) for conventional oven. If you are using a convection oven, reduce temperature by 20 F (15 C)

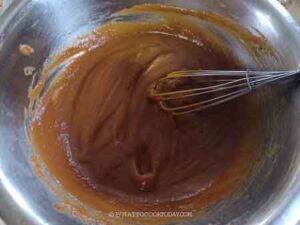
Prepare the kabocha squash layer:
- Combine the kabocha puree, brown sugar, egg, cinnamon, ginger, nutmeg, and salt until they are well-mixed. It should be quite thick
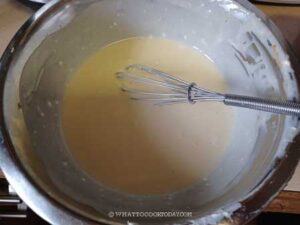
Prepare the yogurt layer:
- Take the Greek yogurt out from the fridge and scoop into a bowl lined with cheesecloth or coffee filter to drain off excess liquid. Let it sit for 30 minutes or as long as few hours if you plan ahead. Discard the excess liquid
- Whisk drained Greek yogurt, sugar, eggs, vanilla, and salt until smooth and combined. Pour this into the pan and smooth with a spatula
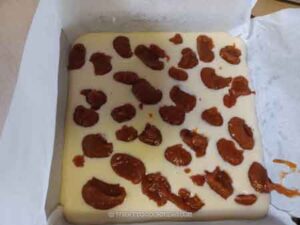
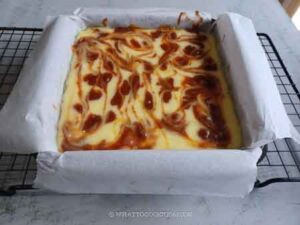
- Dollop about 18-20 of the kabocha mixture on top of the yogurt layer
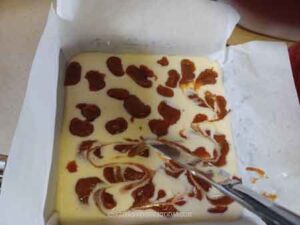
- Use a butter knife to create a few decorative swirls but be careful not to touch the crust at the bottom
- Tap the pan on the counter a few times to release trapped air bubbles
Baking:
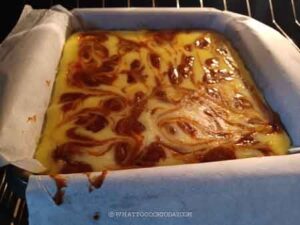
- Bake in a preheated oven for 35-40 minutes. The edges should be puffy but the center will jiggle slightly.
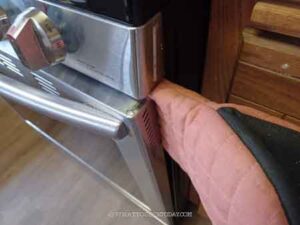
- Turn off the oven and crack the oven door open. I use an oven mitten to wedge the oven's door open a bit. Let it cool down in the oven for 30 minutes like this. This helps to prevent the surface from cracking from a sudden temperature change
Cool down completely:
- Transfer from the oven to a cooling rack to let it cool down completely. Then store it in the fridge, uncovered, overnight before cutting
Serving:
- Depending on how big or a piece you want, you can cut into 9 or 12 pieces. I like it served cold, but you can serve it at room temperature too
Storage:
- The bars can be kept in the fridge for up to 3-4 days or in the freezer for up to 1 month
