This post may contain affiliate links. Please read our disclosure policy.
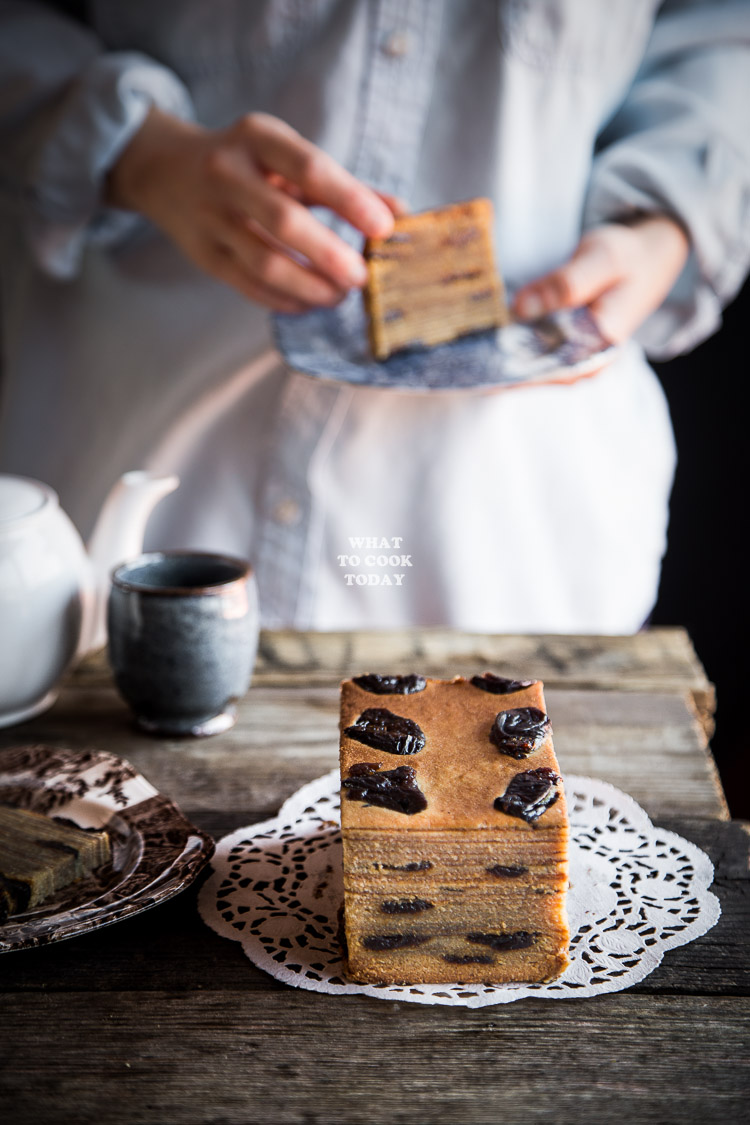
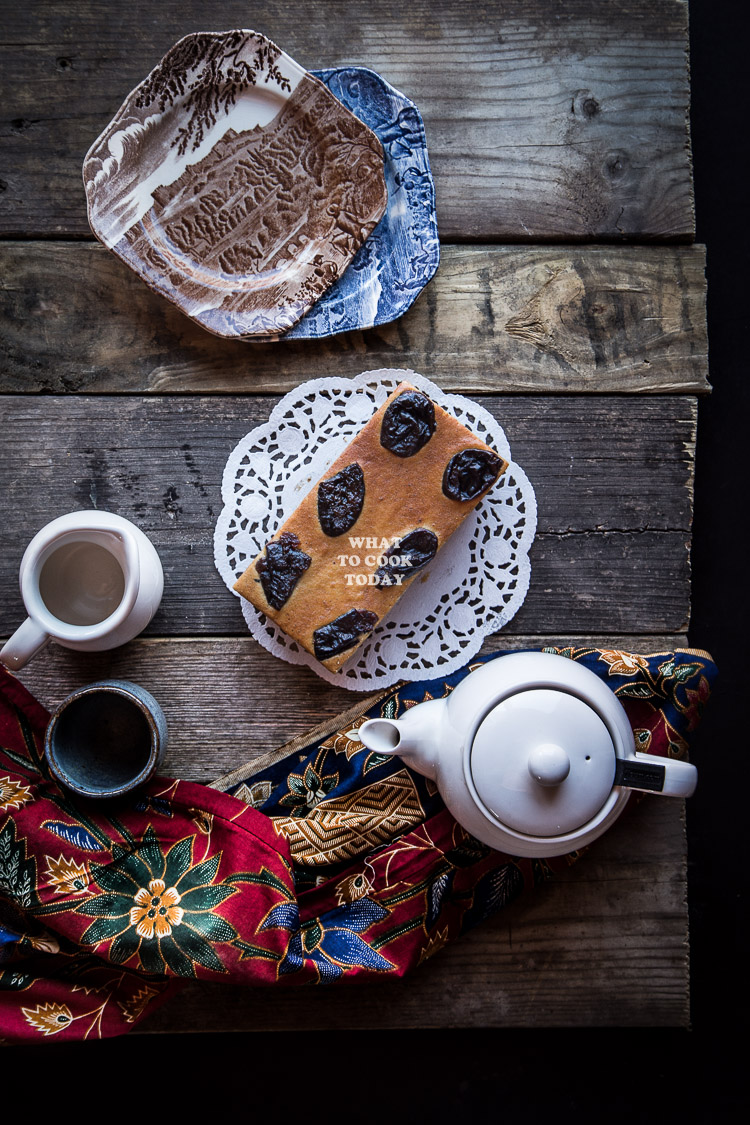
Lapis legit is a popular Indonesian cake that is characterized by its 10-20 thin layers of rich, moist, and buttery cakes flavored with spices and sometimes studded with flattened prunes. Time-consuming to make but every layer is worth it!

Lapis Legit is also known as Spekkoek or Spekuk in Indonesia. The mention of Lapis Legit would transport me back to one of my favorite celebrations of the year, Chinese New Year! Lapis legit is one of the cakes you will see being served to guests during CNY. My aunt used to make these every year. She is an excellent baker! I used to help her making lots of cookies and cakes during CNY.

I’m one who never really gravitate towards cakes. I mean I enjoy eating cake, but I won’t say I would go crazy over it like I would with savory food. I prefer cakes with no cream or heavy frosting. Lapis legit is one of my favorite cakes. Lapis means layers in Indonesian and Legit means thick/rich in taste. It is named as such because it sure is a super-rich cake. Made with loads of butter and eggs (30 eggs or so!). One piece sure goes a long way! (ok, maybe two!)
TOOLS TO HELP MAKE LAPIS LEGIT
1. Fondant smoother or lapis legit presser
In Medan, I can easily get lapis legit presser, but here in North America, my best bet is fondant smoother
2. Aluminum baking pan
I strongly suggest using aluminum pan. Try not to use non-stick baking pan or silicone baking pan. Aluminum transfers heat faster and more even. The non-stick baking pan is usually thicker, darker, and your cake will need to be baked longer and hence, make the cake drier. You can use 9 x 5 inch rectangular loaf pan or 5 x 5 inch square pan.
Baking and layering lapis legit cake is the main bulk of the work! Be prepared to have at least 2 hours to spare without interruption if it’s possible. It is a pretty tedious process having to layer each cake one by one for 20 times and waiting for about 5 minutes each time!

IMPORTANT TIPS TO MAKE GOOD LAPIS LEGIT
1. Use high-quality butter
Tinned or canned butter is best, such as the Dutch Wisjman butter. Regular butter simply is not the same. The cake is less rich and drier.
2. Make sure eggs are at room temperature
This is to prevent the eggs from separating when you mix it with butter later
3. Press the prunes thinly
If you plan to use prunes, make sure you cut in half and press it with your fingers until they are really flat
4. Preheat your baking pan
When you preheat your baking pan, the bottom layer will bake evenly
5. The thickness of each layer
The first layer can be thicker than the rest. You will need to observe if 3 tablespoons of cake batter for the subsequent layer is enough. You can always add more if you want it slightly thicker. If the layer is too thin, they won’t be very much visible when you cut the cake to reveal the layer. Don’t make each layer too thick either or they will take too long to bake
6. Press each layer
Make sure you press each layer so that you will have neat “lines”. If you see any air bubbles, poke it with a toothpick
7. Brush each layer with butter
This will add extra richness and keep the cake really moist, but it’s optional
8. Source of heat
Bake the first layer with regular oven setting, which is usually top and bottom heat, then from 2nd layer onwards, switch to top heat only (broiler setting in my oven)
9. If the cake is not cooked through
If your cake is not cooked through, you can wrap it with aluminum foil and bake again at 325 F for about 10 minutes if necessary
10. Age the cake
I get impatient too and want to eat the cake the same day 🙂 BUT, it is best if you can wait for at least 2 days. The flavor will have really develop and the cake will get even moister.
The recipe is from a dear friend who lives in Pennsylvania. She’s an amazing mom who is also homeschooling her 4 princesses and she made lapis legit pretty often! Now I’m feeling incompetent LOL!

DID YOU MAKE THIS LAPID LEGIT PRUNE RECIPE?
I love it when you guys snap a photo and tag to show me what you’ve made 🙂 Simply tag me @WhatToCookToday #WhatToCookToday on Instagram and I’ll be sure to stop by and take a peek for real!
Lapis Legit / Thousand Layer Cake / Spekkoek
Ingredients
- 250 gr high-quality unsalted butter cut into cubes, plus more for greasing the pan and brushing each layer
- 2 Tbsp condensed milk
- 15 egg yolks from large eggs (room temperature) 270 - 280 gr
- 100 gr icing sugar
Dry ingredients:
- 1 Tbsp milk powder
- 1 tsp Spekkoek spices Available at Asian grocery store or you may skip if unable to find one
- 45 gr all-purpose flour
- ¼ tsp salt
Optional:
- 15 pieces large prune
Instructions
Prepare the prune (if using-can be done the day before):
- Cut the prune in half and press with your fingers until they are really flat
- Preheat oven to 350 F (177 C). Grease the loaf pan with some butter. Place the oven rack at 3rd position from the top. Brush the bottom and sides of the pan with some butter. Place a parchment paper at the bottom of the pan for easy release later. Place the pan in the oven to let it preheat as well
Prepare cake batter:
- Mix all the dry ingredients and set aside. Place the butter and condensed milk in a large mixing bowl or stand mixer bowl with a paddle attachment. Cream them until they are pale.
- Beat the egg yolk with sugar until they are light and airy in another mixing bowl. Gradually add the egg yolk mixture into the butter mixture and beat at low speed until just combined
- Fold in the dry ingredients using rubber spatula in 3 batches until just combined. Do not overmix
Baking and Layering:
- Remove pan from the oven and spoon about 4 Tbsp of the batter on the pan for the first layer and tip the pan slightly to evenly cover the surface of the pan. Pop into the oven and let it cook for 5 minutes. Bake until it is golden brown and the cake is no longer "jiggly". Remove from the oven. I don't have a special tool to flatten the cake. You can use a rubber spatula or fondant smoother to gently flatten the cake. Brush the cake with some melted butter. Brush every layer before you pour the next layer to be baked
- Switch the oven to top heat only. My oven can't do that so I need to turn off my oven and turn on the broiler on low heat
- Spoon about 3 Tbsp of cake batter as a second layer and bake with the top heat now. Watch closely if you use a broiler as you don't want to burn the cake. Bake until just golden brown and the cake is no longer jiggly. Repeat this process until you run out of cake batter. You may need to move the rack down one or two level so if the cake brown too quickly before it gets time to bake the inside
- Once you have 3 layers baked, spoon more cake batter as usual and arrange 6 slices of prune on the surface. Repeat this after every 3 layers and ending with the last layer with prune on top
- Once you get to the last layer, layer 20 or maybe less or more layers, arrange 6 slices of prune and still bake with the broiler until it is golden brown and no longer jiggly. Remove from the oven. If you think the cake is not cooked through, preheat the oven again to 325 F (162 C). Cover the cake with aluminum foil and bake for 10 minutes if necessary
Cooling:
- Remove from the oven and let it cool down in the pan for about 5 minutes. Then loosen the edge of the cake with a knife and then gently pull the cake out and let it cool down completely on a cooling rack
Age the cake:
- Store in a tight container or wrap it up with a wrapper and if you can, let the cake "mature" and consume it in 2-3 days. It tastes the best after being "aged". This is good at room temperature for 3-4 days (if weather is not humid)
Serving:
- The layers of the cake will not be visible until you cut the 4 edges thinly to reveal it. Slice into the desired size and serve at room temperature
Storing leftover:
- For longer storage, wrap the cake with cling wrap or store in air-tight container and keep in the fridge. Just note that the longer you keep in the fridge, the dryer the cake will get


22 comments
Hi! What size eggs do you use for this recipe?:) 56/60g etc?
Around 56-60 grams. It’s about 270-280 grams of yolks