This post may contain affiliate links. Please read our disclosure policy.
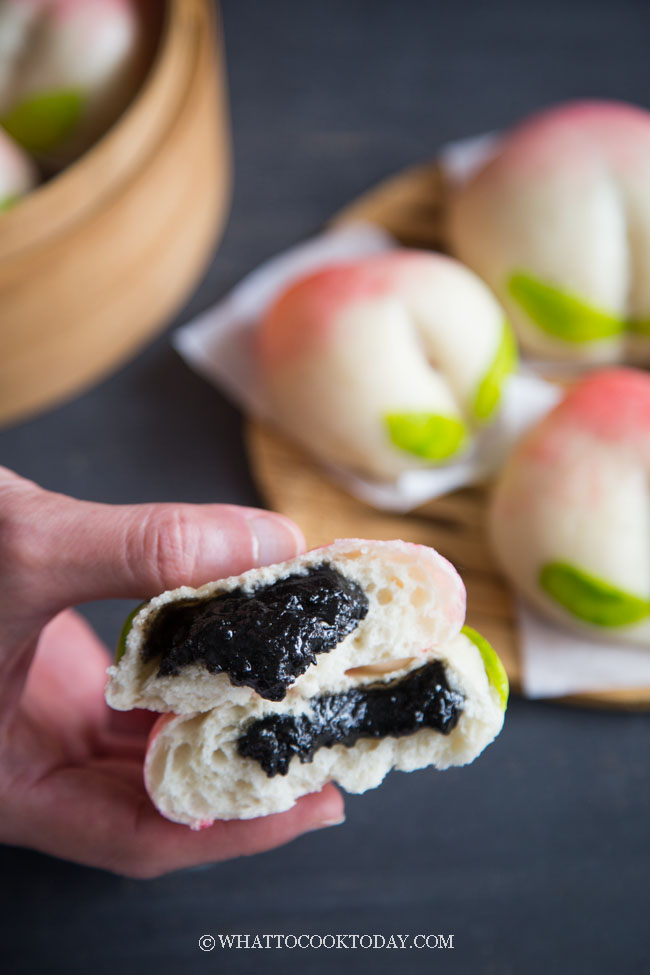
A Soft fluffy basic steamed bun is shaped into a peach shape and can be filled with a sweet filling of your choice is popular in the Chinese culture to represent longevity.
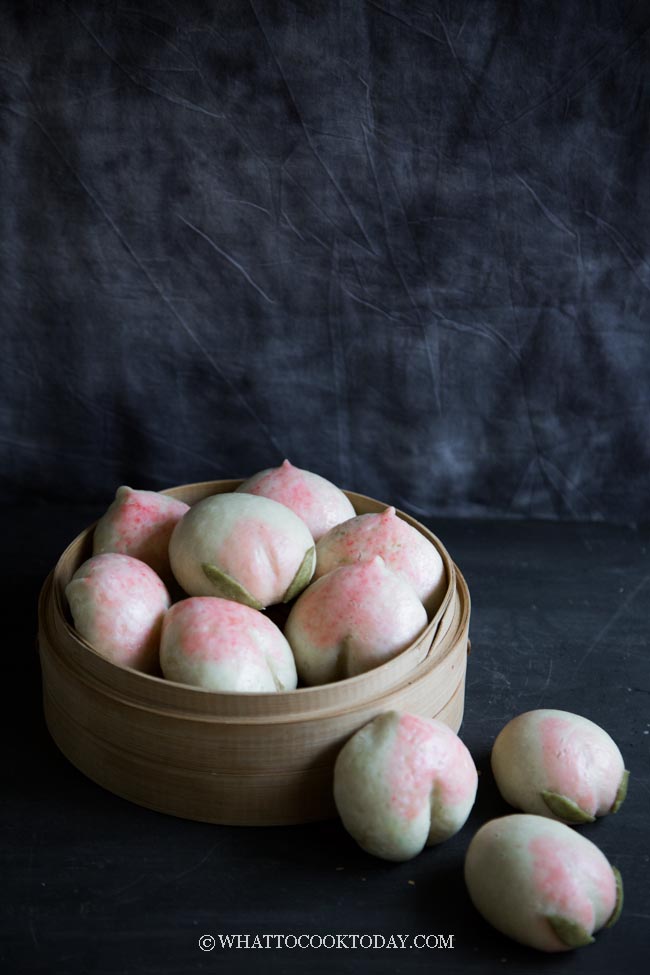
Longevity Peach Steamed Buns (Shòutáo Bao – 寿桃包)
WHY THEY ARE CALLED LONGEVITY PEACH BUNS
Shòu means longevity and táo means peach. Why peach? It was back in the ancient times when the immortals have been given peaches that promise longevity. It was called peaches of immortality and to this date, the peach has been used as the symbol of longevity. So it is not uncommon to see fresh peaches or longevity peach steamed buns are gifted as birthday presents in the Chinese culture.
I remember seeing this Shòutáo Bao in many of the celebrations like birthday especially, wedding, or other important Chinese celebrations when I was a kid. Mom often bought them from the market and I thought they were the cutest thing.
TWO DIFFERENT DESIGNS
FIRST SIMPLE DESIGN: I made the longevity peach buns using my basic soft and fluffy steamed buns dough, shaped them like a peach and then painted the buns with some faint red color (pink)

SECOND DESIGN WITH GREEN LEAVES: The extra step I did was I pinched off a small amount of the bao dough and color it green with matcha powder to make the green. You can use food coloring.

HOW TO MAKE LONGEVITY PEACH STEAMED BUNS
1. START WITH A SOFT FLUFFY STEAMED BUNS RECIPE
If you plan to make the green leaves, pinch of about 30 grams of dough and then divide the rest into 12-14 doughs, depending on how big or small you want the steamed buns

Color the small dough with green food coloring or about 1/2 tsp of matcha powder

Use a small paring knife or if you have leaf cookie cutter shape, use that to cut out 24 leaves (2 for each bun)

2. WRAP AND SHAPE THE DOUGH
If you don’t plan to use a filling, pull and tuck the dough from top to bottom so the seams are at the bottom and the surface is relatively smooth. If you plan to use a filling, place the filling on the center of the bun and then gather the sides to enclose the bun and pinch to seal. Flip the bun so the seam side is down now. Shape the buns into a peach shape (as shown below)

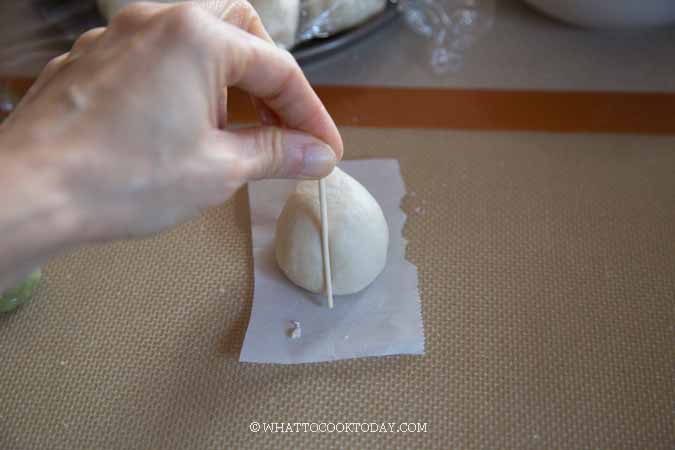
Use a toothpick or chopstick or dough cutter to make a vertical indentation on the bun to resemble a peach

Put a drop or two of red food coloring in 1 Tbsp of water and use your finger to gently brush this on the lower part of the buns or on the top part. You can use your fingers or use a brush (like I did in the video). Either way works


Pink color on top of the bun

pink color near the bottom
Attach the two leaves on the buns if you make the leaves design. Continue with the rest of the dough and filling (if using). Keep the buns covered in clean dry towel

3. PROOF THE BUNS
Let the buns proof at a warm place for about 30 minutes to 1 hour or until they are 50% larger than the original size. Don’t go by the time. Sometime it may take longer to proof the buns if the temperature is colder. The buns should feel lighter too when you lift them up.

4. STEAM THE BUNS
Bring water in the steamer to a rolling boil. Wrap the lid with a cloth to prevent condensation drips back to the buns. Place the proofed buns in the steamer and close the lid. Lower the heat to MEDIUM and let them steam for the next 10 minutes with a lid about 1/4-1/2 inch ajar. Then turn off the heat and wait 1 minute before opening the lid to remove the buns from the steamer
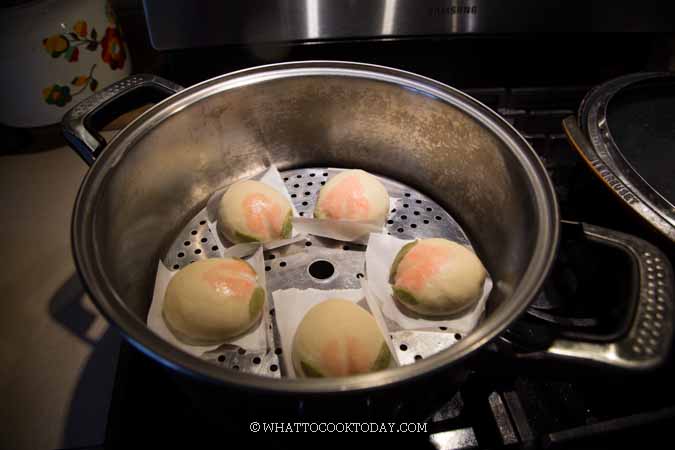
5. COOL DOWN
Let the steamed buns cooled down on a cooling rack so the bottom of the buns won’t be wet and soggy. Repeat with the next batch.
And here you have your beautiful longevity peach buns. I think mine could’ve looked better. They actually looked better when I made them again for the video.
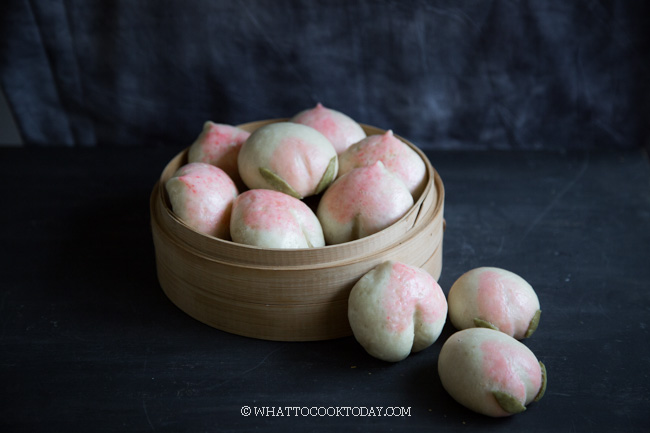
HOW TO STORE LONGEVITY PEACH BUNS
I recommend to freeze them in the freezer for longer storage. So they are excellent for making ahead. Here’s how:
OPTION 1: You can individually wrap them with a cling wrap and then place in a freezer bag, and they can be kept for 3 months max.
OPTION 2: You can place them on a baking sheet lined with parchment paper and put in the freezer for about 1 hour. This will not be completely frozen yet. Transfer to a freezer bag and they won’t stick to each other anymore

HOW TO REHEAT LONGEVITY PEACH BUNS
I highly recommend reheating using moist heat, such as steamer as it keeps the buns soft and fluffy. Here’s how:
1. Bring the water in the steamer to a rolling boil. Place a trivet inside your steamer
2. Place the frozen peach buns on a plate. Put the plate on top of the trivet in the steamer and let them steam over high heat for 5 minutes or until heated through
If you want to reheat with microwave:
Place the steamed buns on a plate. Wet some paper towel, wring out excess water and place this on top of the steamed buns and microwave on high for 1 minute and add the time as needed until heated through

DID YOU MAKE THIS LONGEVITY PEACH STEAMED BUNS RECIPE?
I love it when you guys snap a photo and tag to show me what you’ve made 🙂 Simply tag me @WhatToCookToday #WhatToCookToday on Instagram and I’ll be sure to stop by and take a peek for real!
The recipe was first published in November 2019 and I have edited some information, process, and included a video to this post on October 22,2020.
Longevity Peach Steamed Buns (Shòutáo Bao - 寿桃包)
Ingredients
Option 1:
- 300 gr all-purpose flour 2 cups + 2 Tbsp, plus more for dusting
- 60 gr wheat starch 10 Tbsp, or use potato starch or cornstarch
Option 2:
- 180 gr all-purpose flour 1 cup + 5 Tbsp, plus more for dusting
- 180 gr cake flour 1 cup + 5 1/2 Tbsp
For both options:
- 4 gr instant yeast
- 60 gr sugar about 5 Tbsp, more or less to your taste
- ¼ tsp salt
- 1 Tbsp oil
- 150 ml cold milk or cold water about 2/3 cup, start with this amount, you may need more
Other things you need:
Sweet filling suggestion (use either one):
- 360 gr dou sha
- 360 gr black sesame paste
Instructions
If you plan to use a sweet filling:
- It's easier to chill the filling, for example like dou sha (sweet bean paste), and then roll into balls, about 30 grams each for easier wrapping
Prepare the dough with a machine:
- Place all ingredients, except for food coloring in a mixing bowl. If you are using a stand mixer, knead the dough with a dough hook attachment until the dough is soft and not sticky anymore, about 10-12 minutes. It should be silky smooth
Prepare the dough by hands:
- Place all ingredients, except for food coloring in a mixing bowl. Mix until you get a rough dough (it's not going to be smooth yet). Cover and rest it for 15 minutes. Then go back and knead it. You'll be surprised by how easier it is to knead it now. Knead until the dough is smooth and pliable, about 15-20 minutes. At any point during kneading, you can always stop and rest the dough if you find it hard to knead. This is to relax the gluten. Then go back to knead again and you'll be surprised by the difference it makes by just resting the dough before kneading again. It's easier for you too
Rest the dough:
- Lightly dust your work surface with all-purpose flour. Not too much. If you use a silicone pastry mat, you may not even need to dust with flour. Divide the dough into 12 equal portions. Cover and rest the dough for 15 minutes. This is not to proof the dough. It shouldn't double in size. This is to relax the gluten for easier shaping and rolling the dough
- Pinch of about 30 grams of dough and put a few drops of green color to color the dough green for the leaves
Wrap and shape the buns:
- If you don't plan to use a filling, pull and tuck the dough from top to bottom so the seams are at the bottom and the surface is relatively smooth
- If you plan to use a filling, place the filling on the center of the bun and then gather the sides to enclose the bun and pinch to seal. Flip the bun so the seam side is down now. Shape the buns into a peach shape. Repeat this with the rest of the dough and fillings. You can also wrap it like how I did in the video. I like it better as the filling is more "centered"
- Use a toothpick or chopstick to make a vertical indentation on the bun to resemble a peach. Continue shaping the rest of the dough
- After you are done shaping all the buns, cover them with a dry cloth. Put a drop or two of red food coloring in 1 tsp of water in a bowl and use your finger or brush to gently brush this on the lower part of the buns or on the top part. Either way works. Take care not to brush too much and making the surface of the buns too wet. This will make the steamed buns wrinkle when you steam them
- Dust your work surface with a thin layer of flour and roll the green dough out into a flat sheet and use a knife to cut out 24 leaves (or 28 if you make 14 steamed buns)
- Attach the two leaves on the buns if you make the leaves design. Lightly wet the leaves with a bit of water if needed to help them attached to the buns
Proof the buns:
- Let the buns proof at a warm place for about 30 minutes to 1 hour at a warm place. Don't go by the time because sometimes it may take longer or may not take that long to proof the buns. It depends on the temperature. The proofed buns should feel lighter and about 50% of their original size, they won’t double in size.
Steam the buns:
- Bring water in the steamer to a rolling boil over medium heat. Wrap the lid with a cloth to prevent condensation drips back to the buns. Place the proofed buns in the steamer and close the lid
- LOWER THE HEAT TO MEDIUM. Place the buns in there, leaving about 1-inch space in between. Cover with a lid but leaving it about 1/4-inch gap for some steam to escape. Steam on medium heat for 10 minutes. This is especially important if you see that you have overproof the steamed buns (the steamed buns have doubled in size and they have widened to the side). As long as you steam them like this, the buns will not wrinkle and collapse later when you take them out from the steamer
- If you want to steam the buns with an Instant Pot, follow this set up
Cool the steamed buns:
- Let the steamed buns cooled down on a cooling rack so the bottom of the buns won’t be wet and soggy. Repeat with the next batch.
RECOMMEDED TOOLS
Check out this Soft and Fluffy No-Yeast Chinese Steamed Buns. These are so good and super easy to make!
CHECK OUT MY OTHER STEAMED BUN RECIPES


17 comments
I tried your recipe and I like the texture. Thank you. I used left over lotus paste from mooncake.
Hi Lois, thank you for trying and I’m glad you enjoyed the texture 🙂
Excited to make this for my dad’s birthday! I want to make it ahead and bring it over for dinner. Is it best to freeze it after steaming or do I freeze it after proofing?
Thank you for this beautiful recipe!
Hi Samantha, I don’t recommend to freeze after proofing. I would go for freezing after steaming. Let it cool down completely and then Wrap it well to prevent freezer burn and then you can let it thaw out at room temperature and then reheat or you can reheat without thawing too (just take a bit longer to reheat).
Hi, is it possible for me to make one giant longevity bun with this recipe? How would the ingredients/method change if so? Am hoping to make this for my father-in-law’s 60th birthday, as he wants to have a giant longevity bun 😁
Hi Wendy,
You can still use the same recipe and just shape into one large. Now, the steaming time of course gonna change. The steaming method would be the same as in the recipe card, but you will need probably around 40 minutes steaming over medium heat with the lid slightly open.
Hi Marvellina, I used greaseproof paper to sit the buns on when steaming & it seems to stick to buns a fair bit when I peel it off before eating. Also my buns came out a bit flat despite my best efforts to ‘pull them up’ when shaping them😁.
Do you have any suggestions?
Hi Grace, that is weird, the buns usually won’t stick much, if at all, on the parchment paper (what I usually use) after steaming. How was the texture of the buns after steaming? were they light and fluffy? When the buns were proofed for too long, the shape may spread out more to the side during steaming. You also want to make sure you steam the buns on medium heat, NOT high heat.