This post may contain affiliate links. Please read our disclosure policy.
I can’t even begin to tell you how delicious this simple loaf of country bread is. Made with only 5 basic ingredients and baked on the same day! You will want to bake this bread over and over again!

This bread is seriously so good!
I was blown away when I sliced into this bread and took that first bite! I was like!! wow!!!! Shattering thin crust and super soft creamy crumb! It’s all I want in a rustic artisanal bread like this! I usually bake sourdough artisan bread, but I have some requests from readers to share artisan country bread using commercial yeast. I have baked several loaves before but I wasn’t very happy with the result. This loaf though, I couldn’t wait to share it with you guys the moment I ate it! This is a great recipe for bakers of any level!
Easy No-Knead Artisan Country Bread
Ingredients
- 350 g bread flour (12.7% protein content)
- 4 g instant yeast
- 1 tsp sugar
- 8 g fine sea salt
- 270 g water
Instructions
Prepare the dough:
- If you use active dry yeast, mix the yeast with about 2 Tbsp of water (from the 270 grams) and add a small pinch of sugar. Let is sit for about 10 minutes. The mixture should be foamy. If it doesn't, the yeast is no longer good
- In a large mixing bowl, add all the ingredients. Use a sturdy spatula to stir all the ingredients together. Make sure all the flour is well hydrated and there is no bits of dry flour.

- It forms a very shaggy wet dough. If the dough feels kinda dry, you dan add another tablespoon of water and mix again
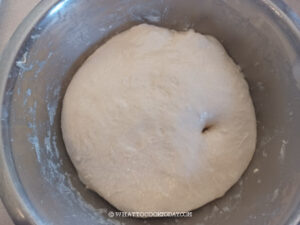
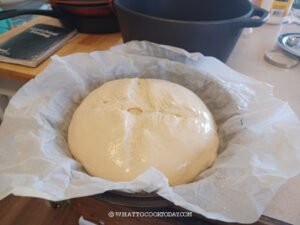
- Cover with a cling wrap and let it rest for 1 hour. During this 1 hour of rest, lots of things happen (that's why you don't need to knead the dough later!). So, do not skip this rest.


1st stretch and fold the dough to develop gluten:
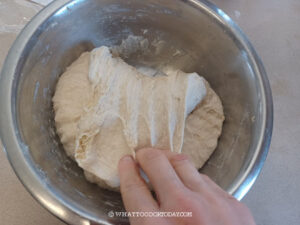
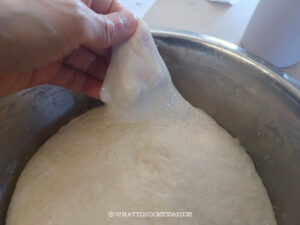
- After the 1 hour rest, Scrape the sides of the bowl with a bench scraper or spatula to "clean" it up. Lightly wet your fingers and scoop the dough from the bottom and gently wiggle and stretch it up and fold it over.
- Do this about 4-5 times around the edge. This actions helps to develop gluten without having to knead the dough. The dough is sticky, so lightly wet your fingers help to prevent the dough from sticking to your fingers
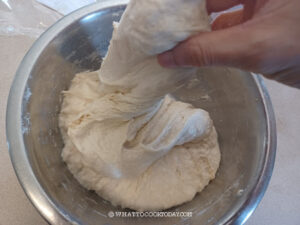
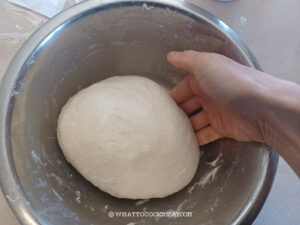
- Round the dough up into a dough ball. Notice how much smoother and stronger the dough is now. Cover again and let it rest for another 20 minutes

Last stretch and fold:
- After 20 minutes, repeat the same action again. This time around, the dough feels much more taut and you probably won't be able to stretch much, which is a good thing. That shows that the gluten is forming. Just stretch as far as the dough let you, don't force it and just fold over. You can probably do about 3-4 stretch and fold. Spray the sides and the bottom of the bowl with non stick spray or lightly oil it to prevent sticking
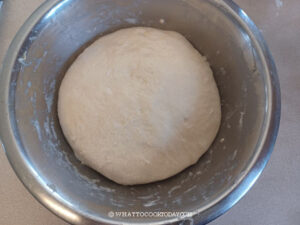
- Cover the dough and let it continue to ferment until it is double in volume. This may take an additional 30 minutes or a bit longer, depending on the temperature where you are. The colder it is, the longer it takes for the dough to ferment
- When you poke the dough with your finger, the indentation stays.
- When you gently stretch a small portion of the dough thinly, it won't tear easily
Shaping:
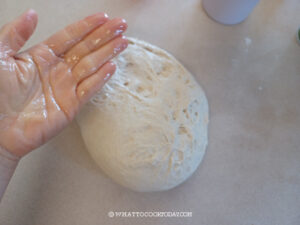
- Turn the mixing bowl upside down to release the bowl onto a work surface. Lightly oil your fingers.
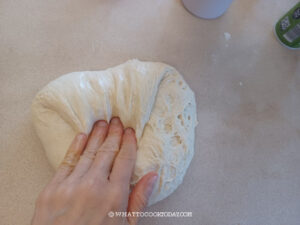
- Pull the edge of the dough towards the center to deflate the dough. Do this 4-5 times all around the edges.
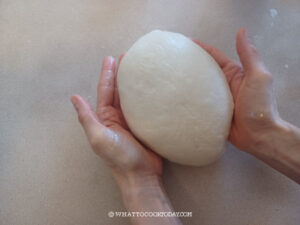
- Turn the dough up so the smooth side is facing you now
- Cup both hands around the dough with the bottom edges of your palms, pressing gently but firmly inward toward the bottom of the dough.
- Rotate the dough while keeping the top side up by sliding your right hand from front to back. Do this several times. This motion helps to "tighten" it. This is to create tension so that the dough hold its shape together instead of spreading to the side
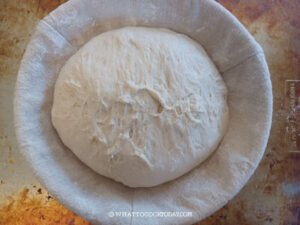
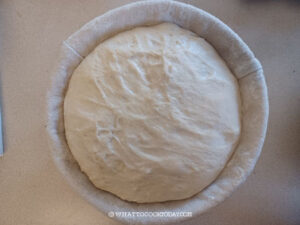
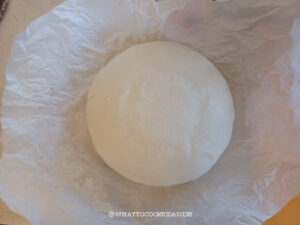
- I have a banneton and so I place the shaped dough seam side up in the banneton. The banneton helps to maintain the round shape. If you don't have one, you can use a large deep bowl lined with a clean tea towel.
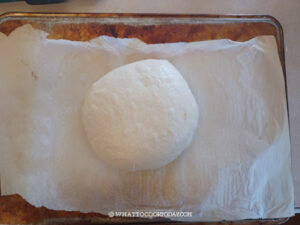
- Alternatively, you can just move the shaped dough onto an upside-down large baking sheet (so it's rimless) or a baker's peel, lined with parchment paper, and lightly dust with some flour. If you choose this method, the dough will be shorter and spread wider because there's nothing to support the shape during the last fermentation


Final proofing:
- Let the shaped dough proof until it doubles in volume and puffy.This may take about 30 minutes to 1 hour, depending on the temperature
- About 20 minutes before the end of the final proofing. Place a baking stone or baking steel or a Dutch oven in the middle rack
- Preheat the oven together with the baking stone/steel or Dutch oven at 500 F (260 C) for conventional oven, 480 F (250 C) for convection oven
Back to the dough:
- The dough should be sufficiently proofed by now. When you gently press on the dough, it bounces back very slowly and leaves an indentation.
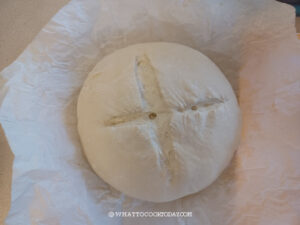
- If you place the dough in a banneton or a large bowl, place a piece of parchment paper on top and then invert it upside down. The smooth side is facing up now
- Lightly dust the top of the dough and brush off any excess. Use a sharp razor or a bread lame to score the dough in a criss-cross pattern, about an 1/2-inch deep in a very quick motion. It's quite challenging trying to score the dough that hasn't been chilled. The secret is to do it quickly in one motion, otherwise, the razor will just drag the dough and not be able to cut into it
If baking with a Dutch oven:
- If you use a Dutch oven, Lift the parchment paper up and load the dough into the Dutch oven. Spray with some water and close the lid and put the Dutch oven into the oven. Lower the temperature to 450 F (230 C) for conventional oven, 430 F (220 C) for convection oven. Bake for 40 minutes and then remove the lid, and lower the temperature to 425 F (218 C) conventional, 400 F (200 C) convection and bake for another 5 minutes. This last round is just to brown the bread. The internal temperature of the bread should be at least 190 F (88 C)
If baking on the baking stone or steel:
- Place the dough along with the parchment paper on a baker's peel or an upside down baking pan. Open the oven door and slide the dough along with the parchment paper onto the baking stone or baking steel. Quickly mist the dough with some water and quickly close the oven door.
- Lower the temperature to 450 F (230 C) for conventional oven, 430 F (220 C) for convection oven. Bake for 30-35 minutes or until the bread is golden brown. The internal temperature of the bread should be at least 190 F (88 C)
- Slide the back onto the peel or an upside down baking sheet and transfer to a cooling rack

Cool down:
- Let the bread cool down for few hours before slicing it with a serrated knife/bread knife. Do not attempt to slice into a warm bread

RECOMMEDED TOOLS

*Nutrition facts are just estimates and calculated using online tools*
Ingredients and substitutions
1. Bread flour
I use King Arthur’s bread flour with 12.7% protein content. I do not recommend using all-purpose flour
2. Instant yeast
I usually use SAF Gold instant yeast in my bread baking. You can also use active dry yeast but they need to be bloomed first before using
3. Salt
I use fine sea salt. I don’t recommend cutting down on the amount of salt
4. Sugar
I only use 1 teaspoon of fine granulated sugar
5. Water
The amount varies depending on the type of flour you use and also the humidity level. Every bread flour has slightly different liquid absorbency. I would start with 270 grams and add more as needed

How to store
1. Let the bread cool down completely. Keep whole unsliced bread in a paper bag and just fold down the opening. They can be kept for 2-3 days at cool room temperature. I usually just keep it in a bread box without the paper bag
2. If the bread has been sliced (assuming you slice the bread in the middle), you can keep both cut sides down on a cutting board, to protect the cut side from drying out
3. For longer storage or if it’s humid where you are, wrap the bread in aluminum foil and put it inside a large freezer bag or thick bread bag made for the freezer, push all the air out and seal. Simply thaw at room temperature before slicing and toasting
4. If you have sliced the bread, wrap a few slices per batch with aluminum foil and then put them inside a large freezer bag or thick bread bag made for the freezer, push all the air out and seal. You can thaw at room temperature or toast the frozen slices
Did you make this easy no-knead artisan country bread recipe?
I love it when you guys snap a photo and tag it to show me what you’ve made. Simply tag me @WhatToCookToday #WhatToCookToday on Instagram and I’ll be sure to stop by and take a peek for real!


2 comments
Hi Marvellina. I love all your no-knead bread recipes. I have 2 questions. (1) I would like to try this recipe, but using a loaf pan instead. Do I simply shape it into a loaf and place it into the loaf pan for the final proofing? Would I need to adjust the oven temperature? (2) can I substitute some of the bread flour with whole wheat flour? Thank you
Hi Jean,
1. Yes you can use a loaf pan. 8 1/2 x 4 1/2 loaf pan should fit just right. Just shape into a loaf and final proof is in the loaf pan (you got it right!)
2. You can preheat at the same temperature with a baking stone/steel if you have one (it gives the bread a good rise). I suggest doing a steam bake if you can. Place a cast-iron pan or pot, or a thick heat-resistant pan next to the baking stone so the steam can reach the bread easily. Pour in 2 cups of water. The water will gradually heat up as the oven is preheating. Score the bread with a very sharp knife at the center just before baking, spray the dough with some water. Put this inside the oven on top of the preheated baking stone/steel if you use.Lower the temperature to 400 F (200 C) for conventional and 385 F (195 C) for convection, and bake for 15 minutes. After 15 minutes, remove the pan with water. Continue baking for the next 30 minutes (start checking at around 30 minutes) or until an instant-read thermometer inserted into the dough reads at least 200 F (93 C). If it’s not done, bake another 5 minutes and check again.
3. Yes you can add about 20-30% of whole wheat and see how it goes first, it may affect the amount of water you need as whole wheat flour absorbs more liquid. So you can add one tablespoon at a time if you feel like the dough is too dry. The more whole wheat flour you add, the denser the bread will be, that’s just the way it is.
I hope my answers make sense 🙂