This post may contain affiliate links. Please read our disclosure policy.
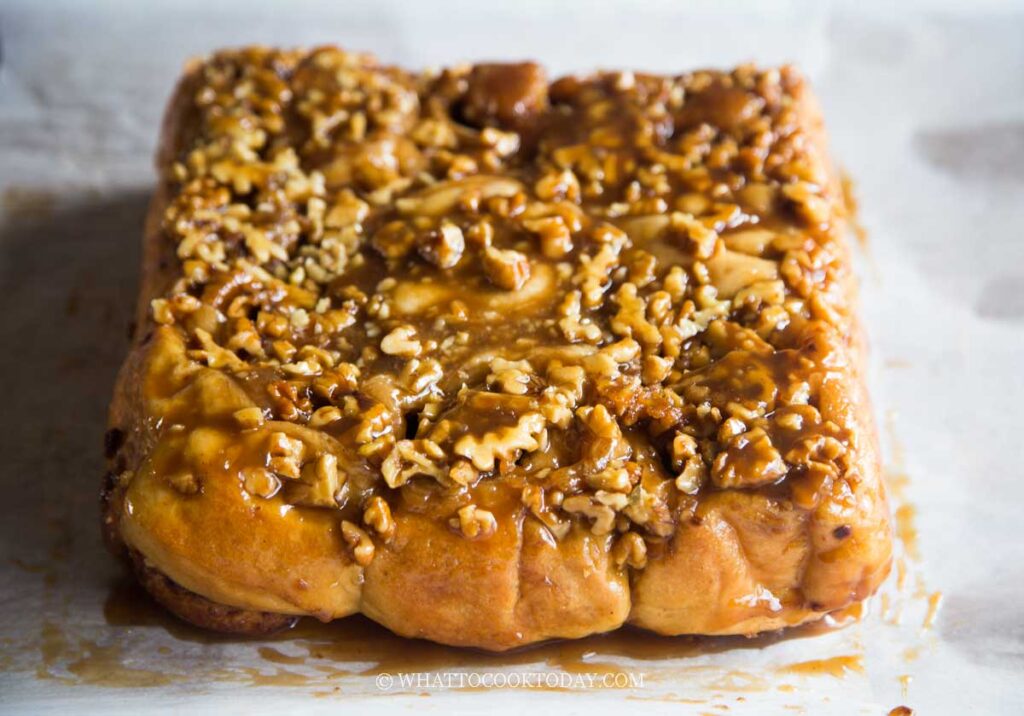
Pillowy soft buns topped with gooey caramel with a hint of savoriness from the miso paste and some crunch from the walnuts are a morning treat to look forward to. The buns stay soft and moist thanks to the tangzhong.

Miso in sticky buns?
I know you may not be convinced! Just like when I made these soy sauce chocolate chip cookies. Nobody knew about the soy sauce part until I told them LOL! The same thing with these miso caramel sticky buns. The trick is not to tell anyone in advance. Do you know how people tend to have biased opinions as soon as they learn something unusual or odd, especially regarding food? Yup!
What does it taste like?
First of all, you can’t tell if it is made with miso. If you know what miso tastes like. And in case you are wondering, what in the world is miso? A quick search will tell you that miso paste is a traditional Japanese seasoning produced by fermenting soybeans with salt and koji (a type of fungus) and sometimes rice, barley, or other ingredients. The fermentation process can take weeks to years, resulting in a paste with a rich, savory flavor and a variety of colors and strengths depending on the ingredients and fermentation time. Miso is commonly used in Japanese cooking to make soups, sauces, marinades, and dressings, adding a deep umami flavor to dishes. In this case, it lends its savory note to the sweet caramel. If you love sweet and salty caramel, that’s exactly what the miso does to it! It has that extra flavor that you just can’t put your fingers on, in a good way IMHO!
Why I like to use tangzhong
I like to use tangzhong method because it extends the shelf life of the buns. It keeps the buns soft and moist without using lots of butter and eggs.
Miso Caramel Walnut Sticky Buns (Tangzhong)
Ingredients
Tangzhong:
- 20 g bread flour
- 100 g milk
Dry ingredients:
- 350 g bread flour
- 6 g instant yeast
- 28 g milk powder
- 30 g sugar
- 5 g salt
Wet ingredients:
- 140 g whole milk
- 1 large egg
To add last:
- 40 g butter unsalted softened
Filling:
- 90 g brown sugar
- 15 g all-purpose flour
- 1 ½ Tbsp ground cinnamon
- 30 g unsalted butter melted
- 100 g roasted walnuts finely chopped, divided
Miso caramel topping:
- 80 g unsalted butter
- 100 g brown sugar
- 45 g heavy cream
- 40 g red or white miso paste red miso gives more intense flavor
Instructions
Prepare tangzhong: (the day before if possible)
- Place milk and the bread flour in a small saucepan. Whisk until there are no more lumps. Cook this mixture over low-medium heat until it reaches 65 C (149 F) or until it thickens into a spreadable paste consistency.

- Remove from the heat and cover with a plastic wrap, touching the tangzhong so the skin won't form. I highly suggest using this the next day instead of using it on the same day. Store this in the fridge

Prepare the dough:
- Mix all the dry ingredients together in a mixing bowl. Make a well in the center and pour in the wet ingredients and the tangzhong. Use a dough hook to stir it roughly so that when you start the machine, the flour won't fly all over.

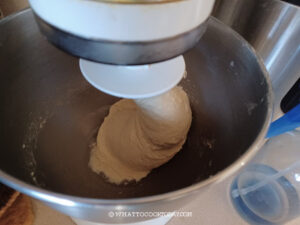
- Knead the dough on low speed until all the crumbly dough starts to come together into one mass, it may take about 2-3 minutes for this to happen. Don't try to add any flour or liquid. You may need to stop halfway and scrape the dough off the hook and the sides of the bowl and knead again several times
- Once you get a rough dough, add the softened butter and continue to knead on medium speed until the dough is smooth and elastic, about 8-10 minutes or longer, depending on your mixer.

- When you gently stretch a small portion of the dough thinly, it won't break. This shows sufficient gluten development

1st proofing:
- Place this dough in a lightly oiled large bowl, cover it with a clean and damp tea cloth or plastic wrap and let it rise at a warm place for about 1 hour.

- The dough will puff up, may be double in size or may be close to double.

Prepare the filling:
- About 15 minutes before the end of proofing for the dough, prepare the filling. Combine brown sugar, flour, and cinnamon in a bowl. Melt some butter and set aside. Proceed to prepare the miso caramel topping

Prepare the miso caramel topping:
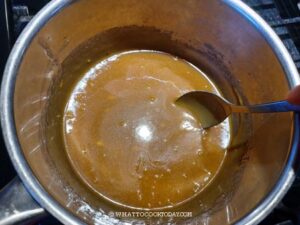
- Place butter, brown sugar, heavy cream, miso paste in a saucepan. Use a whisk to break the miso paste so it blends well with the rest of the ingredients. Cook over medium-low heat until sugar dissolves and no lumps of miso paste in the mixture. Set aside to let it cool down

Shaping:
- Lightly oil your pan, I used a 9 x 9 inch square pan and line the pan with a heavy-duty aluminum foil, covering the bottom and the sides, corner to corner. Apply oil on the foil to prevent sticking. You can also use a non-stick cooking spray.
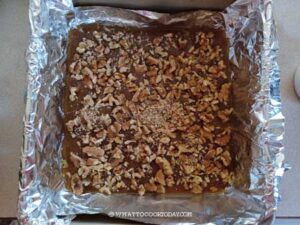
- Pour the miso caramel topping into the pan. It should cover the base of the pan. Sprinkle evenly with the rest of the chopped walnut

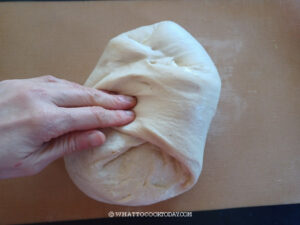
- Deflate the dough by folding the edges towards the center to deflate the dough

- Round it up into a dough ball. Cover it loosely with a cling wrap and let it rest for 5 minutes to relax the gluten

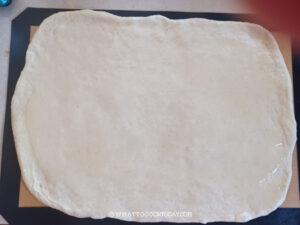
- On a lightly floured surface, roll the dough out using a rolling pin (lightly flour the rolling pin if necessary) to a rectangle about 12 x 15 inches.

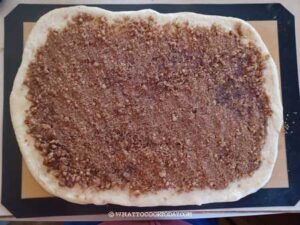
- Spread the melted butter on top of the dough, leaving 1/2 inch along the edges. Sprinkle the cinnamon sugar filling all over, leaving 1/2 inch along the edges. Use your clean hands to press the filling into the dough. The melted butter helps to keep the filling in place. Sprinkle half of the walnuts on top

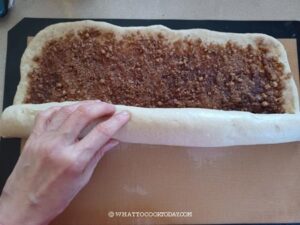
- Start rolling from the long side all the way to the other end. You get a long log now. Take care not to get the butter on your fingers while rolling the dough because it makes the dough slippery and hard to seal later.

- Pinch the seams together to seal


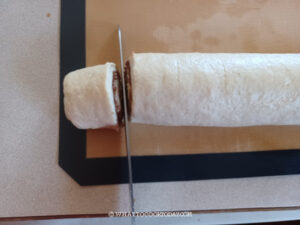
- Use a serrated knife and cut the dough into 9 equal pieces.


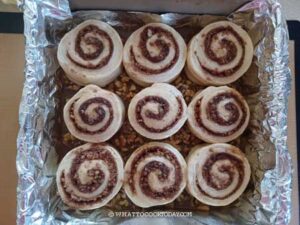
- Arrange the pieces on top of the caramel topping inside the pan. It should be 3 x 3

2nd proofing:
- Let the shaped dough proof again they fill up the pan and really puffy. When you gently push on the dough, it bounces back slowly and leave an indentation. This may take 45 minutes to 1 hour, depending on how warm it is where you are

- 10 minutes before the end of 2nd proofing, preheat the oven to 350 F (180 C) for conventional oven and 330 F (165 C) for convection oven
Baking:
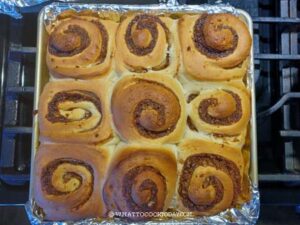
- Put the pan on the middle rack and let it bake for 40-45 minutes. Loosely tent the top of the pan with aluminum foil halfway through baking if the top gets brown too fast. The baking time is just for reference. You know your oven best and adjust the timing as necessary. Start checking for doneness at 30 minutes.
- Check for doneness by using a toothpick inserted into the center piece of the bun. It should come out with some sticky caramel is okay, but no sticky dough. If it does, bake for another 5 minutes and test again.
Cool down:
- Remove from the oven and let the buns cool in the pan for 10 minutes. DO NOT skip this step.

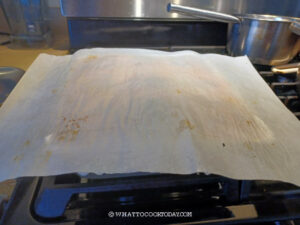
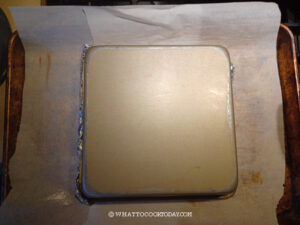
- Place a large piece of parchment paper on top of the buns. Then place a half-sheet pan on top (pan not shown in the photo)

- Quickly but carefully invert the pan. Let it sit like this, do not remove the 9 x 9 pan. Let it cool down this way for at least 20 minutes. If you remove the pan now, the caramel is still hot and thin and it just gushes out. The caramel thickens up and becomes gooey when it cools down. So let it sit and thicken up

To serve:
- After about 20 minutes or so, remove the pan covering the buns. There are still some caramel that drips down but they are thick and gooey and can be easily scoop and drizzle on the buns for extra topping. The buns are best served warm

RECOMMEDED TOOLS
*Nutrition facts are just estimates and calculated using online tools*
What type of miso paste to use
There are many different types of miso paste. The most common ones are:
1. Red miso (Akamiso)
Red miso is fermented for a much longer time and results in a much more intense flavor and deeper color
2. White miso (Shiromiso)
White miso is fermented for just a few months and with less intense flavor, a bit sweeter and the color is less intense compared to red miso
3. Mixed miso (Awase miso)
Mixed miso is a combination of red and white miso. You get the best of both worlds. More intense than white miso but less than red miso with that hint of sweetness. Mixed miso may not always be available (at least where I am)
If it’s your first time using miso paste in baking, I recommend using white miso or mixed miso. Not that red miso is bad, but it has a more pronounced and intense flavor. Some people like it, some people don’t. My kids like red miso. For this recipe, I use white miso because that’s what I have in stock in my fridge. The Asian store I went to the last time was out of red miso and mixed miso paste
How to store baked sticky buns
1. Store at room temperature: Let the buns cool down completely before storing them. I grab the parchment paper and put it back inside the pan. Trim the extra parchment paper. Cover the whole pan with cling wrap and they can be kept at room temperature for 2-3 days
2. Freezer method 1: I don’t recommend storing them in the fridge as the cold air dries out the buns. They can, however, be kept frozen. Once they have cooled down completely after removing the pan covering the bun, scoop up all the extra caramel that drips on the parchment paper and drizzle them back on top of the buns. Move them back into the pan by grabbing the parchment paper. Cover with aluminum foil. Put the whole thing inside an oversized freezer-friendly thick bread bag, push out all the air and tie it up. They can be kept frozen for 1 month
3. Freezer method 2: Another way to do this is to let the buns cool down completely as described in method 1. Instead of moving them back into the pan (assuming you need your pan for another baking project), wrap the buns, including the parchment paper, in heavy-duty aluminum foil, put the whole thing inside an oversized freezer-friendly thick bread bag, push out all the air and tie it up. They can be kept frozen for 1 month
How to reheat sticky buns in a microwave, oven, and air-fryer
1. Microwave: If they are at room temperature, put one or several rolls in a heat-proof dish. Cover with a damp paper towel on top. Reheat for 15-20 seconds or until they are warm enough for your preference. If they are frozen, I recommend thawing them overnight in the fridge before reheating them. This lessens the cooking time and drying out the buns.
2. Toaster oven or oven: if they are frozen, thaw at room temperature or overnight in the fridge before reheating. Mist the buns with some water or drizzle a tablespoon or two of water on the buns. Cover with aluminum foil. Reheat in a preheated toaster oven or oven at 350 F (180 C) for 10-15 minutes or until warm through. Serve immediately
3. Air-fryer: if they are frozen, thaw at room temperature or overnight in the fridge before reheating. Mist the buns with some water or drizzle a teaspoon or two of water on the buns. Wrap with aluminum foil. Reheat at 350 F (180 C) for 3-5 minutes or until warm through
Did you make this miso caramel walnut sticky buns recipe?
I love it when you guys snap a photo and tag it to show me what you’ve made. Simply tag me @WhatToCookToday #WhatToCookToday on Instagram and I’ll be sure to stop by and take a peek for real!










1 comment
These were absolutely delicious, but they were slightly overbaked at 35 minutes. The caramel bubbled over the edges of the pan and made a mess on the bottom of the oven. I made the caramel with red miso and it was spectacular. Will definitely make again.