This post may contain affiliate links. Please read our disclosure policy.
You can make soft and delicious pain de mie without a machine to knead the dough. If you are looking for a recipe that will fit into your small Pullman loaf pan 9 x 4 x 4 inches, this recipe does exactly that.

So, I used to own a small Pullman loaf pan measuring 7 1/2 x 4 x 4 1/4 inch, which fit about 1 lb (450 grams) worth of dough. This is the size that is most common in Asia. Then that pan got worn out over the years. Well, the quality wasn’t that good to begin with. I recently purchased this 9 x 4 x 4 inch Pullman loaf pan made by USA Pan (not sponsored). I seriously couldn’t be happier with the quality. It bakes like a dream. The pan is heavy and I barely have to grease the pan and the bread slides right out effortlessly. In the U.S., a standard size for a small Pullman pan is 9 x 4 x 4 inches, which can hold about 750-900 grams of dough, depending on what type of bread it is. Whole grain bread needs more dough to fill up the pan. If we are talking about white bread, that is the range. So this recipe fills up the pan nicely when you use the Pullman pan with its lid to create a perfect rectangle loaf of pain de mie.
No-Knead Small Loaf Pain De Mie/ Pullman Bread
Ingredients
- 300 g low-fat milk I use 2%
- 430 g unbleached all-purpose flour I use King Arthur's with 11.7% protein
- 9 g fine sea salt
- 8 g instant yeast
- 35 g honey
- 50 g oil
Instructions
- I use a small Pullman loaf pan that measures 9 x 4 x 4 inch. For recipe adjustment to fit a different loaf pan, please see my post below
Scald the milk:
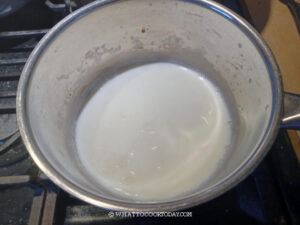
- Put the milk in a saucepan and bring it just until it starts to simmer. Turn off the heat immediately. You don't want to boil the milk. If you have an instant-read thermometer, it should be around 170 F (77 C). Scalding the milk helps to deactivate the whey protein in the milk that interferes with gluten development. Let the milk cool down to lukewarm before using as we don't want to kill the yeast

- I have tried making the dough with scalded milk and without the scalded milk. The one without the scalded milk, never rose as tall as the one with scalded milk.
Prepare the dough:
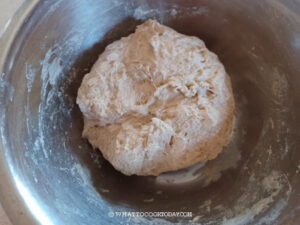
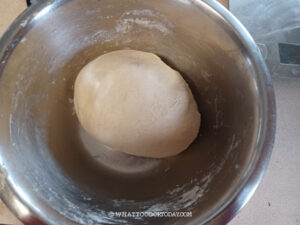
- Put all ingredients, including the already cooled-down scalded milk in a large mixing bowl. Use a sturdy spatula to stir into a wet shaggy dough. Don't handle the dough with your hand at this stage. It's sticky. Cover with a cling wrap and let it rest for 30 minutes

3 sets of stretch and fold (every 30 minutes):
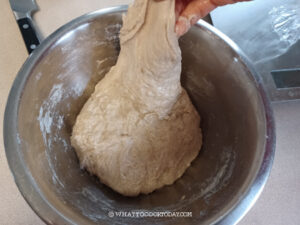
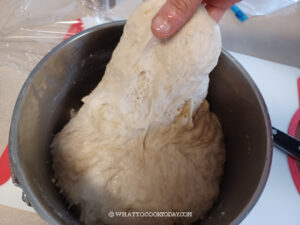
- After 30 minutes, lightly wet your fingers, scoop and grab the edge of the dough from the bottom and gently wiggle it up to stretch it as far as it allows you to (don't force it and tear the dough)

- Then fold over to the center. Repeat this with the next edge. You can probably do about 4-5 stretches and folds for this first round.

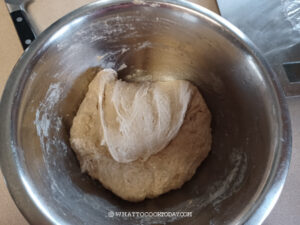
- Round it up into a dough ball with the smooth side up. Cover it back again and rest for another 30 minutes

- Perform the second sets of stretch and fold like you did before. Notice the dough gets stronger now and not as slack. It won't allow you to stretch as far as the first round. You can probably do about 4 stretches and folds. Cover and rest for another 30 minutes

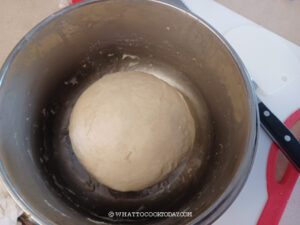
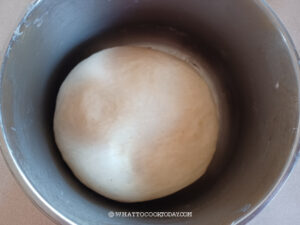
- After the 3rd sets of stretch and fold, cover and let the dough proof until it double in size at a warm place, this may take 30 minutes to 1 hour

- This is after the dough has doubled in volume

Shaping:
- Deflate the dough by folding the dough towards the center to push all the air out. Round it up into a dough ball, cover and rest for 10 minutes to relax the gluten
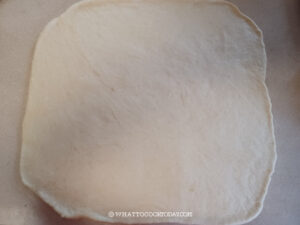
- Lightly dust your work surface. Transfer the dough on it. Use a rolling pin to roll the dough out into a rectangle, roughly about 14 x 10 inches

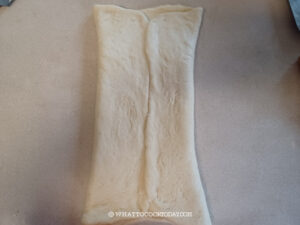
- Fold both sides (shorter side) to meet at the center

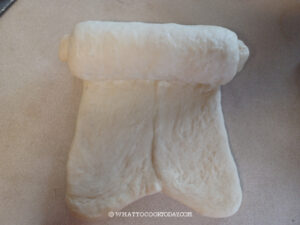
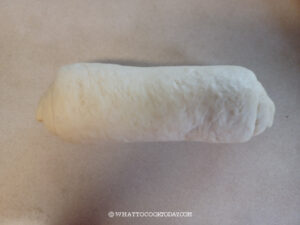
- Then roll tightly into a log, roughly about as long as the pan. Pinch the dough to seal each time you roll to create tension and to make it tight. Push out as much air as you can to prevent big holes in the crumbs later


Final proof:
- Lightly grease the 9 x 4 x 4 inches Pullman loaf pan and its lid (if you plan to use i). You can also bake this in a 9 x 5 x 2 3/4 inches loaf pan. This gives you a shorter but wider loaf of bread
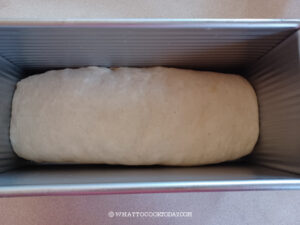
- Place the log inside the loaf pan. Push the dough down to fit the pan and to even out the dough.

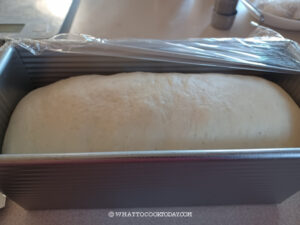
- Cover and let the dough proof until it is about 1-inch below the rim if you plan to use the lid with your Pullman pan. Slide the cover close

- If you use 9 x 5 x 2 3/4 inch loaf pan, proof until the dough is about 1-inch above the rim. This may take somewhere from 45 minutes to 1 hour or longer at warm temperature around 82 F. Don't go by the time however, observe the dough instead
Baking:
- 10 minutes before the end of final proofing, preheat the oven to 375 F (190C) for conventional oven, 350 F (180 C) for convection oven
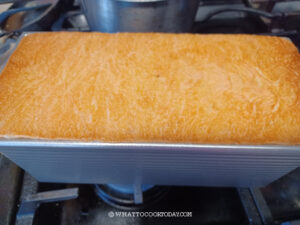
- Put the pan in the oven's middle rack. Bake for 30 minutes if you use Pullman pan with the lid, then open the lid and bake for another 5 minutes. If you bake it in a regular pan, bake for 25-30 minutes or until the top is golden brown. Tent the loaf with aluminum foil if it gets dark before the end of cooking time. The internal temperature at the center of the bread should be at least 190 F (88 C)

Cooling:
- Gently wiggle the bread out of the pan and let it cool off on a cooling rack completely before slicing the bread
How to store:
- Let the bread cool down completely. You can keep them in an air-tight container for 3 days. They can also be kept frozen for up to 1 month in the freezer
RECOMMEDED TOOLS
*Nutrition facts are just estimates and calculated using online tools*

Important tips you want to read
1. Bake without the lid if this is your first time
This recipe fits into my 9x4x4 inch Pullman loaf pan with its lid. It produces a perfect square bread after I slice it. If this is your first time and you are unsure if the dough will fill up your pan or worse, overflow, I recommend baking it without the lid to see how much the dough springs up after baking. Different types of flour (especially if you mix in some whole-grain flour), or whatever adjustment you make, will affect the outcome too. If the bread rises about 2 inches above the rim after baking, most likely it will fill up the pan when you bake it with a lid. If the bread barely rises and is less than 2 inches, it probably won’t fill up the pan corner to corner when you bake it with a lid on.
2. If you bake with a different size loaf pan
If this is your first time making this recipe with Pullman loaf pan, I suggest baking without the lid first to figure out how the dough fills the pan after baking. The type of flour you use and hydration also affect how much the dough rises.
1. For 8.5 x 4.5 x 2.6 inches loaf pan, you can 0.73 x the recipe
2. For 9 x 5 x 2.75 inches loaf pan, you can 0.87 x the recipe
3. For Asian small Pullman loaf pan 7.5 x 4 x 4.4 loaf pan, you can 0.92 x the recipe
4. For large Pullman loaf pan 13 x 4 x 4 inches loaf pan from USA Pan, you can 1.2 x the recipe
3. Why do I need to scald the milk
As I mentioned briefly, the whey protein in milk interferes with gluten development. Since this is a no-knead bread, it relies on a few series of stretches and folds to develop gluten, therefore, we don’t want the milk protein to interfere with that. I have tried several times to make the dough without scalding the milk and the dough couldn’t fill up the pan after being baked. So, I encourage you not to skip the process if you want that perfect rectangle shape when you bake in a Pullman pan with the lid

Did you make this No-Knead Small Loaf Pain De Mie/ Pullman Bread recipe?
I love it when you guys snap a photo and tag it to show me what you’ve made. Simply tag me @WhatToCookToday #WhatToCookToday on Instagram and I’ll be sure to stop by and take a peek for real!




12 comments
So glad to find your recipe. I have been making too much dough for my pan (9” USA) and it’s just not rising as lightly as I thought it should. I tried your recipe and had great success! I even scalded the milk (like grandma did).
And I love your photos and instructions. I’m just getting started and they’re really clear and a lot of help.
Hello Em Gee, I’m so glad you find the photo and instructions helpful! Even better that you had success this time around 🙂 Thank you for trying and for your feedback!