This post may contain affiliate links. Please read our disclosure policy.
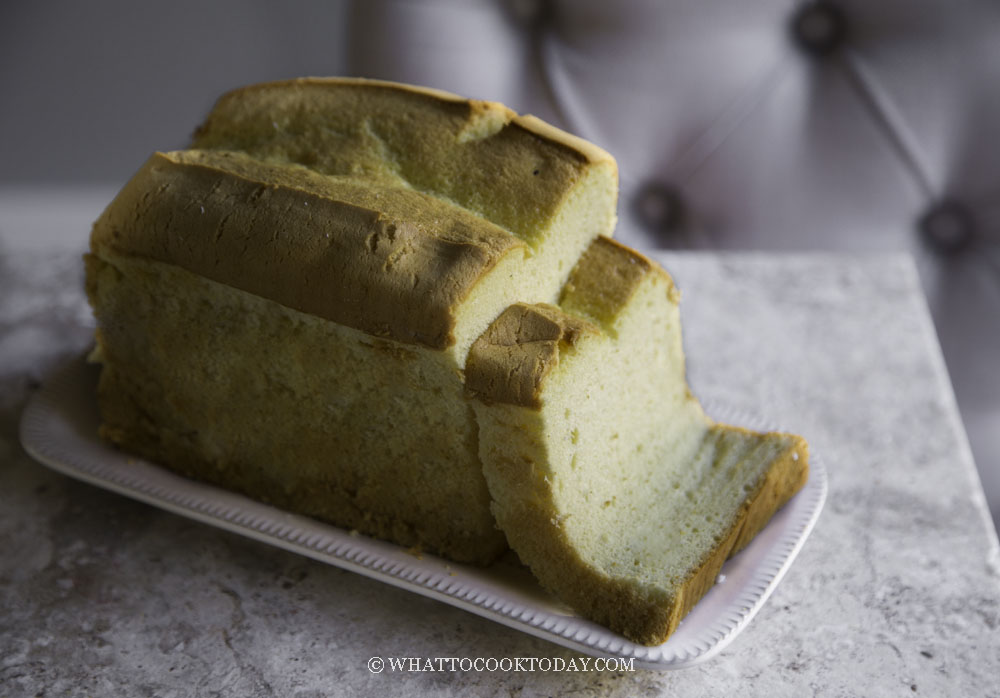
An incredibly soft and fluffy cake that looks like a toast with an aromatic orange scent baked in a loaf pan is a must to try! The cake has a unique texture.

What is golden pillow cake?
I’m not sure exactly why it is called a pillow cake. My guess would be because of the shape that looks like a pillow. Golden pillow cake is made with the same technique as chiffon cake. The egg whites and yolks are separated. The whites are whipped into a meringue and then combined with the yolk batter. The airy and spongy texture comes from the meringue, which is the only rising agent used in this recipe. The color of the pillow cake is usually yellowish orange in color and I guess that’s why it’s called golden pillow cake most of the time. In short, it’s like a chiffon cake baked in a loaf pan/tin.
You can see from here how soft and airy the crumbs of this pillow cake

How to bake an orange pillow loaf cake
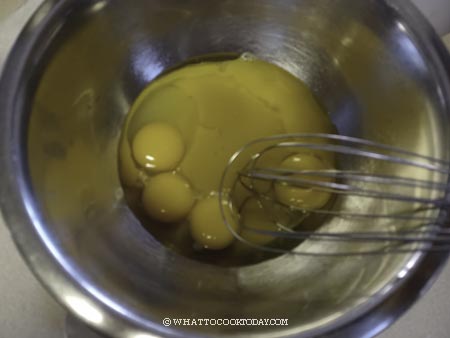
- The eggs and juice need to be at room temperature. Carefully separate the egg yolks from the whites while they are still cold. They are easier to separate when they are cold. We also need one whole egg for this recipe. Let them come to room temperature. Combine the yolks, one whole egg, sugar, oil, orange juice, and its zest with a whisk

- Sift in the cake flour, cornstarch, and salt. Use a whisk to combine again into a smooth and rather thick batter. Set aside

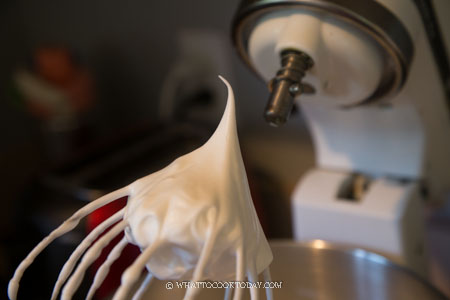
- Beat the egg whites on medium speed until frothy, add cream of tartar or lemon juice/vinegar and whip until it turns whitish and air bubbles are fine. Gradually add the sugar as you beat, in 3 batches. I beat them at medium speed (speed 6 on Kitchen Aid). This will take a bit longer compared to beating at high speed. I used to do higher speed (speed 8), but the meringue is smoother and nicer when I maintain the speed on 6 and much more stable too. I highly recommend stopping several times to check on the consistency and scraping the sides of the bowl to make sure no sugar left on the side of the bowl. Whip until you reach a stiff peak but still have a slight bent on the tip. Then lower the speed to 4 and whip for 1 minute to even out large bubbles and stop beating

- Gently fold 1/3 of the meringue into the thick batter. Using a whisk, using a cutting motion and fold over to mix. Repeat this motion several rounds. Continue on with the second 1/3 of the meringue again to mix. For the last 1/3 of the meringue, use a rubber spatula instead to ensure you get all the batter at the bottom of the bowl mixed in as well. Use a cut down in the middle and fold over motion to fold gently but quickly. Make sure you don’t see any more white meringue. The mixture should be fluffy and voluminous.


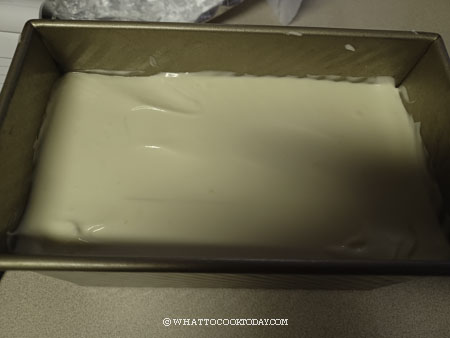
- Pour the batter into the prepared loaf pan. Use a rubber spatula to smooth the surface. Gently tap the pan on the countertop 2-3 times to pop any air bubbles. Use a skewer to draw a zig zag to pop bubbles inside the cake batter, carefully not to disturb the parchment paper lining at the bottom

- Place the loaf pan on the rack and bake for 12-13 minutes or until the top has dried to touch. Take it out and use a very sharp knife to cut one slit in the middle, about 1/2 an inch deep is sufficient. When the cake cracks, it will follow this line that you created instead of just cracking all over the place. Try to accomplish this within one minute. If you are nervous about taking out the cake to make a slit, you can put about 30 grams of softened butter in a piping plastic bag, cut off the tip and squeeze the butter in the middle of the loaf. As the cake rises, it will crack following this line as well. Either method works

- Put the loaf pan back into the oven. Reduce the temperature to 300 F (150 C) for a conventional oven. Lower the temperature by 20 F or 15 C for the convection oven. Bake for another 60 minutes. The cake should be dry to touch and springs back lightly when you touch


- Drop the loaf pan from about 10 cm height on the counter several times to prevent shrinkage when you pull the cake out of the oven. Then carefully invert the pan upside down immediately on two jars or cups on the side. Please don’t be tempted to remove it from the pan if it’s still warm. It takes about one to two hours to cool down completely

- Once it’s cool down completely, use a spatula knife to run through the 4 sides and then gently tip the loaf pan over to release the cake. Peel off the parchment paper from the bottom
Did you make this orange pillow cake loaf recipe?
I love it when you guys snap a photo and tag it to show me what you’ve made 🙂 Simply tag me @WhatToCookToday #WhatToCookToday on Instagram and I’ll be sure to stop by and take a peek for real!

Orange Pillow Loaf Cake (Chiffon Loaf Cake)
Ingredients
Cake batter:
- 4 egg yolks about 72-75 grams
- 1 large egg about 50 grams without the shell
- 20 gr sugar
- 50 gr oil any neutral-tasting oil
- 70 ml orange juice
- Zest from one large orange
- 95 gr cake flour
- 15 gr cornstarch
- ¼ tsp salt
Meringue:
- 4 egg whites about 120 grams
- 1 tsp lemon juice or vinegar
- 70 gr sugar
Instructions
- You can use 8 1/2 x 4 1/2 x 2 1/2 loaf pan or 7 1 /2 x 4 1/2 x 4 loaf pan or 9 x 5 loaf pan. I use 7 1/2 x 4 1/2 x 4 loaf pan. It's a very tall pan and yields a very tall cake. If you use 9 x 5 loaf pan, the cake will be wider and shorter, which is fine too. There's no right or wrong here
- Update: It is better to use a pan that does NOT have non-stick coating. The cake can cling to the side to help it rise tall. I have used a pan with non-stick coating, while it works too, but the cake is much shorter and there's a risk of the cake slipping out of the pan when you invert it to cool down if you use baking method 1. Whether your pan has a non-stick coating or does not have non-stick coating , line the bottom of the pan with parchment paper for easier release, but do not line or grease the side of the pan
- For baking method 1 (take out and slit method, cool upside down): Preheat your oven to 350 F (180 C) for conventional oven. If you have a convection oven, I suggest lowering the temperature by 20 F (15 C). Place the oven rack 3rd rack from the bottom/lower middle of the oven (or adjust accordingly, you will know your oven best)For baking method 2 (low baking temperature, no need to cool upside down) : Preheat your oven to 320 F (160 C) for conventional oven. If you have a convection oven, I suggest lowering the temperature by 20 F (15 C). Place the oven rack at the lowest rack (or adjust accordingly, you will know your oven best)
Prepare the cake batter:
- The eggs and juice need to be at room temperature. Carefully separate the egg yolks from the whites while they are still cold. They are easier to separate when they are cold. We also need one whole egg for this recipe. Let them come to room temperature
- Combine the yolks, one whole egg, sugar, oil, orange juice, and its zest with a whisk. Sift in the cake flour, cornstarch, and salt. Use a whisk to combine again into a smooth and rather thick batter. Set aside
Prepare the meringue:
- Beat the egg whites on medium speed until frothy, add cream of tartar or lemon juice/vinegar and whip until it turns whitish and air bubbles are fine. Gradually add the sugar as you beat, in 3 batches. I beat them at medium speed (speed 6 on Kitchen Aid). This will take a bit longer compared to beating at high speed. I used to do higher speed (speed 8), but the meringue is smoother and nicer when I maintain the speed on 6 and much more stable too. I highly recommend stopping several times to check on the consistency and scraping the sides of the bowl to make sure no sugar left on the side of the bowl. Whip until you reach a stiff peak but still have a slight bent on the tip. Then lower the speed to 4 and whip for 1 minute to even out large bubbles and stop beating
Combine meringue and cake batter:
- Gently fold 1/3 of the meringue into the thick batter. Using a whisk, using a cutting motion and fold over to mix. Repeat this motion several rounds. Continue on with the second 1/3 of the meringue again to mix. For the last 1/3 of the meringue, use a rubber spatula instead to ensure you get all the batter at the bottom of the bowl mixed in as well. Use a cut down in the middle and fold over motion to fold gently but quickly. Make sure you don't see any more white meringue. The mixture should be fluffy and voluminous.
- Pour the batter into the prepared loaf pan. Use a rubber spatula to smooth the surface. Gently tap the pan on the countertop 2-3 times to pop any air bubbles. Use a skewer to draw a zig zag to pop bubbles inside the cake batter, carefully not to disturb the parchment paper lining at the bottom
Baking method 1: (take out and slit)
- Place the loaf pan on the positioned rack and bake for 12-13 minutes or until the top has dried to the touch. Take it out and use a very sharp knife to cut one slit in the middle, about 1/2 an inch deep is sufficient. When the cake cracks, it will follow this line that you created instead of just cracking all over the place. Try to accomplish this within one minute
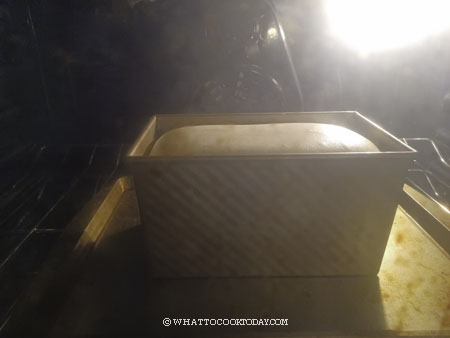
- Put the loaf pan back into the oven. Reduce the temperature to 300 F (150 C) for conventional oven. Lower the temperature by 20 F or 15 C for convection oven. Bake for another 60 minutes.
- The cake will gradually rise tall and then will fall down just a bit towards the end of baking. This is very normal. You don't want your cake to rise tall too quickly, because it will collapse when you take it out
- The cake should be dry to touch and springs back lightly when you touch. If you are unsure, add another 5 minutes to the baking time. It is safer to overbake than underbake a chiffon cake. Underbaked chiffon cake will collapse when you take it out
Baking method 2:
- If you don't like to take the cake out halfway to make a slit like in method 1, you can use this baking method 2
- Before putting the pan in the oven, use a chopstick dip in oil and draw a line in the middle of the batter. You can also squeeze a really soft butter in the middle. The purpose of this is so that the cake will crack following this line instead of cracking all over the places you don't want it to crack
- The cake will very gradually rise tall and then will fall down just a bit towards the end of baking. This is very normal. You don't want your cake to rise tall too quickly, because it will collapse when you take it out
- Put the pan in the lowest rack of the oven and lower the temperature to 300 F (150 C) and bake for 75-80 minutes or until the top spring back when you gently press on it and a cake tester comes out clean. If you are unsure, you can add another 5 minutes or so. It is better to overbake than underbake chiffon cake. Underbaked chiffon cake will collapse when you take it out of the oven
Cooling down with baking method 1 (need to invert the loaf pan upside down or on the side):
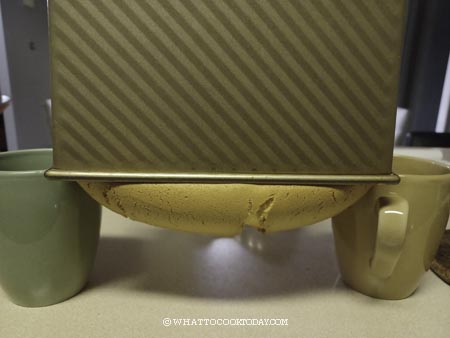
- Drop the loaf pan from about 10 cm height on the counter several times to prevent shrinkage when you pull the cake out of the oven. Then carefully invert the pan upside down immediately on two small bowls or cups on the side. I haven't tried this myself but I have seen some people resting the loaf pan on one of the side.
- Please don't be tempted to remove it from the pan if it's still warm. It takes about two to three hours to cool down completely
Cooling down with baking method 2 (no need to invert):
- Because we bake this cake at much lower temperature and at the lowest rack to let it very slowly rise, the cake is very stable and won't collapse if you don't invert it. Drop the loaf pan from about 10 cm height on the counter several times to prevent shrinkage when you pull the cake out of the oven. Put it on the cooling rack to cool down completely. You don't need to invert the pan. The cake will shrink slightly, but it should not collapse.
Unmolding the cake: (for both methods)
- Once it's cool down completely, use a spatula knife to run through the 4 sides and then gently tip the loaf pan over to release the cake. Peel off the parchment paper from the bottom. The bottom of the cake will concave a bit, and this is normal because we line it with parchment paper and the cake couldn't cling to the bottom of the pan, and instead, pulling on the paper causing it to concave a bit
Serving:
- I suggest that you wait for 24 hours before serving the cake (if you can wait). The flavor always gets better the next day compared to when you serve it on the same day
How to store:
- Let the cake cool down completely. Store the cake in an air-tight container for up to 3 days at room temperature. The cake remains soft and fluffy for about 3 days






4 comments
I baked 3 of your chiffon cakes – Orange chiffon, Coffee Chiffon and now the orange pillow loaf chiffon, all are fantastic! Thank you! Next is to try apple cinnamon chiffon!
Hello,
I couldn’t be happier ro know that 🙂 thank you so much for your feedbacks! I hope the apple chiffon cake will get your approval too 🙂
Can I please ask why is it that when cooling, the cake actually came off the sides of the tin (even though it is non stick) and fell off the cake tin when cooling? Does it mean that the egg white is under whipped or does it mean that the cake should be baked for a longer time? The skewer is clean when inserted into the cake before removing from oven. Your comments will be appreciated. Thank you.
Did the cake collapse/shrink? It could be the oven temperature! Sometimes if the oven is too hot the cake rises too quickly and then shrink when you take it out, but underbaking also can cause it to collapse. It could also be too much air bubbles in the batter and they pop causing the cake to shrink.