This post may contain affiliate links. Please read our disclosure policy.
Soft and fluffy pumpkin-shaped milk buns are filled with easy pumpkin kaya. The recipe is dairy-free and vegan. The recipe also includes a sourdough option using a sweet stiff starter.

I have been wanting to make these cute little pumpkin-shaped rolls/buns for a long time but somehow I just never got to it. I have some cans of pumpkin puree and with pumpkin seasons among us, it’s only right to make these 😉
Why you’ll like this recipe
- Dairy-free and vegan
Despite being dairy-free and vegan, these buns are very tasty - Very soft and fluffy texture
I’m very impressed by how soft the texture of these buns are. Thanks to the coconut milk that provides some fat that lend that soft rich crumbs - Yummy vegan kaya
I made this vegan kaya often especially when pumpkin is abundant - If you are a sourdough baker, I got you covered 😉
I’m a big fan of using sweet stiff starter when preparing enriched dough like this. Sweet stiff starter is much more powerful and the end product is not sour. You don’t need to maintain a sweet stiff starter. I usually build sweet stiff starters using my regular liquid starter - Have I said cute?

No Sour Sourdough Bread
This recipe will give you sourdough bread that doesn’t taste sour. Why? Because we use a Sweet Stiff Levain, which is built from regular 100% hydration sourdough starter. I don’t maintain stiff starter. I build it whenever I need it. I love baking enriched bread/buns and steamed buns using sweet stiff starter.
How to bake pumpkin-shaped milk buns with pumpkin kaya
- If you bake with a sourdough starter, prepare the sweet stiff levain. About 8-10 hours before you plan to make the bread, combine all ingredients for the stiff starter in a bowl. Stir a bit to roughly combine and then use your clean hand to knead it. This is a stiff starter, it’s like a dough. Make sure no pockets of dry flour are visible. Transfer to a large see-through container (plastic or glass is fine, preferably wide-mouth so you can get it out easier later). Loosely cover with the lid and let it ferment until triple in size

- Place all ingredients (except for coconut oil), including all of the stiff starter (if using), in a mixing bowl of a stand mixer fitted with a dough hook attachment. Use the hook to stir everything around a bit so when you turn the machine on, the flour won’t fly around and wet ingredients won’t splash (it happened to me before!). Start with the lowest speed to mix things up and then increase to speed 2 and knead for about 5 minutes or until it forms a dough. If the dough is too dry to come together, you can add a bit of coconut milk one teaspoon at a time. Don’t add too much as we haven’t added coconut oil yet
- Then add coconut oil, in 3-4 batches. The dough will turn into a complete mess again because of the coconut oil, but don’t worry, it will get absorbed by the dough as it kneads. Knead at speed 4 for about 10 minutes or until the dough is smooth and elastic. If you slowly stretch a small amount of dough, it will not break and light can pass through, like a window pane. Proceed to first proofing
- Transfer to a lightly oiled bowl, cover, and proof at a warm place until double in size. If you use commercial yeast, this may take about 1-2 hours. If you use a sourdough starter, this may take about 2-3 hours at 78-80 F (26-28 C), depending on the strength of your starter and temperature. When you poke the dough with your lightly-floured finger, the indentation stays and the dough has clearly almost doubled or doubled in size
- Punch the dough down and give it a knead for a few times. Divide into 9 equal -size smaller doughs. Round up each dough to roughly form a ball. Cover and let them rest for 15 minutes
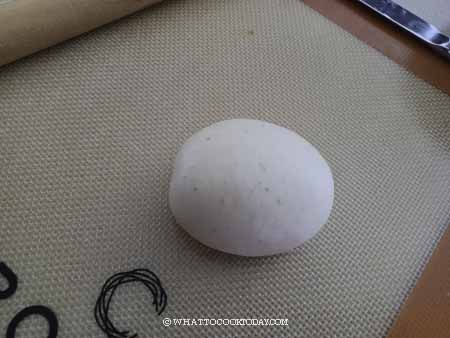
- Then work with one dough at a time, flatten the dough with your palm and roll it into a round shape, about 4 inches in diameter. Scoop about 1- 1 1/2 tablespoons of pumpkin kaya and put in the middle of the dough. Gather the dough around the edge to seal. Pinch the seam to seal really well so it won’t open up after proofing. Place on a baking sheet lined with parchment paper, about 2 inches apart. Repeat with the rest of the dough and filling
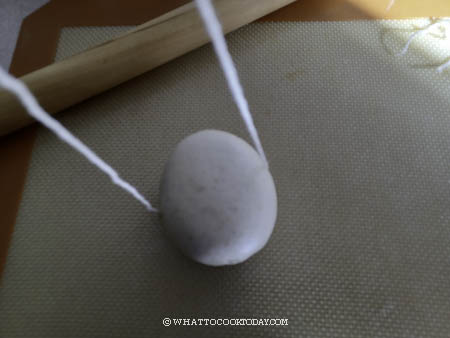
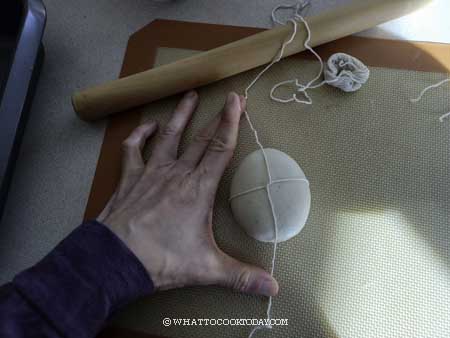
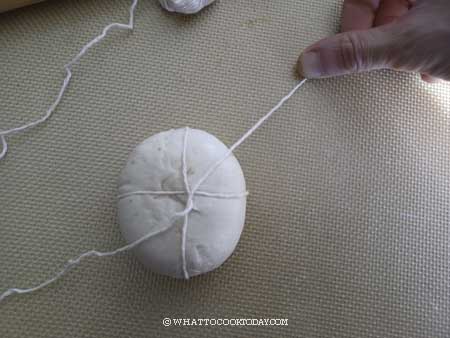
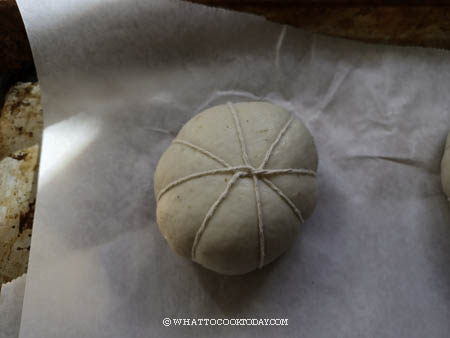
- Cut 9 pieces of about 50 cm long kitchen twine. Toss them in a bit of oil so they won’t get stuck to the bread during baking. Place 1 piece of string on your work surface. Place the dough ball on the string and crisscross it over the dough and then bring the string down, crisscrossing at the bottom and then up again. Try not to do it too tight to allow some room for expansion during fermentation and baking. So you get 8 sections. Tie the string into a knot and cut off the excess string with a scissor. Repeat with the rest of the strings and dough
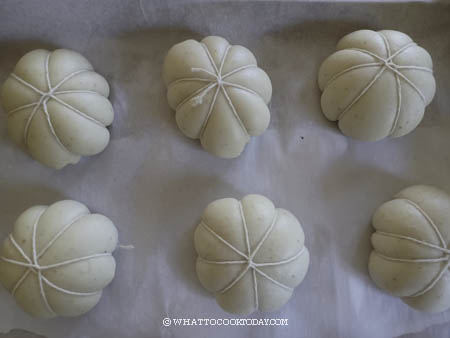
- Put the dough back on the baking sheet again. Cover the shaped buns with a clean cloth or plastic cover and let them proof again at a warm place until they are puffy and almost double in size. If you use commercial yeast, this may take 45 minutes to 1 hour or longer depending on the temperature. If you use a sourdough starter, this may take about 3 1/2- 4 hours or longer, depending on the temperature and the strength of your starter. Final proofing usually takes much longer for sourdough. Mature starter works faster compared to young starter for example. When you gently push on the dough, the indentation bounces back very gradually and may leave a bit of indentation. The dough also feels really light and puffy. These are signs that we are done with the final proofing
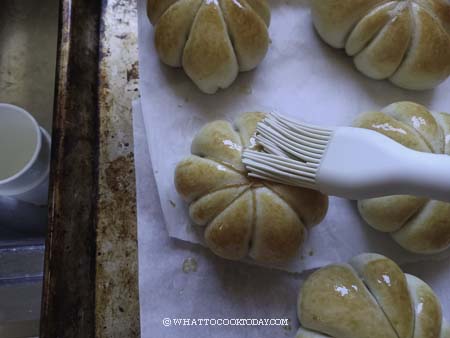
- Brush the surface of the dough with an almond milk wash mixed with a bit of maple syrup
- 10 minutes before the end of final proofing, preheat oven to 375 F (190 C) for conventional oven, 350 F (180 C) for convection oven. Place the baking sheet on the middle rack and bake for 20-23 minutes or until lightly golden brown. Rotate the pan halfway through baking
- Brush with some melted coconut oil if you like for an extra soft crust.
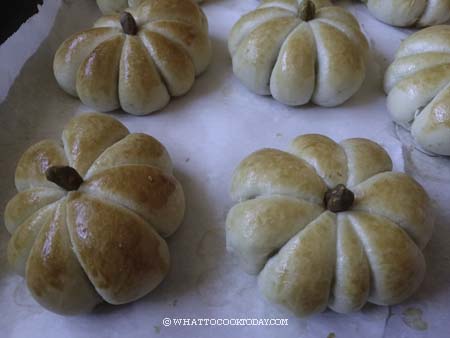
- Let the buns cool down on the cooling rack for 10-15 minutes. Carefully cut off the knots and remove the strings gently.
- Take one pistachio and gently push it into the center of the buns to create stems. They can be served warmed or at room temperature


Did you make these pumpkin-shaped milk buns with pumpkin kaya recipe?
I love it when you guys snap a photo and tag it to show me what you’ve made 🙂 Simply tag me @WhatToCookToday #WhatToCookToday on Instagram and I’ll be sure to stop by and take a peek for real!

Pumpkin-shaped milk buns with pumpkin kaya – with sourdough option
Ingredients
Dough if using commercial yeast:
- 335 gr bread flour (12.7% protein content)
- 5 gr instant yeast
- 30 gr sugar
- 4 gr salt
- 220 gr canned coconut milk
- 20 gr coconut oil plus more for brushing
If using sourdough starter
Prepare sweet stiff starter:
- 30 gr active starter (100% hydration)
- 90 gr bread flour
- 40 gr water
- 30 gr sugar
Dough if using sourdough starter:
- 230 gr bread flour (12.7% protein content)
- 40 gr sugar
- 4 gr salt
- 165 gr canned coconut milk
- 20 gr coconut oil plus more for brushing
Pumpkin kaya:
- 500 gr pumpkin puree
- 200 ml coconut cream
- 150 gr coconut sugar
- ¼ tsp salt
- 1 Tbsp cornstarch
For pumpkin stems: (you can use whatever you like)
- pistachios
Milk wash:
- 1 Tbsp almond milk or other nut milk
- 1 tsp maple syrup
Instructions
Prepare pumpkin kaya: (preferably few days or the day before)
- I use canned pumpkin puree (not pumpkin pie mix). If you use fresh pumpkin, cut into large chunks. Steam over high heat for 15-20 minutes or until fork-tender
- Put this in a blender along with the rest of the ingredients. Blend into a smooth consistency. It will be quite thick at this point
- Pour this into a saucepan. Cook over medium-low heat and keep stirring until sugar melts. It will turn watery a bit when this happens. Don't worry and continue to stir until most liquid has been cooked off. We want to mixture to be thick since we are using it as a filling. It will thicken further after refrigeration because of the coconut cream. Remove from the heat and let it cool down completely before storing it in a jar and keep in the fridge
- You won't need all the pumpkin kaya and will have leftover, which can be kept in the fridge for up to one week
If using sourdough starter
Prepare sweet stiff starter:
- This recipe will give you sourdough bread that doesn't taste sour. Why? Because we use a Sweet Stiff Levain, which is built from regular 100% hydration sourdough starter. I don't maintain stiff starter. I build it whenever I need it. I love baking enriched bread/buns and steamed buns using sweet stiff starter.
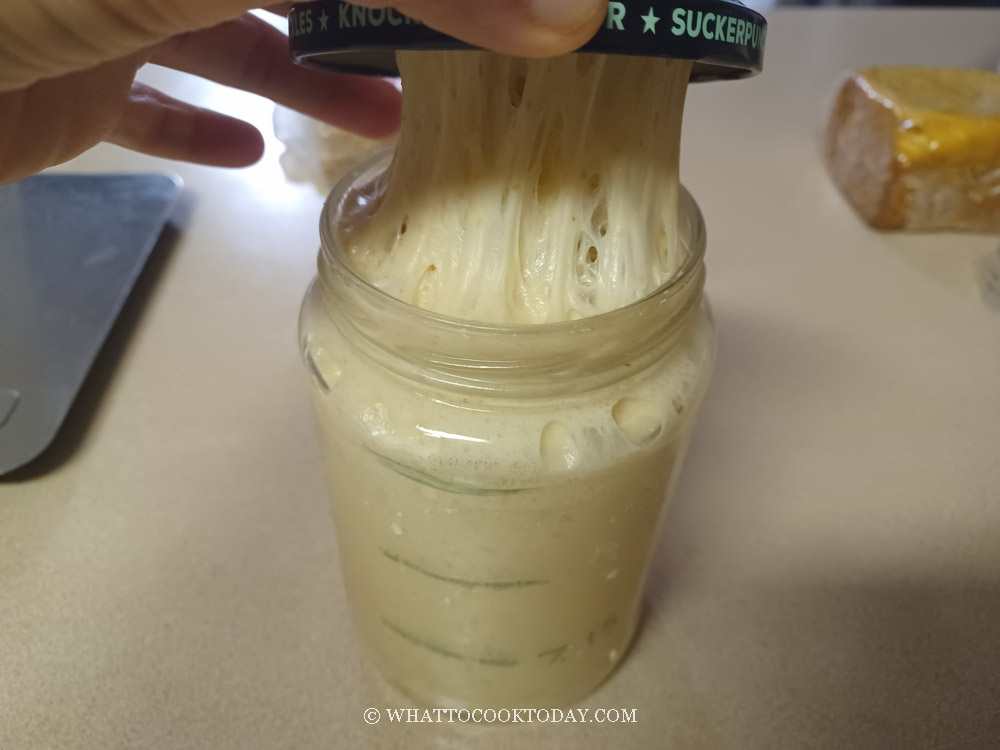
- I recommend using a starter that is at least one month old and consistently doubles or triples in 4-6 hours when you feed it at 1:1:1 ratio. Young starter will not give the best result
- About 8-10 hours before you plan to make the bread, combine all ingredients for the stiff starter in a bowl. Stir a bit to roughly combine and then use your clean hand to knead it. This is a stiff starter, it's like a dough. Make sure no pockets of dry flour are visible. Transfer to a large see-through container (plastic or glass is fine, preferably wide-mouth so you can get it out easier later). Loosely cover with the lid and let it ferment until triple in size
Prepare the dough (for both commercial yeast and sourdough method):
- Place all ingredients (except for coconut oil), including all of the stiff starter (if using), in a mixing bowl of a stand mixer fitted with a dough hook attachment. Use the hook to stir everything around a bit so when you turn the machine on, the flour won't fly around and wet ingredients won't splash (it happened to me before!). Start with the lowest speed to mix things up and then increase to speed 2 and knead for about 5 minutes or until it forms a dough. If the dough is too dry to come together, you can add a bit of coconut milk one teaspoon at a time. Don't add too much as we haven't added coconut oil yet
- Then add coconut oil, in 3-4 batches. The dough will turn into a complete mess again because of the coconut oil, but don't worry, it will get absorbed by the dough as it kneads. Knead at speed 4 for about 10 minutes or until the dough is smooth and elastic. If you slowly stretch a small amount of dough, it will not break and light can pass through, like a window pane. Proceed to first proofing
First proofing:
- Transfer to a lightly oiled bowl, cover, and proof at a warm place until double in size. If you use commercial yeast, this may take about 1-2 hours. If you use a sourdough starter, this may take about 2-3 hours at 78-80 F (26-28 C), depending on the strength of your starter and temperature. When you poke the dough with your lightly-floured finger, the indentation stays and the dough has clearly almost doubled or doubled in size
Shaping:
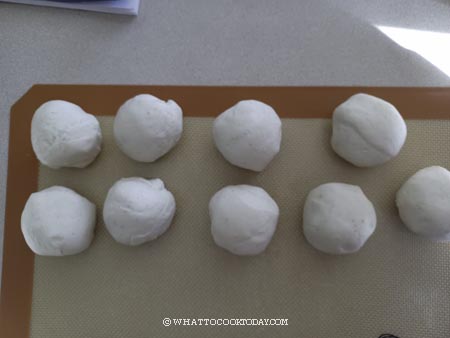
- Punch the dough down and give it a knead for a few times. Divide into 9 equal -size smaller doughs. Round up each dough to roughly form a ball. Cover and let them rest for 15 minutes
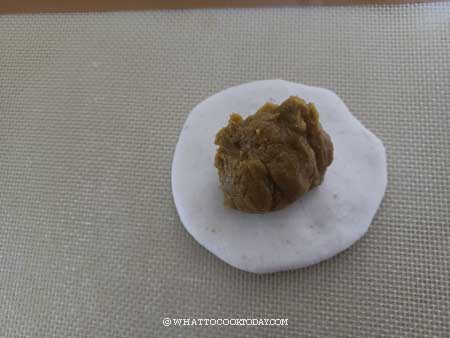
- Then work with one dough at a time, flatten the dough with your palm and roll it into a round shape, about 4 inches in diameter. Scoop about 1- 1 1/2 tablepsoon of pumpkin kaya and put in the middle of the dough. Gather the dough around the edge to seal. Pinch the seam to seal really well so it won’t open up after proofing. Place on a baking sheet lined with parchment paper, about 2 inches apart. Repeat with the rest of the dough and filling
- Cut 9 pieces of about 50 cm long kitchen twine. Toss them in a bit of oil so they won't get stuck to the bread during baking. Place 1 piece of string on your work surface. Place the dough ball on the string and crisscross it over the dough and then bring the string down, crisscrossing at the bottom and then up again. Try not to do it too tight to allow some room for expansion during fermentation and baking. So you get 8 sections. Tie the string into a knot and cut off the excess string with a scissor. Repeat with the rest of the strings and dough
Second proofing:
- Put the dough back on the baking sheet again. Cover the shaped buns with a clean cloth orplastic cover and let them proof again at a warm place until they are puffy and almost double in size. If you use commercial yeast, this may take 45 minutes to 1 hour or longer depending on the temperature. If you use sourdough starter, this may take about 3 1/2- 4 hours or longer, depending on temperature and the strength of your starter. Final proofing usually takes much longer for sourdough. Mature starter works faster compared to young starter for example
- When you gently push on the dough, the indentation bounces back very gradually and may leave a bit of indentation. The dough also feels really light and puffy. These are signs that we are done with the final proofing
- Brush the surface of the dough with an almond milk wash mixed with a bit of maple syrup
Baking:
- 10 minutes before the end of final proofing, preheat oven to 375 F (190 C) for conventional oven. 350 F (180 C) for convection oven. Place the baking sheet on the middle rack and bake for 20-23 minutes or until lightly golden brown. Rotate the pan halfway through baking
- Transfer the buns to a cooling rack. Brush with some melted coconut oil if you like for an extra soft crust. Let the buns cool down on the cooling rack for 10-15 minutes. Carefully cut off the knots and remove the strings gently. Take one pistachio and gently push it into the center of the buns to create stems. They can be served warmed or at room temperature
Storing:
- Leftovers can be stored in an air-tight container and kept at room temperature for 2-3 days