This post may contain affiliate links. Please read our disclosure policy.
Savory crepes stuffed with creamy chicken filling, rolled, breaded & fried to perfection definitely a crowd-pleaser!

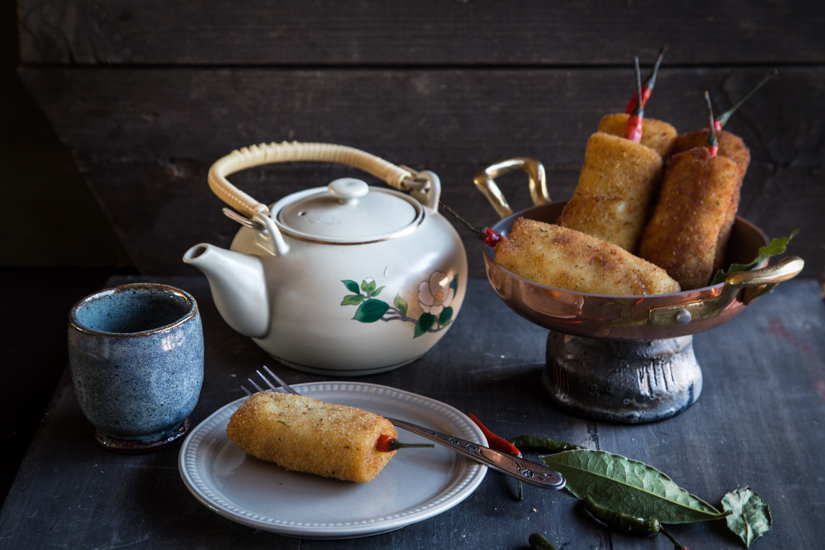
If you grew up in Indonesia or have ever visited, chances are you’ve come across risol ayam—savory crepes filled with creamy chicken and vegetables, coated in breadcrumbs, and deep-fried until golden and crisp. These delightful pockets are a staple in Indonesian jajanan pasar (traditional market snacks), commonly sold by street vendors and served at special occasions or family gatherings.
What Are Rissoles?
The name “risoles” is borrowed from the French word rissolé, meaning “to brown” or “to fry.” Indonesia adopted this dish during colonial times, giving it a distinctly local twist. While French rissoles can resemble turnovers or croquettes, the Indonesian version is more like a rolled crepe—with a savory filling wrapped in a soft pancake, then dipped in egg wash, rolled in breadcrumbs, and fried until crisp. The result? A delicious contrast of textures—crispy on the outside, tender and creamy inside.
Why You’ll Love This Recipe
- Classic Indonesian flavor in every bite
- Perfect for entertaining or make-ahead snacks
- Kid-approved and freezer-friendly
- Great way to use leftover chicken
Indonesian Chicken Rissoles (Risol/Risoles Ayam)
Ingredients
For filling:
- 150 gr carrots peeled and diced
- 500 gr boneless skinless chicken breasts/thighs steamed and shred the meat
- 2 Tbsp butter unsalted
- 1 small onion diced
- 3 cloves garlic minced
- 40 gr milk powder
- 300 ml chicken broth
- 3 Tbsp sugar
- ¼ tsp ground white pepper
- Salt to taste
- 1 stalk green onion finely chopped
- 1 stalk celery leaves finely chopped
- 2 Tbsp all-purpose flour
For the skin:
- 250 gr all-purpose flour
- 550 gr water
- 1 large egg about 58-60 gr with the shell
- 1 Tbsp butter melted
- ½ Tbsp salt
- 40 g condensed milk
To seal:
- 2 tsp all-purpose flour
- 4 tsp water
For coating:
- 2 Tbsp all-purpose flour beaten
- 1 Tbsp cornstarch
- 75 ml water
- 2 cups bread crumbs or more as needed
Instructions
Cook the chicken:
- If you have leftover cooked chicken meat, you can skip this step and shred the chicken meat and set aside. I used leftover rotisserie chicken meat (breast or dark meat combo works here). You will need about 300 grams (about 10.5 oz)
- Steam the chicken meat until cooked through, about 15-20 minutes. I like to steam versus boiling because by steaming, the meat doesn't taste bland. Save the juice for other use (It's good stuff). When it's cool enough to handle, shred the meat. Set aside
Preparing the filling:
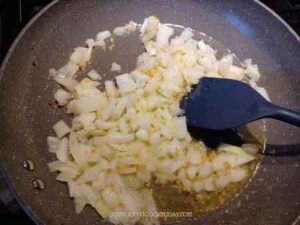
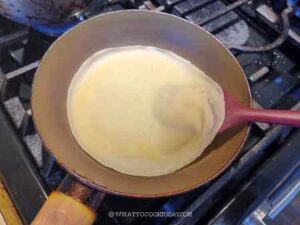
- Melt butter in a pan and saute onions and garlic until fragrant and soft, about 3 minutes.
- Add the carrots, shredded chicken, chicken broth, milk powder, sugar, salt, and ground pepper. Stir to combine.
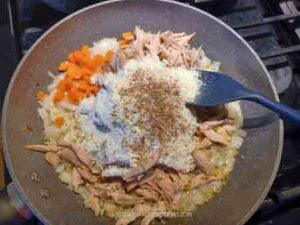
- Sprinkle in the flour and keep stirring to prevent lumps.

- Cook until the mixture is thickened. Sprinkle in green onion and celery leaves. Stir to combine. Have a taste and adjust to your preference

- Remove from the heat and let it cool down completely before wrapping. Can be prepared one day ahead

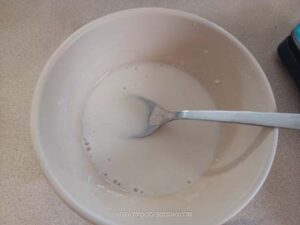
Prepare the batter:
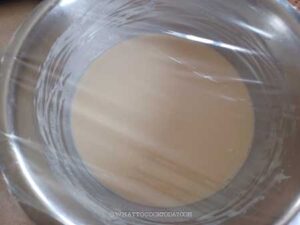
- In a large mixing bowl, add in all-purpose flour, salt, sugar, and eggs. Stir to mix everything. Gradually add in the milk and stir to mix thoroughly. Lastly add in the melted butter. Important step: Strain the mixture to get rid of any lumps

- You can also put all ingredients in a blender and blend until smooth, which is what I did.
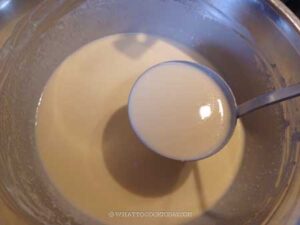
- Cover and let the batter rest for 30 minutes. This hydrates the flour and the crepes are less likely to tear when you cook it
Cook the crepe:
- Preheat the non-stick skillet pan on low heat. Make sure you smear the pan with a little bit of oil (just a bit as you don't want to "fry" the skin, just enough so it won't stick to the pan) or if you have a non-stick spray, you can use that
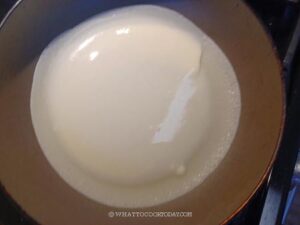
- Laddle about 50 ml (about 1/4 cup for 8-inch pan) of the batter onto the pan
- Immediately swirl it around the pan to make sure it covers the entire surface of the pan.
- Cook for about 1 minute or a bit longer, you will see the edge start to crisp up a bit and leave the side of the pan and the center start to bubble a bit.
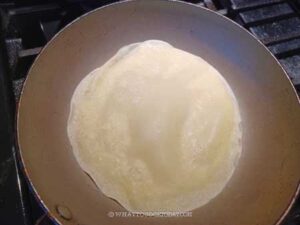
- You should be able to flip it to the other side
- Cook for about 10 seconds.

- Remove and flip onto a plate. Stack them up as you cook them
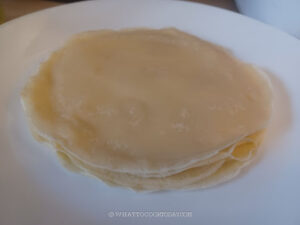
- Continue until you finish with the rest of the batter. Important step: you need to stir the batter each time before you ladle it over to the pan. You need to oil the pan/ spray with non-stick sprayer for each skin
Wrapping:
- Mix 1 all-purpose flour and water in a bowl. It should be a consistency of a paste.
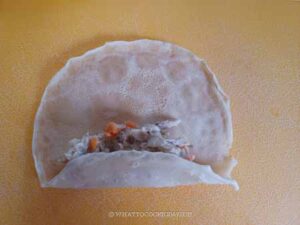
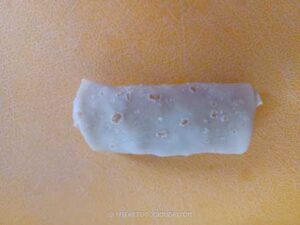
- Lay one skin on a flat surface and spoon about 1 spoonful of the filling, spread them in the middle of the skin (more towards your body).

- Fold the bottom part (the part near your body)
- Then the two sides and rolled it halfway
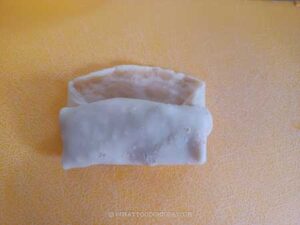
- Smear the paste on the remaining skin
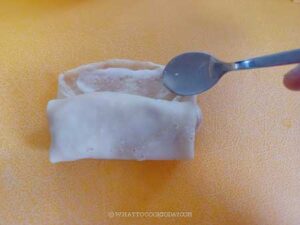
- Fold over to seal. It will look a bit flatter after it's being wrapped. Continue with the rest of the skins and fillings
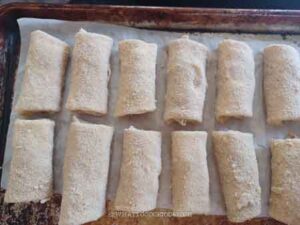
- Place them on a baking sheet lined with parchment paper while you are finishing assembling the rest
Frying:
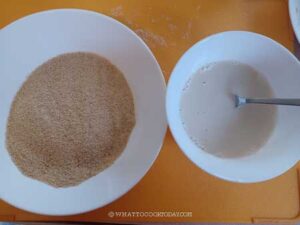
- Prepare the coating by mixing flour, cornstarch, and water. It should be a thin paste consistency, but not too watery. You don't need to thaw the risoles. Prepare the bread crumb in another shallow plate
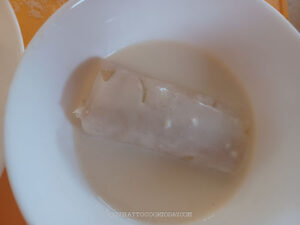
- Heat up about 2-3 inches of oil in a medium deep skillet or fryer. Coat the risoles in the flour paste
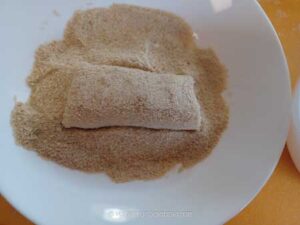
- Then roll into bread crumbs
- Place them on a parchment paper-lined baking sheet. You can freeze this in a freezer for one hour if you don't plan to cook on the same day. Once they are halfway frozen, transfer to a freezer-friendly container or bag and they can be kept frozen for 2 months. Do not thaw when you plan to fry them. They can be fried frozen
- When you dip a skewer inside the oil, there should be bubbles around it. The oil is ready. It is best not to over crowd your fryer. Fry about 3 at one time or as much as your fryer can accommodate. Fry over medium heat. You don't want the outside to burn and the inside is still cold.
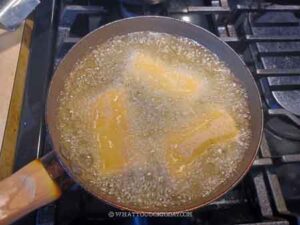
- Fry until they are golden brown.
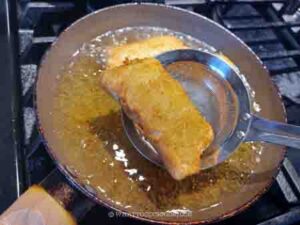
- Remove and put on an absorbent paper towel.

- Use an oil skimmer to remove any bread crumb bits in the oil because these bits will continue to get fried and burnt

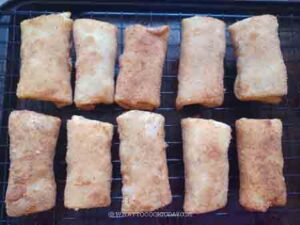
- Place the risoles on a cooling rack set on top of the baking pan and keep them warm in the oven at 200 F (93 C) if you plan to serve them soon.
*Nutrition facts are just estimates and calculated using online tools*
Tips for Success
- Let the filling cool before wrapping to avoid soggy crepes.
- Use a non-stick skillet for foolproof wrappers.
- Keep the heat medium-low while frying to avoid over-browning the outside before the inside heats through.
Variations
- Vegetarian: Skip the chicken and add mushrooms, corn, and peas.
- Cheesy Rissoles: Add a sprinkle of grated cheese to the filling.
Make-Ahead & Storage
- Make-ahead: Assemble and breadcrumb the rissoles. Store in the fridge for up to 2 days before frying.
- Freeze: Freeze uncooked, breaded rissoles on a baking sheet, then transfer to a zip-top bag. Fry from frozen—no need to thaw!
- Leftovers: Reheat in an air fryer or oven at 350°F for 8–10 minutes to restore crispness.
How to Serve Indonesian Rissoles
Serve warm or at room temperature with whole chili, your favorite chili sauce, bottled sambal. They’re a hit at parties, snack time, or as part of a nasi kotak (Indonesian lunch box).

Indonesian chicken rissoles are the kind of snack that brings back childhood memories and creates new ones. Whether you’re making them for a festive gathering or stashing a few in your freezer for later, these crispy, creamy bites are always a crowd-pleaser. Give them a try, and don’t forget the chili!

12 comments
Hi there, thanks for this recipe. I didn’t like rissoles, but recently after buying a few I realized they’re a really great snack to make ahead, freeze and bake when needed.
Just checking, your instructions for the filling mention ‘sprinkling in the flour’ but I can’t seem to find flour in your list of filling ingredients.
Hi Jules, sorry I somehow didn’t put it in the ingredient list. You need about 2 Tbsp all-purpose flour/white flour. It helps to thicken the filling so it’s easier to wrap. I hope this helps.
thanks 4 this risol recipe,,,this is the perfect food:)))))i make be 4,but i put ham,,,this is unforget able food
Hi Jelly,
You are welcome. It is one of the perfect food and comfort food for me. I haven’t made them for a while, I think it’s time to do that again. Thanks for stopping by. Let me know how they turn out if you do give it a try.
Hi Gus,
Awww…that sucks to hear! It’s very difficult to find good Indo restaurant here too 🙁 I’m sad that Indonesian food is not that popular compared to Thai, Japanese, etc. Most people don’t even know where Indonesia is *sigh* Oh well, that’s when home-cooking comes in 🙂 Hope you like what you try.
My Favorite Indonesian restaurant closed, so now i have been looking for a good menu, sadly it has not been the case, now i will try to make my own risoles, Es Teler, and Cendol, oh and last but not least Nasi Goreng. yum.