This post may contain affiliate links. Please read our disclosure policy.
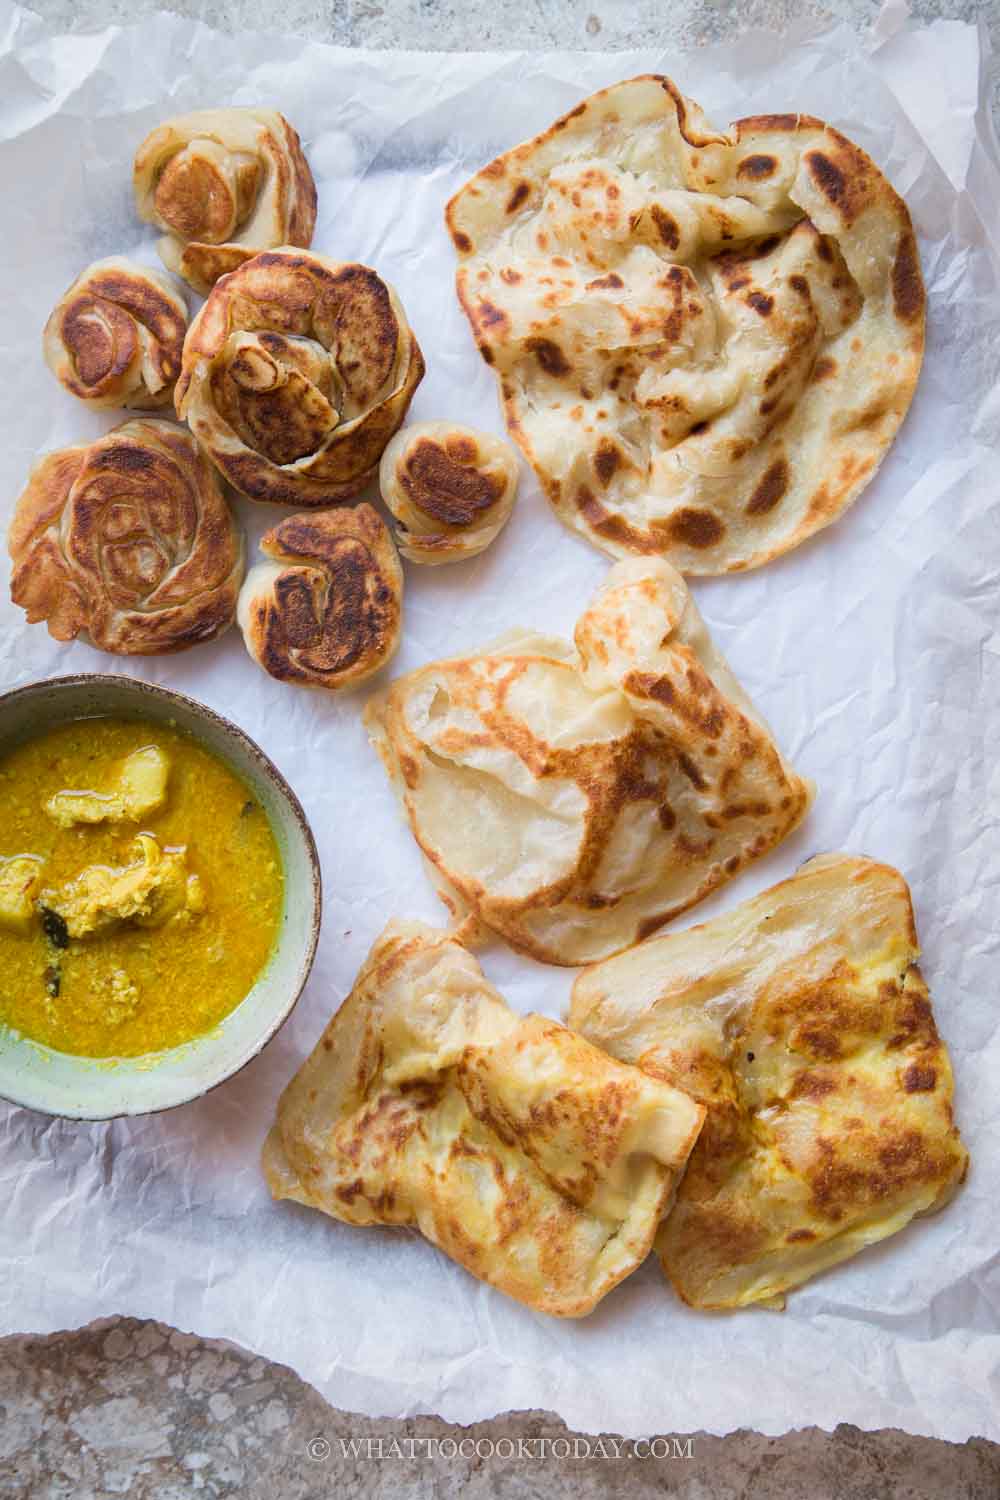
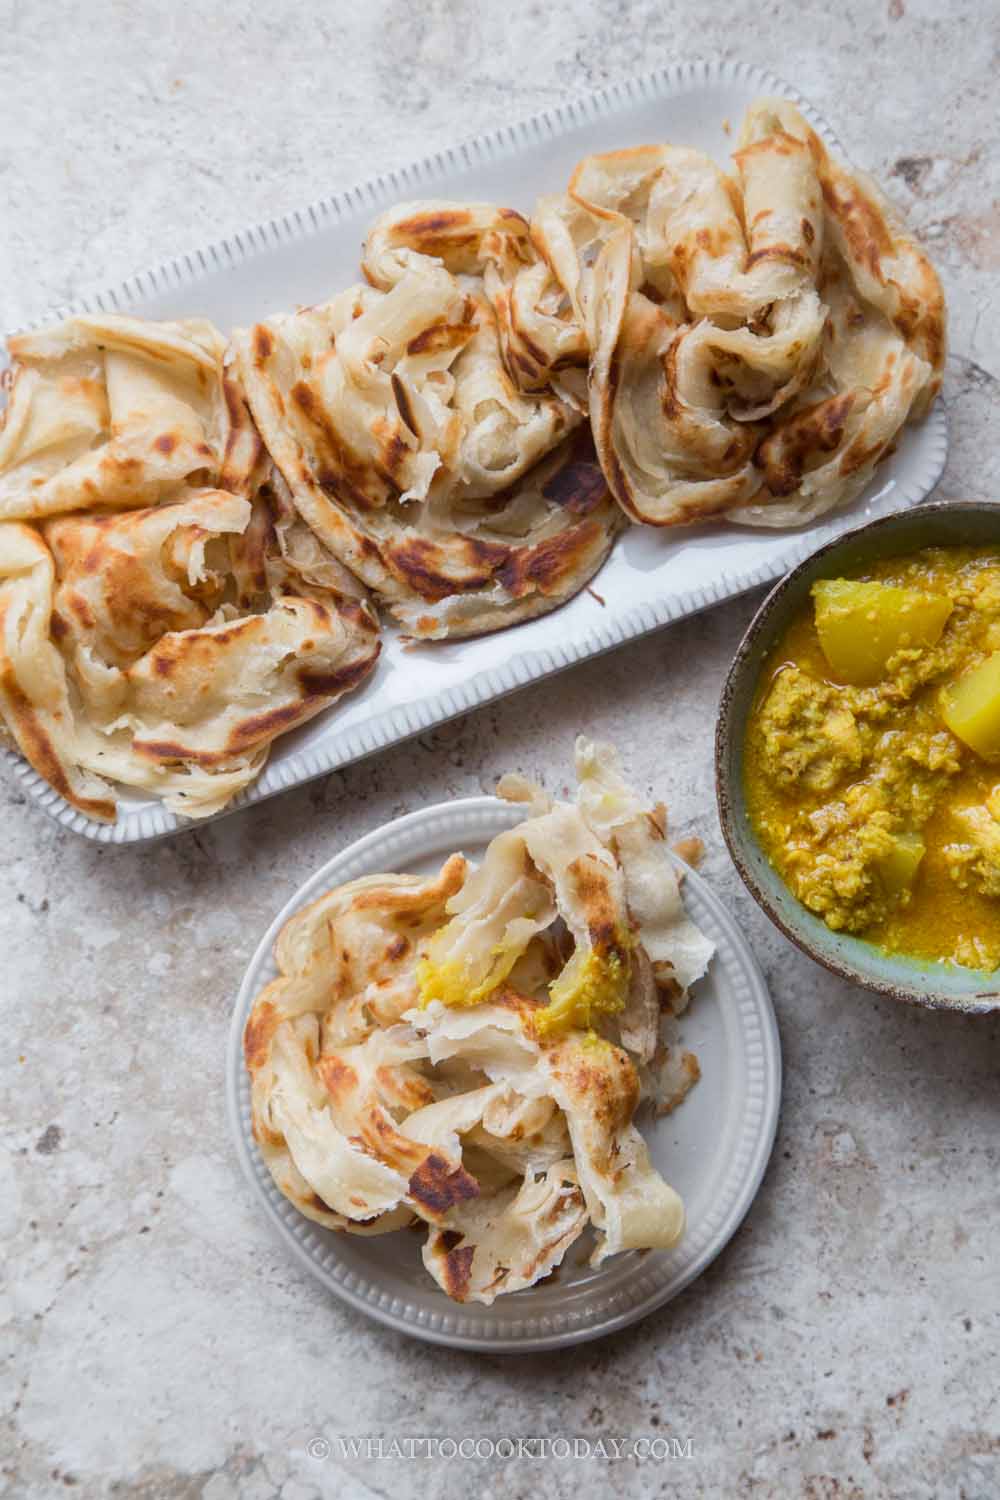
Learn the easy way to make roti prata/roti canai/roti Maryam that is thin, slightly chewy, crispy, and flaky with only 4 ingredients at home. With one dough you can make plain prata, coin prata, egg prata, and sweet paratha (dessert prata).
What is roti prata/paratha?
The word “Roti” means bread in Sanskrit and “paratha” means flat in Hindi. which is also what it means in Malay and Bahasa. When we say roti, it is usually means bread, though most of the time it is referring to loaf of bread, but it also covers leavened or unleavened flat bread such as this roti prata. Roti prata or roti canai / roti Maryam is an Indian-inspired flat bread that is so popular in Southeast Asia. In Singapore, it is known as roti prata/paratha. In Malaysia, it is called roti canai / roti Chennai. In Thailand, it is known as Ro Tee, which is popular among the Muslim Thai. In Indonesia, we call it roti cane or roti Maryam. Roti prata is brought over to the Southeast Asia by the Indian Muslims or also known as mamak in Malaysia. Roti prata is popular food/snacks sold by street vendors.
Basic ingredients for roti prata
The recipe for the dough is an eggless version. You only need 4 very basic ingredients that I can safely say everyone has in his/her kitchen.
1. All-purpose flour
We call it all-purpose flour in the U.S. and usually known as plain flour in other parts of the world. The gluten content of all-purpose flour is in the range between cake flour and bread flour. The one I use have about 11% gluten content. The gluten content can vary slightly from brand to brand. You don’t have to sweat about this gluten content though. Just use your local brand and it should come pretty close.
2. Hot water
The purpose of using hot water is to sort of to gelatinize the dough to give you a soft dough without having to add extra fat/oil
3. Salt
Salt acts as a taste enhancer in the recipe and I strongly encourage not to omit it
4. Sugar
Sugar also acts as a taste enhancer in this recipe. It doesn’t give you a sweet dough, but enough to give you a more complex taste. I strongly encourage you not to omit it, at least not the first time you make this recipe. You’ll know what I mean when you taste it
What to expect
1. Simple ingredients
The ingredients are simple and straight forward
2. Lots of passive waiting time
It’s not difficult to put together, but the dough needs LOTS of resting
3. You don’t need to know how to throw/flip and stretch the dough
I have tried many times to learn, but I’m still not there yet LOL. So, instead I’m showing you how to do it the novice way 🙂 but you will still get good roti prata, I promise!
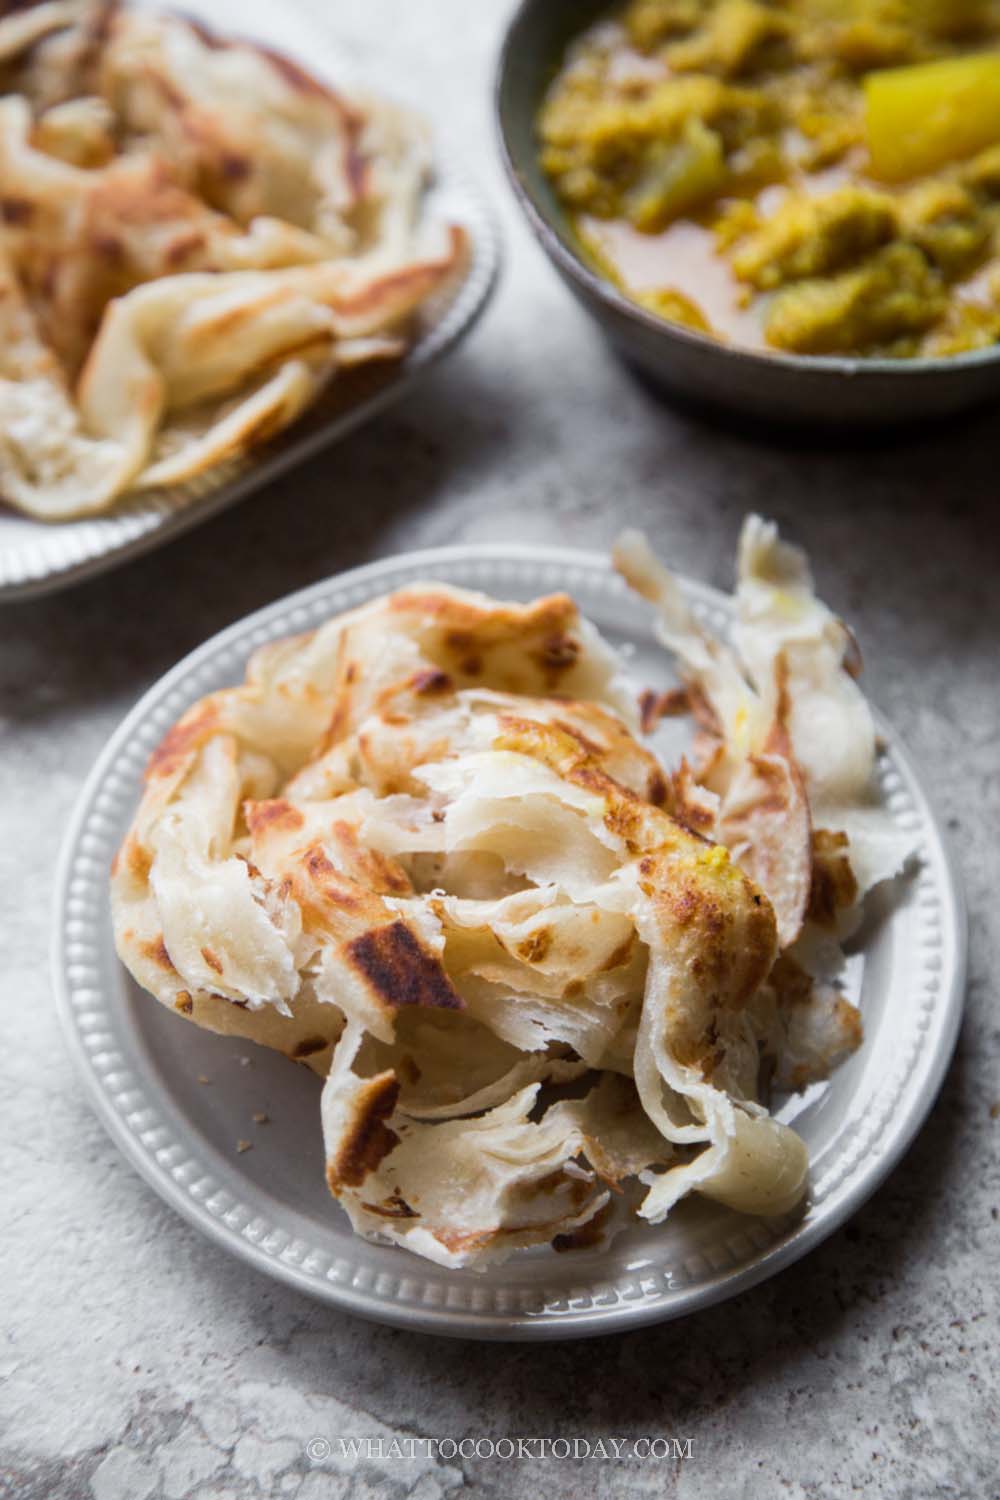
4. The roti prata is crisp with lots of flaky layers
This also depends on how thin you are able to stretch the dough
One dough, many different ways
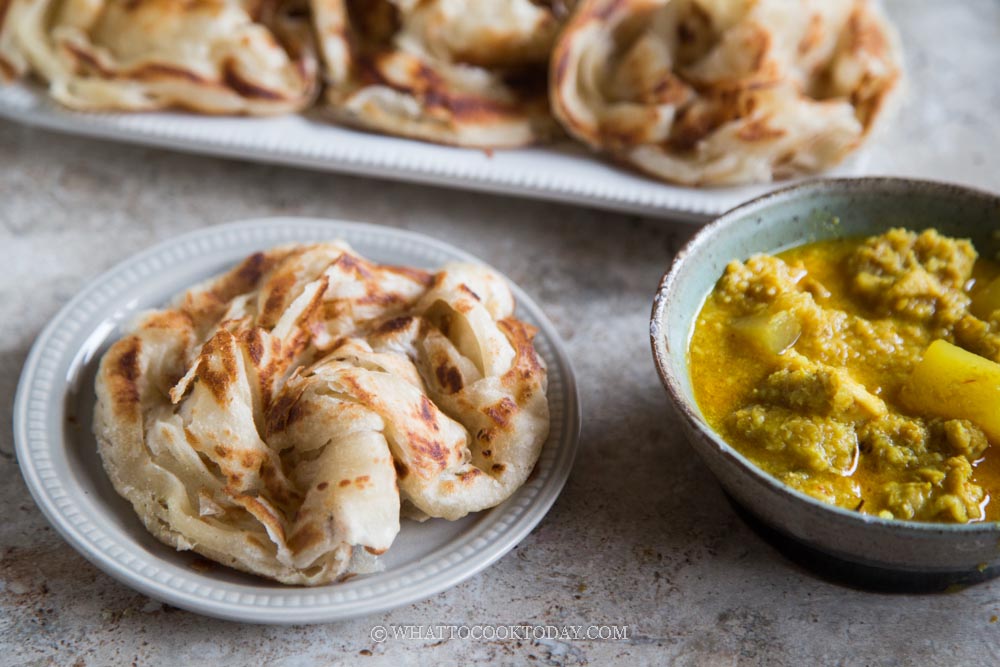
1. Plain roti prata (Prata kosong)
This is just the dough without any filling. Kosong means empty in Malay and Bahasa.
2. Coin prata
The dough is folded and then coiled to form a small, round, and thicker roti prata. My kids love this because of the small size

Coin prata
3. Egg prata
Beaten eggs are spread on the surface of the dough before folding into layers

egg prata
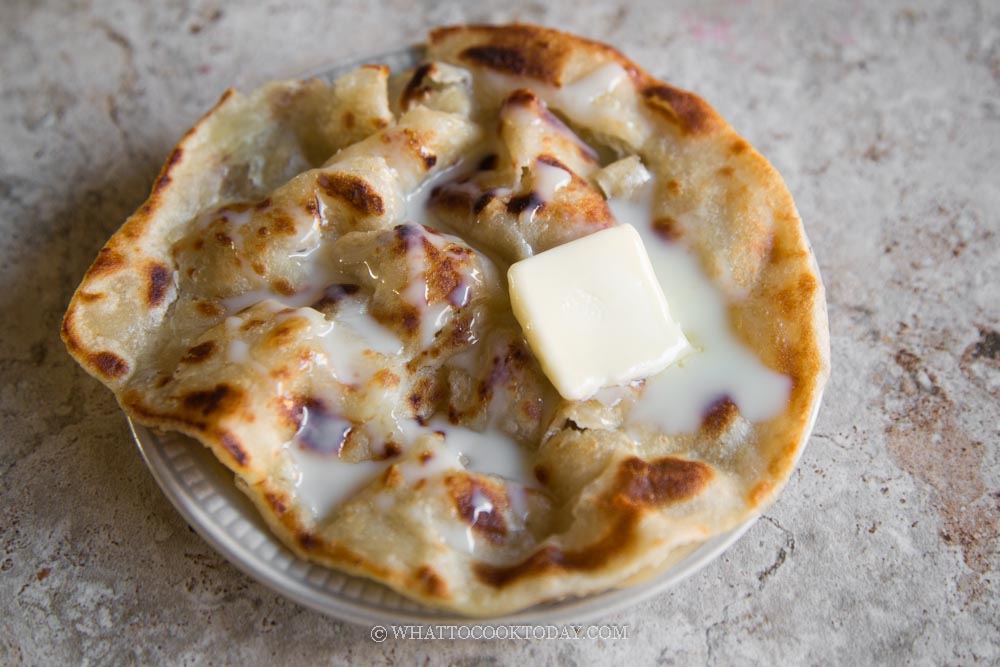
4. Dessert prata
You may have heard of prata bomb, where sugar and margarine are sprinkled on the surface of the dough before folding into layers. The version I’m showing here is not exactly a prata bomb. I grew up with the version where sugar is sprinkled on top or condensed milk and butter are spread on top of the plain prata
dessert prata
How to make roti prata/roti canai/roti maryam at home
1. Place all ingredients in a mixing bowl of a stand mixer. That’s what I’m using to knead the dough
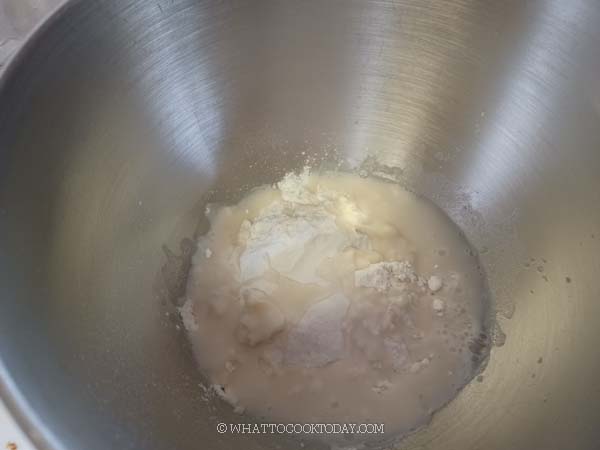
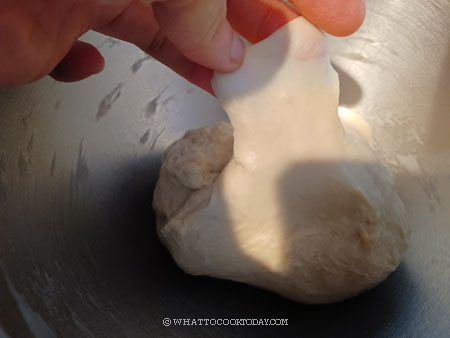
2. Knead on low speed (speed 2 on KA) for 10-12 minutes until the dough is smooth and reaches window pane stage, meaning when you slowly stretch the dough thin, it won’t stretch and a light can pass through because of how thin it is.
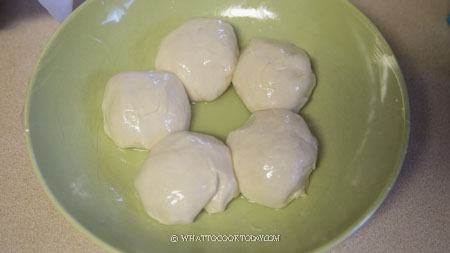
3. Divide the dough into 5 equal portions, roll them into round ball. Add about 2 tablespoon of cooking oil on a plate and rub the oil on each dough to prevent the dough from drying out.
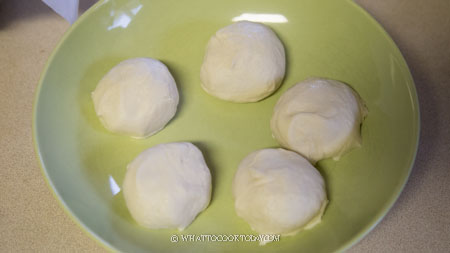
4. Cover tightly with a cling wrap and rest for at least 2 hour or as long as overnight. If you plan to do overnight, keep them in the fridge. The longer your rest, the easier it is for you to stretch the dough thin later. Minimum of 2 hours is a must from my experience. Overnight is the best if you are willing to wait
5. If the doughs have been in the fridge, get them out about 1 1/2 hour before you plan to stretch and shape to let them come to room temperature. Work with one dough at a time and keep the rest covered. Oil your work surface. Gently flatten the dough with your palm or fingers

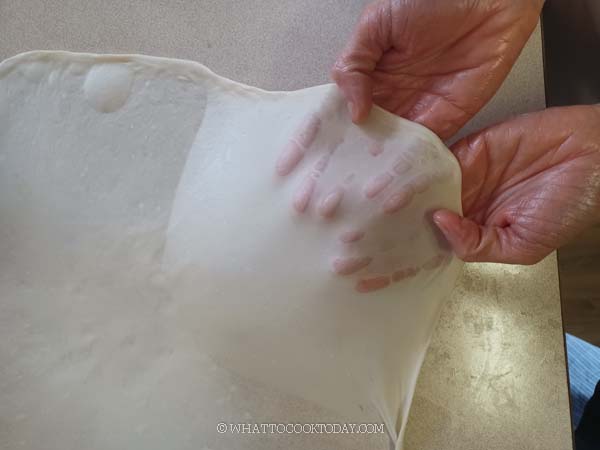
6. Then starting from the center of the dough, use all ten fingers to slowly stretch the dough out in all direction, until you have about 5 inch in diameter and then you can start gently pulling the edge of the dough to stretch it out, moving along the edge to stretch continue to stretch until the dough is very thin and 3 to 4 times its original size. Some parts may tear a bit and don’t sweat it. If you rest the dough beyond 2 hours, this is less likely to happen because the dough is very stretchy

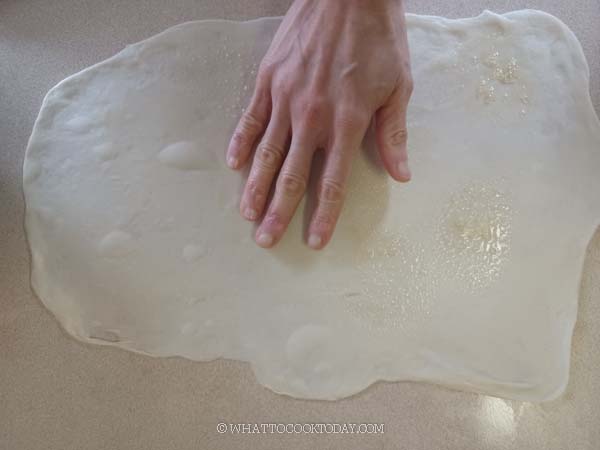
7. This is how thin the dough you want to stretch
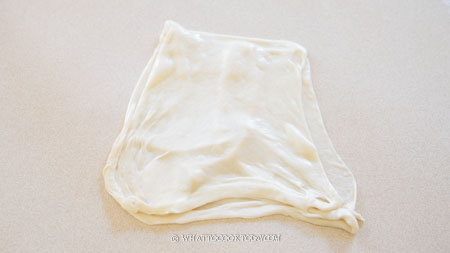
8. For plain prata: Rub some oil on the surface of the dough all over.
Fold the dough in half and then another half. There is no need to rest the dough after this and you can proceed to cooking
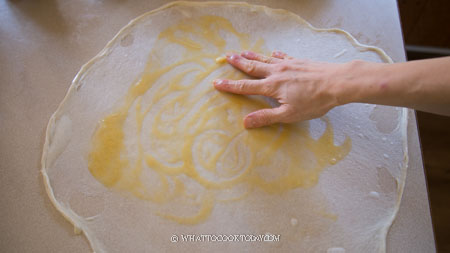
9. For egg prata: same step as the plain prata, just spread some eggs on the surface of the dough after you rub some oil and then fold the dough in half and then half (same as above)
10. For coin prata: Rub some oil on the surface of the dough all over. Fold 1/3 over to the middle

Then fold the other 1/3 over
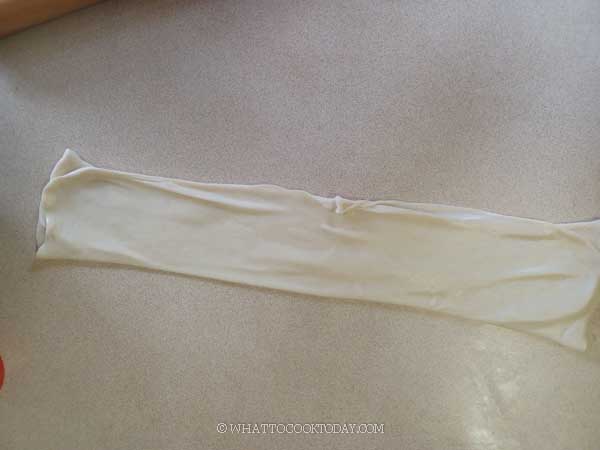
Fold in half and you have a long strip now
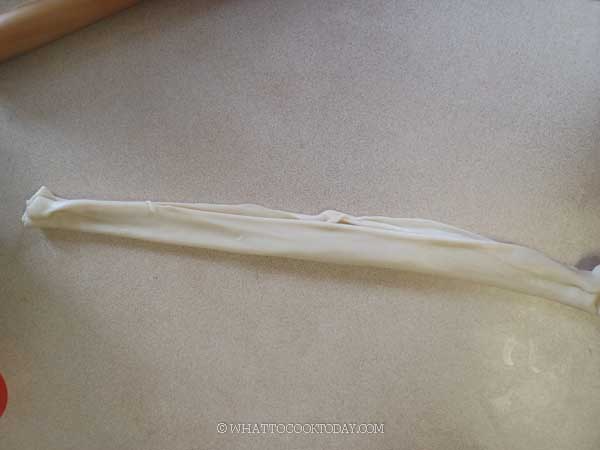
Pick up one end with the other end stay on your work surface
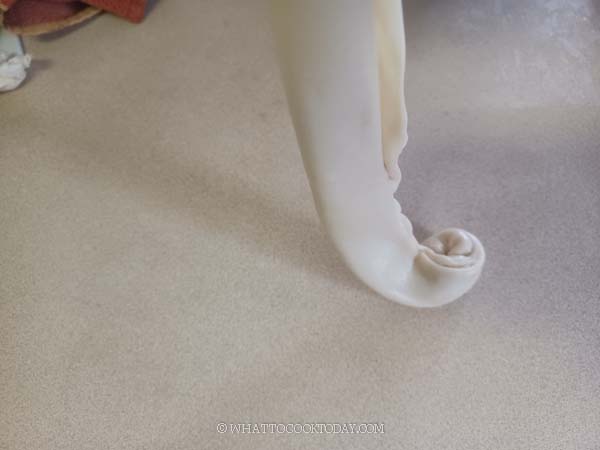
Slowly coil it around and tuck the end underneath. Keep it covered and continue with the rest of the dough. You don’t need to rest the dough after shaping and proceed to the cooking step

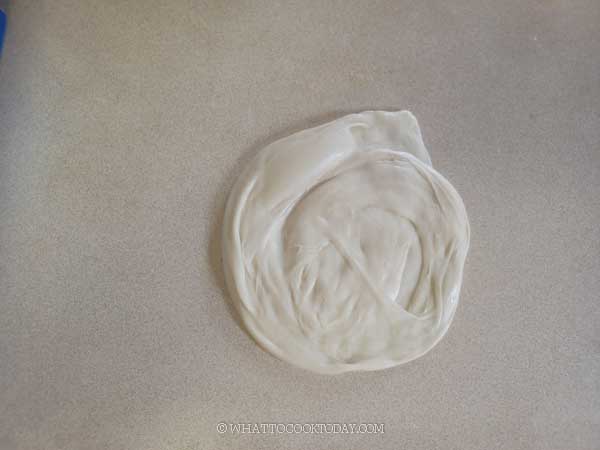
11. For large round shape: Similar to making coin prata above. But, once you get to the coin shape, let the dough rests for 30 minutes

After 30 minutes, get the first dough you coil and then flatten with your palm and stretch it out into a thin disk and proceed to the cooking step
12. Cooking: Preheat a non-stick heavy-bottom pan. Add about 1 Tbsp of cooking oil or butter or ghee. Place the dough on the pan and cook until golden brown and crisp over medium heat. You will see the dough puff up here and there, which is a good sign
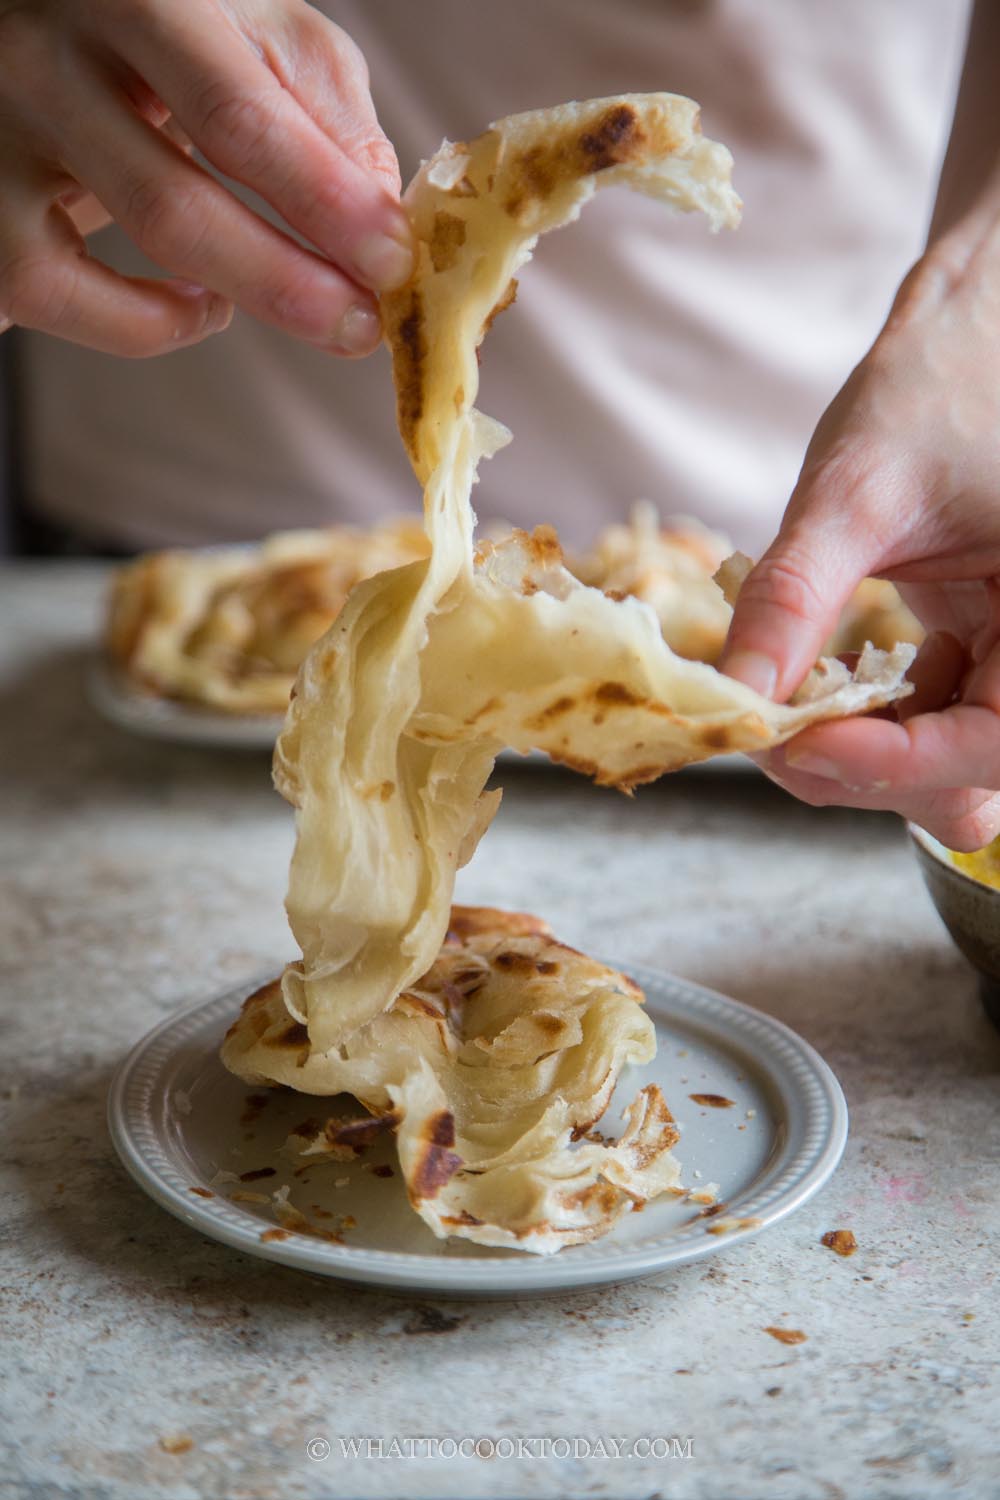
Remove from the pan. Wait for about 1 minute, for plain and egg prata, use your hands (or use two spatulas if it’s too hot for your hands) to fluff and scrunch the dough. The purpose of this is to separate the flaky layers

Important tips to get thin, crispy, and flaky roti prata
1. Rest the dough
This is not something you can do in a jiffy. A minimum of 2-hour of resting the dough is necessary. You can leave them overnight in the fridge for even better flavor
2. Stretch the dough as thin as you can
This is also one of the keys to get the crispy and flaky roti prata. If the dough is thick, the roti prata will be tough and very chewy
3. Don’t be skimpy on the fat/oil
To make really good roti prata that is crispy and flaky, you can’t skimp on the oil/fat. You can however use a healthier oil instead of using butter or ghee, but you definitely want to spread oil/fat on the dough before folding it into layer so they will puff up and separate into nice layer
4. Fluff and scrunch the cooked roti prata
By fluffing and scrunching the cooked roti prata, we separate the layers, which makes it even flakier and crispier
What you can serve with roti prata
Similar to what you can spread or sandwich in between regular bread or toast, prata is the same way. The variations of topping or what you can put in between those flaky layers of roti prata are pretty limitless. Here are just the tip of the iceberg:
1. Savory ideas: curry of any kind, dahl, cheese of any kind, onion, mushrooms, meat floss, deli meat, sausages, scrambled eggs.
2. Sweet ideas: Nutella, honey, jam/jellies, condensed milk and butter/margarine/ghee, turbinado sugar, chocolate sprinkles, peanut butter and jelly, Ice cream, fresh fruit pieces with whipped cream.
How to store roti prata
Like I’ve mentioned before, roti prata is best served immediately after being cooked or it loses that crisp. However, you can make them ahead and freeze and cook them whenever you want them or sometimes you just have leftovers. Here’s how:
1. Leftover cooked roti prata: After they have cooled down completely, store them in an air-tight container and put in the fridge for up to 5 days. They can also be kept frozen for up to one month by wrapping them up in a cling wrap and then a foil and put inside a freezer bag and seal
2. If making ahead: Half-cooked the roti prata and then let them cool down completely. Stack them up with wax paper or parchment paper in between. Wrap with a cling wrap and then an aluminum foil and put inside the freezer bag and they can be kept frozen for up to one month for the best result
How to reheat roti prata
1. If the roti prata is not frozen, simply reheat in the microwave for few seconds until heated through. You can also reheat on the pan with a bit of oil until the roti prata is soft again and with some crisp
2. If the roti prata is frozen, simply reheat in the microwave for 10-15 seconds or longer or until heated through. You can also reheat on the pan without thawing. Let the heat soften the roti prata and then when they are no longer frozen, add a bit of oil to crisp them back up again
Did you make this homemade roti prata/roti canai/roti Maryam recipe?
I love it when you guys snap a photo and tag to show me what you’ve made 🙂 Simply tag me @WhatToCookToday #WhatToCookToday on Instagram and I’ll be sure to stop by and take a peek for real!
Homemade Roti Prata / Roti Canai / Roti Maryam
Ingredients
Dough:
- 250 gr all-purpose flour see notes 1
- 1 tsp salt
- 20 gr sugar
- 150 ml hot water about 200 F (90-93 C)
- Cooking oil for the dough and for cooking. See notes 2
For egg prata:
- 2 large eggs beaten
For sweet paratha, you can top with any of these:
- Condensed milk + butter
- Butter
- Nutella
- Turbinado sugar or regular granulated sugar
- Sweet jam/jelly
For plain prata, serve with any of these:
- Your favorite curry
- Dahl
- Cheese
- Sausages
- Scrambled eggs
Instructions
If using a stand mixer to knead the dough:
- Place all ingredients in a mixing bowl of a stand mixer. That's what I'm using to knead the dough. Knead on low speed (speed 2 on KA) for 10-12 minutes until the dough is smooth and reaches window pane stage, meaning when you slowly stretch the dough thin, it won't stretch and a light can pass through because of how thin it is. Proceed to "rest the dough" step
If kneading by hands:
- Place all ingredients in a mixing bowl and mix into a shaggy rough dough. Cover and rest for 20 minutes. Then go back and knead the dough again until it is really smooth and stretchy. Proceed to "rest the dough" step
Rest the dough (for both methods):
- Divide the dough into 5 equal portions, roll them into round ball. Add about 2 Tbsp of cooking oil on a plate and rub the oil on each dough to prevent the dough from drying out. Cover tightly with a cling wrap and rest for at least 2 hour or as long as overnight. If you plan to do overnight, keep them in the fridge. The longer your rest, the easier it is for you to stretch the dough thin later. Minimum of 2 hours is a must from my experience. Overnight is the best if you are willing to wait
Stretch and shape:
- If the doughs have been in the fridge, get them out about 1 1/2 hour before you plan to stretch and shape to let them come to room temperature
- Work with one dough at a time and keep the rest covered. Oil your work surface. Gently flatten the dough with your palm and then starting from the center of the dough, use all ten fingers to slowly stretch the dough out in all direction, until you have about 5 inch in diameter and then you can start gently pulling the edge of the dough to stretch it out, moving along the edge to stretch continue to stretch until the dough is very thin and 3 to 4 times its original size. Some parts may tear a bit and don't sweat it. If you rest the dough beyond 2 hours, this is less likely to happen because the dough is very stretchy
For egg prata:
- Rub some oil (or you can use melted butter or ghee if you want to go all out) on the surface of the dough all over. Don't skip this part or be skimpy on the oil as this helps to make the layers flaky and separate. Whisk the eggs and spread 1/5 of the beaten egg on the surface of the dough with your hand and then fold the dough into half and then another half and proceed to cooking step
For plain prata (rectangle/square shape):
- Rub some oil (or you can use melted butter or ghee if you want to go all out) on the surface of the dough all over. Don't skip this part or be skimpy on the oil as this helps to make the layers flaky and separate. Fold the dough in half and then another half. There is no need to rest the dough after this and you can proceed to cooking
For coin prata:
- Rub some oil (or you can use melted butter or ghee if you want to go all out) on the surface of the dough all over. Don't skip this part or be skimpy on the oil as this helps to make the layers flaky and separate. Fold 1/3 over to the middle and the other 1/3 over. Fold in half and you have a long strip now. Pick up one end with the other end stay on your work surface and slowly coil it around and tuck the end underneath. Keep it covered and continue with the rest of the dough
- You don't need to rest the dough after shaping and proceed to the cooking step
For plain prata (large round shape):
- Rub some oil (or you can use melted butter or ghee if you want to go all out) on the surface of the dough all over. Don't skip this part or be skimpy on the oil as this helps to make the layers flaky and separate. Fold 1/3 over to the middle and the other 1/3 over. You have a long strip now. Pick up one end with the other end stay on your work surface and slowly coil it around and tuck the end underneath. Keep it covered and continue with the rest of the dough. Let the dough rests for 30 minutes
- After 30 minutes, get the first dough you coil and then flatten with your palm and stretch it out into a thin disk and proceed to the cooking step
Cooking:
- Preheat a non-stick heavy-bottom pan. Add about 1 Tbsp of cooking oil or butter or ghee. Place the dough on the pan and cook until golden brown and crisp over medium heat. You will see the dough puff up here and there, which is a good sign
- For coin prata, you may need to cook a bit longer because it's thicker. Watch the heat, you may need to lower the heat a bit so the inside cooked through before the outside is burnt
- Remove from the pan. Wait for about 1 minute, for plain and egg prata, use your hands (or use two spatulas if it's too hot for your hands) to fluff and scrunch the dough. The purpose of this is to separate the flaky layers
Serve:
- Roti prata needs to be served immediately for that crisp flaky layer. They can be served with savory dish such as curry or as a wrap
- For sweet paratha, simply drizzle some condensed milk and some butter. You can also just sprinkle with some granulated sugar (this was the version I grew up eating, just plain sugar over it and we call it roti cane)
RECOMMEDED TOOLS

Marv's Recipe Notes
- The all-purpose flour I use have about 11% gluten content. The gluten content may vary from brand to brand, so just choose the one closest to this amount. I don't feel like bread flour is necessary. It gives me enough chewiness without overdoing it.
- I use grape seeds oil for healthier version. You are welcome to use melted butter or ghee if you prefer

2 comments
You’re the best! I finished my plain roti canai in 5 minutes! It was my first attempt. It was sooo good that I gobbled it plain. 😂 Crunchy on the outside and fluffy inside. So tasty… 😋 Thank you!
I’m happy to know that it worked out for you yay!!! 🙂 I am sometimes afraid to make roti prata because I know I will eat them straight away without sharing ha..ha…! Thank you for trying and for your feedback 😉