This post may contain affiliate links. Please read our disclosure policy.
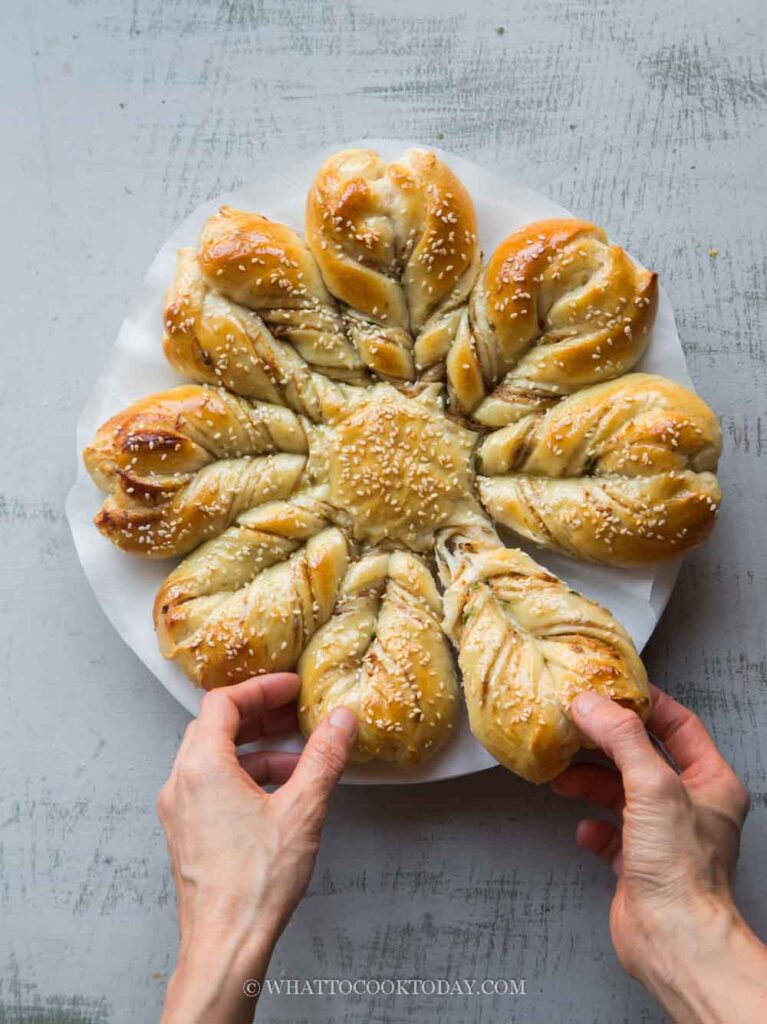
Savory star-shaped pull-apart milk bread is made with yudane/tangzhong that stays soft for days. The bread is filled with savory and umami pork floss and scallion. This makes delicious and beautiful tear-and-share bread to accompany your Holiday meals.

Pork floss or any type of meat floss is a popular snack across Asia. This savory and umami ingredient is popular to be eaten with a bowl of congee, rice, or as a topping or filling for bread, steamed buns, wraps, pastry, etc. I’m personally a huge fan and I couldn’t be happier now that Costco has pork floss or they call it shredded pork (not sponsored by Costco!)
What is snowflake /star bread?
As its name implies, the dough is shaped into a snowflake or some call it a star shape. It is popular pull-apart type of bread that you will around Christmas time. The most common one is the sweet version, which is cinnamon snowflake or star bread. Here’s my savory version using pork floss, sesame seeds, scallions, and mayo spread as a filling. It is so delicious if you are also a fan of pork floss or meat floss.
Bread that stays soft for days
The recipe uses yudane, which is one of my favorite things to use to produce feathery soft bread. The softness stays for days too compared to most regular bread made without it.

How to make pork floss scallion snowflake/star pull-apart bread
1. Measure out 60 gr bread flour in a heat-proof bowl. Place this on top of a kitchen scale. Bring water to a boil. I usually boil 15-20 grams extra than what I need to account for evaporation during boiling. When water comes to a boil, don’t turn it off yet, let it boil for another minute or two to make sure it reaches boiling temperature. Use a thermometer if you have one. I make sure it’s at least 212 F/100 C. Carefully but quickly pour the amount of boiling water you need into the flour and stir with a sturdy spatula until all the flour is hydrated by the hot boiling water. You will get sticky dough. Let it cool down to about 122F/50 C. Wrap it with a cling wrap that I lightly sprayed with non-stick spray and let it sit on the counter if you will be using it 4 hours later or in the fridge for the next day. They can be kept in the fridge for up to 3 days. The longer you rest the yudane, the better the quality of your bread
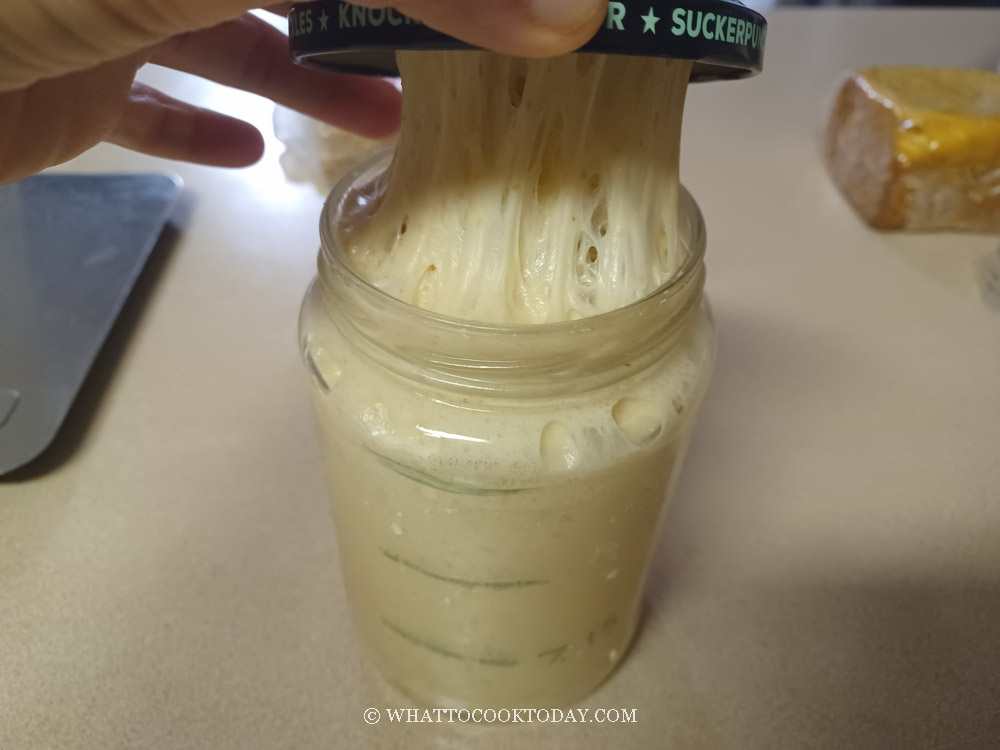
2. I recommend using a starter that is at least one month old and consistently doubles or triples in 4-6 hours when you feed it at 1:1:1 ratio. Young starter will not give the best result. About 8-10 hours before you plan to make the bread, combine all ingredients for the stiff starter in a bowl. Stir a bit to roughly combine and then use your clean hand to knead it. This is a stiff starter, it’s like dough. Make sure no pockets of dry flour are visible. Transfer to a large see-through container (plastic or glass is fine, preferably wide-mouth so you can get it out easier later). Loosely cover with the lid and let it ferment until triple in size
3. Place all ingredients (except for butter), including all of the stiff starter (if using), and tear the yudane into smaller pieces and put in a mixing bowl of a stand mixer fitted with a dough hook attachment. Use the hook to stir everything around a bit so when you turn the machine on, the flour won’t fly around and wet ingredients won’t splash (it happened to me before!). Start with the lowest speed to mix things up and then increase to speed 2 and knead for about 5 minutes or until it forms a dough. If the dough is too dry to come together, you can add a bit of milk one teaspoon at a time. Don’t add too much as we haven’t added butter yet
4. Then add softened butter, in 3-4 batches. The dough will turn into a complete mess again because of the butter, but don’t worry, it will get absorbed by the dough as it kneads. Knead at speed 4 for about 10 minutes or until dough is smooth and elastic. If you slowly stretch a small amount of dough, it will not break and light can pass through, like a window pane
5. Transfer the dough to a lightly oiled bowl. Cover, and proof in a warm place until double in size. If you use commercial yeast, this may take about 1-2 hours. If you use a sourdough starter, this may take about 2-3 hours at 78-80 F (26-28 C), depending on the strength of your starter and temperature. When you poke the dough with your lightly-floured finger, the indentation stays and the dough has clearly almost doubled or doubled in size
6. Combine sesame oil, salt, and mayo. Set aside. Divide the dough into 4 equal pieces. Round each one into a dough ball. Cover and let them relax for 15 minutes so it’s easier to roll them out later
7. Work with one dough at a time, Place the dough on top and then roll it out into a 10-inch circle. 
8. Spread about 1-2 Tbsp of mayonnaise, leaving about 1/4-inch around the edge. Layer 1/2 cup or more of pork floss, sprinkle with 1/4 of the scallion and sesame seeds
9. Roll out the second dough ball into the same size, place this on top of the first dough. Repeat the same process, spread mayo and put the filling. Roll out the third dough, fill and cover with the fourth dough. Leave it bare without filling
10. Place a large cutting board on your work surface. Line with a parchment paper, as big as the baking sheet you will use to bake the bread. Place about 2 1/2-3 inch round cutter or cup or anything you have in the center of the circle as a guide. Use a very sharp knife to cut into 16 equal strips from the center where the guide is all the way through the layers

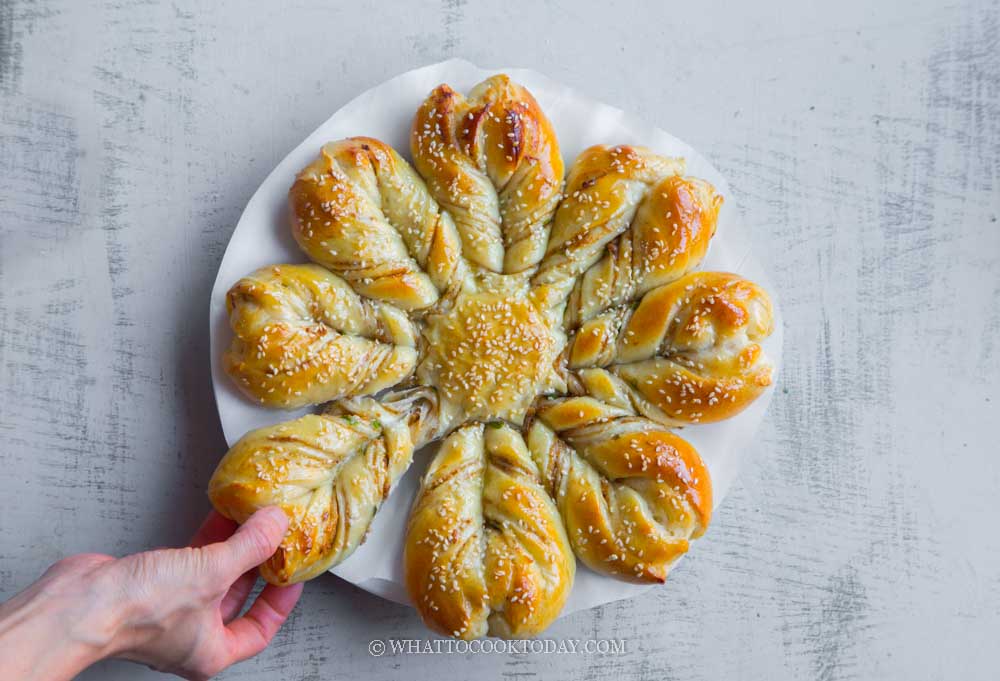
11. Pick up two strips next to each other with your fingers and twist them away from each other and pinch the end to seal and hold them together. Repeat with the rest of the strips. Transfer the dough to the baking sheet by gently sliding the parchment paper on the baking sheet

12. This is how it looks like
13. Cover with a damp kitchen towel or lightly oiled plastic wrap and put it in a warm place to let it have the final proofing. The dough should be puffy. This may take 45 minutes to 1 hour or longer if the temperature is colder. 15 minutes before the end of proofing, preheat the oven to 400 F (204 C) for a conventional oven. For a convection oven, reduce temperature by 20 F or 15 C. Brush the bread with some egg wash. Sprinkle some white sesame seeds on top
14. Place the baking sheet on the middle rack and let it bake for 15 minutes or golden brown. The center of the bread should have an internal temperature of 200 F (93 C). Remove from the oven and let the bread cool down for about 10 minutes before serving. You can brush with some melted butter while the bread is still warm for that soft crust if you like
Did you make this pork floss scallion snowflake/star pull-apart bread recipe?
I love it when you guys snap a photo and tag it to show me what you’ve made 🙂 Simply tag me @WhatToCookToday #WhatToCookToday on Instagram and I’ll be sure to stop by and take a peek for real!

Savory Star Pull-Apart Milk Bread (Pork Floss Scallion)
Ingredients
Prepare yudane (at least 4 hours prior):
- 60 gr bread flour with at least 12% protein content recommended
- 60 gr hot boiling water at least 212 F 100 C
Main dough:
- 255 gr bread flour with at least 12% protein content recommended
- 5 gr instant yeast
- 15 gr milk powder
- 150 gr whole milk +/- 10 gr of milk
- 30 gr sugar
- 4 gr salt
- 30 gr softened butter
If using sourdough starter
Prepare sweet stiff levain:
- 40 gr active starter 100% hydration
- 120 gr bread flour with at least 12% protein content recommended
- 50 gr water
- 20 gr sugar
Main dough if using a sourdough starter:
- 115 gr bread flour with at least 12% protein content recommended
- 15 gr milk powder
- 60 gr whole milk +/- 10 gr of milk
- 4 gr salt
- 30 gr softened butter
Filling:
- 2 cups pork floss or more as needed
- 3 stalks green onion finely chopped
- ¼ tsp salt
- 1 tsp sesame oil
- 6 Tbsp Mayonnaise or as needed
- 1 Tbsp White sesame seeds
Egg wash:
- 1 egg beaten
- 1 tsp milk
Instructions
Prepare yudane:
- Measure out 60 gr bread flour in a heat-proof bowl. Place this on top of a kitchen scale.Bring water to a boil. I usually boil 15-20 grams extra than what I need to account for evaporation during boiling. When water comes to a boil, don’t turn it off yet, let it boil for another minute or two to make sure it reaches boiling temperature. Use a thermometer if you have one. I make sure it’s at least 212 F/100 C
- Carefully but quickly pour the amount of boiling water you need into the flour and stir with a sturdy spatula until all the flour is hydrated by the hot boiling water. You will get a sticky dough
- Let it cool down to about 122F/50 C. Wrap it with a cling wrap that I lightly sprayed with non-stick spray and let it sit on the counter if you will be using it in 4 hours later or in the fridge for the next day. They can be kept in the fridge for up to 3 days. The longer you rest the yudane, the better the quality of your bread
If using sourdough starter:
- I recommend using a starter that is at least one month old and consistently doubles or triples in 4-6 hours when you feed it at 1:1:1 ratio. Young starter will not give the best result
- About 8-10 hours before you plan to make the bread, combine all ingredients for the stiff starter in a bowl. Stir a bit to roughly combine and then use your clean hand to knead it. This is a stiff starter, it's like a dough. Make sure no pockets of dry flour are visible. Transfer to a large see-through container (plastic or glass is fine, preferably wide-mouth so you can get it out easier later). Loosely cover with the lid and let it ferment until triple in size
Prepare the dough:
- Place all ingredients (except for butter), including all of the stiff starter (if using), and tear the yudane into smaller pieces and put in a mixing bowl of a stand mixer fitted with a dough hook attachment. Use the hook to stir everything around a bit so when you turn the machine on, the flour won't fly around and wet ingredients won't splash (it happened to me before!). Start with the lowest speed to mix things up and then increase to speed 2 and knead for about 5 minutes or until it forms a dough. If the dough is too dry to come together, you can add a bit of milk one teaspoon at a time. Don't add too much as we haven't added butter yet
- Then add softened butter, in 3-4 batches. The dough will turn into a complete mess again because of the butter, but don't worry, it will get absorbed by the dough as it kneads. Knead at speed 4 for about 10 minutes or until dough is smooth and elastic. If you slowly stretch a small amount of dough, it will not break and light can pass through, like a window pane
First proofing:
- Transfer the dough to a lightly oiled bowl. Cover, and proof in a warm place until double in size. If you use commercial yeast, this may take about 1-2 hours. If you use a sourdough starter, this may take about 2-3 hours at 78-80 F (26-28 C), depending on the strength of your starter and temperature. When you poke the dough with your lightly-floured finger, the indentation stays and the dough has clearly almost doubled or doubled in size
Shaping:
- Combine sesame oil, salt, and mayo. Set aside
- Divide the dough into 4 equal pieces. Round each one into a dough ball. Cover and let them relax for 15 minutes so it's easier to roll them out later
- Place a large cutting board on your work surface. Line with a parchment paper, as big as the baking sheet you will use to bake the bread. Work with one dough at a time, Place the dough on top and then roll it out into a 10-inch circle. Spread about 1-2 Tbsp of mayonnaise, leaving about 1/4-inch around the edge. Layer 1/2 cup or more of pork floss, sprinkle with 1/4 of the scallion and sesame seeds
- Roll out the second dough ball into the same size, place this on top of the first dough. Repeat the same process, spread mayo and put the filling. Roll out the third dough, fill and cover with the fourth dough. Leave it bare without filling
- Place about 2 1/2-3 inch round cutter or cup or anything you have in the center of the circle as a guide. Use a very sharp knife to cut into 16 equal strips from the center where the guide is all the way through the layers
- Pick up two strips next to each other with your fingers and twist them away from each other and pinch the end to seal and hold them together. Repeat with the rest of the strips. Transfer the dough to the baking sheet by gently sliding the parchment paper on the baking sheet
Final proofing:
- Cover with a damp kitchen towel or lightly oiled plastic wrap and put it in a warm place to let it have the final proofing. The dough should be puffy. This may take 45 minutes to 1 hour or longer if the temperature is colder.
- 15 minutes before the end of proofing, preheat the oven to 400 F (204 C) for a conventional oven. For a convection oven, reduce temperature by 20 F or 15 C. Brush the bread with some egg wash. Sprinkle some white sesame seeds on top
Baking:
- Place the baking sheet on the middle rack and let it bake for 15 minutes or golden brown. The center of the bread should have an internal temperature of 200 F (93 C)
To serve:
- Remove from the oven and let the bread cool down for about 10 minutes before serving. You can brush with some melted butter while the bread is still warm for that soft crust if you like
Storage:
- The bread can be stored at room temperature once it has cooled down completely. Wrap with plastic wrap and put in a bread box or zipper bag. To reheat, loosely wrap with aluminum foil and bake at 350 F for 10-15 minutes or until just warm


