This post may contain affiliate links. Please read our disclosure policy.
Learn how to make sourdough steamed buns using tangzhong which extends the shelf life of the steamed buns. The steamed buns stay soft and fluffy for days.

Have you ever made steamed buns that come out soft and fluffy when they are still warm and then they aren’t as fluffy anymore the next day or when they have cooled down? This is not uncommon. The buns start to go stale pretty quickly. Steamed buns go stale due to a process called retrogradation, which occurs when the starch molecules in the bread begin to re-form after they have been broken down during the baking process. This re-formation of the starch molecules causes the steamed buns to become firm and dry, leading to the characteristic texture and taste of stale bread.
Why using tangzhong ?
When the tangzhong is added to the dough, it coats the starch molecules and prevents them from re-forming as quickly during retrogradation. As a result, the steamed buns retain their moisture and remain soft and fresh for a longer period of time.
In addition, the tangzhong also helps to improve the structure of the steamed buns by increasing the amount of water that the dough can absorb. This results in a steamed bun that is softer, more tender, and has a better crumb.

Why using sweet stiff starter ?
This recipe will give you sourdough steamed buns that don’t taste sour. Why? Because we use a Sweet Stiff Levain, which is built from a regular 100% hydration sourdough starter. I don’t maintain a stiff starter. I build it whenever I need it. I love baking enriched bread/buns and steamed buns using a sweet stiff starter.
Sourdough Baozi/Steamed Buns with Tangzhong
Ingredients
Sweet stiff starter: (peak in 4-6 hours)
- 95 gr active starter (100% hydration)
- 95 gr all-purpose flour
- 30 gr water
- 20 gr sugar
Tangzhong:
- 25 gr all-purpose flour
- 150 gr whole milk
Final dough:
- 125 gr all-purpose flour see notes 1
- 60 gr wheat starch or use cornstarch
- 40 gr sugar
- 4 gr salt
- 1 tsp baking powder
- 15 gr oil
- Whole milk as needed I don't need
Instructions
Prepare sweet stiff starter:
- About 4-6 hours before you plan to make the steamed buns, combine all ingredients for the stiff starter in a bowl. Stir a bit to roughly combine and then use your clean hand to knead it. This is a stiff starter, it's like dough. Make sure no pockets of dry flour are visible. Transfer to a large see-through container (plastic or glass is fine, preferably wide-mouth so you can get it out easier later). Loosely cover with the lid and let it ferment until triple in size
Prepare tangzhong:
- You can read this post about preparing tangzhong in more details if you are interested. Place milk and flour in a small saucepan. Whisk until there are no more lumps. Cook this mixture over low-medium heat for about 3-4 minutes. It should reach about 65 C (149 F). If you overcook it, liquid will evaporate more than needed. Remove from the heat and immediately cover with a cling wrap touching the surface of tangzhong directly to prevent skin from forming.
- Let it cool down completely. You can use it on the same day once it has cooled down, but I highly suggest using this the next day. It improves the taste of the bread. Store this in the fridge
Prepare the dough:
- Place all ingredients for the dough, including all of the stiff starter, and tangzhong in a mixing bowl of a stand mixer fitted with a dough hook attachment. Use the hook to stir everything around a bit so when you turn the machine on, the flour won't fly around and wet ingredients won't splash (it happened to me before!). Start with the lowest speed to mix things up and then increase to speed 2 and knead for about 10 minutes or until it forms a dough that is soft and smooth. The dough clears the side of the bowl but still somewhat sticky to touch. You don't need to knead until window pane stage. Proceed to the shaping step below
Shaping:
- Divide the dough into 8-10 equal portion
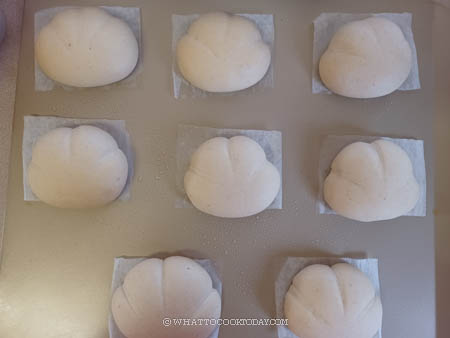
- Lightly dust the work surface with some flour. Work with one dough at a time. Flatten the dough with your palm and then pull the edge towards the center to form a tight dough ball. Repeat with the rest of the dough and place it on a parchment paper and put them on a baking sheet
- If you just want to make a round shape, you are done here. Cover with a clean kitchen towel and proceed to the proofing step
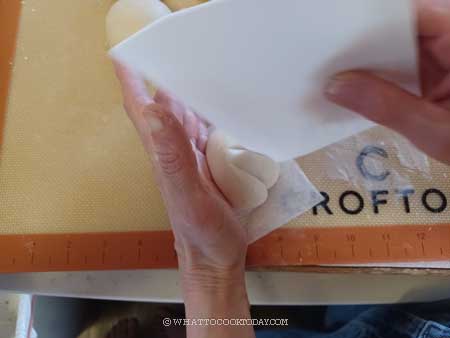
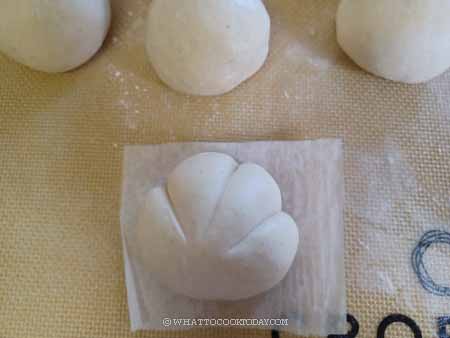
- If you want to shape into "cloud" shape like I did, flatten the round dough with your palm. Hold a bench scraper in one hand and place the other hand on one side. Gently push into the dough with the bench scraper while the other hand is supporting the dough (refer to the photos above). Do this two more times. I actually have to repeat doing this 2-3 times to make sure the indentation stays but take care not to cut through the dough. Cover with a clean kitchen towel and proceed to the proofing step
Proofing: (one-time proofing only)
- Let the dough rise at room temperature or at a warm place, about 84-86 F, don't go above this however. They won't necessarily double in size, but at least puff up to about 50% of the original size. This may take about 3- 3 1/2 hours depending on the temperature and the strength of your starter
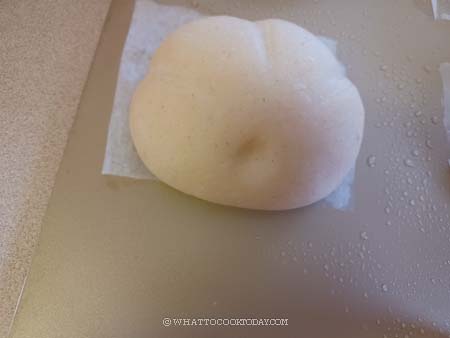
- How do you know if your buns have proofed ? They will be about 50% bigger than their original size AND when you lift them up, they should feel significantly lighter. If not, let them proof a bit longer. Use a finger test too. When you gently push on the dough, it will leave an indentation but it will spring back slowly. This dough is perfectly proofed. If it springs back right away, it needs to be proofed a bit longer. If it never springs back, then you have over-proofed the dough. Loosely cover them with plastic wrap and put the over-proofed buns in the fridge to slow down the proofing while waiting for the steamer
- An under proofed buns will be very dense and have bumpy surfaces after steaming. Over proofed buns may widen to the side and be much flatter, but they shouldn't be dense and heavy. So, overproof may still be a bit "safer" compared to the buns not sufficiently proofed. Ideally, we want it to be perfectly proofed of course
Steaming:
- Fill up the steamer with water but do not turn on the stove yet. Carefully arrange the proofed buns in the steamer, giving about 2 inches of space in between as they will expand quite a bit. Cover with a lid wrapped with a cloth to prevent condensation from dropping on the surface of the buns. If you use a bamboo steamer, you don't need to wrap the lid as bamboo steamer absorbs liquid
- Please note that I use the largest burner on my stove. Different sizes of burners will produce different amounts of heat, so use your largest burner. TURN THE HEAT TO MEDIUM (6/10)
- When the water comes to a simmer, crack the lid open about 1/2 inch gap and start the timer. Steam with the lid cracked open like that for 15 minutes
- After steaming, turn off the heat. DO NOT OPEN THE LID of the steamer. Let the buns sit there for 3 minutes. The buns will not sink or wrinkle due to the sudden change in temperature
- Proceed with the next batch and steam with the same method and setting as I mentioned above. You don't have to wait for the water in the steamer to cool down to start. Just turn on the stove to medium heat, crack the lid open immediately and the time starts when water is back to a simmer again
Serve warm:
- Serve them warm or immediately remove the buns to wire rack to let them cool down. This is to ensure the bottom of the steamed buns will not be wet and soggy
- If you make extra and plan to store them, let the already steamed buns cooled down completely and then place them on a baking sheet, not touching each other, and then put the entire tray inside the freezer for about 1 hour. They will harden, but not completely frozen yet. Transfer to a freezer bag and they will not stick to each other anymore. Try not to keep for more than 1 month
RECOMMEDED TOOLS


Marv’s Recipe Notes
*Nutrition facts are just estimates and calculated using online tools*
Ingredients and substitutions
1. Active sourdough starter
I strongly encourage you to have an active starter that is at least two-month-old before you attempt to make this sourdough steamed buns recipe for the best result. I use the starter to build a sweet stiff starter, which is perfect for enriched dough (dough with added oil and sugar)
2. All-purpose flour
I use unbleached all-purpose flour and that’s why the color of my steamed buns isn’t as white, but this doesn’t affect the taste. You can use bleached all-purpose flour for whiter steamed buns
3. Wheat starch
Wheat starch is a starch extracted from wheat. It’s not regular wheat flour. This is only available at Asian grocery store. You can substitute with corn starch or potato starch. I prefer wheat starch if you can get a hold of it
4. Whole milk
I encourage you to use whole milk as it helps the steamed buns to stay moist and taste better too
5. Sugar
I use granulated sugar. This steamed bun recipe contains about 11% of sugar, which is not noticeably sweet at all. I don’t recommend cutting down lower than 10% for the sake of taste. Sugar also keeps the steamed buns moist
6. Baking powder
I recently started to add baking powder to the recipe. It helps to make the buns even fluffier. You can skip if you prefer not to use
7. Oil
I use avocado oil. You can use any neutral-tasting oil
8. Salt
I use fine sea salt. A pinch of salt improves the overall taste of the steamed buns
How to make sourdough steamed buns with tangzhong
1. About 4-6 hours before you plan to make the steamed buns, combine all ingredients for the stiff starter in a bowl. Stir a bit to roughly combine and then use your clean hand to knead it. This is a stiff starter, it’s like dough. Make sure no pockets of dry flour are visible. Transfer to a large see-through container (plastic or glass is fine, preferably wide-mouth so you can get it out easier later). Loosely cover with the lid and let it ferment until triple in size
2. Place milk and flour in a small saucepan. Whisk until there are no more lumps. Cook this mixture over low-medium heat for about 3-4 minutes. It should reach about 65 C (149 F). If you overcook it, liquid will evaporate more than needed. Remove from the heat and immediately cover with a cling wrap touching the surface of tangzhong directly to prevent skin from forming.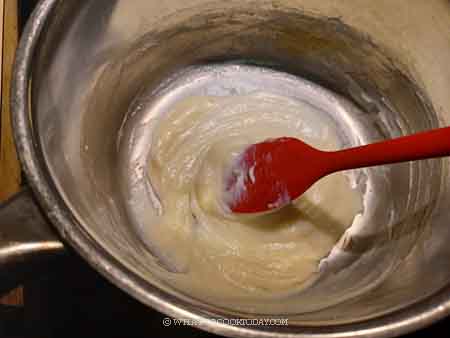
3. Let it cool down completely. You can use it on the same day once it has cooled down, but I highly suggest using this the next day. It improves the taste of the bread. Store this in the fridge
4. Place all ingredients for the dough, including all of the stiff starter, and tangzhong in a mixing bowl of a stand mixer fitted with a dough hook attachment. Use the hook to stir everything around a bit so when you turn the machine on, the flour won’t fly around and wet ingredients won’t splash (it happened to me before!).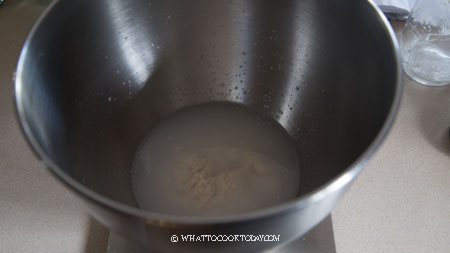
5. Start with the lowest speed to mix things up and then increase to speed 2 and knead for about 10 minutes or until it forms a dough that is soft and smooth. The dough clears the side of the bowl but still somewhat sticky to touch. You don’t need to knead until window pane stage. 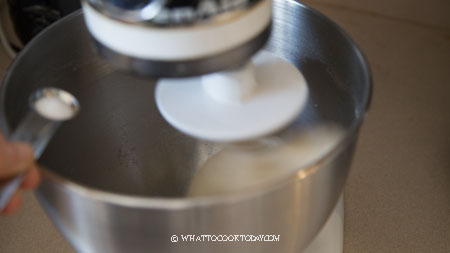

6. Divide the dough into 8-10 equal portion. Lightly dust the work surface with some flour. Work with one dough at a time. Flatten the dough with your palm and then pull the edge towards the center to form a tight dough ball. Repeat with the rest of the dough and place it on a parchment paper and put them on a baking sheet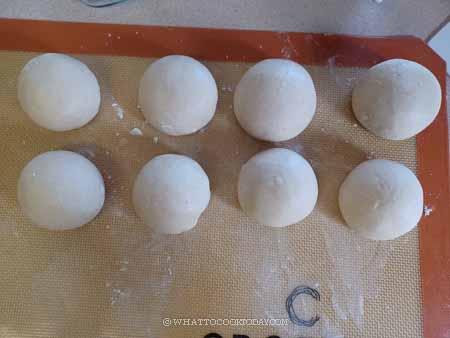
7. If you just want to make a round shape, you are done here. Cover with a clean kitchen towel and proceed to the proofing step. If you want to shape into “cloud” shape like I did, flatten the round dough with your palm. 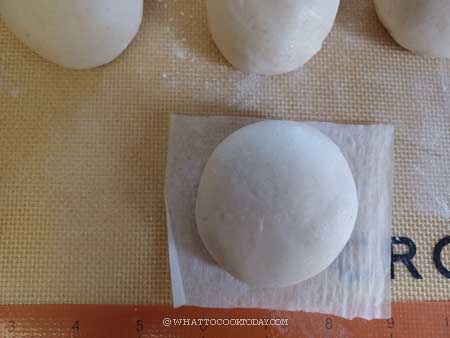
8. Hold a bench scraper in one hand and place the other hand on one side. Gently push into the dough with the bench scraper while the other hand is supporting the dough. 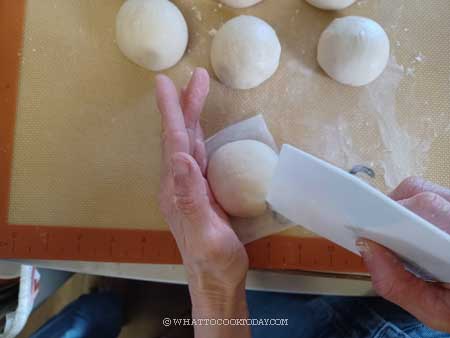
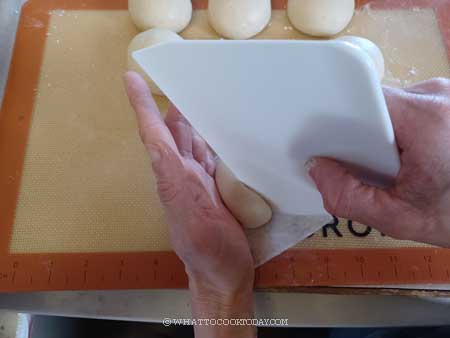
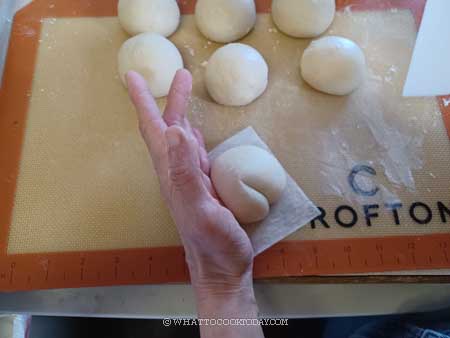
9. Do this two more times. I actually have to repeat doing this 2-3 times to make sure the indentation stays but take care not to cut through the dough. Cover with a clean kitchen towel and proceed to the proofing step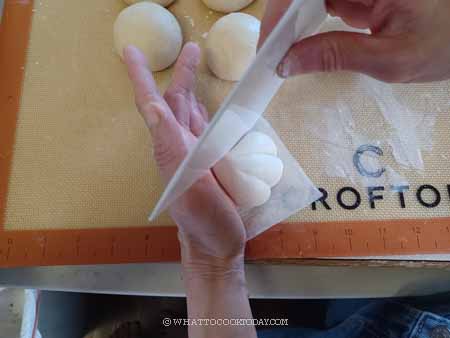
10. Let the dough rise at room temperature or at a warm place, about 84-86 F, don’t go above this however. They won’t necessarily double in size, but at least puff up to about 50% of the original size. This may take about 3- 3 1/2 hours depending on the temperature and the strength of your starter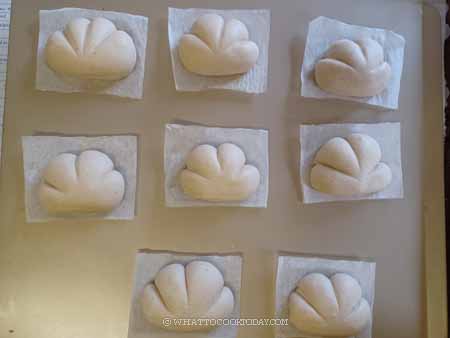
11. How do you know if your buns have proofed ? They will be about 50% bigger than their original size AND when you lift them up, they should feel significantly lighter. If not, let them proof a bit longer. Use a finger test too. When you gently push on the dough, it will leave an indentation but it will spring back slowly. This dough is perfectly proofed. If it springs back right away, it needs to be proofed a bit longer. 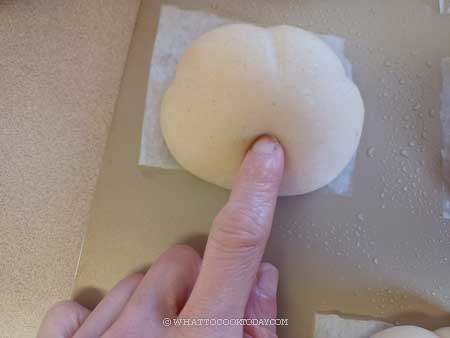
12. Fill up the steamer with water but do not turn on the stove yet. Carefully arrange the proofed buns in the steamer, giving about 2 inches of space in between as they will expand quite a bit. Cover with a lid wrapped with a cloth to prevent condensation from dropping on the surface of the buns. If you use a bamboo steamer, you don’t need to wrap the lid as bamboo steamer absorbs liquid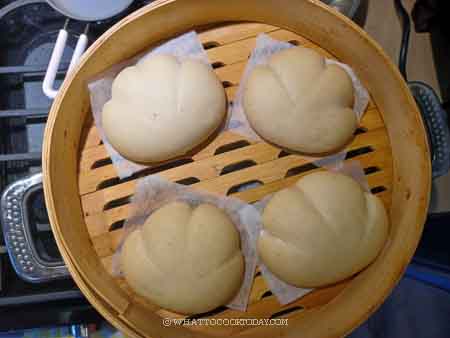
13. Please note that I use the largest burner on my stove. Different sizes of burners will produce different amounts of heat, so use your largest burner. TURN THE HEAT TO MEDIUM (6/10). When the water comes to a simmer, crack the lid open about 1/2 inch gap and start the timer. Steam with the lid cracked open like that for 15 minutes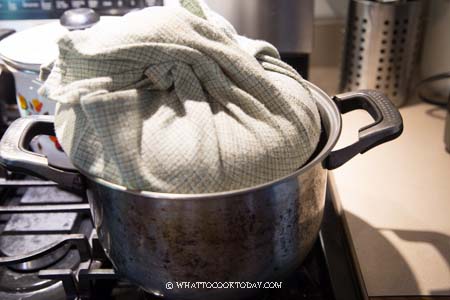
14. After steaming, turn off the heat. DO NOT OPEN THE LID of the steamer. Let the buns sit there for 3 minutes. The buns will not sink or wrinkle due to the sudden change in temperature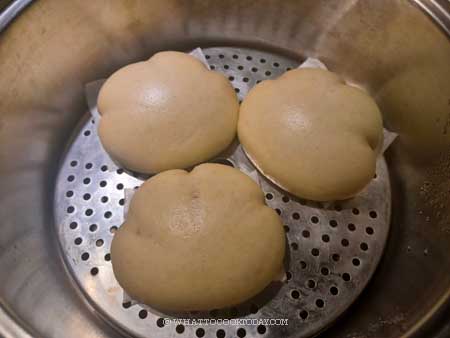
15. Serve them warm or immediately remove the buns to wire rack to let them cool down. This is to ensure the bottom of the steamed buns will not be wet and soggy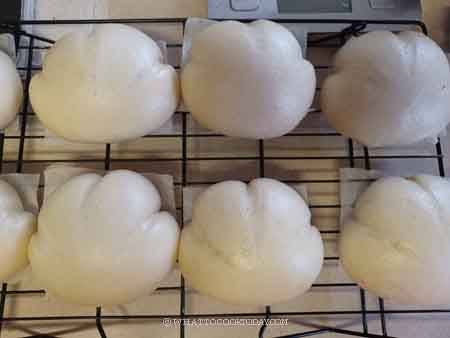
These sourdough steamed buns with tangzhong are perfect as a snack or a light meal. They can be filled with a variety of savory or sweet fillings, such as char siu (Chinese BBQ pork), red bean paste, or custard. Enjoy the delicious flavors of sourdough and tangzhong in these soft and fluffy buns!

Did you make this sourdough steamed buns with tangzhong recipe?
I love it when you guys snap a photo and tag it to show me what you’ve made. Simply tag me @WhatToCookToday #WhatToCookToday on Instagram and I’ll be sure to stop by and take a peek for real!


6 comments
Can I double the recipe to make a big batch of buns? TIA
Hi Celine, yes you can. It’s a large amount of dough and you may want to knead the dough 1 recipe at a time if your mixer can’t accommodate all of them (assuming you will knead it with a standmixer).
Thanks so much for these wonderful, clear instructions. They turned out great the first time.
So glad it worked out for you Betsy!
Gave these buns a try today as Mantou.
They came out really great!
I happen to keep a bleached AP flour sourdough starter for just such recipes!
They’re really easy to maintain. No different than any other sourdough starter, it just took mine a few more days to mature than my bread flour/rye starter. But at this point 7 months later, it’s really strong.
Bleached AP flour starters go really well with sweet doughs or stuff like pizza dough, or for folks who don’t like as much of the sour taste.
The instructions to the recipe were clear, and I had no issues following them!
Thanks for an awesome recipe.
Hi David, Thank you for sharing your sourdough experience. I will have to try the bleached AP flour sourdough starter for enriched doughs next time! I’m glad the recipe worked out for you!