This post may contain affiliate links. Please read our disclosure policy.
Amazingly crisp on the outside with flaky, tender, and rich buttery crumbs cheddar biscuits made with sourdough discard are out of this world delicious. The slight tang from the sourdough discard adds a nice complexity to the overall flavor. You don’t want to miss this recipe!

Why you will love this recipe!
Technically, you really don’t need a sourdough to make biscuits. Biscuits are quickbreads that do not require fermentation by yeast or natural yeast. But, it is a good use of sourdough discard that most of us would accumulate from maintaining a sourdough starter. I’ve never been so happy to collect sourdough discard so I can make this amazing sourdough discard buttermilk cheddar biscuits. I maintain a small batch of sourdough starters, so it took me a few days to collect enough discards LOL! (not that I’m complaining!) These biscuits are seriously good! It’s so flaky and has those beautiful layers!!! The biscuits also have that hint of tanginess from the sourdough discard, which really makes them taste even better! You will not regret it! I got this recipe from Kristen at Full Proof Baking. She is one of my idols when it comes to sourdough baking!
Flaky Sourdough Discard Cheddar Biscuits
Ingredients
- 113 g unsalted butter very cold, grated
Dry ingredients:
- 150 g all-purpose flour
- 2 tsp sugar
- 1 tsp salt
- 20 g baking powder double-acting
- 4 g baking soda
- 3 g garlic powder
Wet ingredients:
- 150 g sourdough starter
- 60 g buttermilk plus more as needed.
- 145 g sharp cheddar cheese shredded, divided
Instructions
- If you don't have buttermilk, you can "make" one by mixing 80 g (1/3 cup) milk with 1 teaspoon of vinegar. Let it sit for 5 minutes. The milk will curdle. I make a little extra here in case we need it to adjust the consistency of the dough. The buttermilk will also react with the baking soda to leaven the biscuits. So do not skip this buttermilk step
- Make sure the butter is really cold. Use a grater to grate the butter and then keep it in the fridge
Prepare the dough:
- Set aside 30 g (1/8 cup) of the cheese for topping. Measure out the starter and start with 60 g (1/4 cup) of buttermilk. If your starter is runny, that maybe all the buttermilk you need. Add the rest of the cheese. Whisk to combine. My starter is thick and so I use a total of 80 g (1/3 cup) of buttermilk. Mix until you get a thick batter-like consistency. Keep this in the fridge for 20 minutes to keep it cold
- Preheat oven to 475 F (250 C) for conventional oven. 450 F (230 C) for convection oven
- Line a baking sheet with parchment paper
- When 20 minutes are almost over, in a large mixing bowl, combine all the dry ingredients and whisk to combine. Add the grated butter and use a dough scraper to cut and combine into uneven crumbs. Add the cold buttermilk and starter mixture into the dry ingredients. Use a dough scraper to cut and fold the wet and dry. DON'T knead the dough. It will be dry and shaggy and there maybe still some loose flour. Do not overmix. We try to handle the dough as little as possible.
- Transfer the dough along with loose bits of flour into a countertop. Limit touching the dough with your hands to avoid warming up the butter too much. Use a bench scraper to collect the dough and the dry bits of flour together and press it down to form a rough rectangle that is about 1 inch thick.
Create flaky layers:
- Use the bench scraper to fold the dough at the long side into half. Switch to a rolling pin. Dust some flour on the rolling pin to prevent sticking.
- Roll the dough out into about 10 inches long. Then cut the dough in half crosswise at the center. Pick up half of the dough and stack it on top of the other half. Rotate the dough a quarter turn. Roll it out again into about 10 inches long. Cut in half again crosswise and then stack the top half on top of the bottom half. Rotate a quarter turn again and repeat the rolling, cutting, and stacking one more time
- Then roll the dough out to about 1-inch thickness
Use a biscuit cutter:
- Important tips: Use a biscuit cutter to cut the biscuit. I use the 2.5 inch round cutter. Push straight down and lift the cutter up. DO NOT twist the cutter. When you do that, you seal up the edges and it won't rise when you bake it. Cut as close as possible to minimize dough scrape
- Gather all the scrapes and push them together (don't knead it) to form a dough ball. I don't recommend rolling it out and cut again because this makes the biscuit tough from too much handling. Instead, just form dough balls from the scrapes. They won't be as pretty as the cut ones, but they are still very tasty and won't be tough
- Place the biscuits on top of the prepared baking sheet, about 2 inches apart
- Important tips: use your thumb to make an indentation in the middle of the biscuits. Why? This is to prevent the biscuits from tipping over to the side when they bake, which happen more often than not. Sprinkle the rest of the cheese you set aside earlier on top of the indentation. You don't have to make indentations on the dough balls you made from the scrapes
- If it's really warm where you are, I recommend freezing the biscuits in the freezer for 15 minutes before baking
If not baking on the same day:
- You can prepare up to this point and freeze the biscuit for one hour in the freezer. Transfer to a freezer bag, push all the air out and seal. I like to double bag them to prevent freezer burn. They can be kept frozen for up to one month. When ready to bake, they can go straight from freezer to the oven. You may want to add an extra 3-5 minutes. Monitor the time closely so you don't overbake
Bake:
- Place the baking pan on the middle rack. Turn the temperature down to 450 F (230 C) for conventional oven, 430 F (220 C) for convection oven. Bake for 10-12 minutes or until golden brown. It's important not to overbake them
Cool down and serve:
- Let them cool down on the pan set on top of a cooling rack for 5 minutes, then transfer to a cooling rack. Serve warm or at room temperature
- Biscuits are best served on the same day they are made. They are so delicious served with an extra pat of butter and honey or jam. We love them plain too!
RECOMMEDED TOOLS
Marv’s Recipe Notes
*Nutrition facts are just estimates and calculated using online tools*
How to bake flaky sourdough buttermilk cheddar biscuits
1. If you don’t have buttermilk, you can “make” one by mixing 80 g (1/3 cup) milk with 1 teaspoon of vinegar. Let it sit for 5 minutes. The milk will curdle. I make a little extra here in case we need it to adjust the consistency of the dough. The buttermilk will also react with the baking soda to leaven the biscuits. So do not skip this buttermilk step
2. Make sure the butter is really cold. Use a grater to grate the butter and then keep it in the fridge
3. Set aside 30 g (1/8 cup) of the cheese for topping. Measure out the starter and start with 60 g (1/4 cup) of buttermilk. If your starter is runny, that maybe all the buttermilk you need. Add the rest of the cheese. Whisk to combine. My starter is thick and so I use a total of 80 g (1/3 cup) of buttermilk. Mix until you get a thick batter-like consistency. Keep this in the fridge for 20 minutes to keep it cold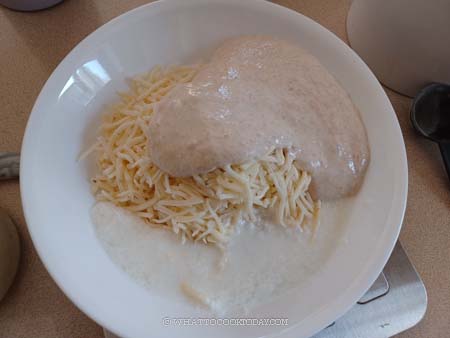
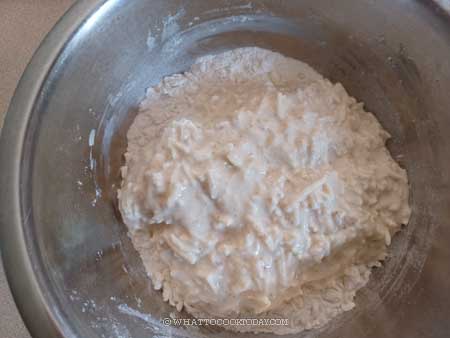
4. Preheat oven to 475 F (250 C) for conventional oven. 450 F (230 C) for convection oven. Line a baking sheet with parchment paper. When 20 minutes are almost over, in a large mixing bowl, combine all the dry ingredients and whisk to combine. 
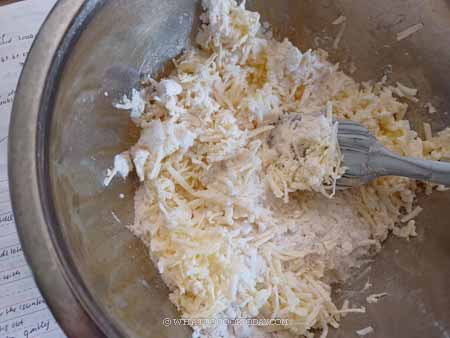
5. Add the grated butter and use a dough scraper to cut and combine into uneven crumbs. Add the cold buttermilk and starter mixture into the dry ingredients.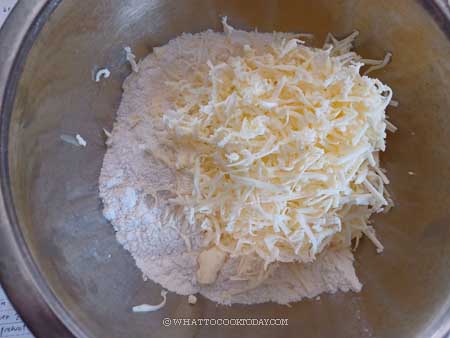
6. Use a dough scraper to cut and fold the wet and dry. DON’T knead the dough. It will be dry and shaggy and there maybe still some loose flour. Do not overmix. We try to handle the dough as little as possible.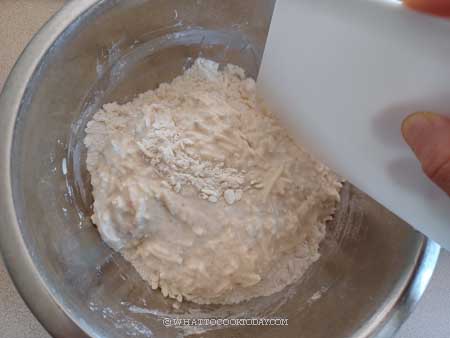
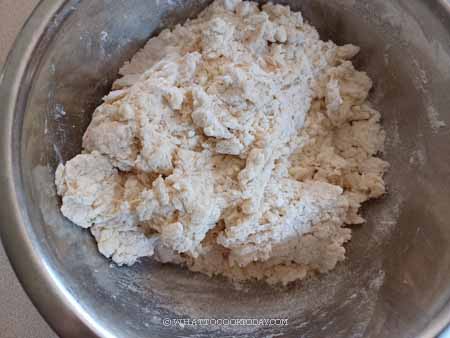
7. Transfer the dough along with loose bits of flour into a countertop. Limit touching the dough with your hands to avoid warming up the butter too much. Use a bench scraper to collect the dough and the dry bits of flour together and press it down to form a rough rectangle that is about 1 inch thick.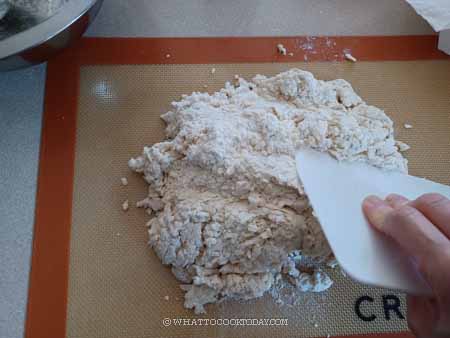
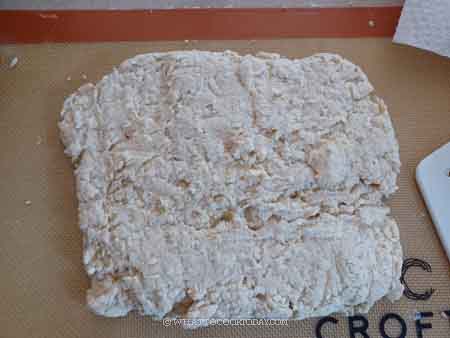
8. Use the bench scraper to fold the dough on the short side into half. 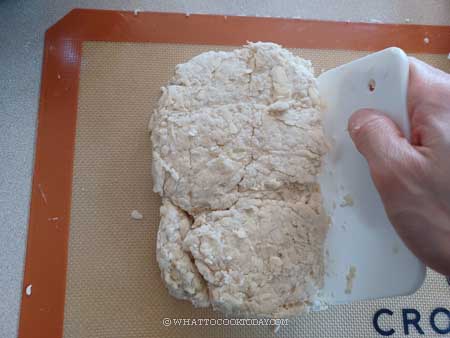
9. Switch to a rolling pin. Dust some flour on the rolling pin to prevent sticking. Roll the dough out into about 10 inches long. 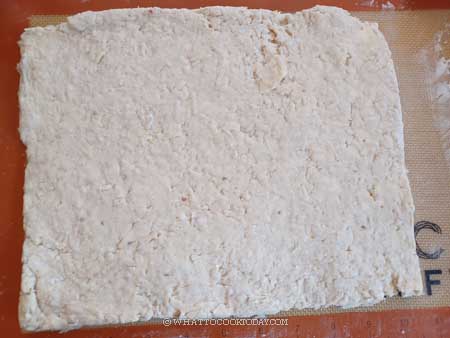
10. Then cut the dough in half at the center. 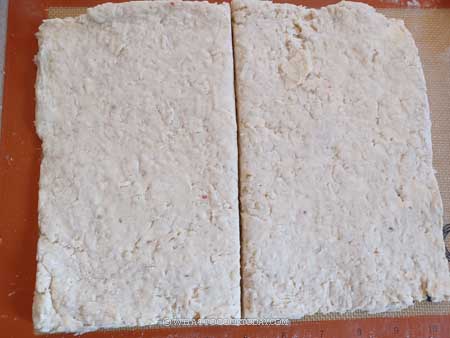
11. Pick up half of the dough and stack it on top of the other half. 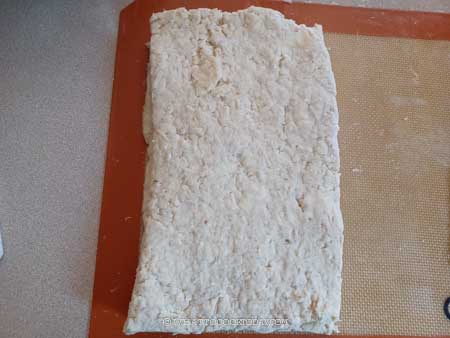
12. Rotate the dough a quarter turn. Roll it out again into about 10 inches long. Cut in half again crosswise and then stack the top half on top of the bottom half. Rotate a quarter turn again and repeat the rolling, cutting, and stacking one more time. So a total of three sets.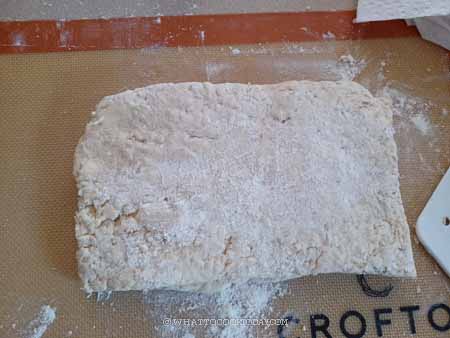
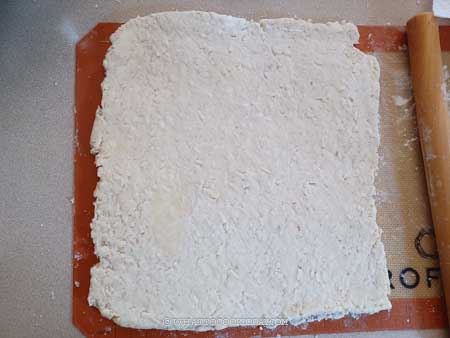
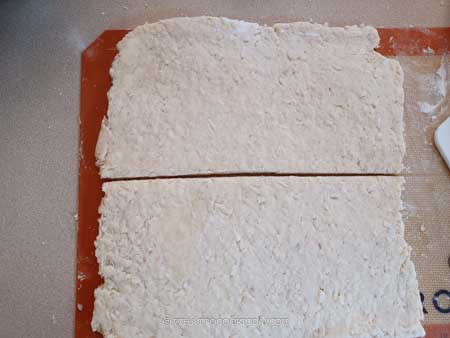
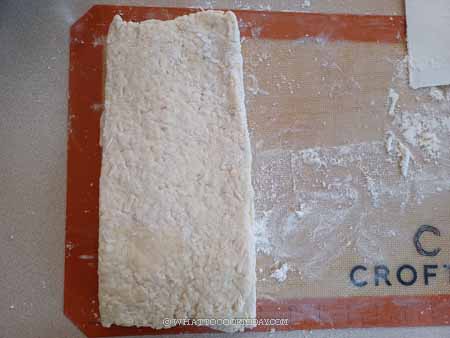
13. Then roll the dough out to about 1-inch thickness. I use a serrated knife to cut using a “sawing” motion. Do not cut the dough by pressing the knife down as you seal the edges and the biscuits won’t rise. If you use a biscuit cutter, use the 2.5 inch round cutter. Push straight down and lift the cutter up. DO NOT twist the cutter. When you do that, you seal up the edges and it won’t rise when you bake it. Cut as close as possible to minimize dough scrape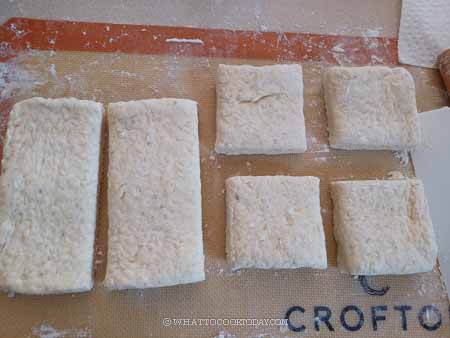
14. If you use a biscuit cutter, you will have scrapes. Gather all the scrapes and push them together (don’t knead it) to form a dough ball. I don’t recommend rolling it out and cut again because this makes the biscuit tough from too much handling. Instead, just form dough balls from the scrapes. They won’t be as pretty as the cut ones, but they are still very tasty and won’t be tough
15. Use your thumb to make an indentation in the middle of the biscuits. Why? This is to prevent the biscuits from tipping over to the side when they bake, which happens more often than not. Sprinkle the rest of the cheese you set aside earlier on top of the indentation. You don’t have to make indentations on the dough balls you made from the scrape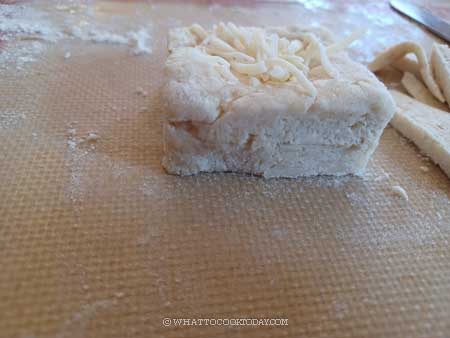
16. If it’s really warm where you are, I recommend freezing the biscuits in the freezer for 15 minutes before baking
17. Place the baking pan on the middle rack. Turn the temperature down to 450 F (230 C) for conventional oven, 430 F (220 C) for convection oven. Bake for 10-12 minutes or until golden brown. It’s important not to overbake them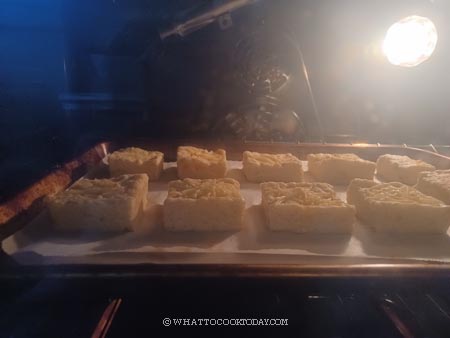
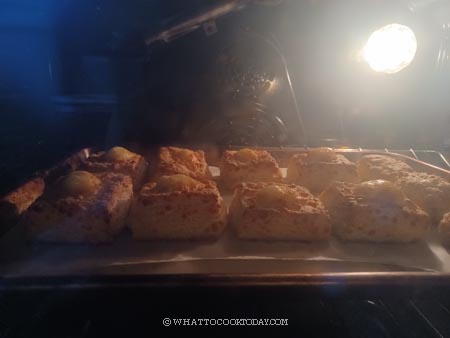
18. Let them cool down on the pan set on top of a cooling rack for 5 minutes, then transfer to a cooling rack. Serve warm or at room temperature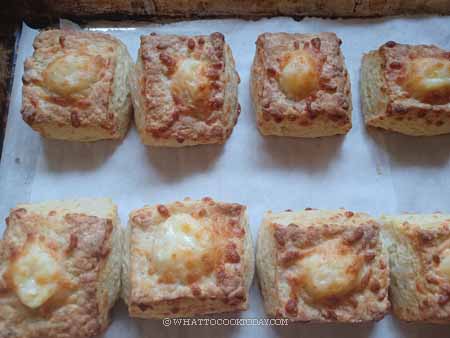
19. Biscuits are best served on the same day they are made. They are so delicious served with an extra pat of butter and honey or jam. We love them plain too!
Important tips for flaky, tender, and tall biscuits
1. Keep all ingredients cold, especially the butter
Cold ingredients are VERY important when it comes to making good biscuits. During baking, these solid pieces of cold butter create layers within the dough. As the biscuits bake, the butter melts and creates steam. This steam gets trapped in between the layers of dough, causing the biscuits to puff up and become flaky. If the butter were at room temperature, it would melt too quickly and not create the desired layers and pockets of air.
2. Use a bench scraper/dough scraper
It’s important to handle the dough with your hands as little as possible. This is to prevent warming up the butter too much and also to avoid overmixing the dough. Biscuit dough is supposed to be dry and shaggy. You want to cut and fold using a bench scraper to make the dough
3. Cut and fold
The beautiful multiple flaky layers are created by cutting and folding/stacking the dough using a bench knife. Almost like making a croissant, but 100 times easier!
4. Get a clean cut
Use a biscuit cutter to cut the biscuit. You need to make sure you push the cutter down and lift it up. DO NOT twist the cutter. When you twist, you seal the edges and this prevents the biscuit from rising
5. Make an indentation in the middle
This little tip is truly a life-changing one. I have made many many biscuits and most of the time, my biscuits would tip to the left or right during baking. My making indentation in the center of the dough, prevents the tipping. What a clever idea!
6. Do not overbake
Overbaking will dry out the biscuits and make them tough. So, make sure your oven is accurate and monitor them closely

How to store leftover biscuits and reheating them
They are best served on the same day they are made, but if you have leftovers, store them in an air-tight container and they can be kept at room temperature for 2-3 days. Simply reheat at 350 F (180 C) for 3-5 minutes in an oven or 300 F (160 C) for 3-5 minutes in air fryer. To reheat in the microwave, wrap them in a damp paper towel and microwave on high for 15-20 seconds or until just warm through
Did you make this flaky sourdough discard buttermilk cheddar biscuits recipe?
I love it when you guys snap a photo and tag it to show me what you’ve made. Simply tag me @WhatToCookToday #WhatToCookToday on Instagram and I’ll be sure to stop by and take a peek for real!


