This post may contain affiliate links. Please read our disclosure policy.
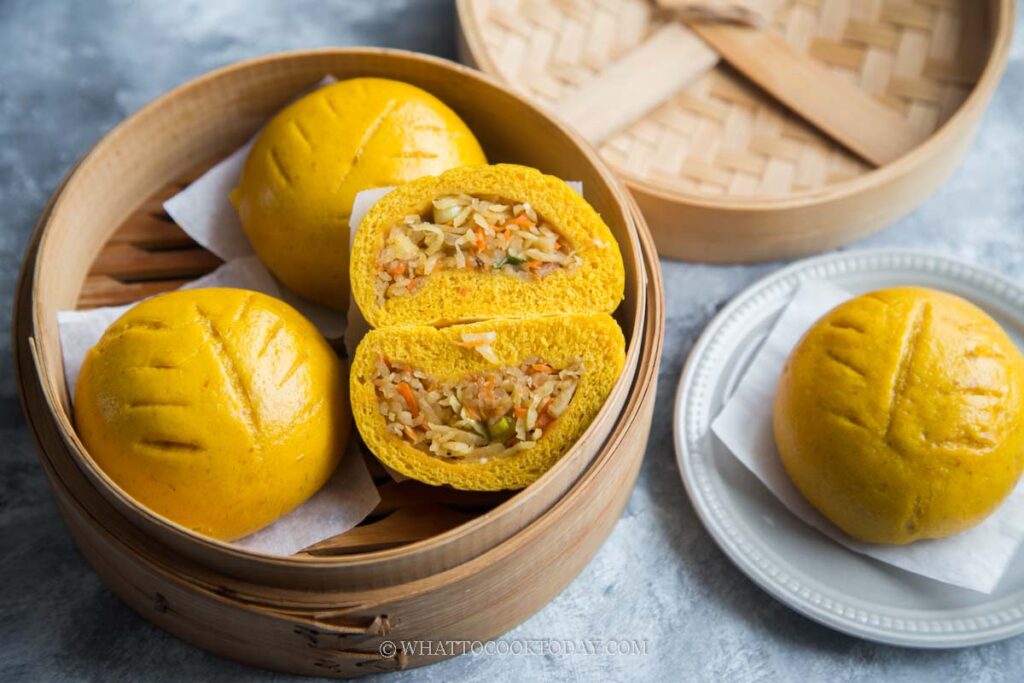
Make these delicious, soft fluffy steamed buns with natural color from pumpkin puree and filled with savory and umami jicama/yam bean filling.

Pumpkin season is in full swing now and you see recipes featuring pumpkin everywhere. I usually buy canned pumpkin puree and keep it in stock because I just like to make bread, steamed buns, or cake or kueh with it. I love to eat them too. They are healthy and nutritious. This time around, I decided to make pumpkin bao filled with savory yam bean filling.
What are yam beans ?
Yam beans, also known as jicama (pronounced hee-kah-ma), are crisp, sweet, and starchy tuberous vegetables. They belong to the legume family, Fabaceae, and are native to Mexico, although they are now cultivated in many parts of the world. In some parts of Asia, they are more commonly called yam beans. The taste is often described as mildly sweet and refreshing, with a texture similar to a water chestnut or pear. I love to use yam beans in savory filling for buns like this.
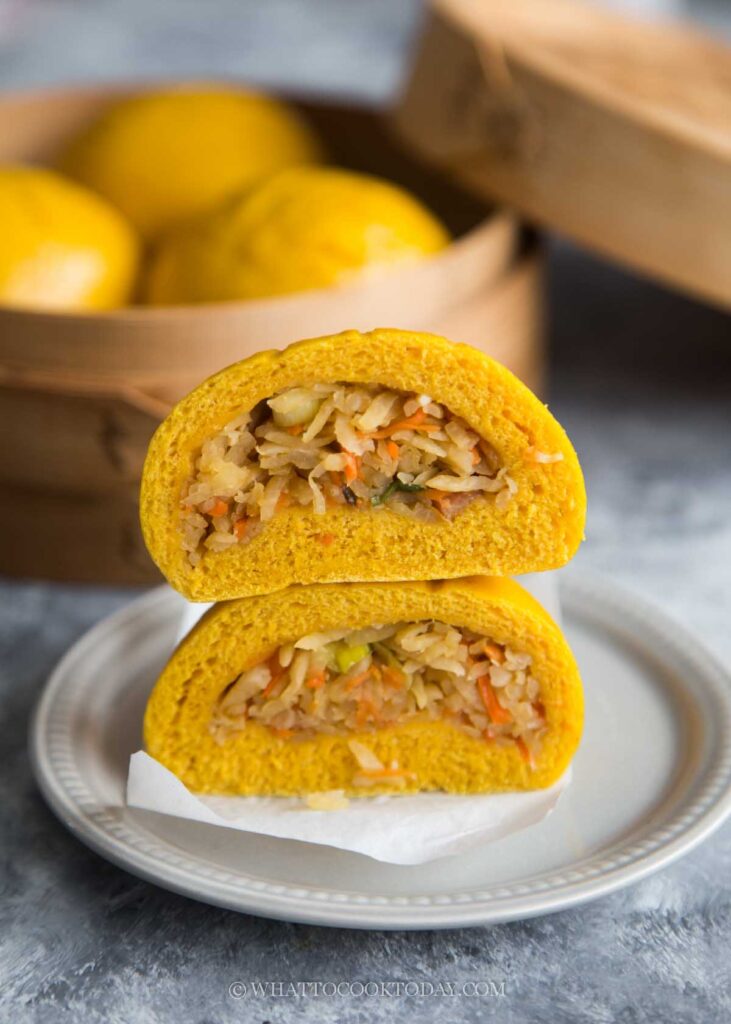
Steamed Pumpkin Bao Buns (with Jicama/Yam Bean Filling)
Ingredients
Steamed buns dough:
- 180 g all-purpose flour plus more for dusting
- 180 g cake flour plus more as needed
- 1 ¼ tsp instant yeast
- 15 g sugar
- 1 Tbsp cooking oil
- ½ tsp salt
- 200 g pumpkin puree
- Water as needed
Filling:
- 250 g jicama/yam bean shredded
- 50 g carrots shredded
- 3 cloves garlic minced
- 20 g dried shrimp soaked, finely chopped
- 1 Tbsp cooking oil
- 2 Tbsp Crispy fried shallots / bawang goreng
- 1 stalk green onion finely chopped
Seasonings: (adjust to your taste preference)
- 1 tsp soy sauce
- 1 Tbsp oyster sauce
- ½ tsp salt or more to taste
- ½ tsp sugar
- ¼ tsp ground white pepper
Instructions
Prepare the filling: (can be done the day before and keep in the fridge)
- Preheat a large wok or skillet over medium heat. Add cooking oil. Add garlic and saute for about 10 seconds. Add dried shrimp and stir fry until fragrant, about 2-3 minutes. Add the yam bean, carrots and seasonings. Saute until the beans and carrots are soft. Cook until the filling is dry an no longer soupy. Have a taste and adjust seasonings to your preference. Off the heat
- Add the crispy fried shallots and green onion (if using). Toss to combine. Let the filling cool down completely before wrapping
Prepare the dough:
- Place all the ingredients for the dough in a mixing bowl of a standmixer fitted with a dough hook attachment. If it feels dry, add water, 1 teaspoon at a time. How much water needed really depends on the pumpkin puree. I used canned pumpkin puree, which has less water. If you use homemade pumpkin puree, you may not need to add additional water. If the dough feels too wet, add a bit more cake flour as needed, one tablespoon at a time. The dough should feel soft and just slightly sticky to the touch. Knead on medium speed until the dough is smooth.
- Cover and rest the dough for 10 minutes. This is not to proof the dough. It shouldn't double in size. This is to relax the gluten for easier shaping and rolling the dough
Wrapping:
- Divide the dough into 10 equal portions. Lightly dust the work surface with some flour. Flatten the dough with your palm and then use a rolling pin to roll it out to form a circle about 4-5 inches, with a slightly thicker middle part. This is to support the weight of the filling. Don't roll the dough too thin. If you roll the dough too thin, the filling might make the steamed buns "wrinkle" later when you steam
- Scoop about 1-2 Tbsp of the filling onto the middle of the dough. Gather the sides to enclose the bun and pinch to seal the buns. This can be the pattern for the bun or if you flip the bun so the seam side is down, you will just have a smooth round steamed buns
- Cup the dough with both palms and move the dough in a circular motion to shape it taller. This part is important so your steamed buns come out tall instead of spreading to the side after steaming
Proofing:
- Let the dough rise at room temperature or at a warm place. If it's winter where you are, you can use your oven "bread proof" function to let them proof in there, or simply turn on your oven to the lowest temperature and then turn off and after 15 minutes, place the shaped buns in there to let them proof. They won't necessarily double in size, but at least puff up to about 50% of the original size. This may take about 1 hour or longer at a warm temperature. Don't go by the time however. Observe the dough instead!
- How do you know if your buns have proofed ? They will be about 50% bigger than their original size AND when you lift them up, they should feel significantly lighter. If not, let them proof a bit longer. They may not visually look bigger. Use a finger test too. When you gently push on the dough, it will leave an indentation but it will spring back slowly. This dough is perfectly proofed. If it springs back right away, it needs to be proofed a bit longer. If it never springs back, then you have over-proofed the dough. Loosely cover them with plastic wrap and put the over-proofed buns in the fridge to slow down the proofing while waiting for the steamer
- An under proofed buns will be very dense and have bumpy surface after steaming. An over proofed buns may widen to the side and much flatter, but they shouldn't be dense and heavy. So, overproof may still be a bit "safer" compared to the buns not sufficiently proofed. Ideally, we want it to be perfectly proofed of course
Steaming:
- Fill up the steamer with water but do not turn on the stove yet. Carefully arrange the proofed buns in the steamer, giving about 2 inches of space in between as they will expand quite a bit. Cover with a lid wrapped with a cloth to prevent condensation from dropping on the surface of the buns. If you use a bamboo steamer, you don't need to wrap the lid as bamboo steamer absorbs liquid
- Please note that I use the largest burner on my stove. Different sizes of burners will produce different amount of heat, so use your largest burner. TURN THE HEAT TO MEDIUM (6/10)
- When the water comes to a simmer, crack the lid open about 1/2 inch gap and start the timer. Steam with the lid cracked open like that for 15 minutes for large buns, about 10 minutes for medium buns
- After steaming, turn off the heat. DO NOT OPEN THE LID of the steamer. Let the buns sit there for 3 minutes. The buns will not sink or wrinkle due to the sudden change in temperature
- Proceed with the next batch and steam with the same method and setting as I mentioned above. You don't have to wait for the water in the steamer to cool down to start. Just turn on the stove to medium heat, crack the lid open immediately and the time starts when water is back to a simmer again
Serving:
- Serve them warm or immediately remove the buns to wire rack to let them cool down. This is to ensure the bottom of the steamed buns will not be wet and soggy
- If you make extra and plan to store them, let the already steamed buns cool down completely and then place them on a baking sheet, not touching each other, and then put the entire tray inside the freezer for about 1 hour. They will harden, but not completely frozen yet. Transfer to a freezer bag and they will not stick to each other anymore. Try not to keep for more than 1 month
- Simply reheat in the steamer before serving. If frozen, steam over medium heat for 12-15 minutes or until heated through. The timing depends on the size of the buns and whether or not you have a filling inside. You can also partially thaw them by letting them sit at room temperature for about 30 minutes and then steam them on medium heat for about 10 minutes or until heated through
*Nutrition facts are just estimates and calculated using online tools*

How to make steamed pumpkin bao buns (with Jicama/Yam Bean Filling)
1. Prepare the filling: Preheat a large wok or skillet over medium heat. Add cooking oil. Add garlic and saute for about 10 seconds. Add dried shrimp and stir fry until fragrant, about 2-3 minutes.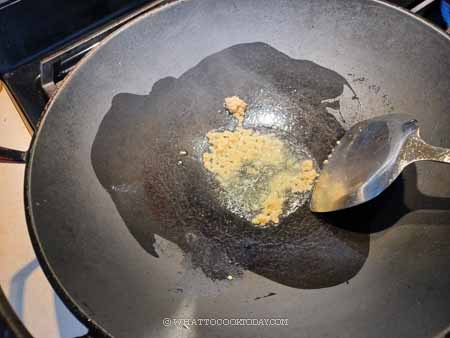
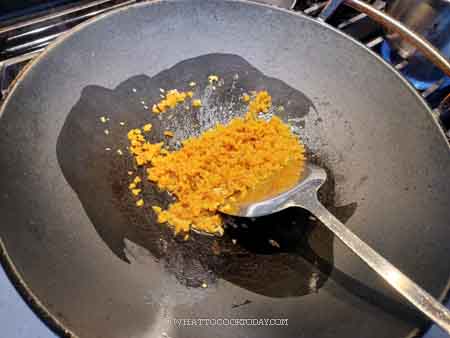
2. Add the yam bean, carrots and seasonings. Saute until the beans and carrots are soft. Cook until the filling is dry an no longer soupy. Have a taste and adjust seasonings to your preference. Off the heat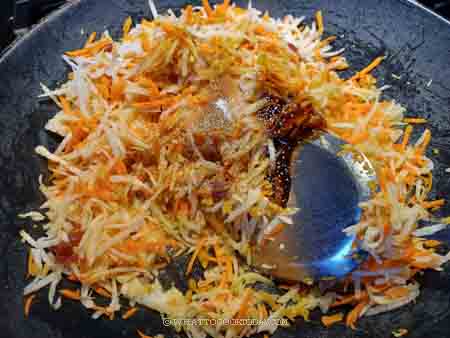
3. Add the crispy fried shallots and green onion (if using). Toss to combine. Let the filling cool down completely before wrapping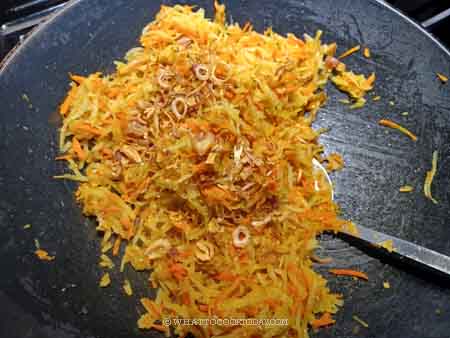
4. Prepare the dough. Place all the ingredients for the dough in a mixing bowl of a standmixer fitted with a dough hook attachment. If it feels dry, add water, 1 teaspoon at a time. How much water is needed really depends on the pumpkin puree. I used canned pumpkin puree, which has less water. If you use homemade pumpkin puree, you may not need to add additional water. If the dough feels too wet, add a bit more cake flour as needed, one tablespoon at a time. 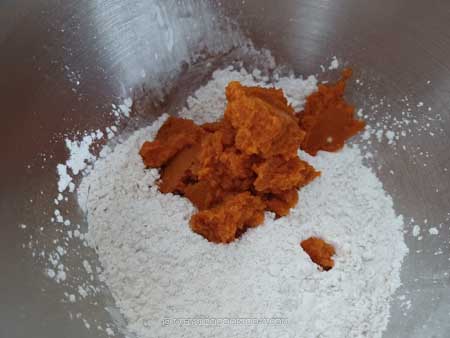
5. The dough should feel soft and just slightly sticky to the touch. Knead on medium speed until the dough is smooth.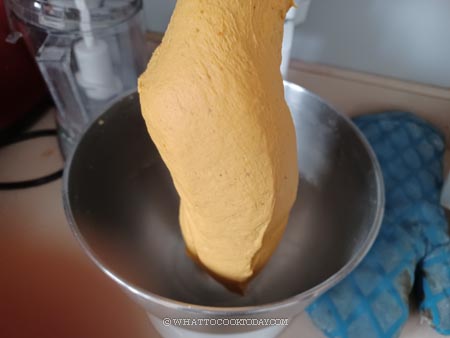
6. Cover and rest the dough for 10 minutes. This is not to proof the dough. It shouldn’t double in size. This is to relax the gluten for easier shaping and rolling the dough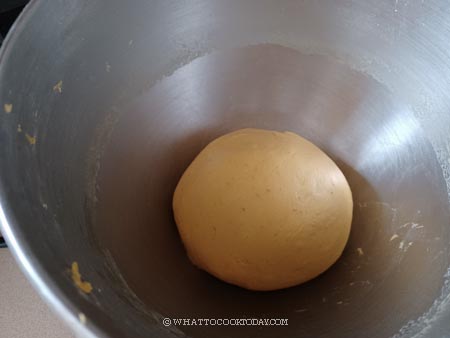
7. Divide the dough into 10 equal portions. Round them up into dough balls. 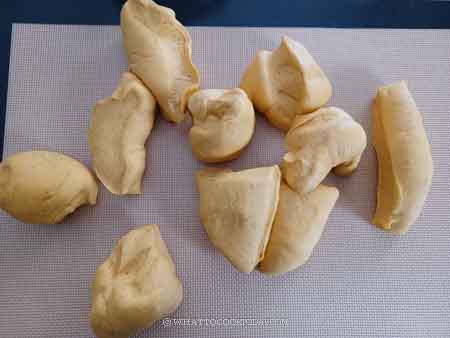
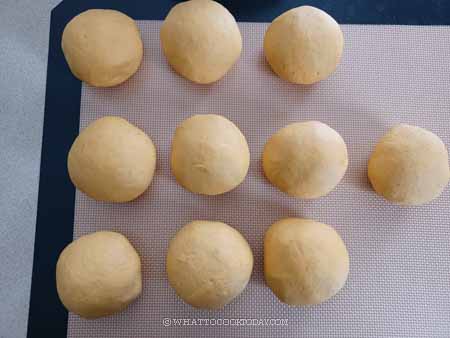
8. Lightly dust the work surface with some flour. Flatten the dough with your palm and then use a rolling pin to roll it out to form a circle about 4-5 inches, with a slightly thicker middle part. This is to support the weight of the filling. Don’t roll the dough too thin. If you roll the dough too thin, the filling might make the steamed buns “wrinkle” later when you steam
Cup the dough with both palms and move the dough in a circular motion to shape it taller. This part is important so your steamed buns come out tall instead of spreading to the side after steaming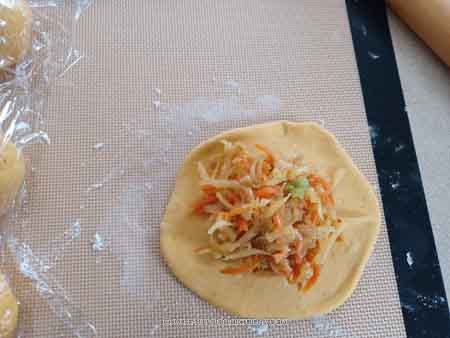
9. Scoop about 1-2 Tbsp of the filling onto the middle of the dough. Gather the sides to enclose the bun and pinch to seal the buns. This can be the pattern for the bun or if you flip the bun so the seam side is down, you will just have smooth round steamed buns. 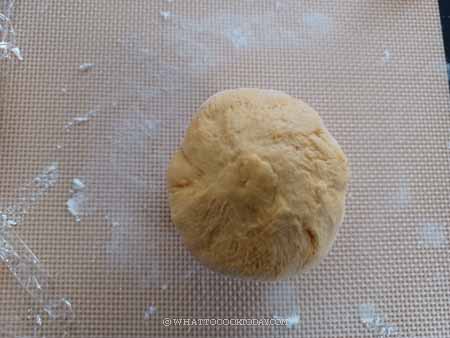
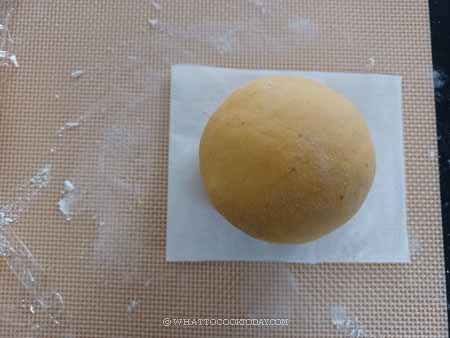
10. Let the dough rise at room temperature or at a warm place. If it’s winter where you are, you can use your oven “bread proof” function to let them proof in there, or simply turn on your oven to the lowest temperature and then turn off and after 15 minutes, place the shaped buns in there to let them proof. They won’t necessarily double in size, but at least puff up to about 50% of the original size. This may take about 1 hour or longer at a warm temperature. Don’t go by the time however. Observe the dough instead!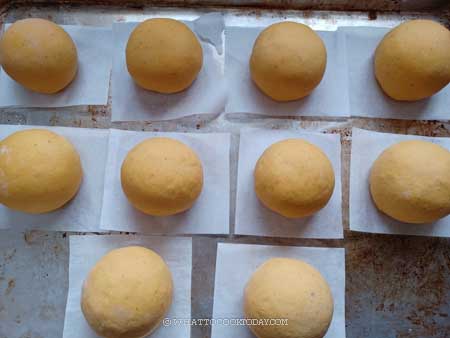
11. How do you know if your buns have proofed ? They will be about 50% bigger than their original size AND when you lift them up, they should feel significantly lighter. If not, let them proof a bit longer. They may not visually look bigger. Use a finger test too. When you gently push on the dough, it will leave an indentation but it will spring back slowly. This dough is perfectly proofed. If it springs back right away, it needs to be proofed a bit longer. If it never springs back, then you have over-proofed the dough. Loosely cover them with plastic wrap and put the over-proofed buns in the fridge to slow down the proofing while waiting for the steamer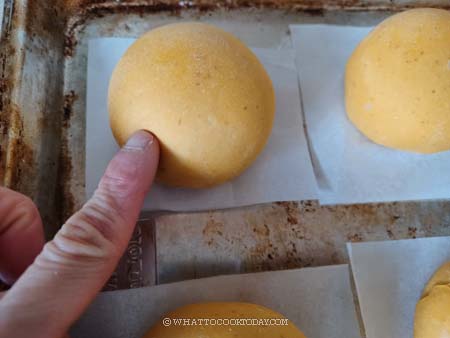
12. Fill up the steamer with water but do not turn on the stove yet. Carefully arrange the proofed buns in the steamer, giving about 2 inches of space in between as they will expand quite a bit. Cover with a lid wrapped with a cloth to prevent condensation from dropping on the surface of the buns. If you use a bamboo steamer, you don’t need to wrap the lid as bamboo steamer absorbs liquid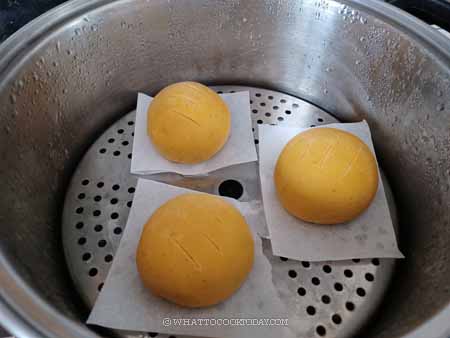
13. Please note that I use the largest burner on my stove. Different sizes of burners will produce different amount of heat, so use your largest burner. TURN THE HEAT TO MEDIUM (6/10). When the water comes to a simmer, crack the lid open about 1/2 inch gap and start the timer. Steam with the lid cracked open like that for 15 minutes for large buns, about 10 minutes for medium buns
14. After steaming, turn off the heat. DO NOT OPEN THE LID of the steamer. Let the buns sit there for 3 minutes. The buns will not sink or wrinkle due to the sudden change in temperature. Proceed with the next batch and steam with the same method and setting as I mentioned above. You don’t have to wait for the water in the steamer to cool down to start. Just turn on the stove to medium heat, crack the lid open immediately and the time starts when water is back to a simmer again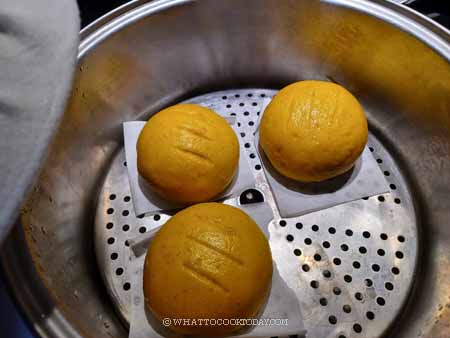
15. Serve them warm or immediately remove the buns to wire rack to let them cool down. This is to ensure the bottom of the steamed buns will not be wet and soggy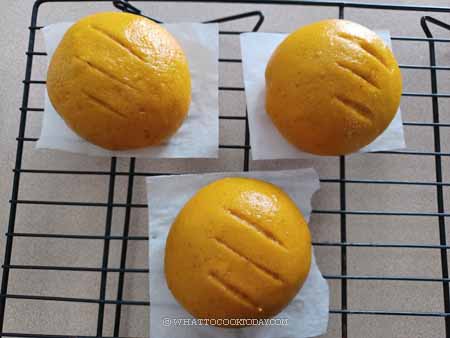
Did you make this steamed pumpki bao buns with savory yam bean/jicama filling recipe?
I love it when you guys snap a photo and tag it to show me what you’ve made. Simply tag me @WhatToCookToday #WhatToCookToday on Instagram and I’ll be sure to stop by and take a peek for real!
