This post may contain affiliate links. Please read our disclosure policy.
Take pain de mie to the next level by making the sourdough version. We love the complex flavor of sourdough bread and this sourdough pain de mie is delicious with soft crumb. This recipe is perfect for a small Pullman pan (9x4x4 inches).

Why you’ll love this recipe
1. Taste and flavor
I say this to my husband each time I bake sourdough bread “I just love the complex flavor a sourdough bread has to offer”. Despite the complex flavor, the bread is not overly sour because I use a sweet stiff levain that I prepare from my regular liquid starter.
2. Sweet stiff levain to the rescue
Because the pain de mie is enriched with milk, oil, and honey, sweet stiff levain helps shorten the fermentation time without sacrificing the complexity of taste and flavor a sourdough bread has to offer. Using a regular liquid starter takes a long time and gives a very distinct sour taste, which some of you may like. Sweet stiff levain is also known to give bread its soft and shreddy crumbs

Sourdough Pain De Mie/Pullman Bread Loaf
Ingredients
For sweet stiff starter: (peak in 8-10 hours)
- 65 g active starter (100% hydration)
- 195 g bread flour (12.7% protein content)
- 80 g water
- 35 g sugar
Main dough:
- 190 g milk I use 2% milk, plus more as needed
- 250 g bread flour (12.7% protein content) or more as needed
- 8 g salt
- 35 g honey
- 50 g oil
Instructions
- If you are looking for a yeast version of pain de mie, check this no-knead pain de mie recipe out
- I use a small Pullman loaf pan that measures 9 x 4 x 4 inch. For recipe adjustment to fit a different loaf pan, please see my post below
Prepare the sweet stiff starter:
- I recommend using a starter that is at least two months old and consistently doubles or triples in 4-6 hours when you feed it at 1:1:1 ratio. Young starter will not give the best result
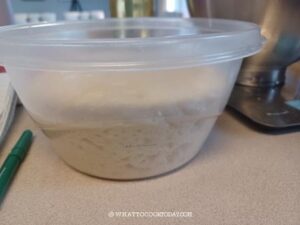
- Combine all ingredients for the sweet stiff starter in a bowl. Stir a bit to roughly combine and then use your clean hand to knead it. This is a stiff starter, it's like a dough. Make sure no pockets of dry flour are visible. Transfer to a large see-through container (plastic or glass is fine, preferably wide-mouth so you can get it out easier later). Loosely cover with the lid and let it ferment until triple in size
Prepare the dough:
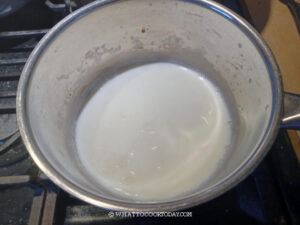
- Put the milk in a saucepan and bring it just until it starts to simmer. Turn off the heat immediately. You don't want to boil the milk. If you have an instant-read thermometer, it should be around 170 F (77 C). Scalding the milk helps to deactivate the whey protein in the milk that interferes with gluten development. Let the milk cool down to lukewarm before using as we don't want to kill the natural yeast

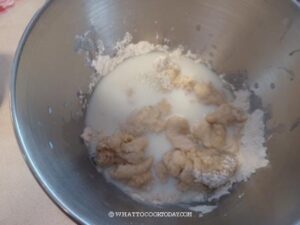
- Place all ingredients and the stiff starter in a mixing bowl of a stand mixer fitted with a dough hook attachment. Use the hook to stir everything around a bit so when you turn the machine on, the flour won't fly around and wet ingredients won't splash

- Start with the lowest speed to mix things up and then increase to speed 2 and knead for about 5 minutes or until it forms a dough. If the dough is too dry to come together, you can add a bit of milk one teaspoon at a time.
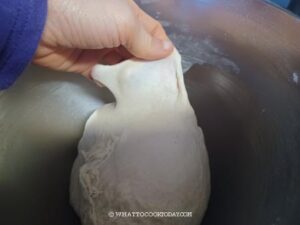
- Knead at speed 4 for about 5-8 minutes or until the dough is smooth and elastic. If you slowly stretch a small amount of dough, it will not break and light can pass through, like a window pane. Proceed to first proofing

First proofing:
- Transfer to a lightly oiled bowl, cover, and proof at a warm place for 2 hours, about 78-82 F (26-28 C), the dough will not double in size. It probably only rises about 25% but that's okay. Sourdough starter is different from using commercial yeast. We are not aiming for the dough to double at this first proofing

Shaping:
- Grease your loaf pan on all sides for easier release after baking
- Deflate the dough by folding the dough towards the center to push all the air out. Round it up into a dough ball, cover and rest for 10 minutes to relax the gluten
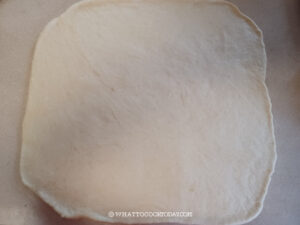
- Lightly dust your work surface. Transfer the dough on it. Use a rolling pin to roll the dough out into a rectangle, roughly about 14 x 10 inches

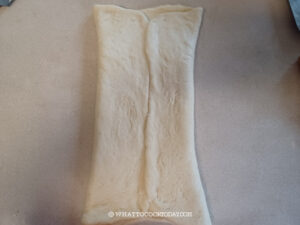
- Fold both sides (shorter side) to meet at the center

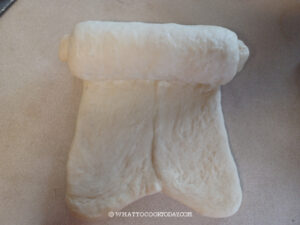
- Then roll tightly into a log, roughly about as long as the pan. Pinch the dough to seal each time you roll to create tension and to make it tight. Push out as much air as you can to prevent big holes in the crumbs later

Final proof:
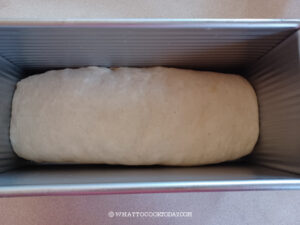
- Place the log inside the loaf pan. Push the dough down to fit the pan and to even out the dough.

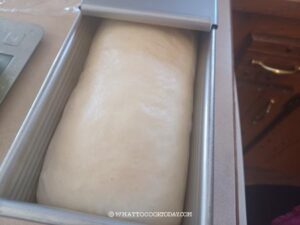
- Cover and let the dough proof until it is about 1-inch below the rim if you plan to use the lid with your Pullman pan. Slide the cover close

- If you use 9 x 5 inch loaf pan, proof until the dough is about 1-inch above the rim
- The final proof may take somewhere around 3-4 hours at 78-80 F (26-27 C). Mine usually takes about 3- 3 1/2 hours at the mentioned temperature
Baking:
- 10 minutes before the end of final proofing, preheat the oven to 375 F (190C) for conventional oven, 350 F (180 C) for convection oven
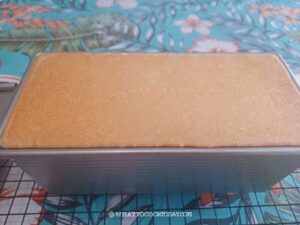
- Put the pan in the oven's middle rack. Bake for 30 minutes if you use Pullman pan with the lid, then open the lid and bake for another 5 minutes. If you bake it in a regular pan, bake for 25-30 minutes or until the top is golden brown. Tent the loaf with aluminum foil if it gets dark before the end of cooking time. The internal temperature at the center of the bread should be at least 190 F (88 C)

Cooling:
- Gently wiggle the bread out of the pan and let it cool off on a cooling rack completely before slicing the bread
Storing:
- Let the bread cool down completely. You can keep them in an air-tight container for 3 days. They can also be kept frozen for up to 1 month in the freezer
*Nutrition facts are just estimates and calculated using online tools*
How to adjust the recipe for different pan sizes
If this is your first time making this recipe with Pullman loaf pan, I suggest baking without the lid first to figure out how the dough fills the pan after baking. The type of flour you use and hydration affect how much the dough rises too.
1. For 8.5 x 4.5 x 2.6 inches loaf pan, you can 0.73 x the recipe
2. For 9 x 5 x 2.75 inches loaf pan, you can 0.87 x the recipe
3. For Asian small Pullman loaf pan 7.5 x 4 x 4.4 loaf pan, you can 0.92x the recipe
4. For large Pullman loaf pan 13 x 4 x 4 inches loaf pan from USA Pan, you can 1.2 x the recipe

Can I bake pain de mie without a sourdough starter?
Of course you can, you can use this no-knead small pain de mie recipe. It uses commercial yeast. You can also try this wholemeal/whole wheat pain de mie recipe. You can also make sourdough wholemeal/wholewheat pain de mie too.
Did you make this sourdough pain de mie recipe?
I love it when you guys snap a photo and tag it to show me what you’ve made. Simply tag me @WhatToCookToday #WhatToCookToday on Instagram and I’ll be sure to stop by and take a peek for real!



2 comments
in this sourdough recipe can buttermilk be substituted and will it require scalding? planning to use my new pans soon.
Hi Mike, yes, you can use buttermilk but I’m still suggesting the you scald it first. It still has whey protein that interfere with gluten development.