This post may contain affiliate links. Please read our disclosure policy.
These Peach Blossom Mooncake Pastries are delicate, flaky, and filled with sweet bean or seed paste. Shaped into pretty flower designs, they’re a stunning way to celebrate the Mid-Autumn Festival and make a thoughtful homemade gift.
Mooncake season is one of my favorite times of the year. Besides the traditional baked mooncakes, snow skin mooncakes, and thousand-layer pastry mooncakes, there are also beautiful flaky flower pastry mooncakes. One of the prettiest versions is the Peach Blossom Mooncake Pastry. These delicate pastries have thin, crisp layers that flake apart when you bite into them, and the inside is filled with sweet bean paste or nut/seed paste. Shaped into peach blossoms (sometimes chrysanthemums too), they look like little edible works of art—perfect for celebrating the Mid-Autumn Festival.
In Chinese culture, the peach blossom is a powerful symbol of love, vitality, and renewal. During the Lunar New Year, peach blossoms are often displayed to bring good fortune and prosperity. So, shaping mooncakes into peach blossoms not only makes them gorgeous but also meaningful—something you’d be proud to share with family or gift to friends.
Why You’ll Like This Recipe
- The doughs are easy to work with
- Flaky and crisp layers – The pastry is made with both an oil dough and a water dough, creating those irresistible layers.
- Beautiful presentation – The flower shape looks impressive, but it’s not as complicated as it seems.
- Customizable filling – You can use red bean paste, lotus seed paste, mung bean paste for the filling
- Perfect for gifting – These pastries stay fresh for days and make such an elegant homemade mooncake gift.
Ingredients and Substitutions
- All-purpose flour – I use unbleached all-purpose flour
- Fat – Lard is traditional and makes the flakiest pastry, but I use unsalted butter for this recipe
- Powdered sugar – Helps tenderize the dough and adds a light sweetness.
- Cold water – Keeps the water dough easy to handle and prevents stickiness.
- Food coloring (optional) – Use gel food coloring and avoid water-based food coloring. A touch of pink or red makes the peach blossom petals stand out.
- Filling – Any Asian-style sweet bean paste or seed paste works well here.
Frequently Asked Questions
- Can I make these without food coloring?
Yes! They’ll still look beautiful in their natural golden-brown shade. - Can I make the dough in advance?
Absolutely. You can prepare both the water dough and oil dough, wrap them tightly or they may dry out, and refrigerate them overnight. Let them come to room temperature before shaping. - Can I use store-bought filling?
Yes. Store-bought bean or seed paste works fine, but keep in mind they’re usually sweeter. - Why does my pastry crack?
Usually, it’s caused by over-rolling or not resting the dough long enough. Ensure the dough relaxes between folds.
These Peach Blossom Mooncake Pastries are not just delicious, but also carry beautiful cultural symbolism. The flaky layers, sweet filling, and flower shape make them extra special for Mid-Autumn Festival. If you’re looking for a mooncake recipe that’s both traditional and eye-catching, give these a try.
This 3-D flower mooncake is one of my favorite ones to make.
Peach Blossom Mooncake Pastry
Ingredients
Water dough:
- 114 g all-purpose flour
- 23 g powdered sugar
- 2 g salt
- 43 g unsalted butter softened
- 36 g water or more as needed
Oil dough:
- 74 g all-purpose flour
- 50 g unsalted butter softened
- Gel food coloring
Filling:
- 300 g lotus seed paste
Instructions
The filling:
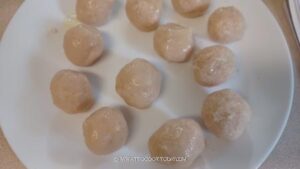
- You can use red bean paste, mung bean paste or lotus seed paste as the filling. I use lotus seed paste and portion into 25 grams dough balls and keep them covered in the fridge until they are ready to be used
Prepare water dough:
- Add flour, sugar, and salt to a mixing bowl. Whisk to mix together. Add the softened butter.
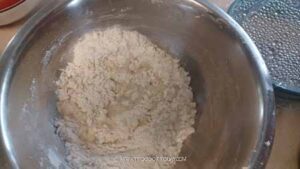
- Use your hands to rub the butter into the flour mixture. It would resemble some coarse crumbs. Add the water and gently knead into the dough. You may need more water or you may not.
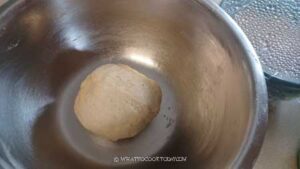
- The dough is not going to be smooth but it should be soft. Your bowl should be clean.
- Wrap with a cling wrap and set aside to let it rest for 15 minutes
Prepare the oil dough:
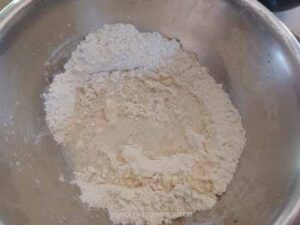
- Add flour and softened butter to the same mixing bowl.
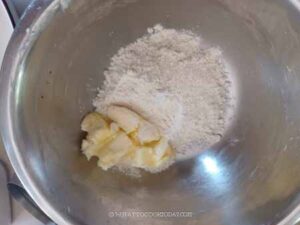
- Use your hands to rub the butter into the flour until you can form a non-sticky dough. This dough has no gluten development because there's no water.
- Divide into two equal pieces and put gel-food coloring on each one

- Knead it to distribute the colors evenly
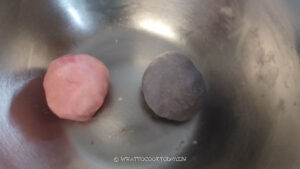
- Divide each color into 6 pieces
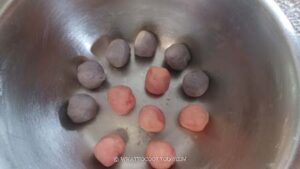
- Then each piece into another two, so you get a total of 24 (12 for each color). Put one purple and one pink together. You have 12 pieces total
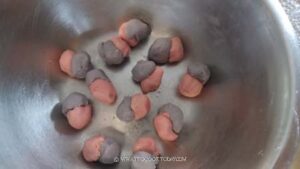
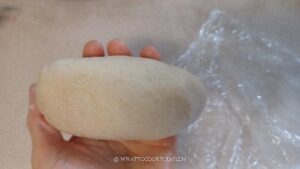
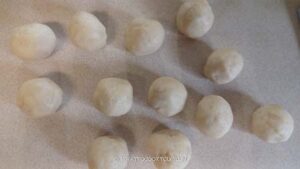
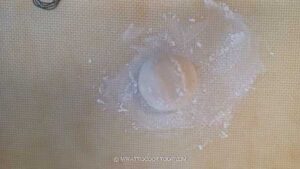
- After resting the water dough, divide into 12 pieces (about 18 grams each). Round each one into a dough ball. Lightly dust your work surface with a bit of flour if necessary
Put the two doughs together:
- Line a large baking sheet with parchment paper. Preheat oven at 350 F (180 C). I have a conventional oven with bottom heat only. If your oven has both bottom and top heat, you may want to lower the temperature by 15 C/ 20 F
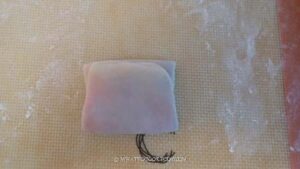
- Lightly flour your work surface. Take one water dough and flatten it into a round with your palm and use a rolling pin to roll from center to the edge to form a disc, about 3 inches. Put the the colored oil dough on top
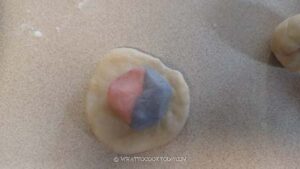
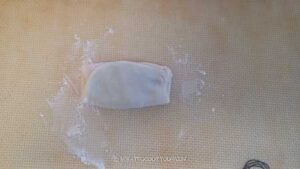
- Wrap the water dough around it.
- Pinch the seam to seal tightly and roll it between your palm to form a nice round dough ball
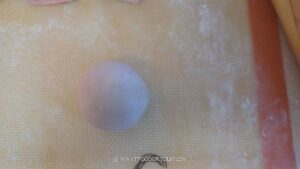
- Repeat with the rest. Cover them with a cling wrap
Shaping:
- Lightly flour your work surface and work with one dough at a time and keep the rest covered
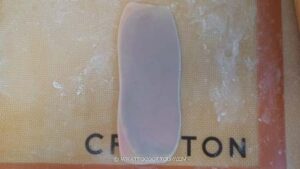
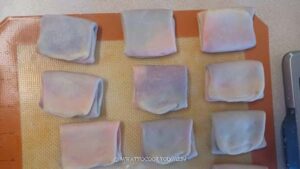
- Roll the dough from the center and outward into an oblong shape, about 5 inches long.

- Fold 1/3 down
- Fold the other 1/3 up
- Repeat with the rest of the dough
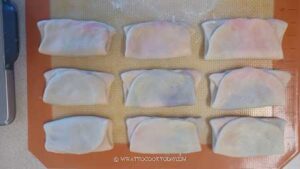
- Rotate the dough 90 degrees
- roll it out again to about 5-6 inches long (the measurement doesn't have to be super precise here, just roughly)
- Do the same fold again, for 1/3 down, and the other 1/3 up
- Repeat with the rest and keep them covered
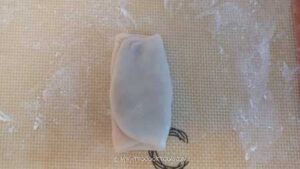
- Use a rolling pin to roll it out from the center and outward to form a circle about 5 inches wide and slightly thicker at the center.
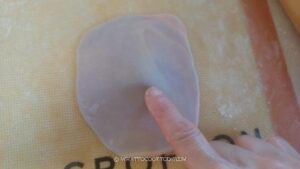
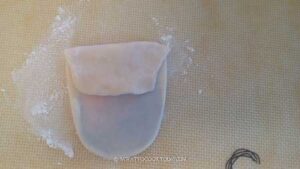
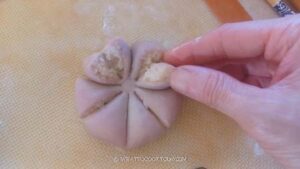
- Place the filling on the center
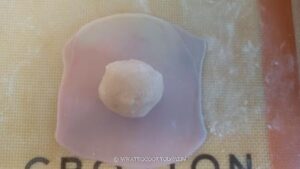
- Gather the dough around it to seal and pinch the seams to seal. Roll it between your palms to form nice round dough balls. Keep them covered all the time to prevent the dough from drying out

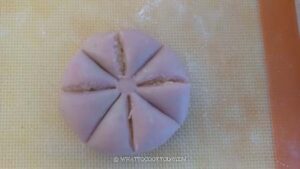
- Take one dough and flatten with your palm or you can use a rolling pin to gently roll it back and forth to form a disc, about 4-5 inches wide
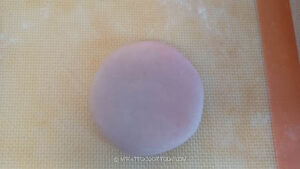
- Use the blunt side of the chopstick to make an indentation at the center of the disc

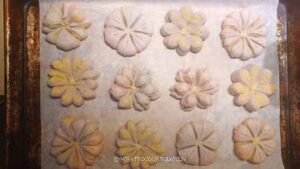
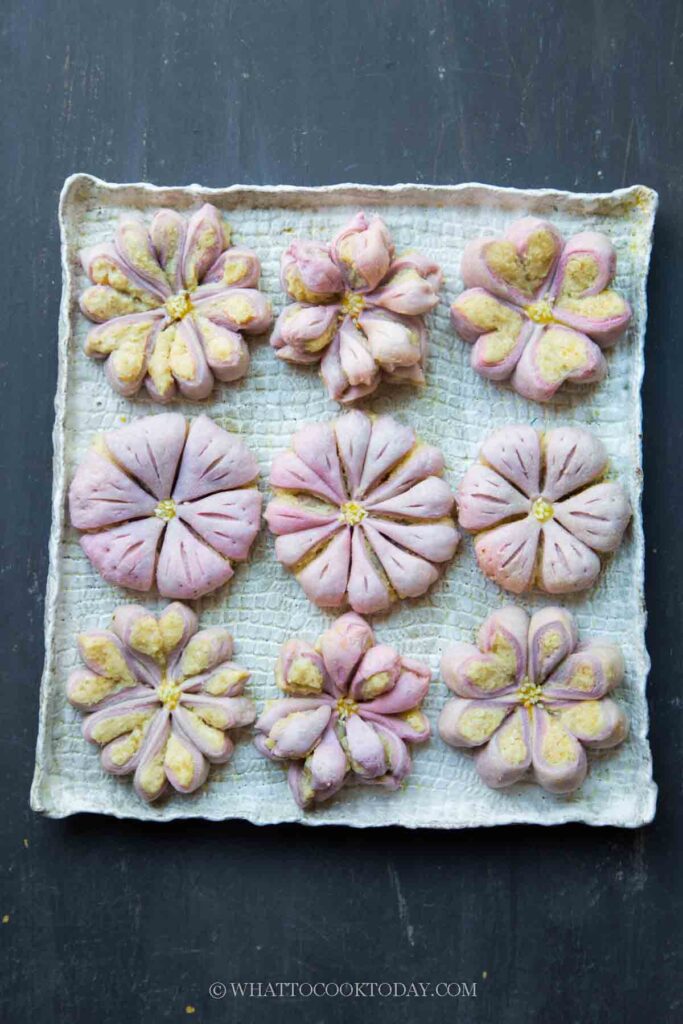
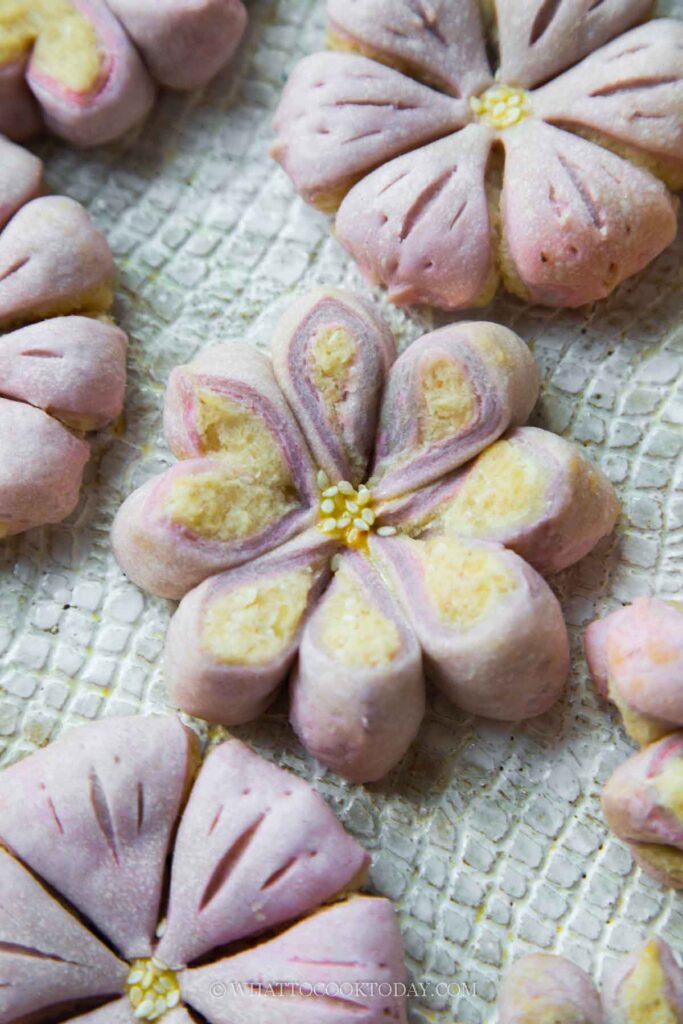
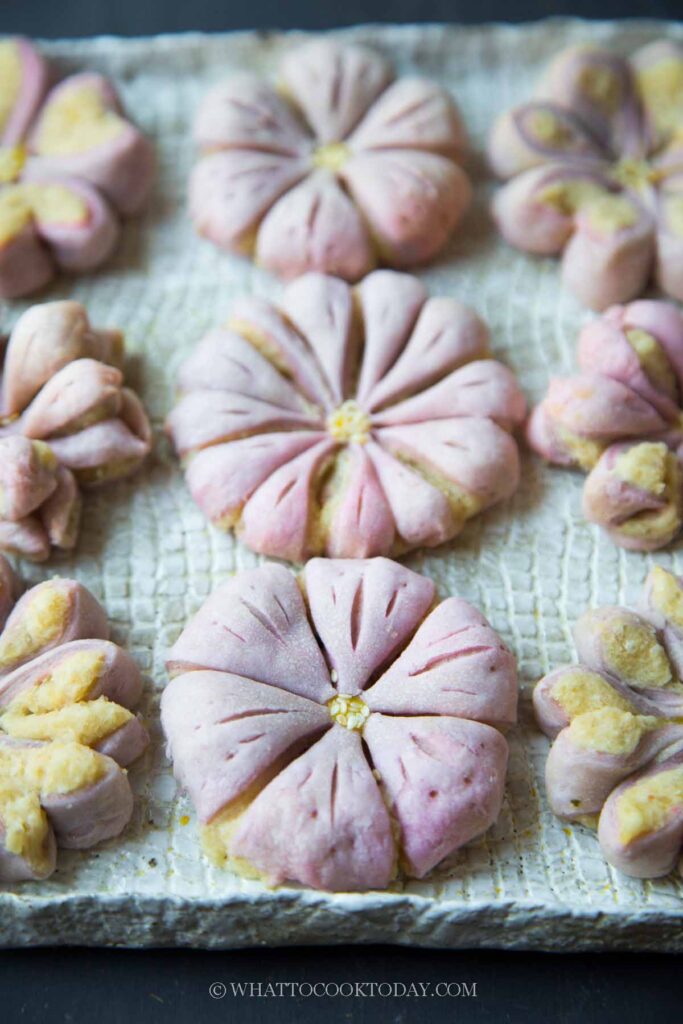
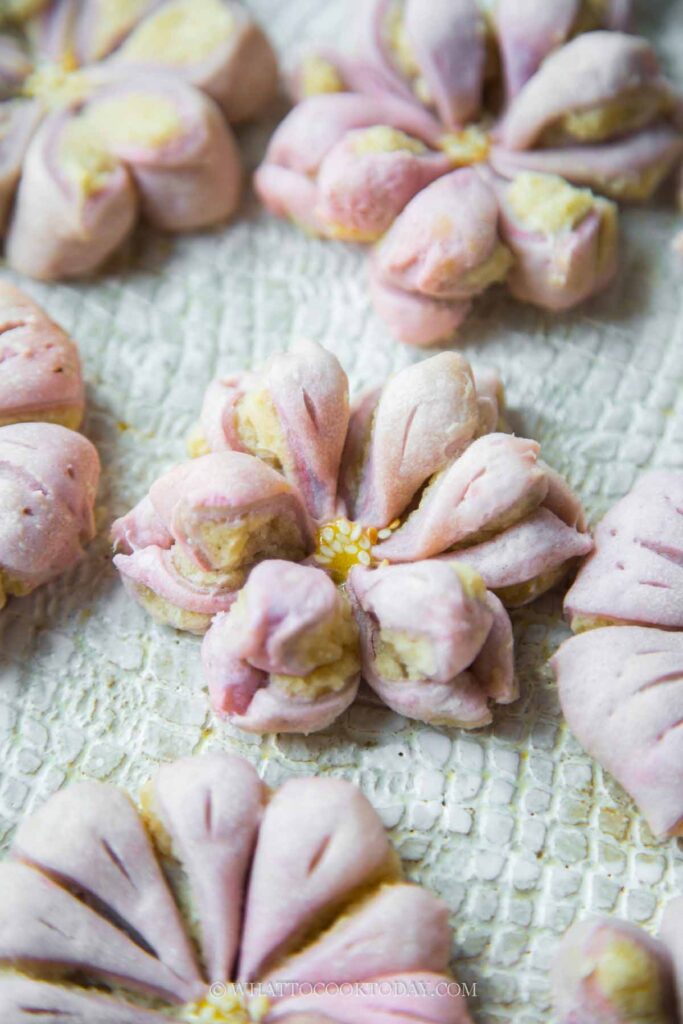
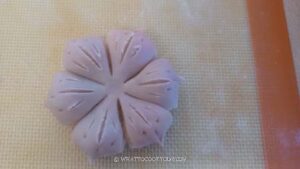
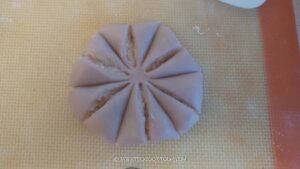
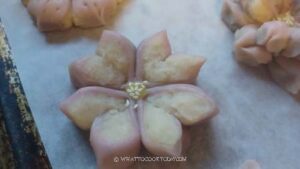
To make the classic peach flower shape:
- This is the classic one that most people make for flower mooncake pastry
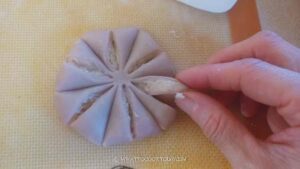
- Use a bench knife or a sharp knife to make 6 cuts, leaving the center uncut. You can also do a 5 petals, 7, 8 petals, or even 12 petals
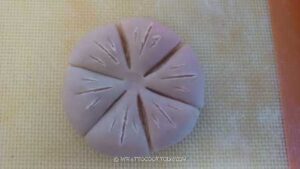
- Use a bread lame or a very sharp razor to make some shallow cuts to create some designs on the petal if you want
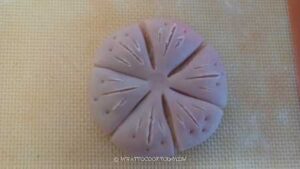
- Use your fingers to pinch the petals to create some shape
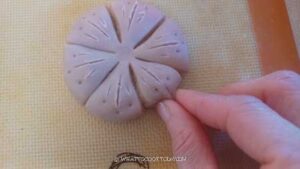
- This is a 6-petals peach flower
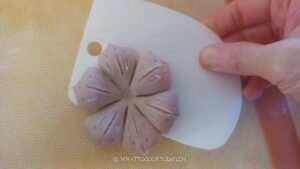
- Use a bench scraper/knife to help you pick up the pastry and put on a baking sheet lined with parchment paper
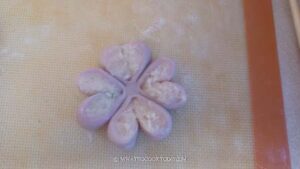
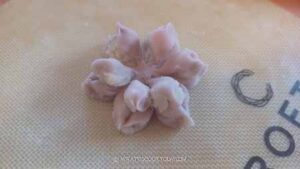
For heart shape:
- Use a bench knife or a sharp knife to make 8 cuts, leaving the center uncut.
- Gently twist each petal to face upward, revealing the filling
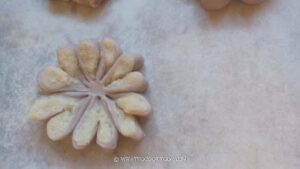
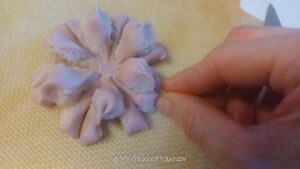
For chrysantemum:
- Use a bench knife or a sharp knife to make 12 cuts, leaving the center uncut.
- Twist each petal to face upward, revealing the filling
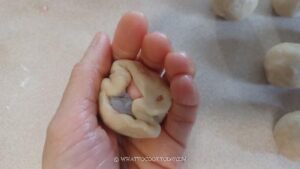
For 3D flower shape:
- Use a bench knife or a sharp knife to make 12 cuts, leaving the center uncut.

- Make another cut on EVERY OTHER PETAL, so you skip one petal, cut the next one into two, skip the next one, cut the next one. You get the idea I hope!
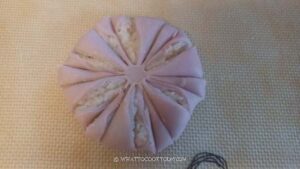
- Bring the uncut petal up, and pinch the petals on its left and right together
- So I make 4 different shapes for the 12 mooncakes
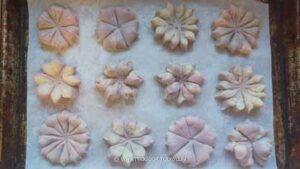
- Put a bit of egg yolk at the center of the flower and sprinkle with some white and/or black sesame seeds
Baking:
- Put the baking sheet in the oven, middle rack and bake for 22 minutes.
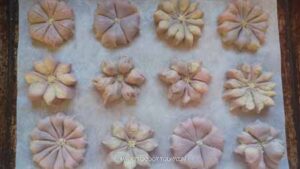
- Remove from the oven and let them cool down completely on the pan. Each petal is fragile if you handle the pastry too early when they are still warm