This post may contain affiliate links. Please read our disclosure policy.
Sweet yam/taro paste is encased in ultra-flaky spiral pastry crust with colorful pastel rainbow colors is both an eye-candy and delicious Teochew spiral yam mooncake you can make at home to celebrate the mooncake festival.

I call it rainbow spiral yam mooncake, but I didn’t actually use 6 different colors. My daughter said I should called it unicorn color instead. Well, rainbow enough for me 🙂 This flaky spiral mooncake is one of my favorite mooncakes. They look more complicated than it actually is. They are much easier to make compared to the traditional Chinese baked mooncake. A while ago I made some thousand-layer spiral mooncakes with red bean paste filling . This time around, I want it with sweet yam/taro filling. It’s one of my favorite fillings for mooncakes and pastries.
How to make Teochew rainbow spiral yam mooncake
Please note that I only made 1/2 recipe in the step-by-step photos.
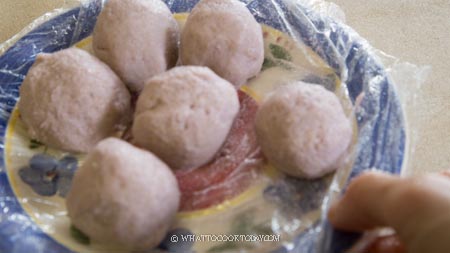
1. Divide the taro paste that has been chilled in the fridge into 12 portions (6 portion in the photos because I only made 1/2 recipe), about 40 grams each. Roll into round balls, covered and keep in the fridge while you prepare the rest
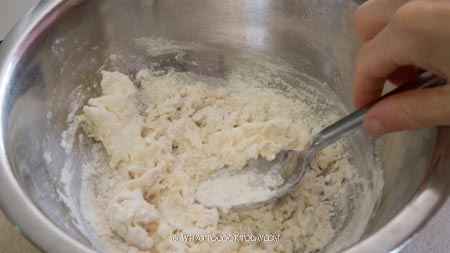
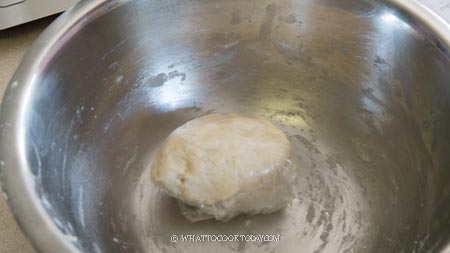
2. Water dough: In a large mixing bowl, mix flour with icing sugar. Rub the shortening into the flour mixture. It will feel crumbly, resembling bread crumbs. Gradually add the water and continue to mix and knead until you form a non-sticky dough. Cover and let it rest for 30 minutes
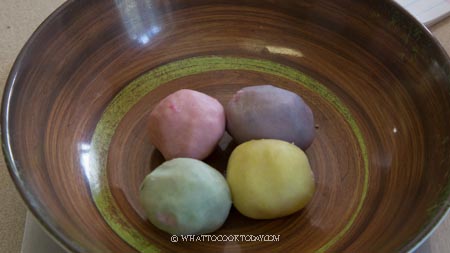
3. Oil dough: Each color will use 25 grams cake flour + 10 grams of butter + food coloring. Rub the butter into the flour until it forms a smooth dough. Add food coloring and knead until the color is even. Cover and let the dough rest for 30 minutes. Repeat with the rest of the flour and butter to make three more doughs with different color.
4. Divide water dough into 6 portions (again, 3 portions for me because I’m doing 1/2 recipe).
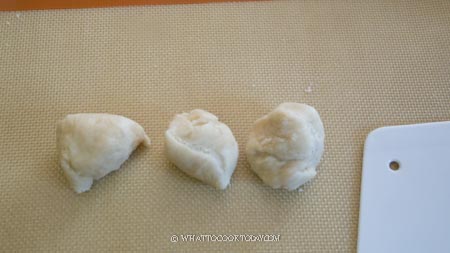
5. Divide the colored dough into 6 portions for each color. So there will be 6 pinks, 6 blues, 6 yellow, 6 purple
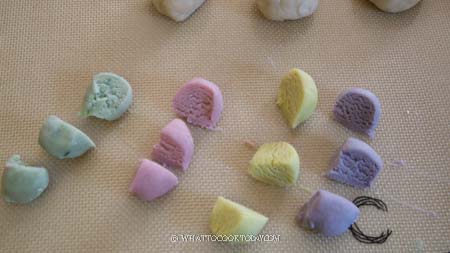
6. Flatten the water dough and roll into a round circle. Place 4 different colors of oil dough on top of the water dough
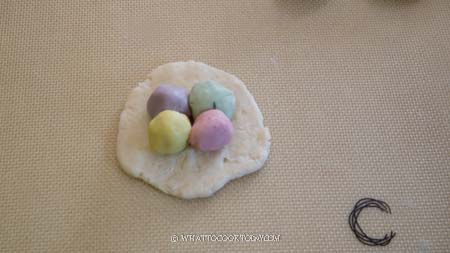
7. Wrap the water dough around the oil dough. So the oil dough is nested inside the water dough now. Repeat with the rest of the doughs
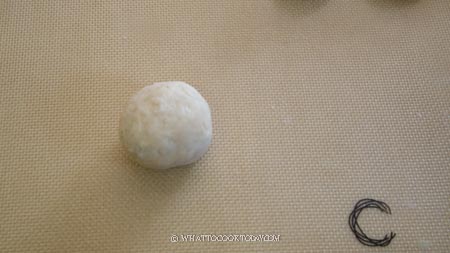
8. Keep them covered and let them rest for 30 minutes
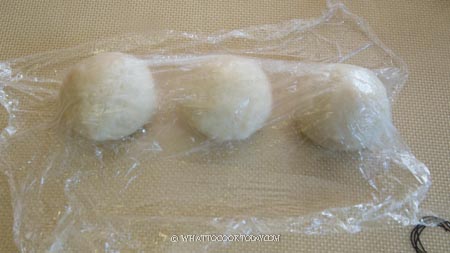
9. Preheat oven to 180 C (350 F). My oven only uses bottom heat. Please adjust accordingly if you use a convection top and bottom heat oven. Work with one dough at a time. Use a rolling pin to roll this dough into a flat oval shape
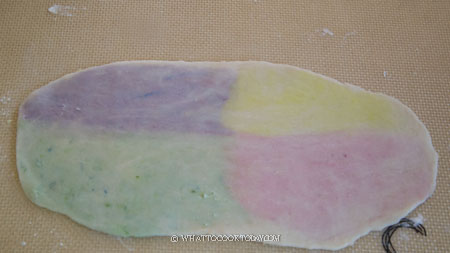
10. Roll it up from the side
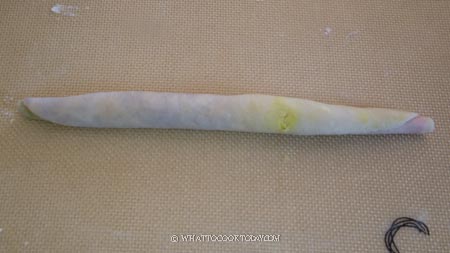
11. Flatten into a long log
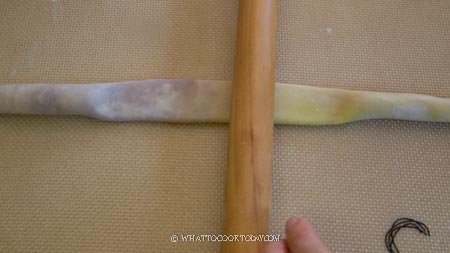
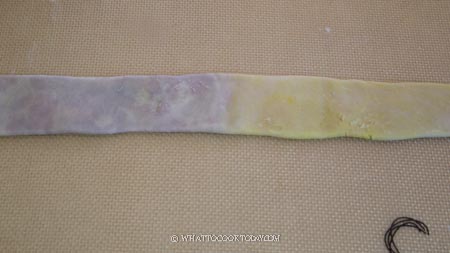
12. Roll it up into a Swiss roll
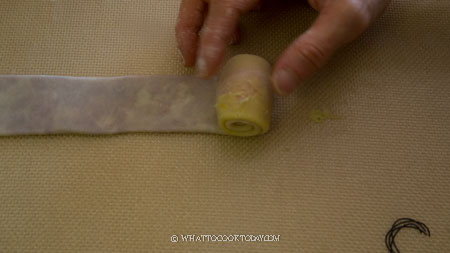
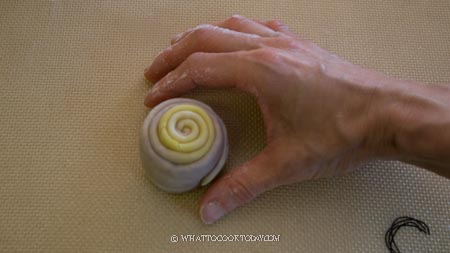
13. Flip to its side and cut into half with a very sharp knife (serrated knife is recommended)
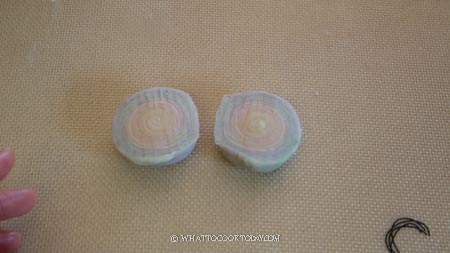
14. Place the cut-side facing down

15. Use a rolling pin to roll it out into a circle, about 7-inch in width and place the filling on top
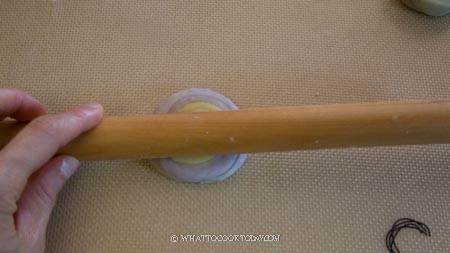

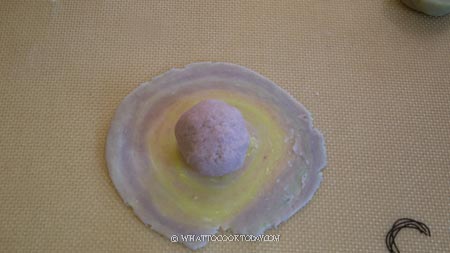
16. Gather the sides to wrap the filling. Pinch to seal at the bottom
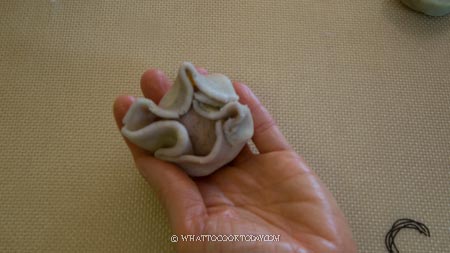
17. When you flip it over, you’ll see the spiral pattern. Place them on a baking sheet lined with parchment paper

18. Place the baking sheet, 3rd rack from the top into the oven and bake for about 20-25 minutes or until the bottom is golden brown. Remove from the oven and let them cool on the baking sheets for 5 minutes and then remove to cooling rack to let them cool down completely

Other sweet filling ideas
You can also fill the mooncake with: mung bean paste, lotus seeds paste, red bean paste
How to store flaky pastry like this
1. Let them cool down completely on a cooling rack
2. If you plan to eat them the next day or two, keep them in paper bag. Push all the air out and fold over. The paper bag can help to retain the crisp and flakiness at least for a day or two
3. For longer storage, put the whole paper bag inside a freezer bag. Push all the air out and seal the bag. They can be kept for up to 3 months in the freezer
4. Thaw them at room temperature and then reheat briefly in the oven or an air-fryer at 350 F for 8-10 minutes or until crisp again

Did you make this Teochew Rainbow Spiral Yam Mooncake recipe?
I love it when you guys snap a photo and tag to show me what you’ve made 🙂 Simply tag me @WhatToCookToday #WhatToCookToday on Instagram and I’ll be sure to stop by and take a peek for real!

The recipe is adapted from here
Teochew Rainbow Spiral Yam Mooncake
Ingredients
Filling:
- 500 gr yam/taro paste
Water dough:
- 110 gr all-purpose flour
- 20 gr icing sugar
- 40 gr shortening or lard
- 50 ml water
- ½ tsp lemon juice
Oil dough (4 colors):
- 100 gr cake flour divided
- 40 gr butter divided
- Color of your choice I use purple, yellow, pink, green
Instructions
- Divide the taro paste that has been chilled in the fridge into 12 portions, about 40 grams each. Roll into round balls, covered and keep in the fridge while you prepare the rest
Prepare the water dough:
- In a large mixing bowl, mix flour with icing sugar. Rub the shortening into the flourmixture. It will feel crumbly, resembling bread crumbs. Gradually add the water and continue to mix and knead until you form a non-sticky dough. Cover and let it rest for 15 minutes
Prepare the oil dough (4 colored doughs):
- Each color will use 25 grams cake flour + 10 grams of butter + food coloring. Rub the butter into the flour until it forms a smooth dough. Add food coloring and knead until the color is even. Cover and let the dough rest for 30 minutes. Repeat with the rest of the flour and butter to make three more doughs with different color.
Shaping:
- Divide water dough into 6 portions. Divide the colored dough into 6 portions for each color. So I have 6 pinks, 6 blues, 6 yellow, 6 purple
- Flatten the water dough and roll into a round circle. Place 4 different colors of oil dough on top of the water dough. Wrap the water dough around the oil dough. So the oil dough is nested inside the water dough now. Repeat with the rest of the doughs. Keep them covered and let them rest for 30 minutes
- Preheat oven to 180 C (350 F). My oven only uses bottom heat. Please adjust accordingly if you use convection top and bottom heat oven
- Work with one dough at a time. Use a rolling pin to roll this dough into a flat oval shape. Roll it up from the side and then flatten into a long log. Roll it up into a Swiss roll. Flip to its side and cut into half with a very sharp knife (serrated knife is recommended)
- Place the cut-side facing down. Use a rolling pin to roll it out into a circle, about 7-inch in width and place the filling on top. Gather the sides to wrap the filling. Pinch to seal at the bottom. When you flip it over, you'll see the spiral pattern. Place them on a baking sheet lined with parchment paper
Baking:
- Place the baking sheet, 3rd rack from the top into the oven and bake for about 20-25 minutes or until the bottom is golden brown. Remove from the oven and let them cool on the baking sheets for 5 minutes and then remove to cooling rack to let them cool down completely
Serving and storing:
- They can be served on the same day after baking, but I feel like they taste better the next day as the flavor has time to develop. They can be kept at room temperature for 2-3 days in an air-tight container or if you want to preserve the flaky crust, store them in a paper bag, fold it over. The crust will soften in the next few days, which is normal. Simply reheat in the oven at 350 F (180 C) for 5 minutes or so and they are as good as new
- They also freeze very well. I wrap each in a cling wrap and then put in a freezer bag, push all the air out and seal the bag. Keep them in the freezer for one month max. When ready to serve, simply thaw at room temperature and you can recrisp it in the oven at 350 F (180 C) for 5 minutes or so



9 comments
hello! can I prepare them filled and unbaked and refrigerate to bake in the week after? if so, do I need to rest them to room temp before baking? or will baking from the fridge be better?
I recommend freezing them instead of refrigerating before baking if it’s going to be a week after. You can keep them frozen unbaked for up to one month. You can put them on a baking pan and put in freezer for about 1 hour to harden and then transfer to freezer bag, push all the air out and seal. When ready to bake, you don’t need to thaw. Bake straight from frozen, don’t thaw. You may need to add a bit extra time.
How do you store this please?
Hi Sarah, I did cover this in the post. Please let me know if you have trouble finding it.
Hello I’ve a question! I made a batch of single coloured ones and some, I could see the swirls clearly but some not so. I guess it’s to do with the rolling technique bit. However my concern is, what causes some to look like the 2 colours have fused? And looking a little blotted at some parts is there a way I can resolve it after rolling? Such as manually trying to ease the blots out?
And is there any implications on the final baked product?
Thanks!:)
Hello, Maybe tried to chill the pastries in the freezer for 30 minutes after you have shaped them? when the butter gets too warm, the layers may fused together.
Sorry my bad,I fail my math haha .correct it’s 12 sorry
Hi April, I hope everything turned out just fine ?
Hi.. I was tying you recipe then I realised 12 taro roll but the dough is for 6.. u mentioned water dough divide in to 6 portion?