This post may contain affiliate links. Please read our disclosure policy.
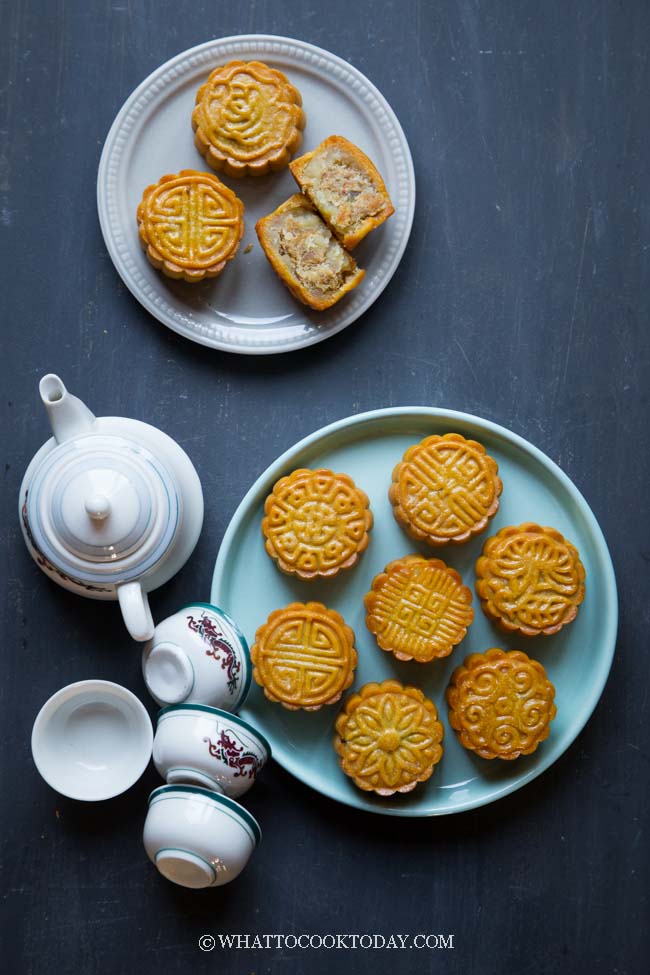
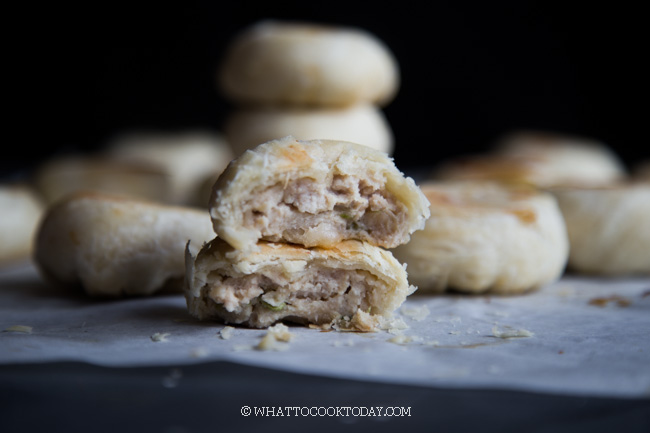
Making traditional Chinese baked mooncakes can be overwhelming but you can do it with this recipe and straightforward steps. I use lotus seed paste, sweet red bean paste, and meat floss for the filling. Accompanied by step-by-step photos and a video so you can make this successfully at home too. You can also make mooncakes without using golden syrup.
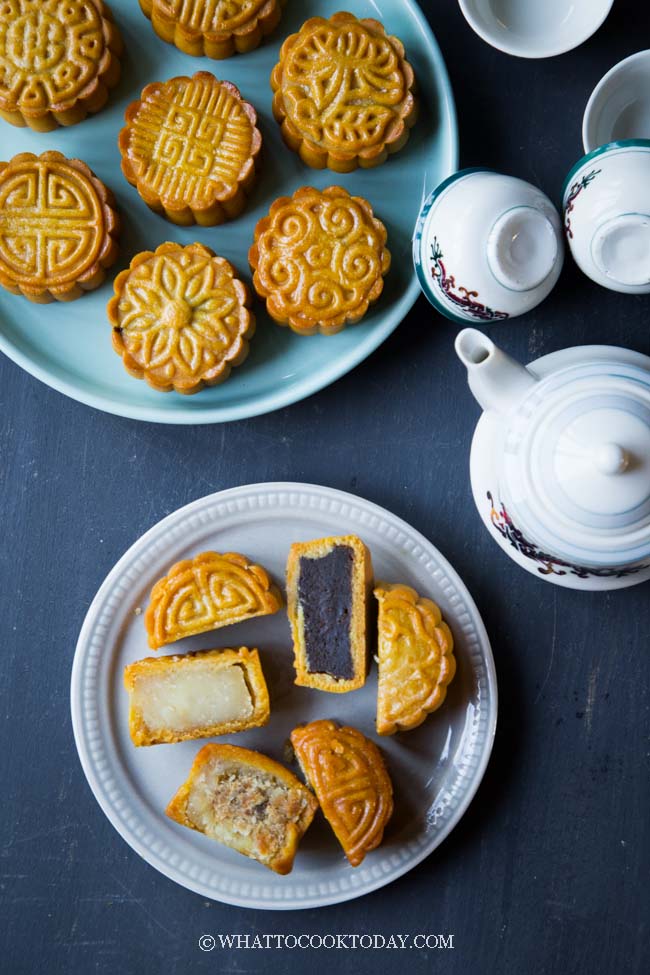
I have tried making Chinese baked mooncakes several times in the past few years and they never turned out good for me. They cracked on the surface and had “waists” 🙁 This year I was determined to get it crossed out of my list and finally I could 🙂
WHY BOTHER MAKING YOUR OWN TRADITIONAL BAKED MOONCAKES?
It does involve a bit of work, but trust me, it’s not complicated. I like homemade baked mooncakes because:
1. I have control over the sweetness of the filling. The store-bought mooncakes are insanely sweet (at least that’s how I feel)
2. We use the best ingredients we can get. Since we are making them for our own consumption, naturally, we want the best for our bodies, don’t we? 😉
3. No other chemicals, preservatives, or additives added. Besides alkaline water, which I won’t recommend omitting at all when it comes to mooncake, we don’t add other chemicals, preservatives or additives. Homemade mooncakes do not last as long as the commercial one that’s for sure
WHY YOU’LL LIKE THIS RECIPE
1. No complicated steps
2. Recipe yields tender mooncake pastry
3. No lard or shortening.
INGREDIENTS
1. CAKE FLOUR
I highly recommend using cake flour instead of regular all-purpose flour as it yields tender mooncakes. You can also make your own cake flour. Here’s how: for 100 grams of cake flour, use 85 grams (3/4 cup) of all-purpose flour and 15 grams (2 Tbsp) of cornstarch
2. ALKALINE WATER (KANSUI)
Like many of you out there, I tried not to use alkaline water in any recipe I possibly can, but for mooncakes, I can’t omit it. I’ve tried in the past not using alkaline water and the result was not good and the mooncakes just wouldn’t bake to golden perfection and it tasted funny (no alkaline to neutralize the acidic golden syrup). What is the purpose of alkaline water in mooncakes you would ask? Alkaline water helps to neutralize the acidity in the golden syrup and it helps to darken the mooncake during baking too.
Can you make your own kansui?
Well, sort of. I did this a while ago while trying to make my own ramen at home. I baked some baking soda. Here’s how:
Spread about 1/2 cup of baking soda on a baking sheet lined with a parchment paper. You will end up with about 1/3 cup or less after baking. Bake in a preheated oven at 350 F (177 C) for 30 minutes. Let it cools down completely and store it in an air-tight container. Don’t touch it with your hand as it is an irritant to the skin. How to use homemade kansui in this recipe? Scoop 1/8 tsp of the baked baking soda and mix it with 1/2 tsp of water to dissolve it.
3. GOLDEN SYRUP / INVERT SUGAR SYRUP
What is the purpose of golden syrup in mooncakes?
The golden syrup gives the mooncakes its tender texture because it helps to retain moisture and it prolongs the shelf-life of the product too. If you can’t find any, you can always make your own homemade golden syrup. It’s not complicated at all.
Can I bake mooncakes without golden syrup?
Yes, the closest substitution to golden syrup would be honey. Do not use maple syrup as it is too runny. I have had very good result baking mooncakes with honey. Just make sure it’s liquid and no crystals in the honey. If you use honey, you will also need less alkaline water (lye water) because honey is not acidic compared to homemade invert syrup
4. COOKING OIL
I use a neutral-tasing cooking oil like avocado oil, grapeseeds oil, vegetable oil. I do not recommend cutting down on the amount of oil in this recipe. It is needed to add that moisture to the dough
5. FILLING
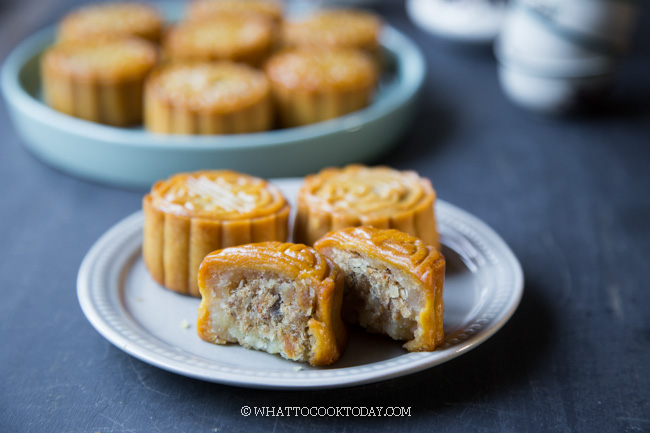
The most popular filling for baked mooncakes is usually the lotus seed paste. But I have used dou sha (red bean paste) filling and also mung bean paste filling as well. This round, I added a bit of pork floss into the filling for that sweet-savory combination and it is so good! Whatever filling you choose, please make sure it has good amount of oil and sturdy enough (not too soft) so it can “support” the crust of the mooncake. You will end up with skewed shape or mooncake with “waist”
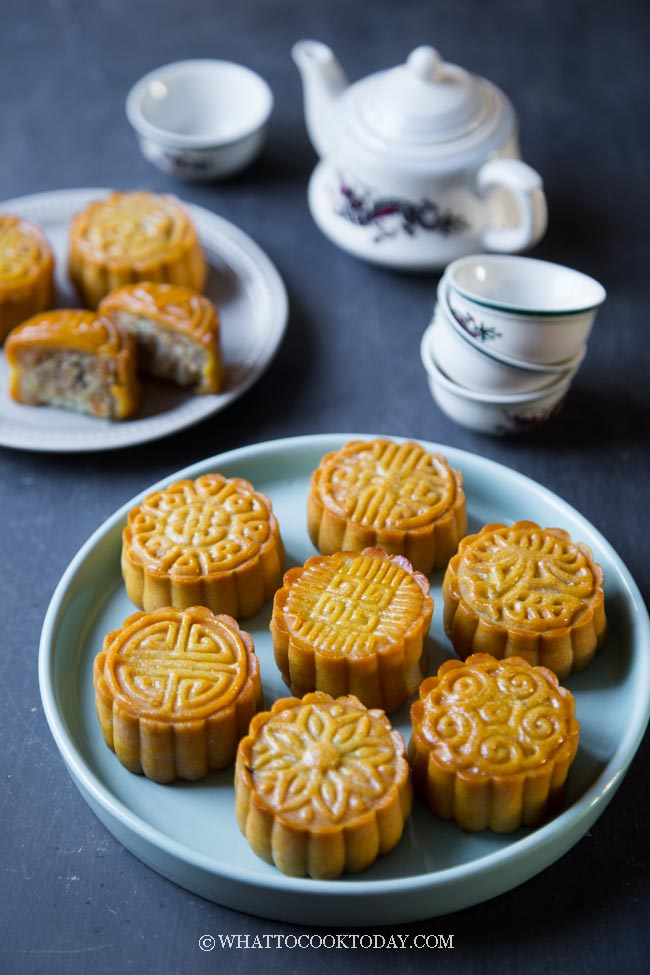
Now are we ready for some serious work? I bet you are 🙂
HOW TO MAKE TRADITIONAL CHINESE BAKED MOONCAKES IN A FEW SIMPLE STEPS
1. PREPARE THE DOUGH
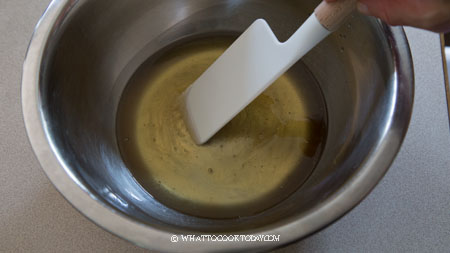
Mix golden syrup (or honey), alkaline water, and oil until almost combined. It may not be fully combined and that’s fine. Just stir to roughly mix it.
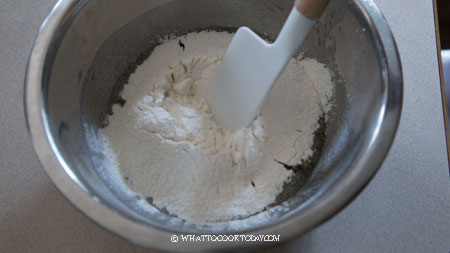
Sift in flour and stir until combine. Don’t overmix it.
Cover and rest the dough for 1 hour
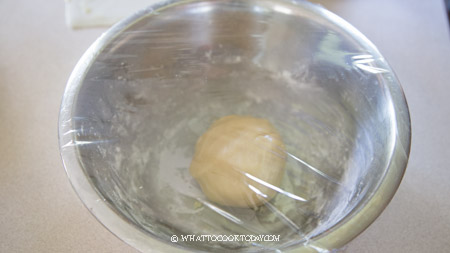
2. DIVIDE THE DOUGH AND FILLING
Preheat oven to 350 F (177 C). I use a 50-gram mooncake mould and I use 20 grams for the dough and 30 grams for filling (25 grams lotus seeds + 5 grams pork floss or you can use 30 grams lotus seeds without the pork floss). Please make sure you weight accurately as the mould can only fit in exactly 50 grams. If you make it bigger than that, the shape will be skewed.
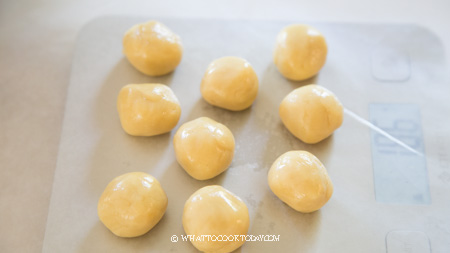
Roll the lotus seed paste into a round ball.
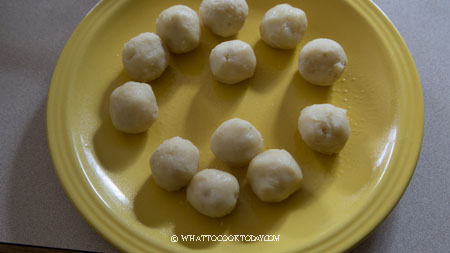
If you are doing lotus seed paste and pork floss combination, mix sesame seeds with the pork floss.
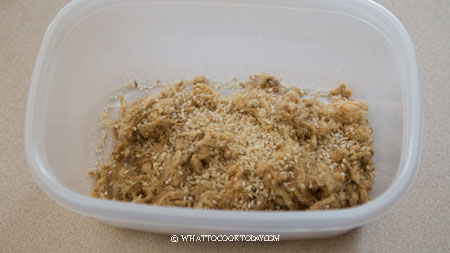
Use your thumb to gently press into the lotus seed paste ball and continue to shape it to look like a “bowl”
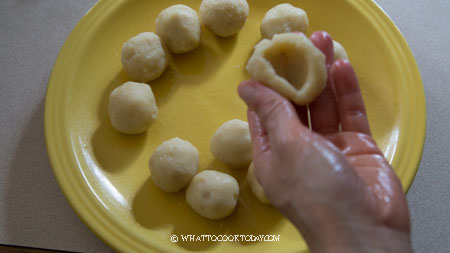
Put the pork floss (about 5 grams) inside the cavity (refer to video if you need to) and seal it to close

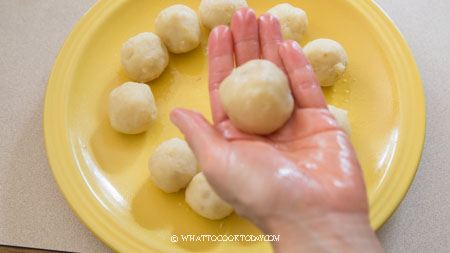
3. FILL AND SHAPE
This is my favorite way of wrapping. I can get thin skin without much difficulty. Take one dough and divide it into two.

Gently flatten them with your palm. Put the filling on top of one and then drape another flattened dough over it (refer to the video if you need to).
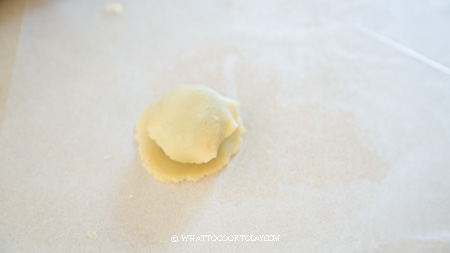
Gently close the gap between the two doughs around the filling and roll into a smooth round ball. Continue with the rest of the dough and filling
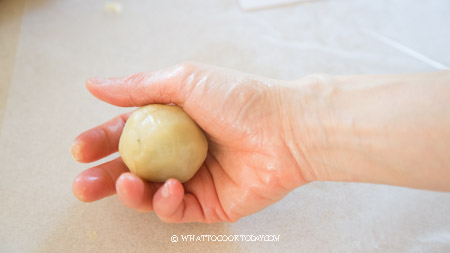
Dust the mooncake mould with a thin layer of cake flour and shake off any excess. I also dusted the mooncake dough with thin layer of flour and shake off any excess
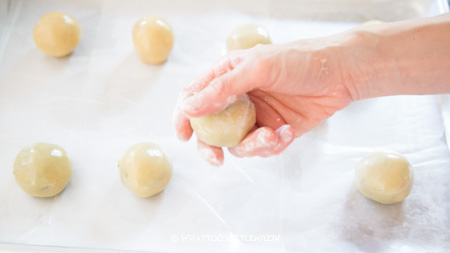
Put the dough inside the cavity of the mould and then face it down on a flat surface and gently push down the piston down to imprint the pattern on the dough
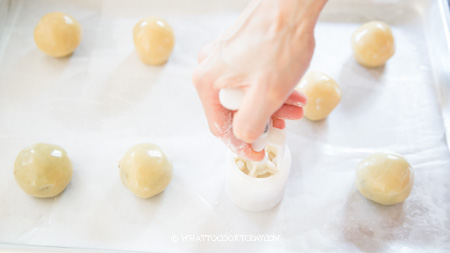
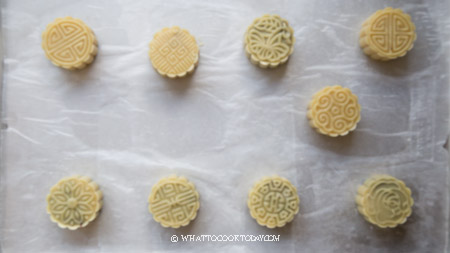
Gently push the mooncake out and voila, you have just shaped the dough into a mooncake with imprint on top. Place the shaped dough on a baking sheet lined with a parchment paper
4. BAKING
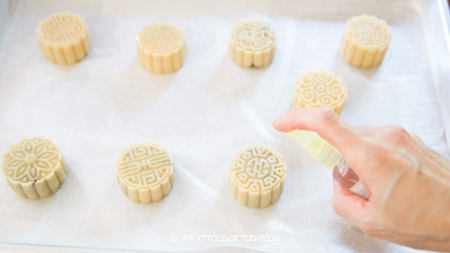
Mist the top of the mooncake with some water from about 4-inch distance. You don’t want to make the mooncake super wet, just mist it lightly to prevent it from cracking during baking
Put the baking sheet, in the middle of the oven, 3rd rack from the top for my oven. Bake for 9 minutes and then remove from the oven
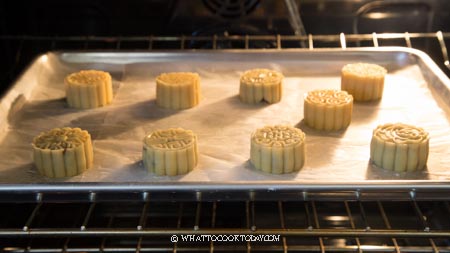
The mooncakes will still be pale at this point. Let them cool down for 15 minutes. Please don’t skip this step no matter how tempted you are
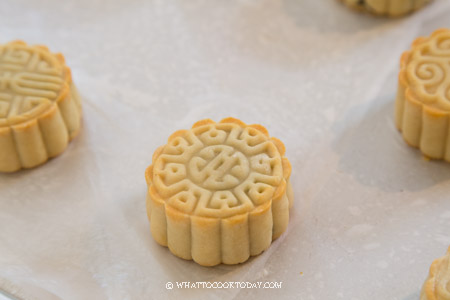
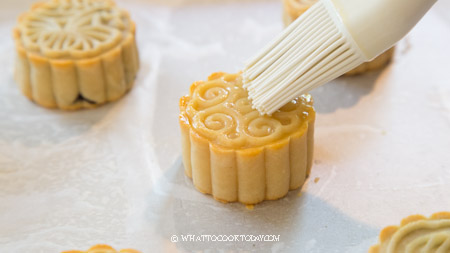
Beat the egg yolk with a small pinch of salt and water and dip your brush inside the egg yolk and brush off any excess egg wash. Very gently and thinly brush this egg wash on top of the mooncake (don’t brush the side, only the surface of the mooncake). If you accidentally brush on too much egg wash, very gently blob it with a paper towel to get the extra egg wash off
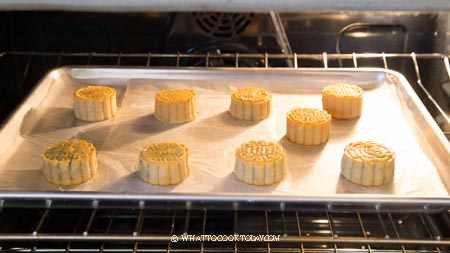
Place the baking sheet back into the oven, the same position, and bake for another 5-8 minutes or until you have a nice golden brown. Check at 5 minutes mark to see
5. COOLING
Remove from the oven and let them cool down on the baking sheet for 5 minutes. Don’t attempt to move them to cooling rack yet as they are very soft and you will break them trying to lift them up when they are fresh out from the oven like this
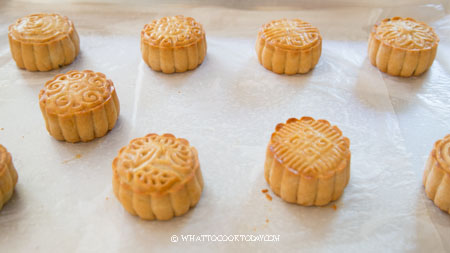
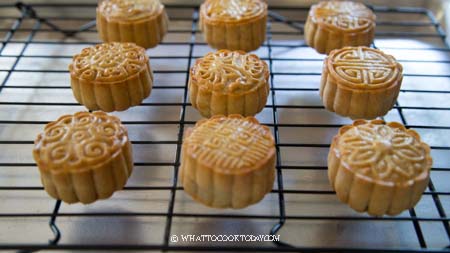
After 5 minutes, very gently transfer them to a cooling rack to let them cool down completely. The color will darken too as they cool down
6. LET THE MOONCAKES AGE
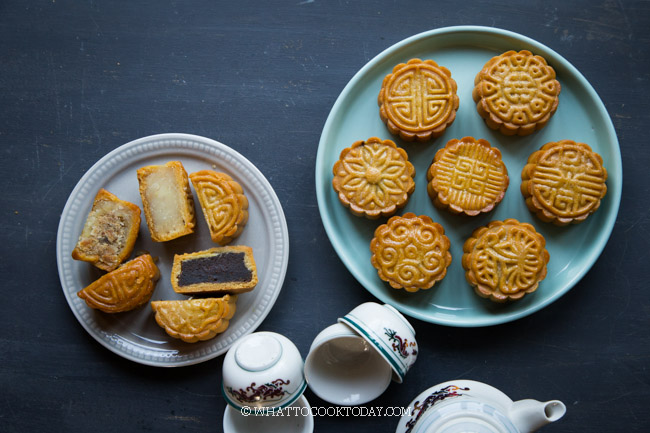
Baked mooncakes are not made to be consumed on the same day. You will see that the mooncakes appear very dry when they just come out from the oven on day 1. This is very normal. You might think these mooncakes are going to be super dry and not going to be nice, but on day 3 (or sometimes at day 2) you will see the oil from the filling has sipped into the dough making it all moist and shiny. It is definitely ready to be consumed by day 3
MY RECOMMENDATIONS FOR FIRST-TIMER
If this is your first time trying to make baked mooncakes, these are my recommendations:
1. If you plan to make your own golden syrup, starts a month before the actual event. The syrup can keep for a long time and the longer it keeps, the flavor gets better. You can also use honey to substitute for the golden syrup
2. If you plan to make your own filling, make them a few weeks before the actual event. This way you won’t feel overwhelmed
3. Follow the recipe very closely
I don’t recommend reducing the amount of oil or golden syrup or omitting kan sui in the recipe. They are all needed to successfully make the mooncakes at home
4. Use a small size mould
I use a 50-gram mould, which is the smallest I know. It’s easier to manage when making smaller size mooncakes like this
5. Keep the filling simple
I don’t use any salted eggs in this recipe and just keep it simple by using just the lotus seeds paste or red bean paste. So you get a feel of how it’s like making your own mooncake without feeling overwhelmed
RATIO OF CRUST TO FILLING
If you use a 4:6 ratio = for 50-gram mould it would be 20 grams dough and 30 grams filling and you will get about 9 mooncakes. If you use 17 grams dough and 32 grams filling you can get close to 10 mooncakes. It can be a bit challenging to wrap by using the method I showed, you should be able to wrap with those ratios.
HOW TO STORE HOMEMADE BAKED MOONCAKES
Like I’ve mentioned before that homemade mooncakes do not last as long as the commercial ones. Here’s how to store them:
1. ROOM TEMPERATURE: They can be kept at room temperature, counting from the day you freshly baked them, for about 5 days max in an air-tight container
2. FRIDGE: After 5 days, store them in an air-tight container for up to another week or so
3. FREEZER: For longer storage, you can place them on a baking sheet lined with a parchment paper, not touching each other and let them freeze for one hour and then transfer to a freezer bag, they won’t stick to each other anymore. Push out all air and seal the bag tightly. Freeze for up to one month for the best result. The longer you keep the quality will suffer.
DID YOU MAKE THIS EASY BAKED MOONCAKE RECIPE?
I love it when you guys snap a photo and tag to show me what you’ve made 🙂 Simply tag me @WhatToCookToday #WhatToCookToday on Instagram and I’ll be sure to stop by and take a peek for real!
Easy Baked Mooncakes Recipe / Yue Bing (Assorted Fillings)
Ingredients
Please weigh ingredients with kitchen scale
Dough:
- 100 gr cake flour
- 4 gr alkaline water if using golden syrup
- 2 gr alkaline water if using honey
- 25 gr cooking oil
- 60 gr golden syrup homemade or store-bought, or use honey. see notes
Filling (If you want the lotus seed paste + pork floss combination):
- 250 gr lotus seed paste homemade or store-bought, or other sweet paste of your choice
- 45 gr pork floss
- 1 tsp white sesame seeds
Filling (If you want only lotus seed paste or other sweet bean paste):
- 270 gr lotus seed paste or other sweet bean paste like dou sha
Egg wash:
- 1 egg yolk
- 1 Tbsp water
- ⅛ tsp salt
Instructions
Prepare the dough:
- Mix golden syrup (or honey), alkaline water, and oil until almost combined. It may not be fully combined if you use golden syrup and that's fine. Just stir to roughly mix it. Sift in flour and stir until combine. Don't overmix it. Cover and rest the dough for at least 1 hour or up to 3 hours
Divide the dough and filling:
- Preheat oven to 350 F (180 C). My oven uses bottom heat only, no fan. I use a 50-gram mooncake mould and I use 20 grams of the dough and 30 grams of filling (25 grams lotus seeds + 5 grams pork floss or you can use 30 grams lotus seeds without the pork floss). Please make sure you weight accurately as the mould can only fit in about 50 grams. If you make it bigger than that, the shape will be skewed
- Roll the lotus seed paste into a round ball. If you are doing lotus seed paste and pork floss combination, mix sesame seeds with the pork floss. Use your thumb to gently press into the lotus seed paste ball and continue to shape it to look like a "bowl". Put the pork floss inside the cavity (refer to video) and seal it to close
Fill and shape:
- This is my favorite way of wrapping. I can get thin skin without much difficulty. Take one dough and divide it into two. Flatten them with your palm. Put the filling on top of one and then cover with another flattened dough (refer to the video for visual). Gently close the gap between the two doughs around the filling and roll into a round smooth ball. Continue with the rest of the dough and filling
- Dust the mooncake mould with a thin layer of cake flour and shake off any excess. I also dusted the mooncake dough with thin layer of flour and shake off any excess. Put the dough inside the cavity of the mould and then face it down on a flat surface and gently push down the piston down to imprint the pattern on the dough. Gently push the mooncake out and voila, you have just shaped the dough into a mooncake with imprint on top. Repeat with the rest and dusting with some flour on the mould and the dough each time. Place the shaped dough on a baking sheet lined with a parchment paper
Baking:
- Mist the top of the mooncake with some water from about 4-inch distance. You don't want to make the mooncake super wet, just mist it lightly to prevent it from cracking during baking
- Put the baking sheet, in the middle of the oven, 3rd rack from the top for my oven. Bake for 9 minutes. The mooncakes will still be pale at this point. Let them cool down for 15 minutes. Please don't skip this step no matter how tempted you are
- Beat the egg yolk with a small pinch of salt and water. Don't use silicone brush like I did. You want to use brush with soft bristles. This is very important as we don't want a thick layer of egg wash that will blur the imprint later after baking
- Very gently and thinly brush this egg wash on top of the mooncake (don't brush the side, only the surface of the mooncake). If you accidentally brush on too much egg wash, very gently blob it with a paper towel or use a brush to get the extra egg wash off
- Place the baking sheet back into the oven, the same position, and bake for another 5-8 minutes or until you have a nice golden brown. Check at 5 minutes to see
- Please note that if you use honey, the mooncakes will have lighter golden color compared to using golden syrup
Cooling:
- Remove from the oven and let them cool down on the baking sheet for 5 minutes. Don't attempt to move them to cooling rack yet as they are very soft and you will break them trying to lift them up when they are fresh out from the oven like this
- After 5 minutes, very gently transfer them to a cooling rack to let them cool down completely. The color will darken too as they cool down
Let the mooncakes age:
- Baked mooncakes are not made to be consumed on the same day. You will see that the mooncakes appear very dry when they just come out from the oven on day 1. This is very normal. You might think these mooncakes are going to be super dry and not going to be nice, but on day 3 you will see the oil from the filling has sipped into the dough making it all moist and shiny
- After 3 days, you can consume the mooncakes. This is the best time to consume. Keep the rest in the fridge for up to 2 weeks. Homemade version will not last as long as the commercial one because we do not put any other preservative and additives




22 comments
can one use AP flour instead of cake flour ?
Hi Emily, you can use AP flour. The pastry will be less tender, but it should work.
Can I let my dough rest overnight in the fridge? (My molds don’t arrive until tomorrow 😅) If so, would I then let it come to room temp before dividing and rolling? Thank you!
Hi Miranda, you don’t have to keep it in the fridge. It should be okay until tomorrow. The fridge will dry out the dough a lot.
Hi Marvellina, I tried to let my dough sit for one hour but my dough ended up being dry and hard to work with, even after covering it with food wrap, when I wrapped it around my filling. Is it due to the glutinous rice flour I use? I use three elephant brand glutinous rice flour and find that I always have to work with it quickly or else I have to throw it away 😢 (like making tang yuan). I have also tried to wrap my filling immediately after I mix everything together while it’s still stretchable but have found that after baking it doesn’t end up as moist as I’d liked it. Is that due to not letting the dough sit? Or is it because my homemade filling (red bean) should have more oil in it? After letting it sit for three days the oil and moisture from my cakes had escaped (?) despite sealing it in a container. This is what I experienced last year but I hope to improve better this year! Your advice would be very much appreciated. 🙏
Hi Nat, this recipe uses cake flour and NOT glutinous rice flour. If you use glutinous rice flour, it is definitely going to be hard and dry. The flour in this recipe cannot be substitute with glutinous rice flour.
Oh no! I mixed up this question for a tang yuan recipe, sorry bout that! I’ve been putting this question of to the side for over a year 😅.
I did use cake flour (ignore the glutinous rice flour question), however, while the mooncake skin would turn moist after three days, I found that my pastes on the inside would be dry despite keeping them in a shut container. Should I add more oil into the pastes next time? Does this mean I baked them for too long?
Hi Nat, it could be both. I’m not sure what kind of filling you use, but the filling for mooncakes usually uses lots of oil and this is for reason. So the oil will moisten the mooncake as you age them. overbaking the mooncake can also cause the crust to be dry, but if your filling is nice and oily, it will moisten it as it ages
I like to watch your video with Easy Traditional bake moon cake ,but I don’t know how to find the video.Please help .YThanks
Hi Mai, I’m sorry you have trouble finding the video. It should pop up when you look at the post, but I’m not sure what happened. Here’s the link to the video on youtube: https://www.youtube.com/watch?v=qBWUFCeDI5M Let me know if you are still having trouble!