This post may contain affiliate links. Please read our disclosure policy.
Learn how to easily make Shanghai Mooncake that has buttery and crumbly crust filled with sweet red bean paste filling (dou sha) and melon seeds. So much easier to make than traditional mooncake.
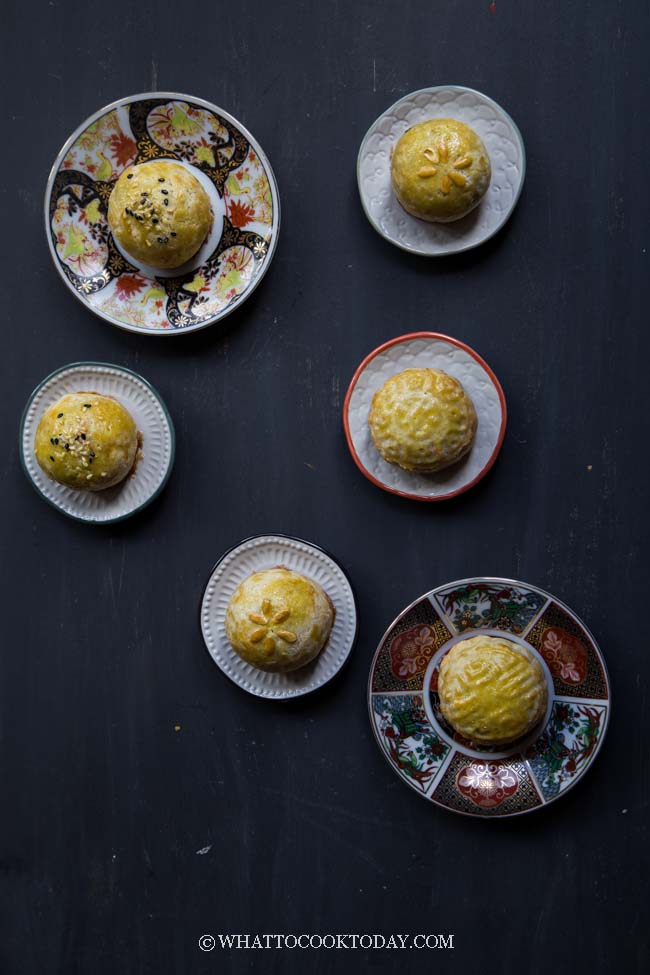
I’ve been having lots of fun making all these mooncakes for the past few months. My family is not crazy about traditional baked mooncakes. I’ve never been a fan of one since I was a kid. Mom usually got one box every year with dou sha and salted egg yolk filling, but I found it too rich and just never really a fan of it. This Shanghai mooncake is another story! It has buttery and crumbly crust that reminds me of eating shortbread or pineapple tarts (kue nastar). It is way easier to make compared to traditional baked mooncakes too!
TYPE OF FAT TO USE
LARD: Back in the days, Shanghai mooncake or many other types of Chinese baked pastries are made with lard. If you have access to purchase lard, hey, go for it. I believe it makes the best pastries 🙂
BUTTER: If lard is not available, butter is a great substitute.
COCONUT OIL: My family loves it with coconut oil. I grew up in Southeast Asia and so we are crazy about anything coconut. It gives a nice coconut aroma to the mooncake. If that’s not your cup of tea, stick with butter
COOKING OIL: I won’t recommend using cooking oil for this Shanghai mooncake simply because the dough is more difficult to handle and when you wrap it just keeps breaking. I’ve tried it and I won’t do it again.
HOW TO EASILY MAKE SHANGHAI MOONCAKE
1. ROAST THE MELON SEEDS
Roast melon seeds in a dry pan until golden brown and nutty.
2. MIX THE MELON SEEDS WITH RED BEAN PASTE

3. DIVIDE INTO PORTIONS

4. PREPARE THE DOUGH
Mix all the dry ingredients in a mixing bowl.

Add softened butter or coconut oil. I used coconut oil, but you need to make sure the coconut oil is not in a melting liquid state. It needs to be in solid but soft form.

Make sure the coconut oil (if you choose to use) is in solid but soft form
Rub in the butter/coconut oil until you get a crumbly texture


Add egg and continue to knead into a soft smooth ball. If it’s a bit too wet, you may add a bit flour, teaspoon by teaspoon, but you shouldn’t have to. If it’s too dry, you can add a bit of milk to help the dough comes together


Wrap with a plastic wrap and chill for 30 minutes in the fridge.

5. WRAPPING
Preheat oven to 350 F. After chilling in the fridge, remove the dough and portion into roughly about 30 grams dough each (if you plan to use 50 gr mooncake mould to press), otherwise, just divide into 10 equal portions. Keeping them covered and work with one dough at a time.

Take one dough and flatten with your palm and roll it out into about 4-inch diameter circle. Place one filling in the middle.

Use the dough to wrap around the filling to close.
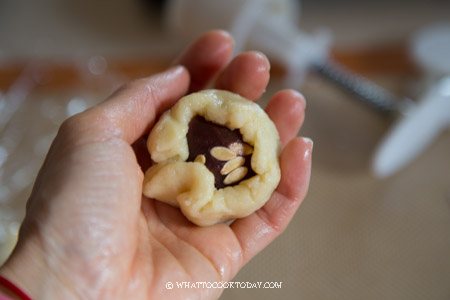
Cup your hands around the dough to shape it tall.

If you are using mooncake mould, gently place this inside the cavity of the mooncake mould and press to print the pattern.

6. CHILLING
Place on a baking sheet lined with parchment paper. Once you are done, pop the baking sheet in the fridge to let them chill for 15 minutes. This helps to prevent the mooncake from spreading to the side too quickly.

7. BAKING
Remove from the fridge and brush with egg wash and sprinkle with some sesame seeds or use melon seeds, gently press them down so they stay.


If you are using mooncake mould: Do not brush the mooncake with eggwash yet or the imprints won’t be so visible anymore after baking.

Don’t brush with egg wash yet if you use mooncake mould
Bake in the oven for 15 minutes and then brush with egg wash for the second time. If you are using mooncake mould, brush with egg wash after baking for 15 minutes. Bake again for another 10-15 minutes or until nicely golden brown.

8. COOL DOWN
Let them cool down on the baking sheet for 5 minutes and then transfer to a cooling rack to let them cool down completely.
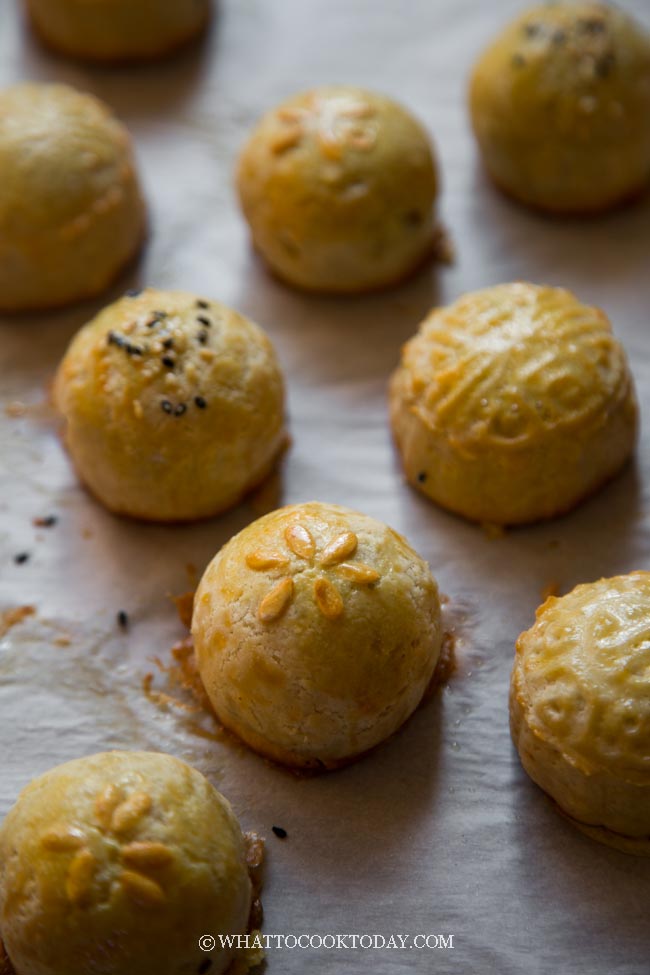
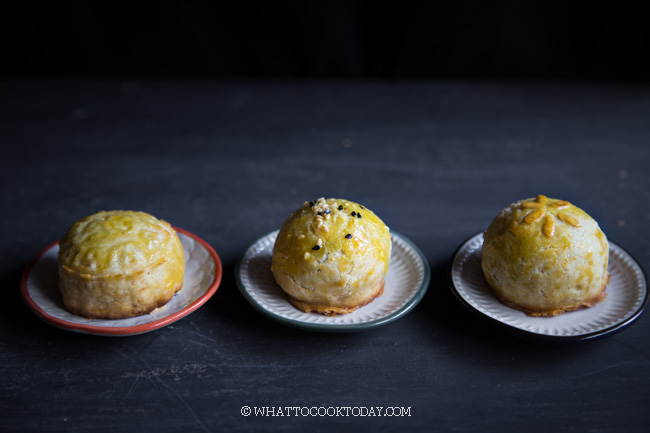
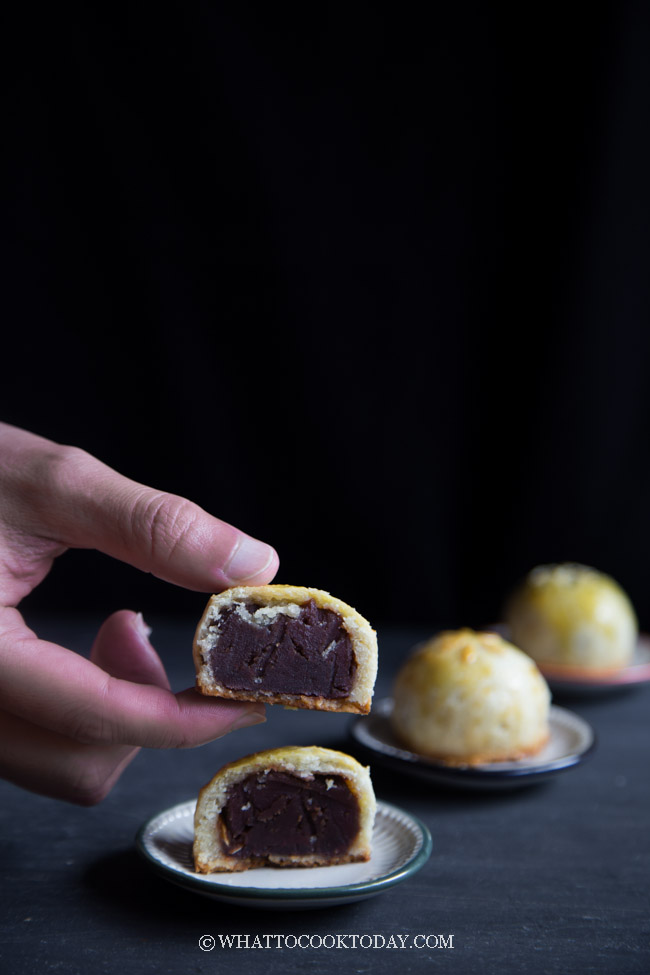
Here you can see three different styles: Left with 50 gr mooncake mould, middle with black and white sesame seeds, right with roasted melon seeds.

Love how buttery and crumbly they are!

VARIATIONS WITH FILLING
1. Add salted egg yolk
2. Use other sweet paste such as : lotus seeds paste, melon seeds paste, mung bean paste. You get the idea!
3. Use savory filling! I’ve tried it with meat filling and it’s so good too. An unorthodox approach, but the family loves it too.
HOW TO STORE SHANGHAI MOONCAKE
ROOM TEMPERATURE: Commercially-made mooncakes can last for months and years without going bad because of the preservatives and/or additives they use. The homemade version is different. Shorter shelf life (but it’s wholesome 😉 ). Homemade Shanghai mooncake can be stored at room temperature in an air-tight container for up to 3 days.
REFRIGERATOR: Refrigerate if you plan to keep longer, but no more than 2 weeks.
FREEZER: For longer storage, place them on a baking sheet lined with parchment paper and freeze for 1 hour and then transfer to a freezer bag or container and they can be kept for up to 3 months. The quality may suffer the longer you freeze them. Simply thaw them in the fridge when ready to consume

Shanghai Mooncake (with Red Bean Paste)
Ingredients
Dry ingredients:
- 125 gr all-purpose flour (plus more as needed)
- 10 gr icing sugar
- 20 gr milk powder
- ⅛ tsp salt
Wet ingredients:
- 65 gr butter unsalted, softened, or use coconut oil in soft solid state
- 1 large egg about 50 gr (without shell)
- milk if needed
Filling:
- 1 recipe Red bean paste (dou sha) you may have a bit leftover
- 25 gr melon seeds save about 30 seeds to decorate later
Egg wash:
- 1 egg yolk
- ½ tsp milk
Instructions
- Toast the melon seeds on a dry pan until lightly brown and dry. Set aside to cool down
- Prepare the red bean paste or other sweet paste of your choice the day before is best. Weigh out about 10 portions of 20 grams filling (if you plan to use 50 gr mooncake mould to press), otherwise portion into 10 equal portions for the filling
- Mix the red bean paste with toasted melon seeds, saving some of the seeds for decoration later
Make the dough:
- Mix all the dry ingredients in a mixing bowl. Add softened butter or coconut oil. I used coconut oil, but you need to make sure the coconut oil is not in a melting liquid state. It needs to be in solid but soft form. Rub in the butter/coconut oil until you get a crumbly texture
- Add egg and continue to knead into a soft smooth ball. If it's a bit too wet, you may add a bit flour, teaspoon by teaspoon, but you shouldn't have to. If it's too dry, you can add a bit of milk, teaspoon by teaspoon. Wrap with a plastic wrap and chill for 30 minutes in the fridge
Wrapping:
- Preheat oven to 350 F. After chilling in the fridge, remove the dough and portion into roughly about 30 grams dough each (if you plan to use 50 gr mooncake mould to press), otherwise, just divide into 10 equal portions. Keeping them covered and work with one dough at a time
- Take one dough and flatten with your palm and roll it out into about 4-inch diameter circle. Place one filling in the middle and use the dough to wrap around the filling to close. Cup your hands around the dough to shape it tall. Place the seam side down on a baking sheet lined with parchment paper. Once you are done, pop the baking sheet in the fridge to let them chill for 15 minutes. This helps to prevent the mooncake from spreading to the side too quickly
If using 50 gr mooncake mould:
- Preheat oven to 350 F. Take one dough and flatten with your palm and roll it out into about 4-inch diameter circle. Place one filling in the middle and use the dough to wrap around the filling to close. Gently place this inside the cavity of the mooncake mould and press to print the pattern. Place on a baking sheet lined with parchment paper. Once you are done, pop the baking sheet in the fridge to let them chill for 15 minutes. This helps to prevent the mooncake from spreading to the side too quickly
Baking:
- Remove from the fridge and brush with egg wash and sprinkle with some sesame seeds or use melon seeds, gently press them down so they stay
- If you are using mooncake mould: Do not brush the mooncake with eggwash yet or the imprints won't be so visible anymore after baking
- Bake in the oven for 15 minutes and then brush with egg wash for the second time. If you are using mooncake mould, brush with egg wash after baking for 15 minutes. Bake again for another 10-15 minutes or until nicely golden brown
- Let them cool down on the baking sheet for 5 minutes and then transfer to a cooling rack to let them cool down completely



3 comments
Can you also provide English measurements for those of us without metric scales? Thank you. I love your recipes. Check out my food blog for many more ideas for you. http://www.cooksjournalblog.com
Hi, Marvellina
Can I omit the milk powder? Also if using salted butter can I just add two pinches of salt?
Thanks
Yes ! Amazing ! And proud to say I have mooncake mould…. party time 🙂