This post may contain affiliate links. Please read our disclosure policy.
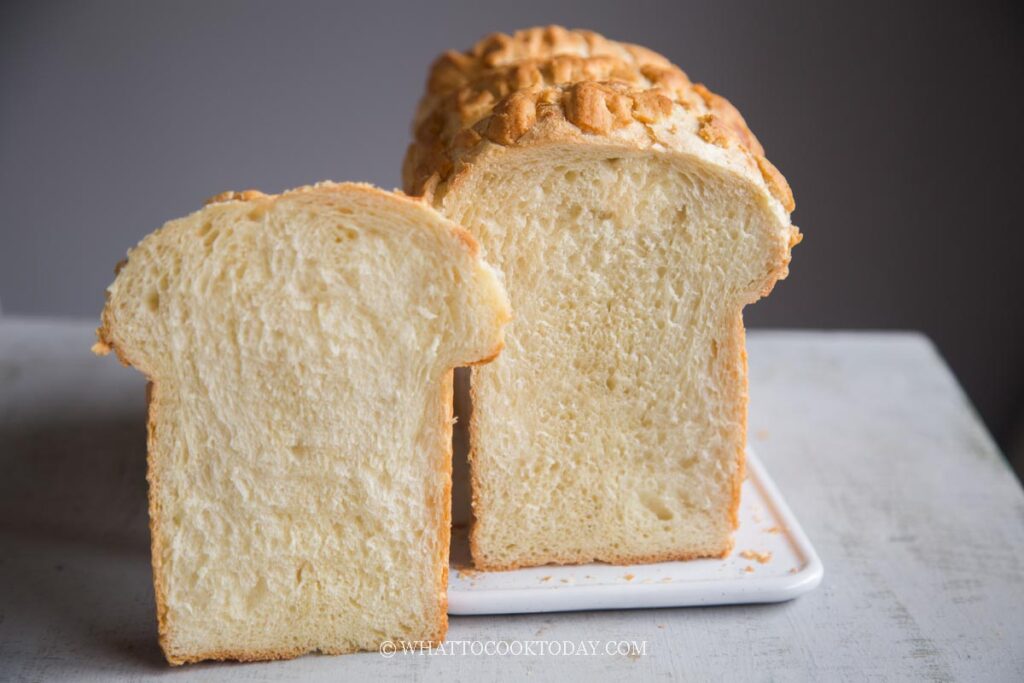
If you love Japanese milk bread and Dutch Crunch bread, this loaf gives you the best of both worlds. The soft, feathery crumb combined with the crispy crackled topping makes this bread incredibly satisfying to eat.
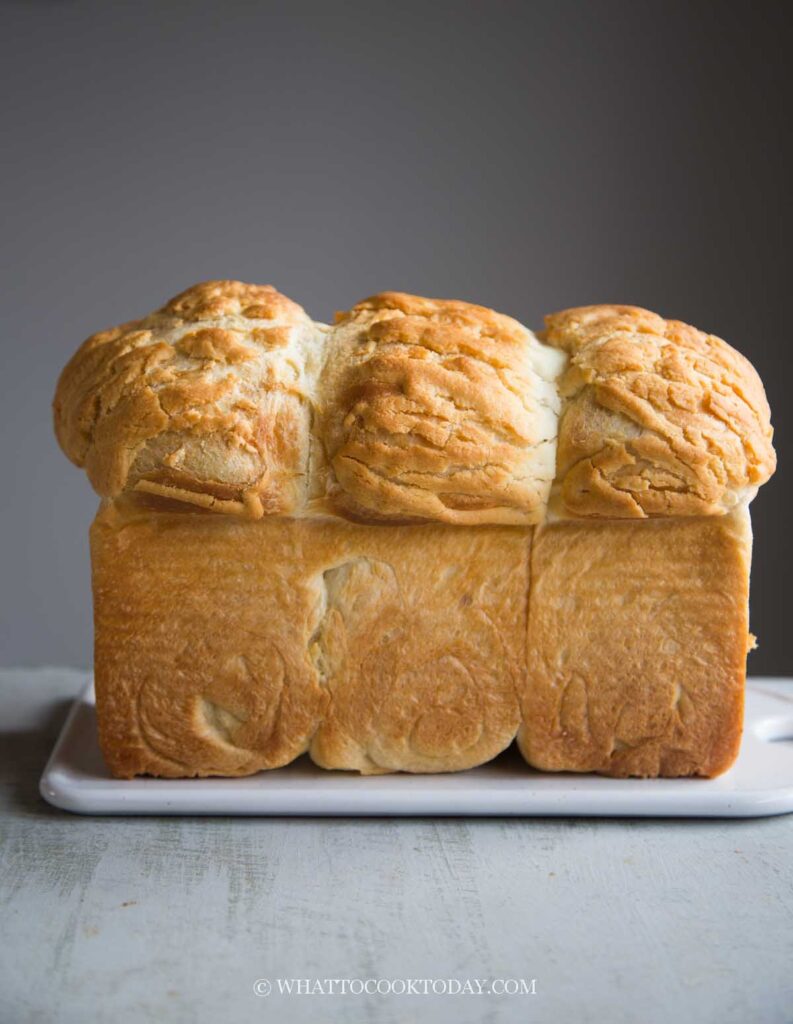
This Dutch Crunch Milk Bread combines two of my favorite breads in one loaf. You get the incredibly soft, fluffy, and milky texture of Japanese shokupan, paired with a crispy, savory rice-flour topping inspired by Dutch Crunch bread. The contrast in texture is absolutely amazing.
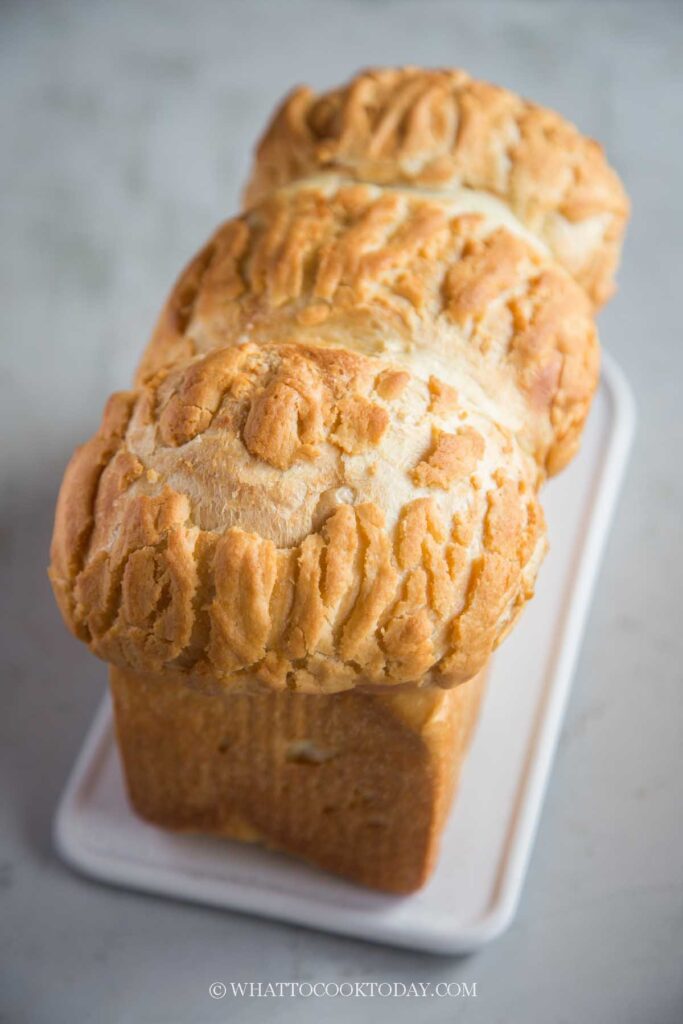
The topping bakes up into a beautiful crackly tiger-like pattern that makes the bread look bakery-worthy, but it’s actually very doable at home. The bread itself stays light and feathery-soft thanks to the tangzhong method, while the rice flour topping adds a thin, crunchy crust with a subtle savory flavor from toasted sesame oil.
I especially love this bread toasted. The top gets even crispier while the inside stays pillowy soft.
Why You’ll Like This Recipe
- The bread is incredibly soft, fluffy, and stays fresh longer thanks to the tangzhong method.
- The crispy Dutch Crunch topping creates a beautiful bakery-style crackled pattern.
- The contrast between the crunchy top and soft interior is absolutely irresistible.
- The recipe works beautifully in both a Pullman loaf pan and a regular loaf pan.
- The dough can be prepared ahead and refrigerated overnight for better flavor.
- The bread freezes very well, making it great for meal prep.
- It makes amazing toast, sandwiches, or simply eaten warm with butter.
What Is Dutch Crunch Bread?
Dutch Crunch bread is a bread topped with a rice flour paste before baking. As the bread expands in the oven, the topping dries and cracks, creating its signature tiger or giraffe-like pattern.
Traditionally, Dutch Crunch bread is commonly seen in sandwich rolls, especially around the San Francisco area. In this recipe, I paired that crunchy topping with soft Japanese milk bread (shokupan), and the combination works beautifully.
My Version
- I use a Japanese milk bread dough as the base because I love the soft, fluffy, shreddable texture.
- Instead of a traditional lean bread dough, this enriched dough contains milk, butter, egg, and milk powder for a richer flavor.
- I use toasted sesame oil in the rice flour topping because it adds a subtle savory aroma that pairs so well with the slightly sweet bread.
- This recipe is made in a smaller Pullman loaf pan without the lid to create an extra-tall loaf with dramatic cracks on top.
- The tangzhong and optional overnight dough fermentation help improve both flavor and texture.
Ingredients and Substitutions
- Bread flour gives the bread its structure and chewy-soft texture. I recommend using bread flour with a protein content of around 12–13%.
- Whole milk makes the bread richer and softer. You can substitute with 2% milk, though the loaf may be slightly less rich.
- Milk powder improves flavor and helps create a softer crumb. You can omit it if necessary.
- Instant yeast can be substituted with active dry yeast. Bloom it first in warm milk before using.
- Butter adds richness and softness. I recommend unsalted butter so you can control the salt level.
- Rice flour is essential for the Dutch Crunch topping. Regular flour will not create the same crackly effect.
- Toasted sesame oil adds a wonderful aroma and savory depth. Neutral oil also works if you prefer a milder flavor.
- Brown sugar adds a slight caramel flavor to the topping, but white sugar can be used too.
Best Pan to Use
I use a small Pullman loaf pan without the lid, measuring 9 x 4 x 4 inches. This gives the loaf extra height and creates a dramatic cracked top. You can also use a standard 9 x 5 inch loaf pan. The loaf will be slightly wider and shorter but still delicious.
Tips for Success
- Do not rush the kneading process. This dough takes time to develop gluten properly.
- Resist adding extra flour even when the dough looks sticky. The dough will eventually become smooth and elastic.
- The autolyse rest helps hydrate the flour and makes the dough easier to work with.
- The dough must pass the windowpane test for the softest texture.
- The rice flour paste should be thick but spreadable. Too thin and it will slide off the dough.
- Use all the rice paste for the most dramatic Dutch Crunch pattern.
- A digital thermometer helps prevent underbaked bread. The center should reach at least 190 F.
What to Serve This With
- Softened salted butter and jam
- Kaya coconut jam
- Peanut butter and banana
- Egg salad sandwiches
- Tuna salad sandwiches
- Toasted with condensed milk
- Cream cheese and smoked salmon
- Chicken katsu sandwiches or any kind of sandwiches
Storage & Reheating
- For short-term storage, keep the unsliced loaf uncovered in the loaf pan to preserve the crunchy top.
- Once sliced, place the cut side down on a wooden cutting board to protect the soft interior.
- For longer storage, freeze individual slices wrapped tightly.
- Reheat slices in a toaster until warm and crisp.
- You can also reheat in an air fryer at 375 F for 2–3 minutes.
Frequently Asked Questions
- Why is my dough so sticky?
This is a high-hydration enriched dough. It will become smooth and elastic with proper kneading. - Can I use all-purpose flour?
I don’t recommend it. Bread flour is strongly recommended for the best structure and texture. - Why didn’t my topping crack?
The rice paste may have been too thin or the dough may have been underproofed. - What does the topping taste like?
It has a lightly savory flavor with a subtle toasted aroma from the sesame oil. The bread works well with both sweet and savory fillings you choose to use
It looks impressive, smells amazing while baking, and tastes even better toasted the next day. Once you try this combination, it’s hard to go back to regular sandwich bread!
Dutch Crunch Milk Bread (Shokupan)
Ingredients
Roux starter (Tangzhong): prepare one day before for the best result
- 23 g bread flour 12.7% protein content
- 108 g whole milk
Dry ingredients:
- 450 g bread flour 12.7% protein content
- 6 g Instant yeast
- 28 g milk powder
Wet ingredients:
- 140 g whole milk plus more as needed
- 50 g egg lightly beaten from 1 large size egg
Ingredient to add last to the dough:
- 60 g unsalted butter softened
- 6 g salt
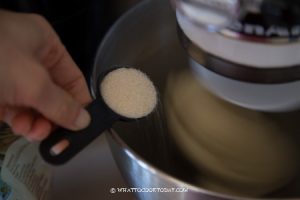
- 45 g sugar
Rice flour topping:
- 45 g rice flour
- 1 tsp instant yeast
- ¼ tsp salt
- 5 g brown sugar
- 30 g water
- 5 g toasted sesame oil or neutral-tasting oil
Instructions
- I use small size Pullman pan without the lid, which measures 9 x 4 x 4 inches. You can also use 9 x 5 inch loaf pan. It makes a very tall loaf
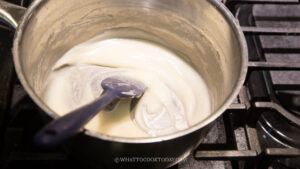
Prepare tang zhong:
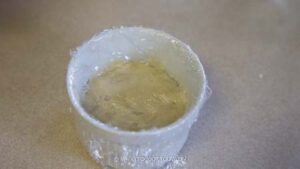
- Place milk and the bread flour in a small saucepan. Whisk until there is no more lumps. Cook this mixture over low-medium heat until it reaches 65 C (149 F).

- Remove from the heat and cover with a plastic wrap, touching the tangzhong so the skin won't form. You can use it on the same day once it has cool down, but I highly suggest using this the next day. It improves the taste of the bread. Store this in the fridge
Make the dough:
- If you use active dry yeast, mix the yeast with 2 tablespoons of warm milk you are going to use in the recipe to bloom the yeast. Let it sit for 10 minutes until it is foamy and bubbly.
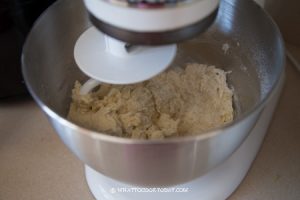
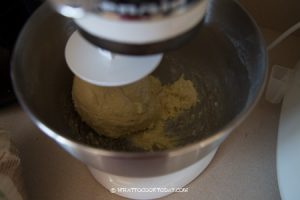
- Mix all the dry ingredients together in a mixing bowl. Make a well in the center and pour in the wet ingredients and the tang zhong you made earlier. Use a dough hook attachment to knead the dough on speed 2 until all the crumbly dough starts to come together into one mass, it may take about 2-3 minutes for this to happen. Don’t be tempted to add any liquid. You may need to stop halfway and scrape the dough off the hook and the sides of the bowl and knead again several times
- Once it comes into a rough dough, stop the machine. The dough will not be smooth, don't worry. Cover the dough and let it rest for 20 minutes. This is an important rest that bakers refer to as an autolyse
- After the rest, turn on and knead the dough again on speed 2 and knead for 1-2 minutes until it is a bit smoother. Then add the salt and sugar into the dough. Continue to knead until the dough is relatively smooth. You need to stop and scrape the dough off the hook and the bowl several times during this process. I promise it’s worth the effort!
- Once you have a smooth dough, turn the machine back on again to knead and increase speed to 4. Gradually add in the softened butter a bit by a bit. The dough will turn into a REAL sticky mess again because of the butter, just keep kneading and stop halfway and scrape the dough off the hook and bowl again and continue to knead until the butter is absorbed by the dough. IT WILL HAPPEN, don't worry! DO NOT be tempted to add any extra flour.
- You will get a shiny smooth dough that is very elastic. This may take about 10-15 minutes. The dough must pass a windowpane test, meaning, when you stretch a small amount of dough thinly, it won't break and a light can pass through
1st proofing:
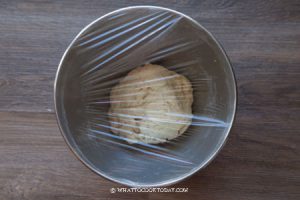
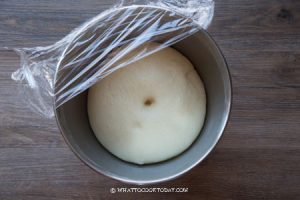
- Place this dough in a lightly oiled large bowl, cover it with a clean and damp tea cloth or plastic wrap and let it rise at a warm place for about 1 hour until the dough doubles in volume
To bake the next day:
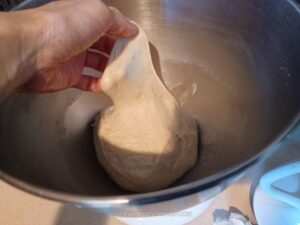
- If you don’t plan to bake on the same day, deflate the dough and then round it up into a dough ball and keep in an air-tight container and put it in the coldest part of your fridge (not freezer) for up to 12 hours. I don’t recommend any longer than that. Proceed to shaping
Shaping:
- Oil your loaf pan all over the bottom and the sides. If the dough is cold from the fridge, let it sit at room temperature for about 15-20 minutes and the proceed to shaping
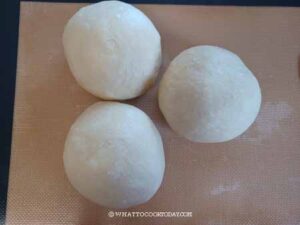
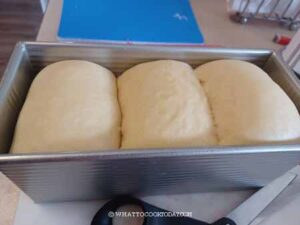
- Deflate the dough and separate it into 3 equal-weight dough. Cover the dough with plastic wrap and let them rest for 10 minutes to relax the gluten
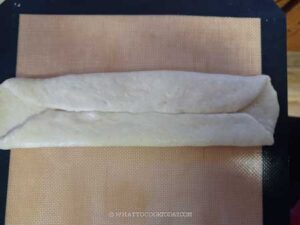
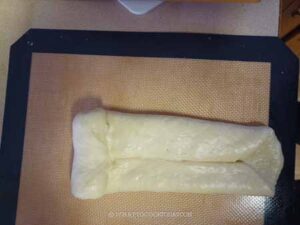
- Roll each ball out into a rectangle shape (don’t have to be exact). Fold the two long sides up
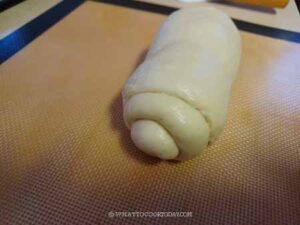
- Then roll it tightly from the top to bottom
- Place the seam side down in the loaf pan and repeat with the other 2 doughs. Place them next to each other. Cover with a plastic wrap

2nd proofing:
- Let the dough proof again for another 45 minutes to one hour (or longer depending on the temperature and the yeast you use) or until they fill up the loaf pan, about 90%.
- 15 minutes before the end of proofing, preheat oven to 375 F (190 C) for conventional oven. If you use a convection oven, lower the temperature by 20 F or 15 C.
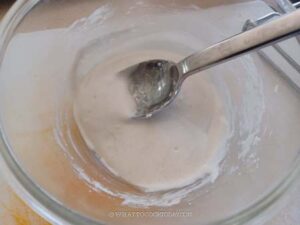
Prepare the rice flour paste:
- 30 minutes before the end of the final proofing, prepare the rice paste. Combine all ingredients for the rice paste. The consistency should be thick but spreadable. You don't want it to be too thin that it runs all over the place when you apply it on the dough later. If it's too thick you can add a bit more water, one teaspoon at a time. If it's too runny, you can add a bit more rice flour, one teaspoon at a time too. Cover and let it proof for about 20-30 minutes until you are done with the dough proofing
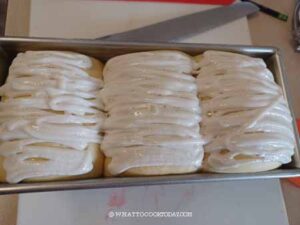
Apply the rice paste on the dough:
- I transfer the paste into a plastic bag and cut the tip of the bag to pipe the paste on top of the dough. I feel like it's easier this way. You can also use a spoon. Spoon some of the rice paste on the dough and then gently use a pastry brush or the back of the spoon to spread the paste to cover the dough. Take care not to deflate the dough. It doesn't have to be neat. This paste will crack during baking, creating the beautiful tiger/giraffe pattern. Use all the paste if possible, don't be shy with it
Baking:
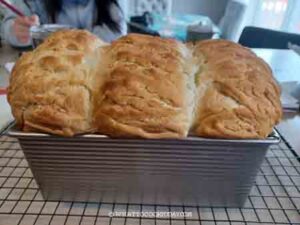
- Put the pan on the middle rack and let it bake for the next 40-45 minutes depending on the oven, mine took about 40 minutes. The internal temperature on the center of the bread is at least 190 F (88 C). I highly recommend a digital thermometer to take out the guess work!
- Remove from the oven and remove the bread from the pan. Let the bread cool down completely on the cooling rack.
Storage:
- For short-term storage: If the loaf is unsliced, I would keep it in the loaf pan, uncovered, to preserve the crunchy top. Once sliced, you can keep the loaf cut-side down on a wooden cutting board to protect the interior while exposing the crunchy top to air.
- For longer storage: Freezer is the best place to store them. Slice into individual serving size. I like to wrap 4 slices in one batch with a cling wrap and then put inside a freezer bag.
How to reheat:
- You can use a toaster on a medium setting. If it's frozen, you can use the frozen setting or add another minute to the toasting time if needed
- You can reheat in an air-fryer at 375 F for 2-3 minutes or until they are warm and the top is crisp again


