This post may contain affiliate links. Please read our disclosure policy.
Soft and fluffy milk bread infused with aromatic Earl Grey tea steeped in milk and made with poolish preferment is perfect for your morning toast or as sandwich bread. The aroma of this bread baking is just amazing! You can bake it into a Pullman loaf or pain de mie or regular bread loaf.

Earl Grey tea is one of my favorite teas. I enjoy the bold flavor of the black tea with that hint of bergamot oil and citrusy note. This loaf of bread infused with Earl Grey milk tea is one of our favorites (well, minus the kids as they don’t care much for Earl Grey tea at this age LOL!).
Earl Grey tea bags VS loose-leaf tea
In general, loose-leaf tea is considered to be of higher quality than tea that is packaged in tea bags. Tea bags usually use broken or low-grade tea leaves, which can affect the flavor and aroma of the tea. Loose-leaf tea is made up of whole, unbroken tea leaves, which can result in a more complex and nuanced flavor profile. That being said, there are, of course, some high-quality tea bags available on the market, made with whole-leaf tea and premium materials that can provide a similar taste and experience to loose-leaf tea. So, to make a long story short, use your favorite brand that you know you like.
Earl Grey Milk Tea Bread (with Poolish)
Ingredients
Poolish: (prepare 4-6 hours before)
- 75 g bread flour (12.7% protein content)
- 75 g water
- ¼ tsp instant yeast
Earl grey milk tea:
- 5 Earl grey tea bags (about 10 grams if you use loose tea leaves)
- 150 g whole milk plus more as needed later
Final dough:
- 275 g bread flour (12.7% protein content)
- 1 ¼ tsp instant yeast
- ¾ tsp salt
- 25 g milk powder
- 40 g sugar
- 40 g unsalted butter softened
Instructions
- The total time it takes to prepare and bake this bread does not include the time you need to prepare the poolish, which can be done the night before you plan to bake
- I use this Pullman loaf pan that measures 8.3x 4.8 x 4.5 inch on the exterior and the interior measures 7.5 x 4 x 4.4 inch. It's a tall loaf pan. You can also use a standard regular 8.5 x 4.5 x 2.75 inch loaf pan
- For other pan size adjustment, please see the details in my post below
Prepare poolish:
- Mix all ingredients for poolish and let it sit for a minimum of 4-6 hours at room temperature. You can even put this in the fridge until the next day when you are ready to use them. Simply let it comes to room temperature for an hour or so before using
Prepare the Earl grey milk tea:
- Bring the milk just to just a gentle simmer, about 180 F (80 C) and then remove from the heat. Put the tea bags in and let the tea bags steep in the milk for about 8 minutes. Don't let the tea steep for too long or it can be too bitter. Squeeze out excess milk from the tea bags. Let the milk tea cool down to lukewarm (about 105 F or 40 C) by putting it on the ice bath to cool it down quickly, about 5 minutes or so.
- Optional: I emptied two of the tea bags and add them to the dough. It's nice to have some specks of Earl grey tea dust
Prepare the dough:
- I use instant yeast. You can also use active dry yeast, but you need to activate the yeast first before mixing it into the dough. Simply mix the yeast with about 2 Tbsp of the milk tea you prepared (make sure it's not lukewarm and not hot) and a small pinch of sugar and let them sit for 10 minutes until they are foamy
- Put all ingredients for the dough (except for the butter), the milk tea, the tea (if using), and the poolish in a mixing bowl of a stand mixer fitter with a dough hook attachment, except for the butter, which we will add last
- Start the mixer on low ("stir" on KA) and knead for about 2 minutes. It should come to a rough dough. If it's too dry, you can add more milk, one teaspoon at a time. Once you get a rough dough that is slightly sticky, increase speed to 2 and knead for 5 minutes, the dough should be smoother and a bit stretchy at this point, but the dough will tear if you pull it. Add the softened butter and continue to knead for another 5-6 minutes until you pass the windowpane test. The dough should be smooth and elastic and just slightly sticky to the touch. When you stretch a small portion of the dough slowly and thinly, it won't break. You can stop kneading at this point
First proofing:
- Oil the bowl and cover and let the dough rise at temperature about 77-86 F (25-30 C) until they are double in size. This may take 1 hour or longer depending on the temperature. If it's really warm where you are, it may not take that long
- When you poke the dough with your lightly oiled finger, the indentation stays. This means the proofing is done and the dough has doubled in size
Shaping:
- Grease the loaf pan well (including the pullman lid if you plan to use it) or use cooking spray. Lightly dust your work surface and rolling pin with a bit of bread flour, not too much.
- Remove the dough and put on your work surface. Deflate the dough by punching the dough down to release gas. Roll it up into a round dough ball again. Cover and let it rest for 10 minutes to let the gluten relax so we can shape it
- Flatten the dough into a rectangle with your palm the best you can, slightly shorter than the length of your pan. Fold the dough down halfway and flatten with your palm. Then fold the two corners to center and flatten with your palm again. Then fold it down halfway again and flatten with the back of your palm and continue to roll it down once more and flatten with the back of your palm. Roll one last time and pinch the seam to seal. Refer to this video from King Arthur Baking if you need some visual. Very useful!
- Put the shaped dough into the pan and lightly push it down with your fingers. Cover with a plastic wrap and let it do the final proofing
Final proofing:
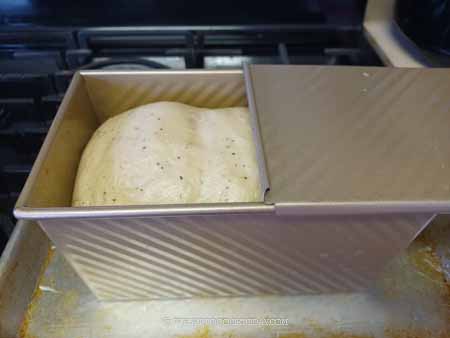
- If you plan to use the cover of the pullman loaf tin, proof until the dough about 1/2 inch below the rim of the pan. Close the lid. If you don't plan to use the lid or you use regular loaf pan, proof until it reaches the rim of the pan. This may take 45 minutes to 1 hour in a warm place. The time depends on the temperature. So watch the dough closely. When you gently push on the dough, it should bounce back very slowly and leave some indentation. This shows that the final proofing is completed
Baking:
- If you bake with a Pullman tin with the lid, 10 minutes before the end of final proofing, preheat oven to 375 F (190 C) for a conventional oven. For a convection oven, lower the temperature by 20 F or 15 C. Place the loaf pan in the middle rack and bake for 10 minutes and then lower the temperature to 350 F (180 C) and continue baking for 23-25 minutes or until the internal temperature is 190 F (88 C)
- If you bake without a lid, preheat oven to 350 F (180 C) for conventional oven. For a convection oven, lower the temperature by 20 F or 15 C. Place the loaf pan in the middle rack and bake for 30-35 minutes or until the internal temperature is 190 F (88 C)
Cooling:
- Remove the pan from the oven and remove the bread from the pan and remove the lid if you use the lid. Remove the bread onto a cooling rack and let it cool down completely on the rack. This may take 2-3 hours. Do not attempt to slice the bread while it is still warm. The crumb will turn gummy
Storing:
- Once they have cooled down completely, you can wrap put inside a bread bag, push all the air out and seal the bag and keep them at room temperature for 2-3 days. For longer storage, wrap with a plastic wrap and keep them in freezer bag for about 1 month
- Simply thaw at room temperature before serving
RECOMMEDED TOOLS


*Nutrition facts are just estimates and calculated using online tools*

Step-by-step on how to bake Earl Grey milk tea bread using poolish
1. Mix all ingredients for poolish and let it sit for a minimum of 4-6 hours at room temperature. You can even put this in the fridge until the next day when you are ready to use them. Simply let it comes to room temperature for an hour or so before using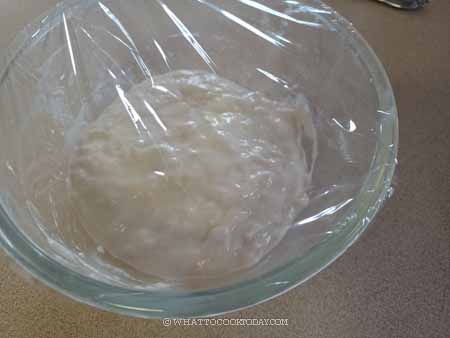
2. Bring the milk just to just a gentle simmer, about 180 F (80 C) and then remove from the heat. Put the tea bags in and let the tea bags steep in the milk for about 8 minutes. Don’t let the tea steep for too long or it can be too bitter. Squeeze out excess milk from the tea bags. Let the milk tea cool down to lukewarm (about 105 F or 40 C) by putting it on the ice bath to cool it down quickly, about 5 minutes or so. Optional: I emptied two of the tea bags and add them to the dough. It’s nice to have some specks of Earl grey tea dust
3. Put all ingredients for the dough, the milk tea, the tea (if using), and the poolish in a mixing bowl of a stand mixer fitter with a dough hook attachment, except for the butter, which we will add last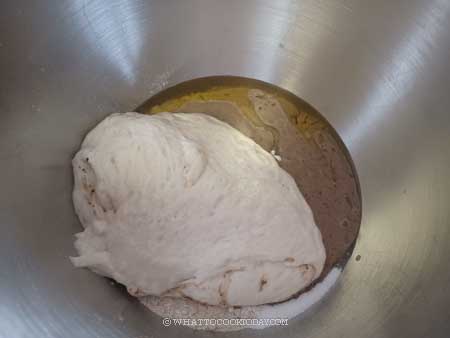
4. Start the mixer on low (“stir” on KA) and knead for about 2 minutes. It should come to a rough dough. If it’s too dry, you can add more milk, one teaspoon at a time. Once you get a rough dough that is slightly sticky, increase speed to 2 and knead for 5 minutes, the dough should be smoother and a bit stretchy at this point, but the dough will tear if you pull it. 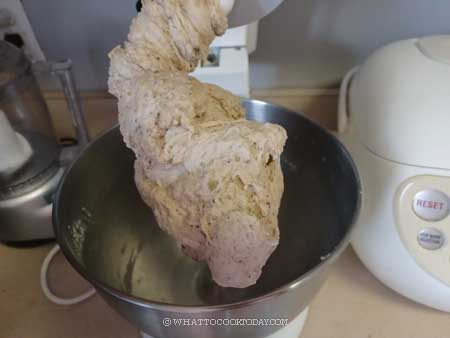
5. Add the softened butter and continue to knead for another 5-6 minutes until you pass the windowpane test. The dough should be smooth and elastic and just slightly sticky to the touch. When you stretch a small portion of the dough slowly and thinly, it won’t break. You can stop kneading at this point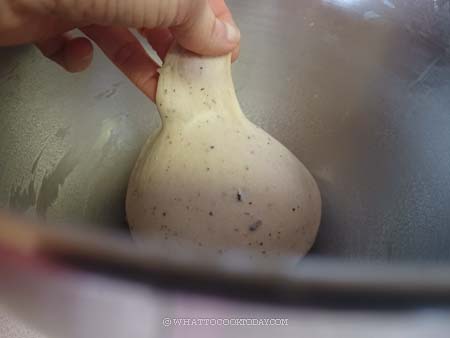
6. Oil the bowl and cover and let the dough rise at temperature about 77-86 F (25-30 C) until they are double in size. This may take 1 hour or longer depending on the temperature. If it’s really warm where you are, it may not take that long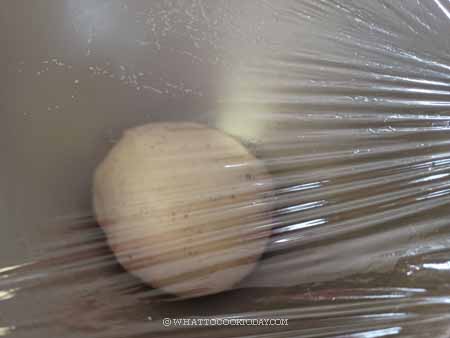
7. When you poke the dough with your lightly oiled finger, the indentation stays. This means the proofing is done and the dough has doubled in size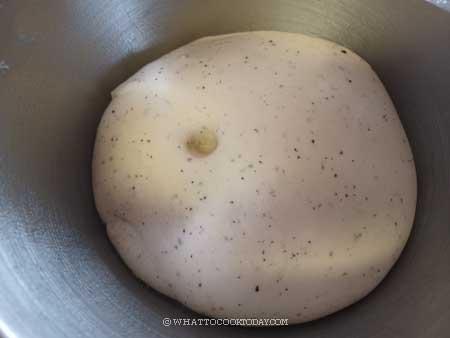
8. I use my small Pullman loaf tin with the lid. You can use regular 8 1/2 x 4 1/2 loaf pan. Grease the loaf pan well (including the pullman lid if you plan to use it) or use cooking spray. Lightly dust your work surface and rolling pin with a bit of bread flour, not too much.
9. Remove the dough and put on your work surface. Deflate the dough by punching the dough down to release gas. Roll it up into a round dough ball again. Cover and let it rest for 10 minutes to let the gluten relax so we can shape it
10. Flatten the dough into a rectangle with your palm the best you can, slightly shorter than the length of your pan. Fold the dough down halfway and flatten with your palm. Then fold the two corners to center and flatten with your palm again. Then fold it down halfway again and flatten with the back of your palm and continue to roll it down once more and flatten with the back of your palm. Roll one last time and pinch the seam to seal. Refer to this video from King Arthur Baking if you need some visual. Very useful!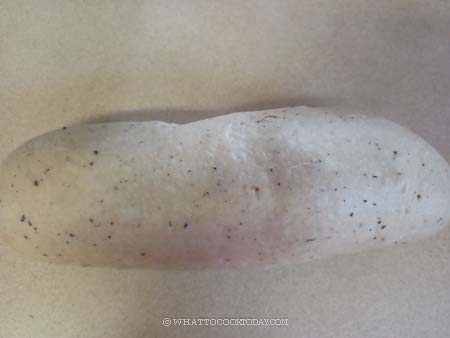
11. Put the shaped dough into the pan and lightly push it down with your fingers. Cover with a plastic wrap and let it do the final proofing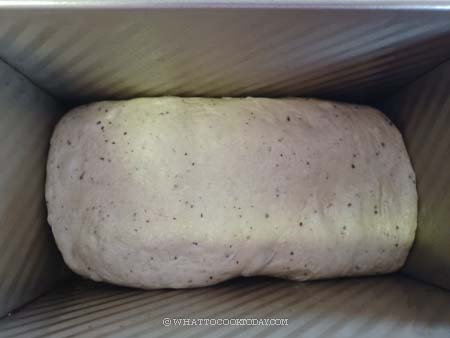
12. If you plan to use the cover of the pullman loaf tin, proof until the dough about 1/2 inch below the rim of the pan. Close the lid. If you don’t plan to use the lid or you use regular loaf pan, proof until it reaches the rim of the pan. This may take 45 minutes to 1 hour in a warm place. The time depends on the temperature. So watch the dough closely. When you gently push on the dough, it should bounce back very slowly and leave some indentation. This shows that the final proofing is completed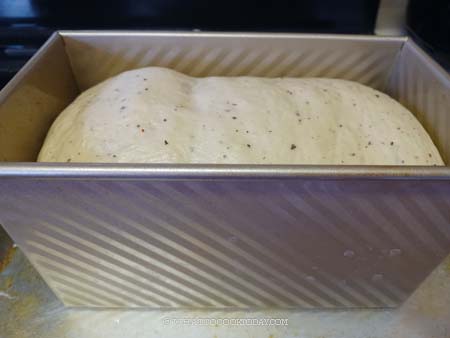
13. If you bake with a Pullman tin with the lid, 10 minutes before the end of final proofing, preheat oven to 375 F (190 C) for a conventional oven. For a convection oven, lower the temperature by 20 F or 15 C. Place the loaf pan in the middle rack and bake for 10 minutes and then lower the temperature to 350 F (180 C) and continue baking for 23-25 minutes or until the internal temperature is 190 F (88 C). If you bake without a lid, preheat oven to 350 F (180 C) for conventional oven. For a convection oven, lower the temperature by 20 F or 15 C. Place the loaf pan in the middle rack and bake for 30-35 minutes or until the internal temperature is 190 F (88 C)
14. Remove the pan from the oven and remove the bread from the pan and remove the lid if you use the lid. 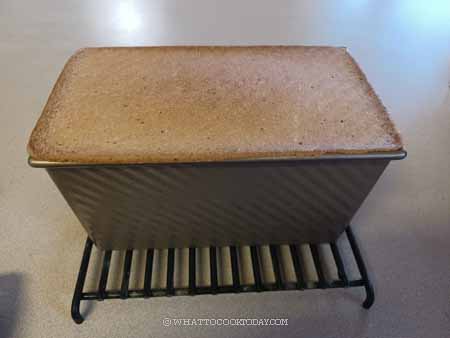
15. Remove the bread onto a cooling rack and let it cool down completely on the rack. This may take 2-3 hours. Do not attempt to slice the bread while it is still warm. The crumb will turn gummy

How to adjust the recipe for different pan sizes
If this is your first time making this recipe with Pullman loaf pan, I suggest baking without the lid first to figure out how the dough fills the pan after baking. The type of flour you use and hydration affect how much the dough rises too. I haven’t personally tried this on the pan I mentioned below because I don’t own all of the pan below. I theoretically calculate the volume of the pan and adjust from there.
1. For 8.5 x 4.5 x 2.75 inches loaf pan, follow the recipe as is, the loaf will be wider
2. For 9 x 5 x 2.75 inches loaf pan, you can 1.1 x the recipe
3. For small Pullman loaf pan 9 x 4 x 4 inches loaf pan from USA Pan, you can 1.2 x the recipe
4. For large Pullman loaf pan 13 x 4 x 4 inches loaf pan from USA Pan, you can 1.6 x the recipe
Ingredients and substitutions
1. Earl Grey tea
I use tea bags, but feel free to you loose-leaf tea if that’s what you prefer
2. Bread flour
I use King Arthur Baking’s bread flour (not sponsored), which has about 12.7% protein content. I don’t recommend using all-purpose flour. If you must substitute with all-purpose flour, you need to cut down on the liquid. Try to reserve 10-20 grams of liquid.
3. Milk
I use whole milk, but you can use low-fat milk if that’s what you prefer.
4. Milk powder
Why add milk powder? It adds a nice milky aroma to the bread and it also improves the texture of the bread. I highly recommend it but you can skip it if you don’t have any
5. Instant yeast
I usually use SAF instant yeast. Feel free to use what’s available in your area. You can also use active dry yeast, but you need to activate the yeast first before mixing it into the dough. Simply mix the yeast with about 2 Tbsp of the milk tea you prepared (make sure it’s not lukewarm and not hot) and a small pinch of sugar and let them sit for 10 minutes until they are foamy
6. Sugar
This is not a sweet bread but the sugar is there to enhance the overall taste of the bread
7. Salt
The salt does improve the flavor of the bread too
8. Unsalted butter
Butter gives the bread a soft and moist texture. If you use salted butter, you can omit or reduce the amount of salt in the recipe
Did you make this Earl Grey milk tea bread recipe?
I love it when you guys snap a photo and tag it to show me what you’ve made. Simply tag me @WhatToCookToday #WhatToCookToday on Instagram and I’ll be sure to stop by and take a peek for real!

