This post may contain affiliate links. Please read our disclosure policy.
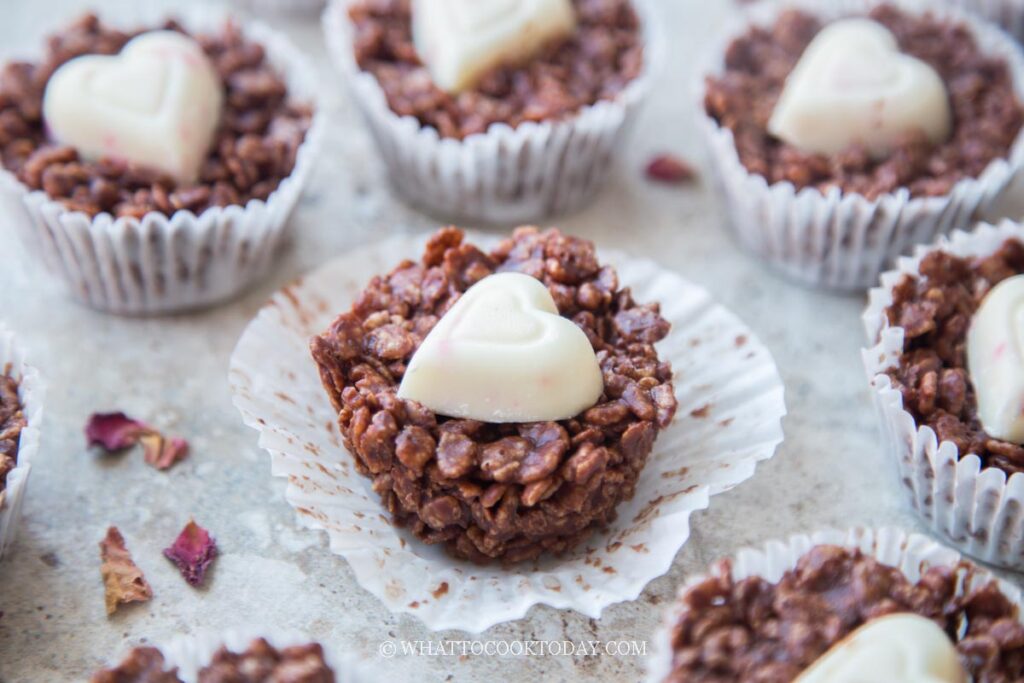
These easy no-bake Valentine chocolate nests are made with cereal, melted chocolate, butter, and corn syrup for a rich, chewy, crispy treat kids and adults love.

If you need a super quick Valentine treat that looks adorable but takes almost zero effort, this one’s for you. These chocolate nests are inspired by the classic Easter chocolate nests I made for my kids when they were little, but I gave them a Valentine twist with cute heart chocolates in the center. My kids absolutely love helping me press the nests into the chocolate nest. Besides, this is a treat not only suitable for kids but also for adults, who find it very tasty! Most recipes use melted chocolate and cereal, which can turn rock hard once set. I add butter and light corn syrup, and trust me — it makes a huge difference. The texture is softer, slightly chewy, and way more decadent. Plus… no oven needed. Win-win.
Why You’ll Like This Recipe
- Completely no-bake — perfect for busy days or when you don’t want to turn on the oven
- Super kid-friendly and fun to assemble
- Softer, fudgier texture instead of hard, brittle chocolate
- Only a handful of pantry ingredients
- Perfect for Valentine’s parties, lunchboxes, or homemade gifts
Ingredients and Substitutions
- Rice Krispies or crushed shredded wheat – either gives crunch; cornflakes or any crispy cereal works too
- Milk chocolate chips – adds sweetness and creaminess
- Semi-sweet chocolate chips – balances the sweetness
- Unsalted butter – adds richness and a softer texture
- Light corn syrup – helps bind everything and keeps the nests chewy instead of hard
- Salt – enhances the chocolate flavor
- Heart-shaped chocolate candy – or any chocolate, M&M’s, truffles, or sprinkles for topping
What to Serve This With
- A Valentine’s dessert platter with brownies and sugar cookies
- Hot cocoa or strawberry milk for kids
- Coffee or tea for adults
- Packed into treat bags for classroom parties
- Alongside fresh berries to balance the sweetness
Storage
- Store in an airtight container at room temperature for up to 1 week
- Refrigerate if your kitchen is warm to prevent melting
- Freeze for up to 2 months
- Thaw at room temperature before serving
Helpful Tips
- Press the mixture firmly so the nests don’t crumble later
- Don’t overheat the chocolate or it can seize
- Work quickly before the mixture cools and firms up
- Use white or pink candy for a pretty color contrast
Frequently Asked Questions
- Can I use only one type of chocolate?
Yes. You can use all milk or all semi-sweet, but I like the combo for balanced sweetness. - Why add light corn syrup?
It keeps the chocolate soft and chewy instead of turning hard like a chocolate bar. - Can I make these gluten-free?
Yes, just use a certified gluten-free crispy cereal. - Can I use marshmallows instead?
Not for this recipe because the texture will be more like Rice Krispie treats rather than chocolate nests. - How far ahead can I make these?
They’re great made 3–5 days ahead, which makes them perfect for parties.
These little chocolate nests are honestly one of those “low effort, high reward” treats I come back to every year. They’re cute, festive, and almost impossible to mess up — which is exactly what I want when life gets busy. If you’re making Valentine treats with kids, this is definitely one to try. Don’t be surprised if half disappear before they even finish setting 😄

Easy Valentine Chocolate Nests
Ingredients
For chocolate nest:
- 100 g rice krispies or shredded wheat (crushed)
- 88 g milk chocolate chips
- 88 g semi-sweet chocolate chips
- 93 g unsalted butter
- 93 g light corn syrup
- ⅛ tsp salt
Topping:
- Heart-shaped chocolate
Instructions
Prepare the chocolate nest:
- Line muffin tin with cupcake liners
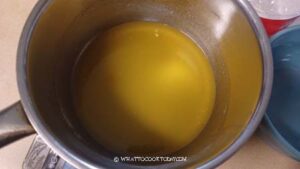
- Put butter, light corn syrup, and salt in a saucepan over medium heat and cook until butter is melted.

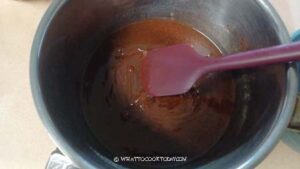
- Remove from the heat and stir in both chocolate and continue to stir until all the chocolate melts
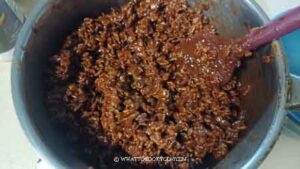
- Stir in the rice krispies or crushed shredded wheat into the chocolate mixture and stir to combine everything evenly
Assembling:
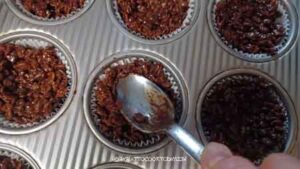
- Spoon the chocolate mixture into the muffin cups. Use the back of the spoon to press the cereal mixture into the pan, slightly hollow at the center and higher around the edge. The slightly hollow center is for you to put the heart-shaped chocolate. Press the cereal mixture firmly against the pan so they stick together and won't fall apart easily.
- I use this Hershey's heart chocolate candy. You can use whatever you want
- Place one piece of heart-shaped chocolate in the hollow. Feel free to use whatever chocolate you want. I used Hershey's heart-shaped chocolate and it is quite large, so I only need one. I also use the white chocolate color so it looks more contrast against the dark brown chocolate nest


Let the nests set:
- Leave them to set for about 2 hours. You can speed up the process by putting them in the fridge too
Storage:
- They can be kept in an air-tight container, at room temperature, for up to one week. They freeze well too. Simply thaw at room temperature before serving
