This post may contain affiliate links. Please read our disclosure policy.
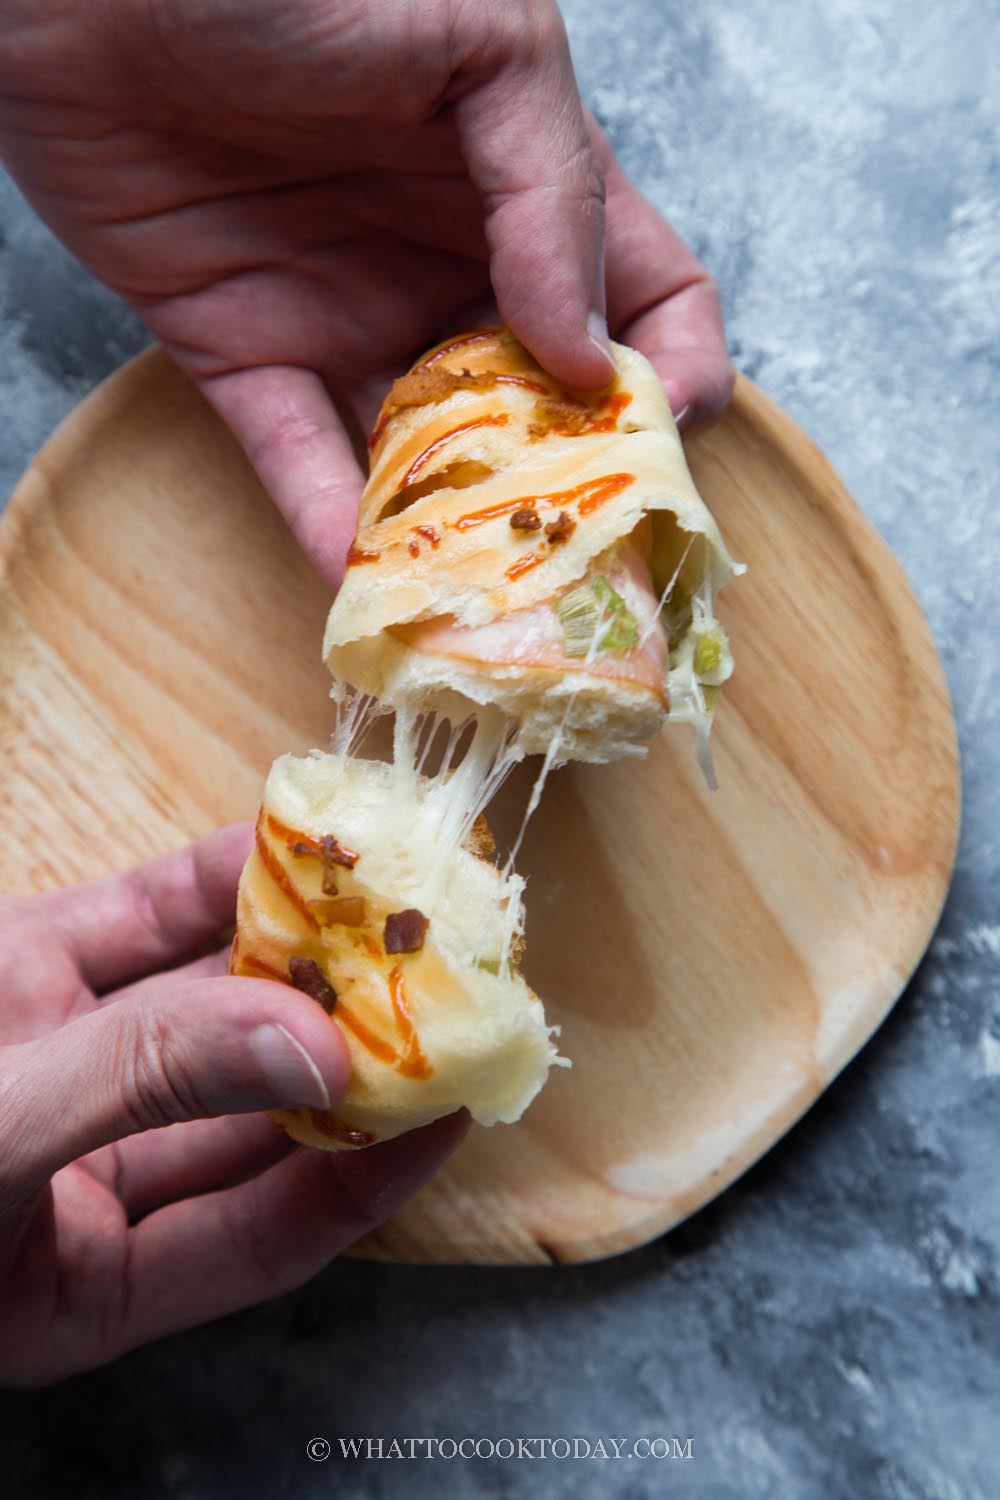
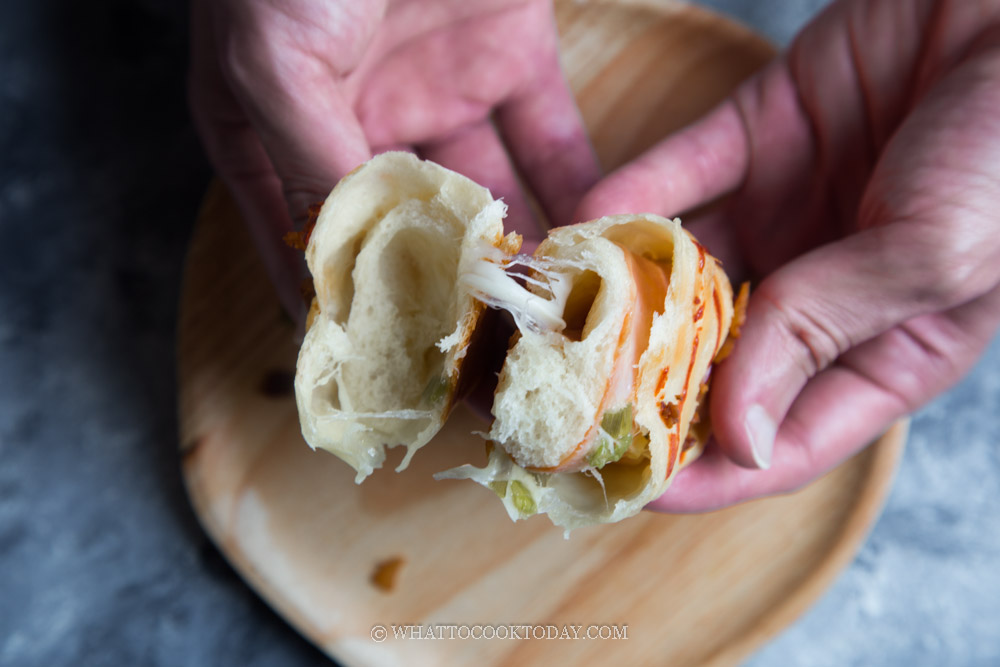
Learn how to make Chinese bakery-style soft and buttery buns filled with cheese, ham, and green onion and topped with bacon bits, ketchup, and mayonnaise. It’s a kind of savory bun that most Asian kids grew up with.
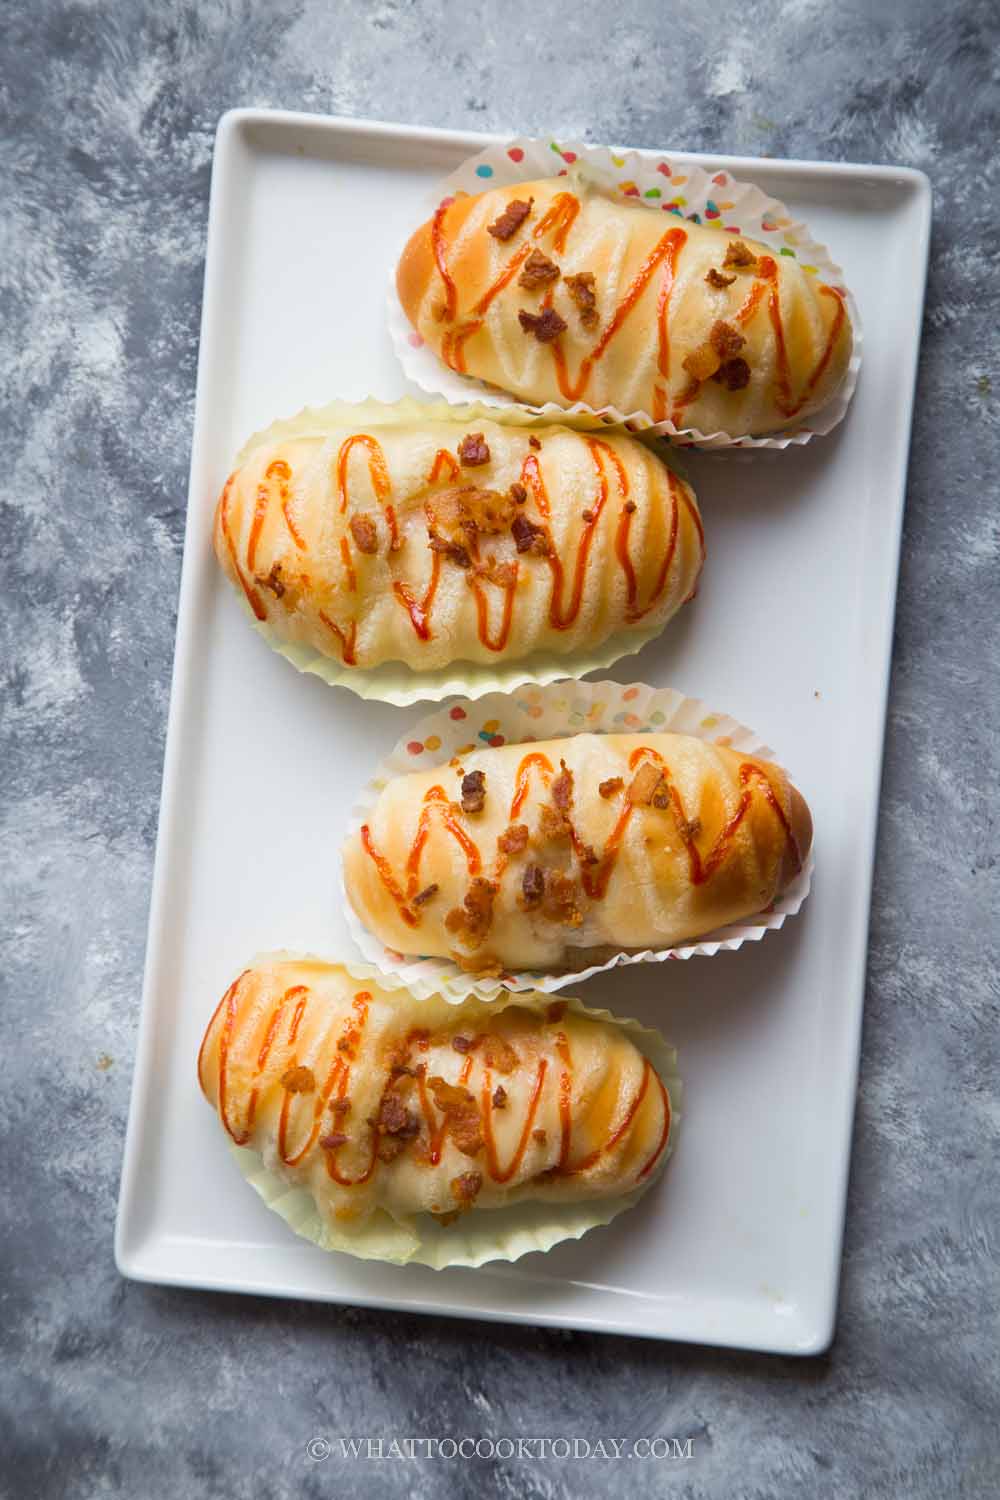
It’s not uncommon to walk into bakery shops in Asia to see these ham and cheese buns. I grew up with these savory baked buns and loved them so much as a kid and still do. My late dad went to a bakery shop after work every day and he would pick up some of his favorite kueh, sliced cakes for him and us, and some savory buns and kueh for my mom (she hates sweets and dessert lol) and us. I eat both sweets and savory stuff (if it’s not obvious already!)
What is Chinese bakery-style ham and cheese bun?
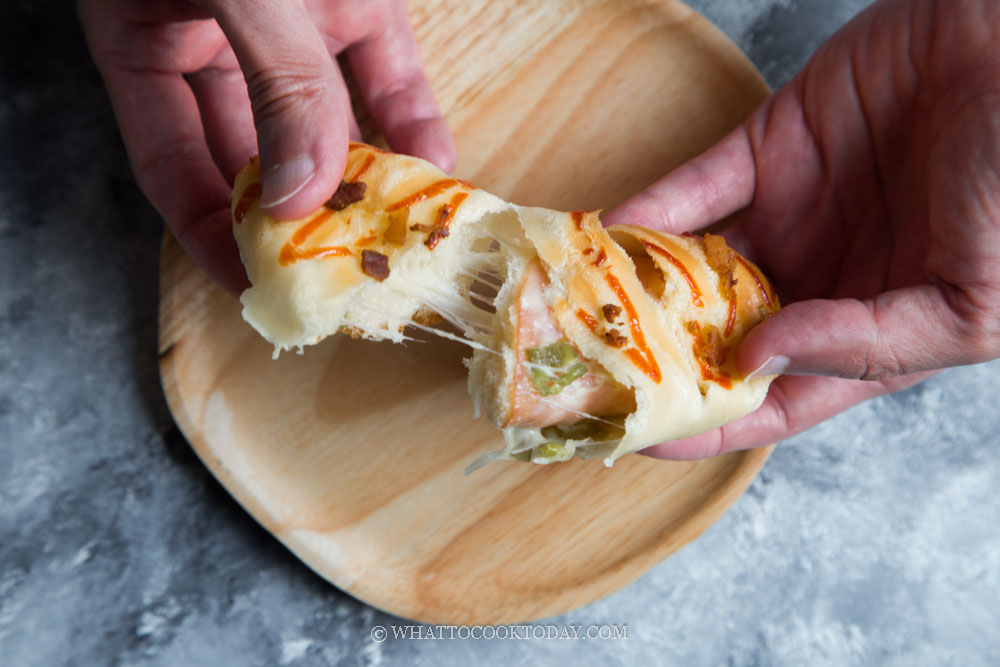
Really, it’s just bread with ham and cheese and more often than not, topped with kewpie mayo and sometimes, ketchup. The bread/buns are usually very soft and fluffy. Even though this is more of a Western influence than Asian, I hardly ever see this type of buns here in the U.S, not in this kind of presentation anyway.
Do I need to use poolish?
I love using poolish to make the bread dough. It creates soft and fluffy bread/buns. If you wish to use a “faster” method, not having to do the preferment the day before, you can use tangzhong method, you can use this recipe to make this ham and cheese buns too. You will get more than 12 buns as the dough is slightly bigger
How to make Chinese bakery-style ham and cheese buns
1. Prepare poolish (the day before you plan to make the bread):
Mix all ingredients for poolish and let it sit for 8-10 hours. You can even put this in the fridge until the next day when you are ready to use them. They can be kept in the fridge for up to 5 days. Simply let it comes to room temperature for an hour or so before using


2. Prepare the dough. Put all ingredients for the dough and the poolish in a mixing bowl of a stand mixer fitter with a dough hook attachment

3. Start the mixer on low (“stir” on KA) and knead for about 2 minutes. It should come to a rough dough. If it’s too dry, you can add a bit more milk. Once you get a rough dough that is slightly sticky, increase speed to 2 and knead for 7-8 minutes, the dough should be smoother and a bit stretchy at this point, but the dough will tear if you pull it

4. Add the softened butter and continue to knead for another 5-6 minutes until you pass the windowpane test. When you stretch the dough thinly, it won’t break. You can stop kneading at this point

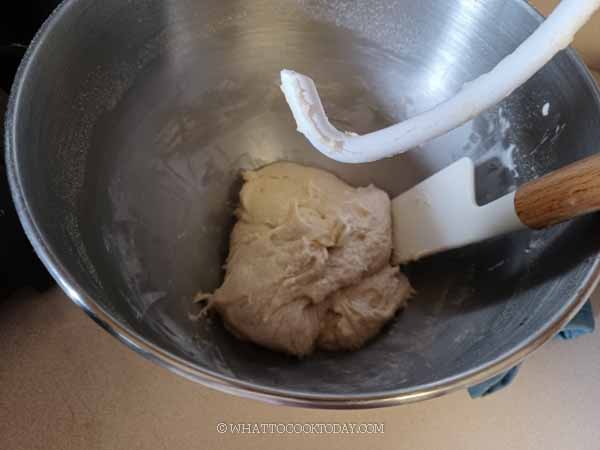
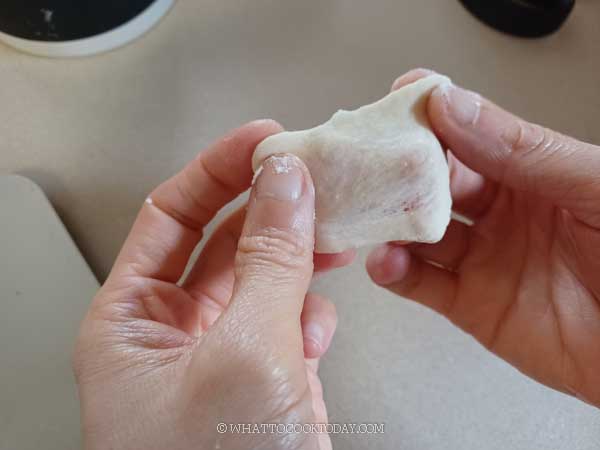
5. Oil the bowl and cover and let the dough rise at temperature about 77-86 F (25-30 C) until they are double in size. This may take 1 hour or longer depending on the temperature. If it’s really warm where you are, it may not take that long

6. When you poke the dough with your lightly oiled finger, the indentation stays. This means the proofing is done and the dough has doubled in size

7. Lightly oil your working surface and your palms. I use non-stick cooking spray and deflate the dough, pushing out all the air. Divide the dough into 12 smaller doughs, about the same size and round them into dough balls. Cover and let them rest for 15 minutes

8. Work with one dough at a time and keep the rest covered. Take one dough and roll it out into about 7-8 inches long oval shape. Place half slice of cheese, a piece of ham (cut to fit into size), and some sprinkles of green onion

9. Roll it up from the side near you and then pinch both ends to seal
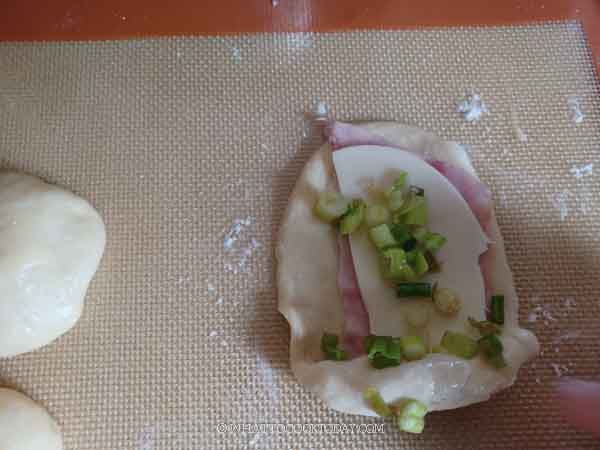
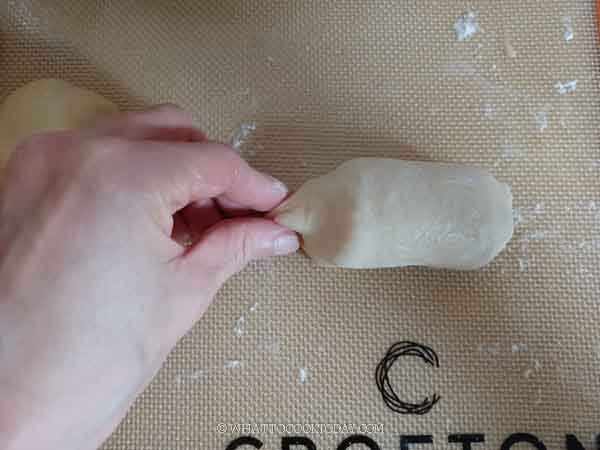

10. Place this on a large muffin or cupcake paper liner and arrange it on a baking sheet. Repeat with the rest of the dough and filling
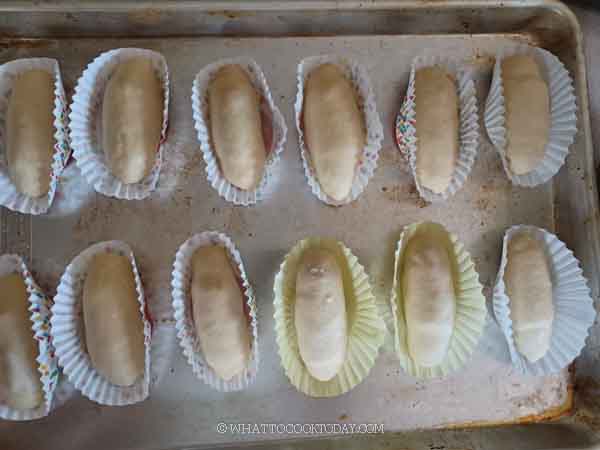
11. Cover and let the shaped buns proof again at a warm place until it doubles in size, about another hour, depending on how warm or cold the temperature where you are. When you gently press on the dough, it should bounce back slowly and feels lighter too. It means that the dough is done proofing.

12. 10 minutes before the end of proofing, preheat your oven to 350 F (180 C) for conventional bottom heat only oven. For convection top and bottom heat, lower the temperature by 20 degrees. Transfer about 1-2 Tbsp of ketchup and mayo into separate plastic bags, pushing it to one corner and then snip the corner of the bag with scissors so you can squeeze the sauce out to decorate. Decorate the top of the bun with some ketchup and mayo (as shown in the photo above). Top with some bacon bits if you like

13. Bake in the preheated oven, middle rack, for 15-20 minutes or until nicely golden brown
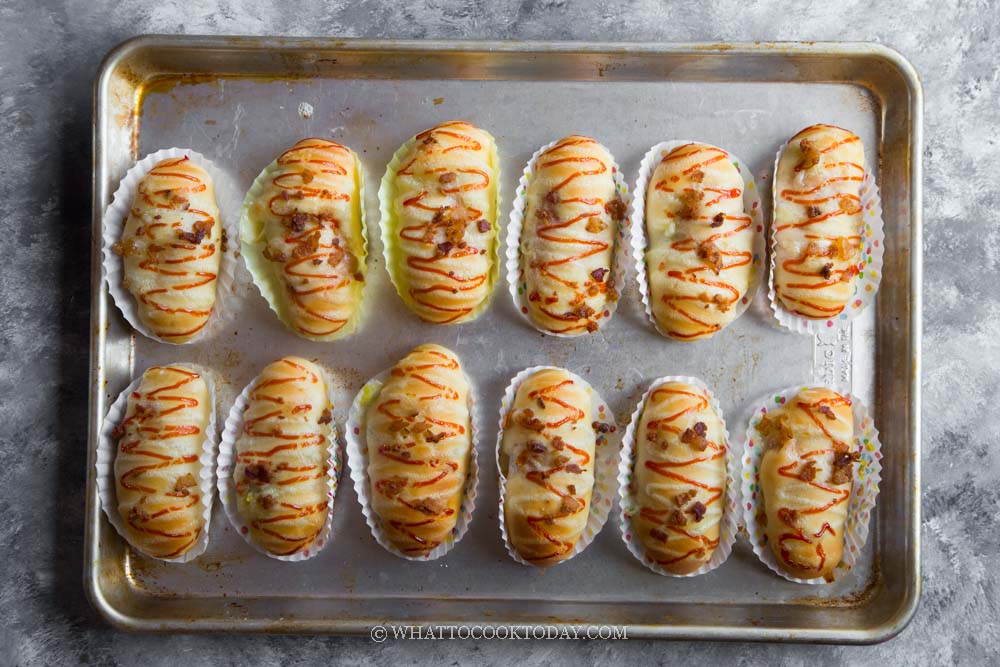
14. The buns are best served warm as the cheese is melty and gooey. The cheese will harden as it cools down completely, which is normal. A few seconds in a microwave will warm it back up
Did you make this Chinese bakery-style ham and cheese buns (with Poolish) recipe?
I love it when you guys snap a photo and tag to show me what you’ve made 🙂 Simply tag me @WhatToCookToday #WhatToCookToday on Instagram and I’ll be sure to stop by and take a peek for real!
Chinese Bakery Style Ham, Cheese, Mayo Buns (with Poolish)
Ingredients
Poolish:
- 50 gr bread flour
- 50 gr water
- ¼ tsp instant yeast
Main dough:
- 210 gr bread flour
- 15 gr milk powder
- 30 gr sugar
- 1 tsp instant yeast
- ½ tsp salt
- 50 gr egg beaten
- 50 ml milk
- 25 gr butter unsalted softened
Filling:
- 6 slices cheddar cheese cut in half
- 12 thin slices ham
- 2 stalks green onion finely chopped
Topping (optional):
- 2 Tbsp Bacon bits or more as needed
- 2 Tbsp Ketchup or more as needed
- 2 Tbsp Kewpie mayo regular mayo works too, more as needed
Instructions
Prepare poolish (the day before you plan to make the bread):
- Mix all ingredients for poolish and let it sit for 8-10 hours. You can even put this in the fridge until the next day when you are ready to use them. They can be kept in the fridge for up to 5 days. Simply let it comes to room temperature for an hour or so before using
Prepare the dough:
- Put all ingredients for the dough and the poolish in a mixing bowl of a stand mixer fitter with a dough hook attachment
- Start the mixer on low ("stir" on KA) and knead for about 2 minutes. It should come to a rough dough. If it's too dry, you can add a bit more of the egg. Once you get a rough dough that is slightly sticky, increase speed to 2 and knead for 7-8 minutes, the dough should be smoother and a bit stretchy at this point, but the dough will tear if you pull it. Add the softened butter and continue to knead for another 5-6 minutes until you pass the windowpane test. When you stretch the dough thinly, it won't break. You can stop kneading at this point
First proofing:
- Oil the bowl and cover and let the dough rise at temperature about 77-86 F (25-30 C) until they are double in size. This may take 1 hour or longer depending on the temperature. If it's really warm where you are, it may not take that long
- When you poke the dough with your lightly oiled finger, the indentation stays. This means the proofing is done and the dough has doubled in size
Filling and shaping:
- Lightly oil your working surface and your palms. I use non-stick cooking spray and deflate the dough, pushing out all the air. Divide the dough into 12 smaller doughs, about the same size. Cover and let them rest for 15 minutes
- Work with one dough at a time and keep the rest covered. Take one dough and roll it out into about 7-8 inches long oval shape. Place half slice of cheese, a piece of ham (cut to fit into size), and some sprinkles of green onion. Roll it up from the side near you and then pinch both ends to seal. Place this on a large muffin or cupcake paper liner and arrange it on a baking sheet. Repeat with the rest of the dough and filling
Second proofing:
- Cover and let the shaped buns proof again at a warm place until it doubles in size, about another hour, depending on how warm or cold the temperature where you are. When you gently press on the dough, it should bounce back slowly and feels lighter too. It means that the dough is done proofing.
- 10 minutes before the end of proofing, preheat your oven to 350 F (180 C) for conventional bottom heat only oven. For convection top and bottom heat, lower the temperature by 20 degrees
- Transfer about 1-2 Tbsp of ketchup and mayo into separate plastic bag, pushing it to one corner and then snip the corner of the bag with scissors so you can squeeze the sauce out to decorate
- Decorate the top of the bun with some ketchup and mayo (as shown in the photo above). Top with some bacon bits if you like
Baking:
- Bake in the preheated oven, middle rack, for 15-20 minutes or until nicely golden brown
Serving:
- The buns are best served warm as the cheese is melty and gooey. The cheese will harden as it cools down completely, which is normal. A few second in a microwave will warm it back up
Storing:
- Let the buns cool down completely. Wrap with a cling wrap and store them in a fridge. When ready to serve, warm them up in the microwave for about 10 seconds or until warm through. You can also warm them up in the oven at 350 F (180 C). Loosely wrap them in foil. Reheat for about 5 minutes in a preheated oven and then open the foil and reheat for another 2 minutes

5 comments
This looks great! I shall try this soon. Can I use this recipe and create a loaf of bread (with poolish) without making it into buns with toppings?
Hi Melissa, you can bake it into a loaf of bread! It will give you soft fluffy loaf of bread too!
Will I need to adjust the amount of flour for a loaf? It couldn’t quite fit my bread loaf it looked really small haha.
Hi Melissa, you can try to 1.3 x the amount of ingredients in the recipe to fit a bread loaf pan, otherwise the original recipe meant to be for buns so they won’t fit a standard size bread loaf pan. Bake at 375 F(190 C) for conventional oven, 350 F (180 C) for convection oven for 35-40 minutes, depending on your oven
Thank you! I will try that :))