This post may contain affiliate links. Please read our disclosure policy.
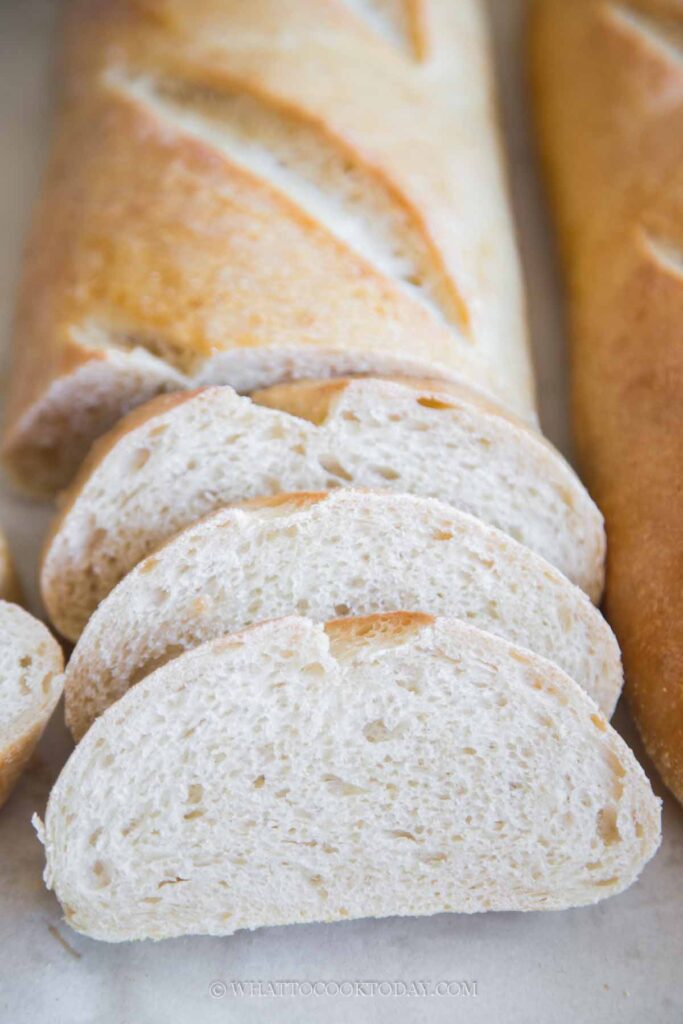
You will be amazed by how tasty and easy this Italian bread is to make. It has a thin crackly crust with soft airy crumbs. This bread is in heavy rotation in our house! So good! Try it out yourself and see 🙂
I have a major weakness for bread, in case you don’t know that already! It got even more serious when I got into sourdough baking more than two and a half years ago. We haven’t bought any bread since then (unless when we travel and I can’t bake, LOL!). This Homemade Italian bread is probably one of my favorite breads I have baked so far! If there is one bread that I can highly recommend for you to bake, it would be this one! Read on why!
What is Italian bread?
There are so many different kinds of Italian bread, but I noticed in the U.S., when people refer to “Italian bread,” they typically mean a soft-crusted, airy white bread that is shaped into a round or oblong loaf This differs from the vast variety of traditional Italian bread found in Italy such as ciabatta, focaccia, pizza, etc. I feel like the generic term “Italian bread” in the U.S. likely emerged as an adaptation of these styles, influenced by immigrant bakeries that catered to American tastes. The result is a soft, slightly chewy loaf with a thin crust.
Why we love this bread so much!
This Italian bread is AMAZING! Italian bread is known for its light, airy crumb, and thin crisp crust. It is a staple in Italian cuisine, used for everything from sandwiches to garlic bread or simply enjoyed with a drizzle of olive oil. This homemade version is easy to prepare, requiring minimal ingredients while yielding a deliciously flavorful loaf. I promise you won’t regret it!
This is a great bread to make ahead too
You can prepare it the night before and have a fresh loaf of bread the next day. The cold fermentation does wonder to the bread

Homemade Italian Bread
Ingredients
- 320 g unbleached all-purpose flour
- 197 g lukewarm water add extra 2 Tbsp of water if you use U.S. customary cup measurement
- 1 Tbsp oil
- 1 ½ tsp instant yeast
- 1 tsp sugar
- 1 tsp salt
Egg white wash:
- 1 egg white
- 1 tsp water
- Small pinch of salt
Instructions
- This recipe also doubles easily. I never thought I would double a recipe, but lately, I have been because this bread is so good and we go through them too fast! LOL! Depending on the capacity of your stand mixer, I have a 4.5 quart capacity and I can double the recipe and knead both at the same time and just split the dough in half later to make two large loaves
Kneading the Dough
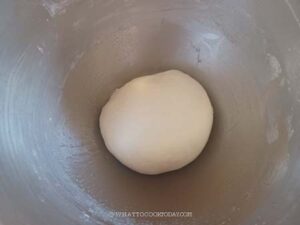
- In a stand mixer, combine all ingredients. Use the dough hook attachment to give the ingredients a rough mix. Knead for 5-6 minutes on mediumspeed (speed 4 on KA) until the dough becomes soft and elastic. The dough will be slightly sticky to the touch and that's normal

Initial Rest
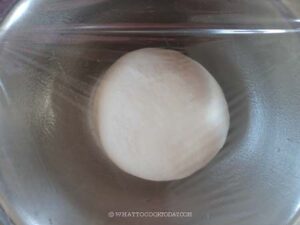
- Lightly oil the bowl, round up the dough into a dough ball and put it back into the bowl, cover with a cling wrap. Let the dough rest in the bowl at room temperature (around 78 F/ 26 C) for 30 minutes. It should puff up slightly. It doesn't have to double in size
Shaping the Dough
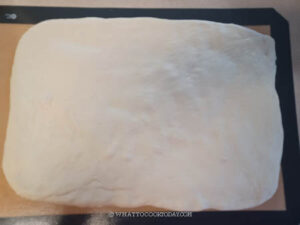
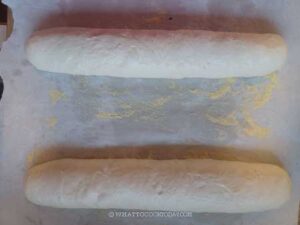
- Flatten the dough into an 8×10-inch rectangle.
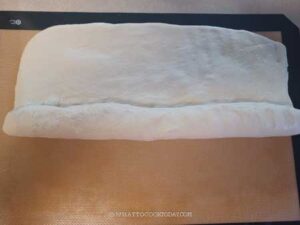
- Roll it up tightly along the long side to form a log.
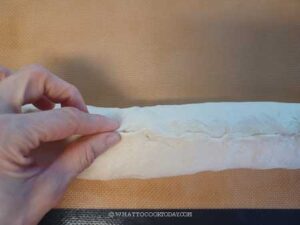
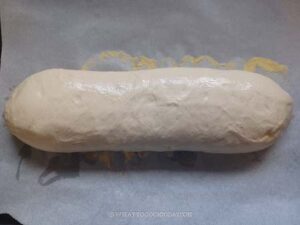
- Pinch the seams together to seal it tightly, including the two ends
Cold Proofing
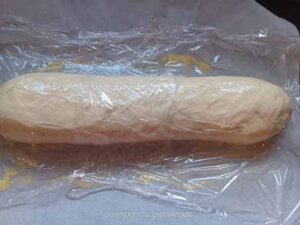
- Scatter cornmeal on a parchment-lined baking pan. Place the dough seam-side down on the baking pan
- If you are baking two loaves, you can place them on the same tray as long as your baking pan is large enough.
- Brush with 1 Tbsp oil, and cover with cling wrap (directly touching the dough). Refrigerate for at least 3 hours or up to 24 hours for cold proofing the dough. This cold fermentation produces bread with great flavor, thin crust, and soft airy crumbs. So please don't skip it and do at least 3 hours
Preparing to Bake
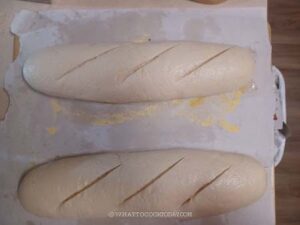
- Take the dough out 15 minutes before baking and let it rest at room temperature while preheating the oven to 425 F (218C). Position the rack in the middle of the oven
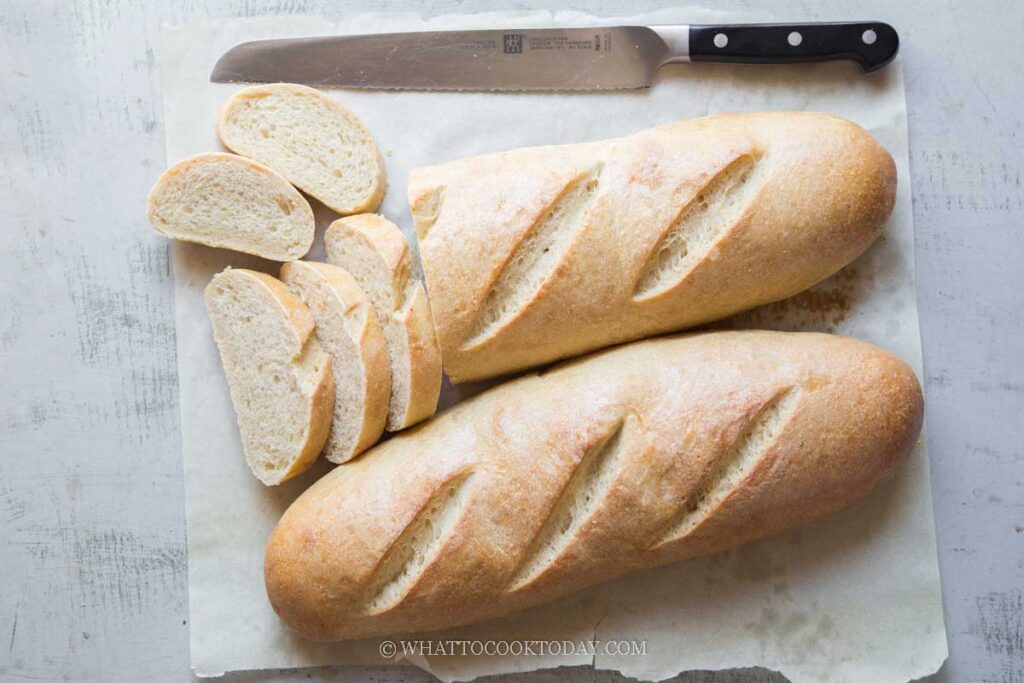
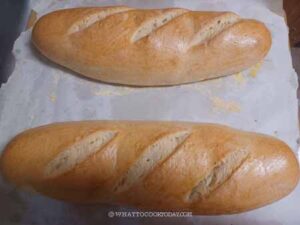
Scoring and Baking
- Using a sharp bread lame or knife, quickly and swiftly score three diagonal lines, about 1/2 inch deep, on top of the dough. Bake at 425 F for 5 minutes, then lower the temperature to 400 F (200 C) and bake for another 15 minutes.
Apply egg white wash
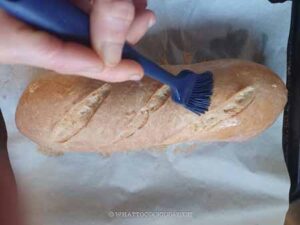
- Remove from the oven and brush the top with an egg white wash (egg white mixed with a pinch of salt and 1 tsp water). Bake for an additional 5 minutes.
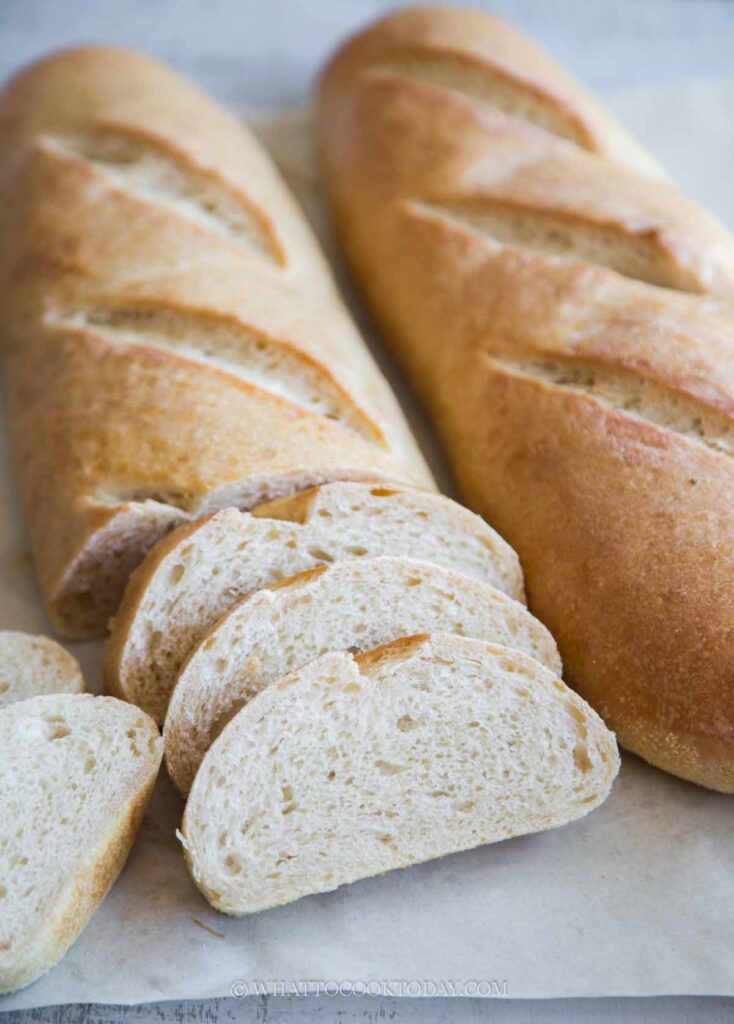
- The egg white wash applied after the initial bake gives the bread a nice gloss to the crust. It also helps achieve a thin, crackly crust while keeping the inside soft and airy. It's a simple yet effective step to elevate the texture and presentation of the bread
Cooling
- Transfer the bread to a wire rack immediately and let it cool for at least 15 minutes before slicing.
*Nutrition facts are just estimates and calculated using online tools*
Tips for Success
1. Cold-proofing benefits: A longer cold rise (up to 24 hours) enhances the depth of flavor and creates a better crust.
2. Proper scoring: Use a sharp blade to score the dough to allow controlled expansion during baking.
3. Crispy crust maintenance: For a crackly crust, allow the bread to cool completely on a wire rack before storing.
How to store freshly baked and unsliced bread
1. Short-term storage: Store at room temperature in a paper bag for up to 2 days to maintain its crisp crust.
2. For long-term storage, wrap in foil or plastic and store in the freezer for up to a month. Reheat in the oven at 350°F for a few minutes to restore crispness.
How to store sliced/cut bread
Once your homemade Italian bread is sliced, it’s best to store it properly to maintain its freshness and texture. Here are the best ways to store cut bread:
1. Short-term storage: For the first 1-2 days, you can place the cut side down on a cutting board or wrap the exposed end with a clean kitchen towel or wax paper. This helps prevent the bread from drying out while keeping the crust crisp. You can also store it in a paper bag or bread box at room temperature to allow airflow and avoid moisture buildup, which can make the crust soft.
2. For long-term storage: Wrap the sliced loaf tightly in plastic wrap or aluminum foil, then place it in a freezer-safe bag. Remove as much air as possible before sealing. Take out individual slices as needed and reheat in a toaster or oven at 350°F for 5-10 minutes.
Serving Ideas
1. Garlic Bread: Slice, brush with garlic-infused butter, and toast.
2. Sandwiches: Perfect for panini, subs, or classic Italian deli sandwiches.
3. Meal Accompaniment: Serve alongside soups, stews, or pasta dishes.
With just a handful of ingredients, you can create bakery-quality Italian bread that pairs beautifully with any meal. Whether fresh from the oven or toasted the next day, this bread delivers a delightful texture and flavor every time.