This post may contain affiliate links. Please read our disclosure policy.
Soft fluffy chiffon cake filled with chilled cream cheese filling and dusted with milk powder and served cold is so dreamy and delicious!

What is Japanese iced/chilled cheese chiffon cake?
It is basically a chiffon cake with chilled cream cheese filling in between the cake and outside the cake and then dusted with milk powder. The cake is usually served cold. I’m not exactly sure. It is named as such because of the fact that this chiffon cake is best served cold. It’s light and refreshing!
Is this the same with Japanese souffle cheesecake?
No, it’s not. The Japanese souffle cheesecake is made with a high proportion of cheese and very little flour is used, basically like a cheesecake. This recipe is a cream cheese chiffon cake iced and filled with cream cheese-based whipped cream filling
How to make Japanese iced cheese chiffon cake
1. Get the eggs out of the fridge and separate them when they are still cold. They are easier to separate when they are cold. Let the yolks and the whites come to room temperature, this may take about 30 minutes or so
2. Put cream cheese and sugar in a bowl and place this bowl over a pot with warm water and stir until cream cheese is softened and creamy. Put heavy cream in another mixing bowl and use a hand mixer to whip the cream over medium speed until just medium-soft peak. Do not whip until stiff. Add then fold in the cream cheese and Nutella (if using) until combined. Cover and keep it chilled in the fridge

3. Preheat your oven to 295 F (146 C) for a conventional oven. If you have a convection oven, I suggest lowering the temperature by 20 F (15 C). Place the oven rack 2nd rack from the bottom (or adjust accordingly, you will know your oven best)
4. Place the egg whites in a clean mixing bowl. I use a stand mixer with a whisk attachment. You will have trouble whipping your meringue if there’s a trace of grease in your utensils or bowls. In a separate bowl, whisk the egg yolks, milk, cream cheese, and oil. Sift the cake flour into the batter. Whisk to mix into a smooth batter. Set aside


5. Beat the egg whites on medium speed until frothy, add cream of tartar or lemon juice/vinegar and whip until it turns whitish and air bubbles are fine. Gradually add the sugar as you beat, in 3 batches. I beat them at medium speed (speed 6 on Kitchen Aid). I highly recommend stopping several times to check on the consistency and scraping the sides of the bowl to make sure no sugar left on the side of the bowl. Whip until you reach a stiff peak but still have a slight bent on the tip. Then lower the speed to 4 and whip for 1 minute to even out large bubbles and stop beating

6. Gently fold 1/3 of the meringue into the thick batter. Using a whisk, using a cutting motion and fold over to mix. Repeat this motion several rounds. Continue on with the second 1/3 of the meringue again to mix.

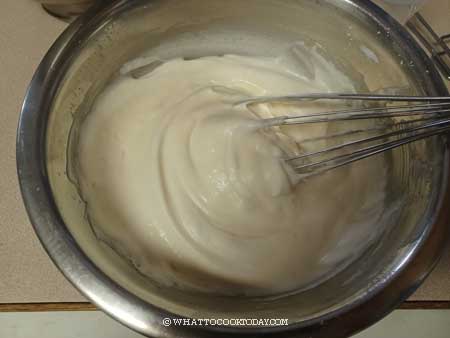
7. For the last 1/3 of the meringue, use a rubber spatula instead to ensure you get all the batter at the bottom of the bowl mixed in as well. Use a cut down in the middle and fold over motion to fold gently but quickly. Make sure you don’t see any more white meringue.
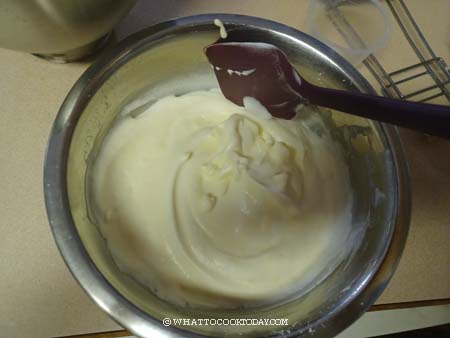
8. The mixture should be fluffy and voluminous.

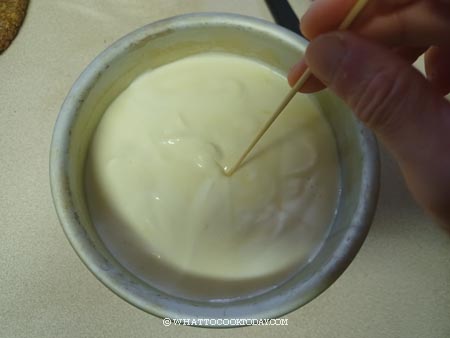
9. Pour the batter into the round cake pan. Use a rubber spatula to smooth the surface. Gently drop the cake pan from about 10 cm height on the counter 2-3 times. Use a skewer to draw a zig zag to pop bubbles inside the cake batter
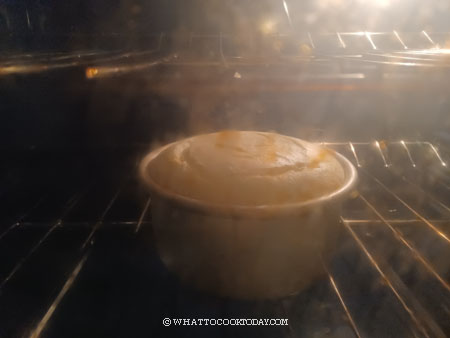
10. Put the pan on the positioned rack for 1 hour and then increase the temperature to 320 F (160 C) and bake for another 15 minutes. For convection oven, lower temperature by 20 F (15 C). The time is just for reference. Your oven may need less or more time to bake
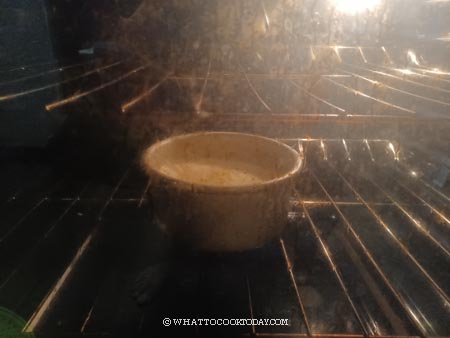
11. The top should be dry to the touch and spring back when you gently press on the top. Usually, if you insert a skewer inside the cake and no crumbs stick to it or very minimal crumbs, it is safe to say that the cake is cooked through. Don’t be alarmed if your cake has some cracks on top. What you are looking at will become the bottom of your cake. I know many people mind it a lot and make a big fuss when the top of the chiffon cake cracks, but actually it’s not a flaw.
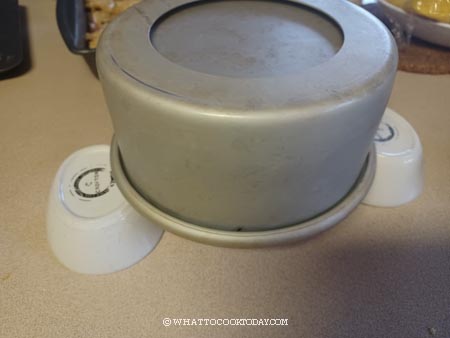
12. Drop the cake pan from about 10 cm height on the counter several times to prevent shrinkage when you pull the cake out of the oven. Then carefully invert the pan upside down immediately on a cooling rack. Please don’t be tempted to remove it from the pan if it’s still warm. It takes about one to two hours to cool down completely
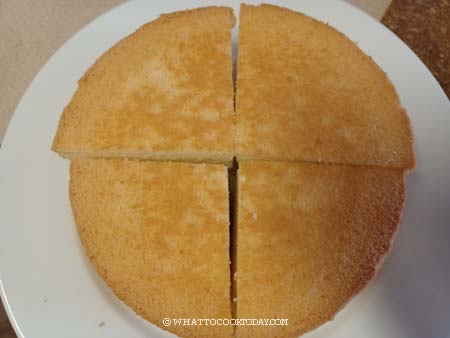
13. Once it’s cool down completely, use a spatula knife to run through the edge to help release the cake. Gently push the base to lift the cake out. Use the knife again to run through the base of the pan and then carefully release the cake. Cut the cake into 4 large pieces (you can do 6 smaller pieces too if you prefer)
14. Then cut each slice horizontally, taking care not to cut through into two slices. Fill each slice with the chilled cream cheese filling and then spread the filling on the cut side of the cake. Dip sprinkle with milk powder on the side and top of the chiffon cake. Repeat with the rest of the slice and arrange them back into a round cake for presentation. Top with some fresh fruit if you prefer.
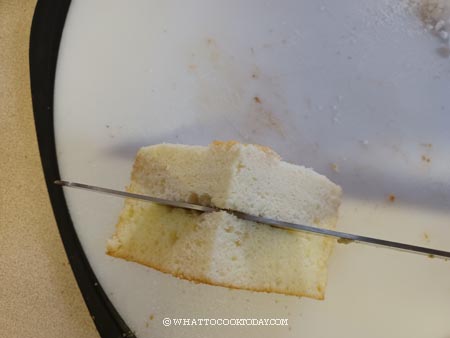
15. Fill each slice with the chilled cream cheese filling and then spread the filling on the cut side of the cake.


16. Dip into milk powder on both sides of the chiffon cake. Repeat with the rest of the slices

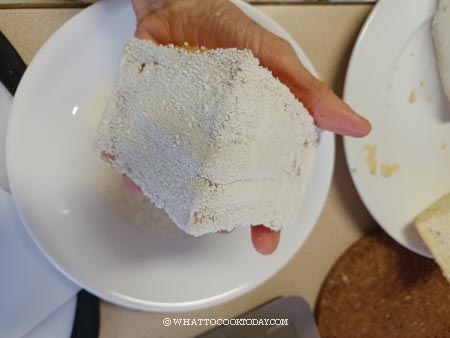
17. Arrange them back into a round cake for presentation. Dust with some milk powder on the surface of the cake. Top with some fresh fruit if you prefer. Cover the cake and keep the cake chilled in the fridge for 24 hours if you can wait that long!

Other cheese you can use
If you don’t like cream cheese (my son doesn’t like cream cheese), you can use mascarpone or ricotta cheese. Ricotta cheese won’t give a smooth texture but is still very tasty.
How to store
Leftovers can be kept in the fridge in an air-tight container for about 3 days. The longer you keep them in the fridge, the chance of the cake texture becoming dry is higher. I don’t recommend freezing.
Did you make this Japanese iced cheese chiffon cake recipe?
I love it when you guys snap a photo and tag it to show me what you’ve made 🙂 Simply tag me @WhatToCookToday #WhatToCookToday on Instagram and I’ll be sure to stop by and take a peek for real!

This recipe is adapted from Lisa’s Kitchen.
Japanese Iced/Chilled Cheese Chiffon Cake
Ingredients
Cake batter:
- 60 gr egg yolks (room temperature) from 3 large eggs
- 75 gr cake flour
- 55 gr cream cheese (softened)
- 80 gr milk (room temperature)
- 25 gr oil
Meringue:
- 90 gr egg whites (room temperature) from 2 large eggs
- 50 gr sugar
- ½ tsp lemon juice
Cream cheese filling:
- 80 gr cream cheese (softened)
- 12 gr icing sugar
- 40 gr heavy cream
- 2 Tbsp Nutella
For dusting:
Instructions
- You will need a 6-inch round cake pan with a removable bottom and a tall side and without any non-stick coating. Do not grease the pan at all. I do not recommend using a regular round pan lined with parchment paper on the bottom. I've tried this before and the base of the cake has a concave shape when I do this
- Get the eggs out of the fridge and separate them when they are still cold. They are easier to separate when they are cold. Let the yolks and the whites come to a room temperature, this may take about 30 minutes or so
Prepare the filling: (can be done the day before)
- Put cream cheese and sugar in a bowl and place this bowl over a pot with warm water and stir until cream cheese is softened and creamy. Put heavy cream in another mixing bowl and use a hand mixer to whip the cream over medium speed until just medium-soft peak. Do not whip until stiff. Add then fold in the cream cheese and Nutella (if using) until combined. Cover and keep it chilled in the fridge
Prepare cake batter:
- Preheat your oven to 295 F (146 C) for conventional oven. If you have a convection oven, I suggest lowering the temperature by 20 F (15 C). Place the oven rack 2nd rack from the bottom (or adjust accordingly, you will know your oven best)
- Place the egg whites in a clean mixing bowl. I use a stand mixer with a whisk attachment. You will have trouble whipping your meringue if there's a trace of grease in your utensils or bowls
- In a separate bowl, whisk the egg yolks, milk, cream cheese, and oil. Sift the cake flour into the batter. Whisk to mix into a smooth batter. Set aside
Prepare the meringue:
- Beat the egg whites on medium speed until frothy, add cream of tartar or lemon juice/vinegar and whip until it turns whitish and air bubbles are fine. Gradually add the sugar as you beat, in 3 batches. I beat them at medium speed (speed 6 on Kitchen Aid). This will take a bit longer compared to beating at high speed. I used to do higher speed (speed 8), but the meringue is smoother and nicer when I maintain the speed on 6 and much more stable too
- I highly recommend stopping several times to check on the consistency and scraping the sides of the bowl to make sure no sugar left on the side of the bowl. Whip until you reach a stiff peak but still have a slight bent on the tip. Then lower the speed to 4 and whip for 1 minute to even out large bubbles and stop beating
Fold meringue into the cake batter:
- Gently fold 1/3 of the meringue into the thick batter. Using a whisk, using a cutting motion and fold over to mix. Repeat this motion several rounds. Continue on with the second 1/3 of the meringue again to mix. For the last 1/3 of the meringue, use a rubber spatula instead to ensure you get all the batter at the bottom of the bowl mixed in as well. Use a cut down in the middle and fold over motion to fold gently but quickly. Make sure you don't see any more white meringue. The mixture should be fluffy and voluminous.
- Pour the batter into the round cake pan. Use a rubber spatula to smooth the surface. Gently drop the cake pan from about 10 cm height on the counter 2-3 times. Use a skewer to draw a zig zag to pop bubbles inside the cake batter
Baking:
- Put the pan on the positioned rack for 1 hour and then increase the temperature to 320 F (160 C) and bake for another 15 minutes or until the top is dry to touch and spring back lightly when you touch. The time is just for reference. Your oven may need less or more time to bake
- Usually if you insert a skewer inside the cake and no crumbs stick to it or very minimal crumbs, it is safe to say that the cake is cooked through
- Don't be alarmed if your cake has some cracks on top. What you are looking at will become the bottom of your cake. I know many people mind it a lot and make a big fuss when the top of the chiffon cake cracks, but actually it's not a flaw.
Cooling:
- Drop the cake pan from about 10 cm height on the counter several times to prevent shrinkage when you pull the cake out of the oven. Then carefully invert the pan upside down immediately on a cooling rack. Please don't be tempted to remove it from the pan if it's still warm. It takes about one to two hours to cool down completely
- Once it's cool down completely, use a spatula knife to run through the edge to help release the cake. Gently push the base to lift the cake out. Use the knife again to run through the base of the pan and then carefully release the cake.
Fill the cake:
- Cut the cake into 4 large pieces (you can do 6 smaller pieces too if you prefer). Then cut each slice horizontally, taking care not to cut through into two slices. Fill each slice with the chilled cream cheese filling and then spread the filling on the cut side of the cake. Dip into milk powder on both sides of the chiffon cake. Repeat with the rest of the slice and arrange them back into a round cake for presentation. Dust with some milk powder on the surface of the cake. Top with some fresh fruit if you prefer.
Chill the finished cake:
- Cover the cake and keep the cake chilled in the fridge for 24 hours if you can wait that long!


2 comments
I only have a spring form pan. Do you think it will work? Otherwise, I will need to use my regular chiffon vake tube pan, which may require double the recipe? Your thoughts?
Hi Tuty, I never tried it with the spring form pan before but I think it may work.