This post may contain affiliate links. Please read our disclosure policy.
Soft and fluffy matcha and sweet red bean paste-flavored milk bread are shaped into a Christmas tree. The bread stays soft for days and it makes such a cute presentation to accompany your holiday celebration.

It’s one of my favorite times of the year! Christmas is all about baking! (well, some cooking too!). Last year, I baked lots of Christmas-themed bread, cakes, and cookies. I surprisingly haven’t made any Christmas tree-shaped bread. I know the pull-apart bread is highly popular and so I thought I want to add this to the collection. This soft and fluffy milk bread is flavored with matcha and filled with sweet red bean paste and it’s so good! The bread stays soft for days even without using any yudane or tangzhong! The bread looks harder than it is, but as you scroll down to see the step-by-step process, you will soon realize that it’s pretty easy to put together.
Let’s get started, shall we?
How to bake matcha red bean Christmas tree milk bread
1. Combine bread flour, sugar, salt, and yeast in a mixing bowl of a stand mixer fitted with a dough hook attachment. Add cream cheese and milk. Turn the mixer to the lowest speed to let it stir a bit so it won’t fly all over the place. Increase the speed to 2 and knead for about 8 minutes until a dough is formed, but not smooth and flexible yet at this point
2. Add the softened butter and continue to knead again on speed 2 for another 10 minutes or until the dough reaches window pane stage. If you pull a small piece of the dough and gently and slowly pull it, it will stretch thin without breaking. You can stop kneading if you’ve reached that point. The dough should be smooth and stretchy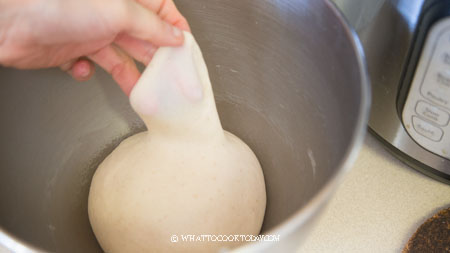
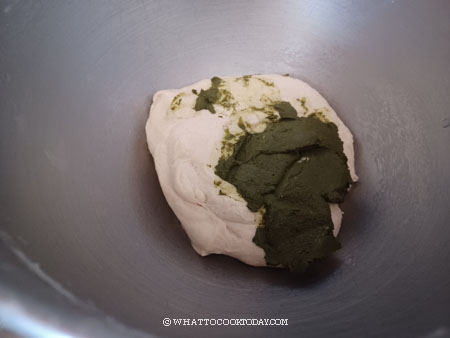
3. Pinch off 30 grams of dough. Divide into two. Add cocoa powder to one of the doughs and knead until the color is evenly distributed. The cocoa dough will be the tree trunk and the original color will be the tree topper star. Dissolve matcha powder in water and then add to the main big dough. Turn on the machine to the lowest speed and let it knead until the color is evenly distributed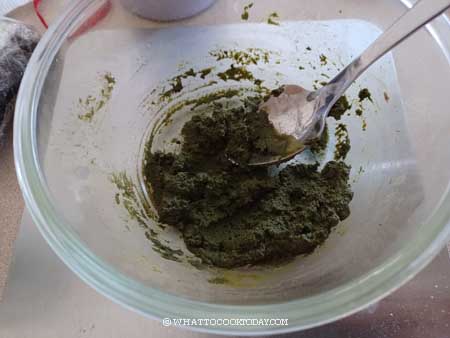
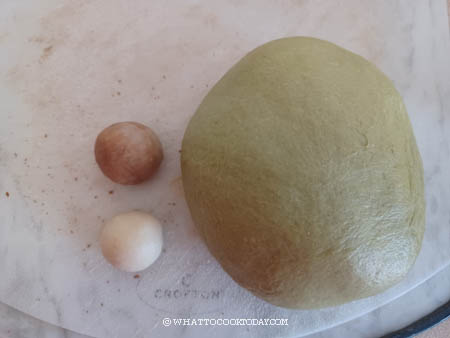
4. Cover the bowl with a plastic wrap or shower cap. Let the dough ferment at a warm place until it doubles in size. I put the other two small doughs in a large bowl for fermentation. If you poke your floured finger into the dough, the indentations stays, the dough is done proofing. This can take somewhere from 1-2 hours or longer depending on the temperature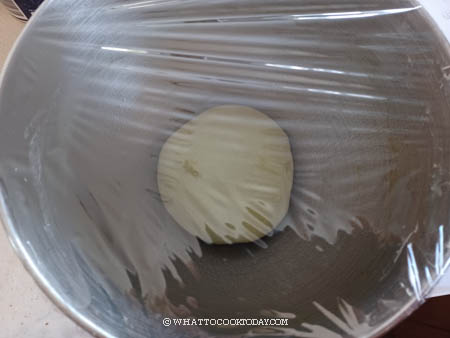
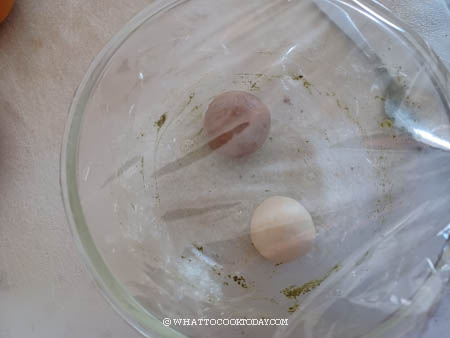
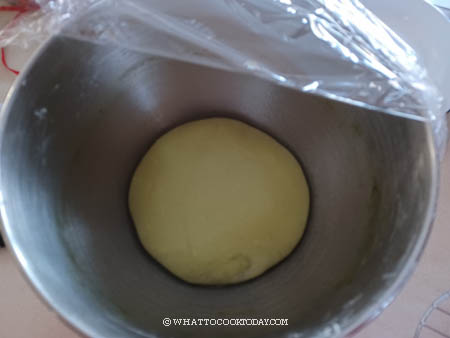
5. Set aside about 2 teaspoons of the red bean paste to fill the start and the tree trunk. Transfer the matcha dough to a work surface. I use a silicone mat. You can use a parchment paper if you don’t have a silicone mat. Punch the air out and round it up into a dough ball and divide into two equal-weight dough. Cover and let them rest for 15 minutes to relax the gluten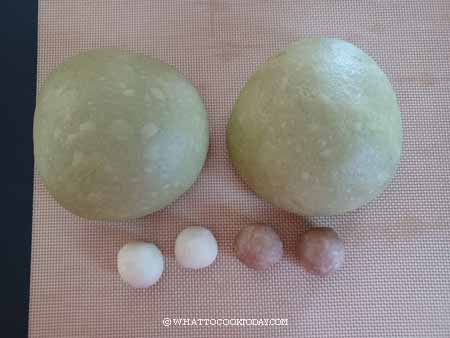
6. Roll one of the doughs out into a triangle, like a Christmas tree shape, smaller on the top and about 10 inches wide at the bottom, about 18 inches long. 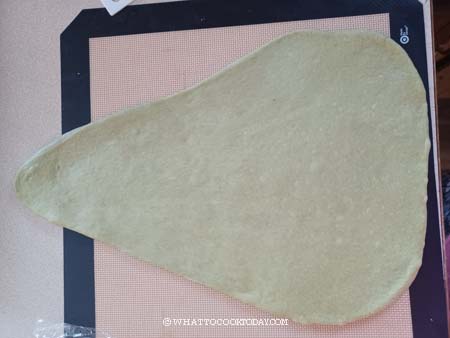
7. Lay a piece of parchment paper, the size you are going to put on an upside-down baking sheet. Flip it over and gently peel the silicone mat away. Gently reshape it. It may shrink a bit as you transfer it, stretch it out again. 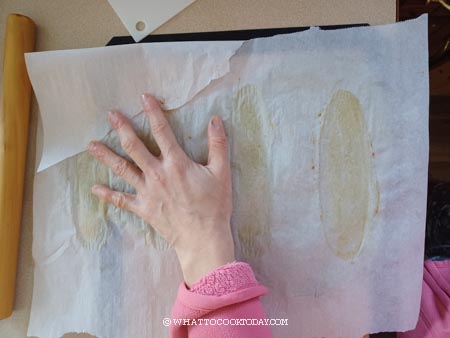
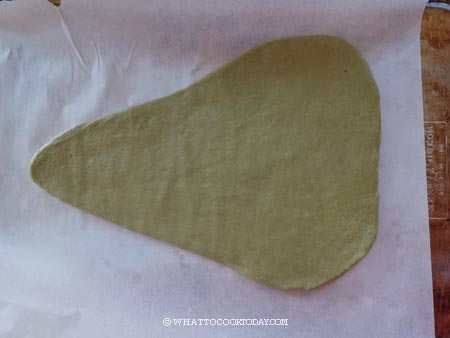
8. Spread the sweet red bean paste on the surface of the dough, leaving about a 1/2-inch border on the edge. Try not to smear too hard as we don’t want to tear the dough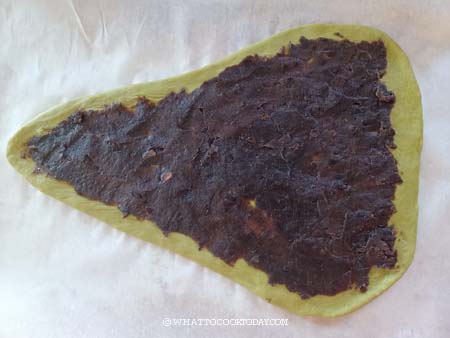
9. Repeat with the second matcha dough. Drape this on top of the other dough and stretch it so it’s the same size as the other dough. Seal the edges. 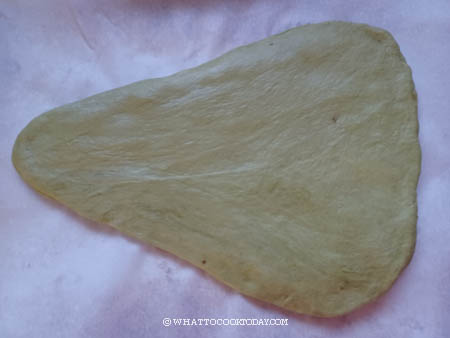
10. Put a rolling pin in the middle of the triangle and then use a bench knife or a sharp knife to cut about 1-inch thick strips on both sides (refer to the photo).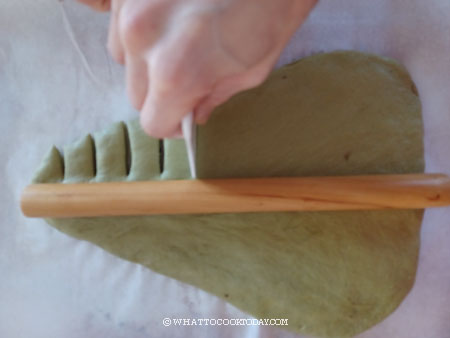
11. Twist each one of this strip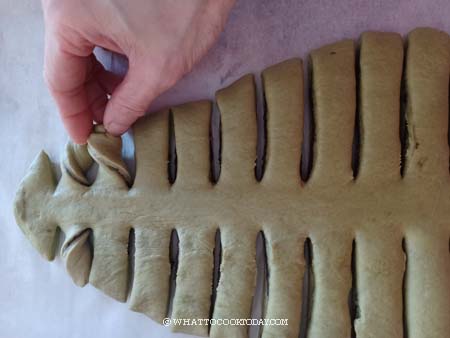
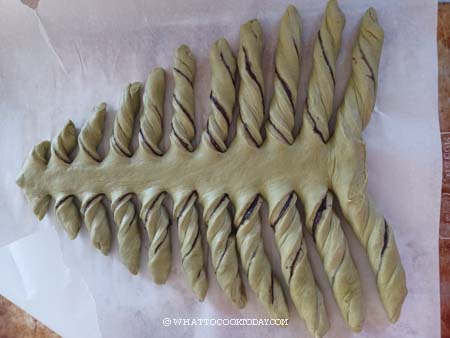
12. Divide the cocoa dough into two and roughly flatten and shape them into rectangles. Spread 1 teaspoon of the red bean paste on the cocoa dough and cover with the other dough and seal the edges. 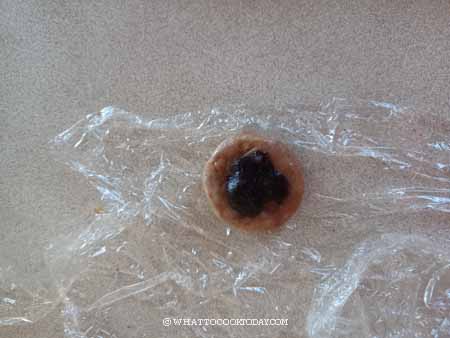
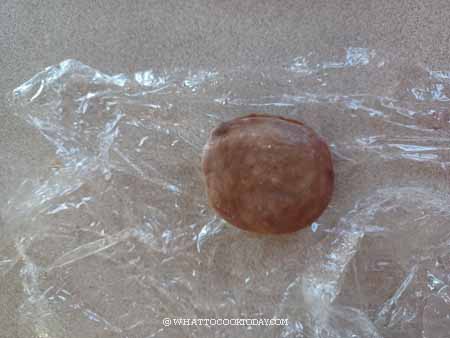
13. Do the same with the star dough. Use a knife to cut into a star shape. Save the scrape doughs. I rolled them up into tiny balls to make round ornaments later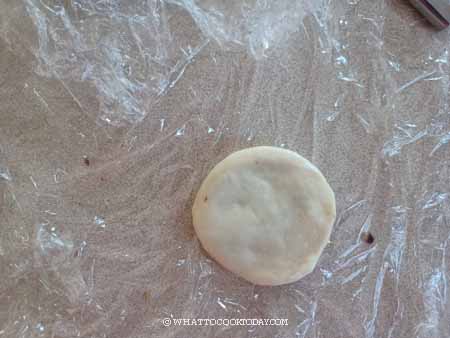
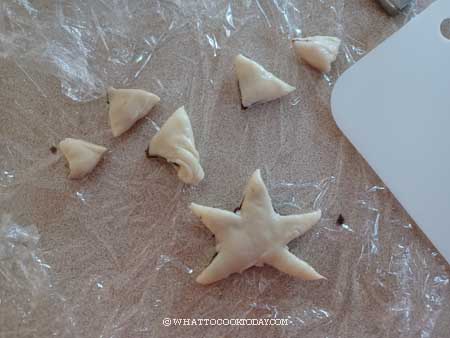
14. Place the star on top of the tree and the trunk at the bottom and the little ornament ball randomly on the tree. Lightly mist the dough with water and cover with a towel and put it at a warm place for final proofing until puffy, about 1 hour or longer, depending on the temperature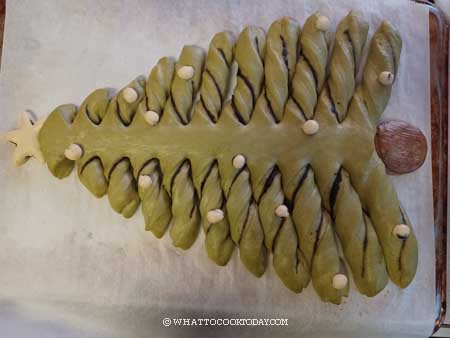
15. 15 minutes before the end of final proofing, preheat the oven to 375 F (190 C) for a conventional oven. For a convection oven, lower the temperature by 20 F or 15 C. Position the rack in the lower middle of the oven (4th rack from the top for me). Right just before putting the baking pan inside the oven, dust the tree with some bread flour. This will create the snow effect for a more dreamy look (optional). I didn’t egg wash this dough since I want to preserve the green color as much as possible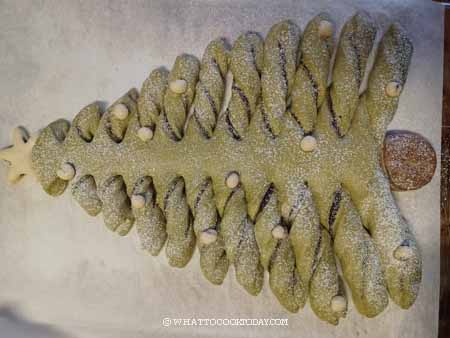
16. Put the baking pan on the positioned rack. Immediately lower the oven temperature to 320 F (160 C) for a conventional oven and lower the temperature by 20 F or 15 C for a convection oven. Bake for 30-35 minutes. Check at 15 minutes to see if the top starts to get brown, if it is, tent loosely with aluminum foil on top, shiny side up, and continue to bake. You can tell that the color from after baked and before baked (above) stays about the same, which was what I wanted by baking at lower temperature.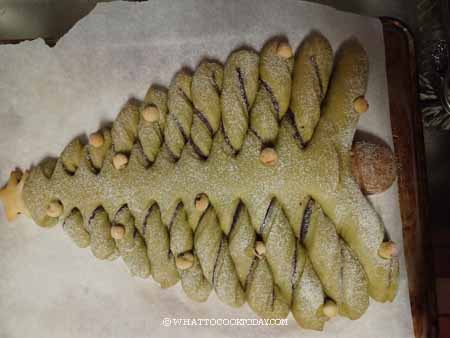
17. When it’s out of the oven, remove it from the pan immediately onto the cooling rack. This can be served warm or at room temperature

Did you make this matcha red bean Christmas tree milk bread recipe?
I love it when you guys snap a photo and tag it to show me what you’ve made 🙂 Simply tag me @WhatToCookToday #WhatToCookToday on Instagram and I’ll be sure to stop by and take a peek for real!

Matcha Red Bean Christmas Tree Milk Bread
Ingredients
- 240 gr bread flour plus more for dusting and decoration
- 40 gr sugar
- 60 gr cream cheese (softened)
- 130 gr whole milk
- 4 gr instant yeast
- 3 gr salt
- 25 gr softened butter
- 5 gr matcha powder mix with 1 1/2 Tbsp water
- 150 gr red bean paste
Instructions
Prepare the dough:
- Combine bread flour, sugar, salt, and yeast in a mixing bowl of a stand mixer fitted with a dough hook attachment. Add cream cheese and milk. Turn the mixer to the lowest speed to let it stir a bit so it won't fly all over the place. Increase the speed to 2 and knead for about 8 minutes until a dough is formed, but not smooth and flexible yet at this point
- Add the softened butter and continue to knead again on speed 2 for another 10 minutes or until the dough reaches window pane stage. If you pull a small piece of the dough and gently and slowly pull it, it will stretch thin without breaking. You can stop kneading if you've reached that point. The dough should be smooth and stretchy
- Pinch off 30 grams of dough. Divide into two. Add cocoa powder to one of the doughs and knead until the color is evenly distributed. The cocoa dough will be the tree trunk and the original color will be the tree topper star
- Dissolve matcha powder in water and then add to the main big dough. Turn on the machine to the lowest speed and let it knead until the color is evenly distributed
First fermentation:
- Cover the bowl with a plastic wrap or shower cap. Let the dough ferment at a warm place until it doubles in size. I put the other two small doughs in a large bowl for fermentation. If you poke your floured finger into the dough, the indentations stays, the dough is done proofing. This can take somewhere from 1-2 hours or longer depending on the temperature
To make ahead:
- After the first fermentation and the dough doubles in size, cover tightly and retard in the fridge. Place it in the coldest part of your fridge (32 F or 4 C recommended to prevent overproofing). Let it retard in the fridge for up to 24 hours. Simply take it out from the fridge and let it sit at room temperature for 30 minutes before proceeding to the shaping stage
Shaping:
- Set aside about 2 teaspoons of the red bean paste to fill the start and the tree trunk
- Transfer the matcha dough to a work surface. I use a silicone mat. You can use a parchment paper if you don't have a silicone mat. Punch the air out and round it up into a dough ball and divide into two equal weight dough. Cover and let them rest for 15 minutes to relax the gluten
- Roll one of the doughs out into a triangle, like a Christmas tree shape, smaller on the top and about 10 inches wide at the bottom, about 18 inches long. Lay a piece of parchment paper, the size you are going to put on an upside-down baking sheet. Flip it over and gently peel the silicone mat away. Gently reshape it. It may shrink a bit as you transfer it, stretch it out again. Spread the sweet red bean paste on the surface of the dough, leaving about a 1/2-inch border on the edge. Try not to smear too hard as we don't want to tear the dough
- Repeat with the second matcha dough. Drape this on top of the other dough and stretch it so it's the same size as the other dough. Seal the edges. Put a rolling pin in the middle of the triangle and then use a bench knife or a sharp knife to cut about 1-inch thick strips on both sides (refer to the photo). Twist each one of this strip
- Divide the cocoa dough into two and roughly flatten and shape them into rectangles. Spread 1 teaspoon of the red bean paste on the cocoa dough and cover with the other dough and seal the edges. Do the same with the star dough. Use a knife to cut into a star shape. Save the scrape doughs. I rolled them up into tiny balls to make a round ornament (refer to photo)
Final proofing:
- Place the star on top of the tree and the trunk at the bottom. Lightly mist the dough with water and cover with a towel and put at a warm place for final proofing until puffy, about 1 hour or longer, depending on the temperature
Baking:
- 15 minutes before the end of final proofing, preheat the oven to 375 F (190 C) for a conventional oven. For a convection oven, lower the temperature by 20 F or 15 C. Position the rack in the lower middle of the oven (4th rack from the top for me)
- Right just before putting the baking pan inside the oven, dust the tree with some bread flour. This will create the snow effect for a more dreamy look (optional). I didn't egg wash this dough since I want to preserve the green color as much as possible
- Put the baking pan on the positioned rack. Immediately lower the oven temperature to 320 F (160 C) for a conventional oven and lower the temperature by 20 F or 15 C for a convection oven. Bake for 30-35 minutes. Check at 15 minutes to see if the top starts to get brown, if it is, tent loosely with aluminum foil on top, shiny side up, and continue to bake. You can tell that the color from after baked and before baked (above) stays about the same, which was what I wanted by baking at lower temperature.
Cool down:
- When it's out of the oven, remove it from the pan immediately onto the cooling rack. This can be served warm or at room temperature
Storage:
- Wrap the bread tightly in a cling wrap and put inside a ziplock bag, push out all the air and seal. It stays soft at room temperature for 3 days when properly wrapped. For longer storage, keep it in the freezer. Simply thaw at room temperature before serving. You can loosely wrap in an aluminum foil and reheat at 350 F (180 C) for 10 minutes or until warmed through if you prefer


1 comment
It looks stunning! I’m always impressed by your intricate breads and pastries. You’ve got quite the skills there 🙂
I’m not a fan of matcha though (and I don’t have any), I might try making it using pandan extract instead.