This post may contain affiliate links. Please read our disclosure policy.
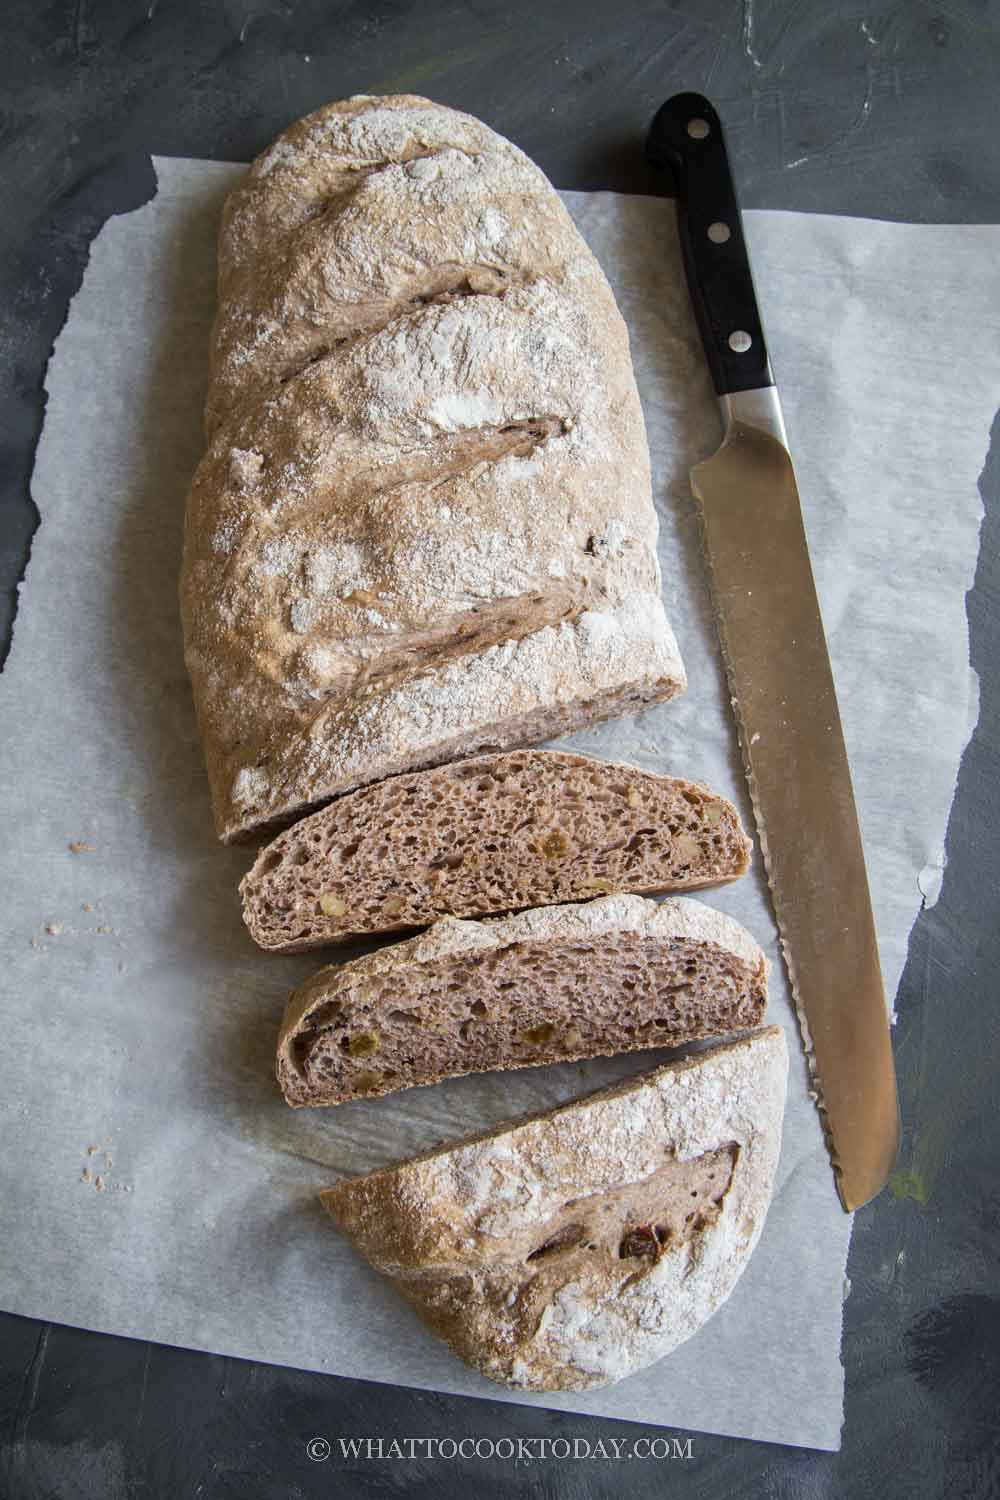
You will love and enjoy making this totally no-knead, no-oil, no-added sugar, no eggs, and dairy-free wholemeal/whole wheat bread. So perfect for bakers of any level and you get crusty on the outside and soft inside artisanal bread.

I absolutely love baking bread at home. The aroma is totally amazing! I’m the kind of person who can survive without rice (Most Asians love their rice), but bread…oh boy…I love bread more than anything really! If I could eat bread all day long, I would! LOL!
This super easy no-knead wholemeal/whole wheat bread, YOU MUST TRY! It’s a no-brainer and super easy to make. Absolutely no kneading. If you know how to stir and fold with a spatula, you have bread!
The recipe rundown
Taste: Nice sweet nutty aroma thanks to the wholemeal flour. It’s perfect to eat with a sweet or savory spread, or dunk into a soup, dip into olive oil and balsamic vinegar. You get it!
Texture: Crusty outside, soft, moist, with some chew on the inside
Difficulty: Easy
Pros: You don’t need special gadgets and the bread doesn’t use oil, added sugar, eggs, or any dairy. So it’s vegan
Cons: I really can’t think of any other than I ended up eating too much!
Type of flour to use or substitute
This recipe uses half wholemeal/whole wheat flour and half all-purpose flour. You can do the following combinations:
1. All wholemeal/whole wheat flour
You will need a bit more extra liquid and the texture will be denser
2. Half wholemeal + Half bread flour
You will need more extra liquid and the texture will be pleasantly chewier too
3. All spelt flour
You will need extra liquid and the texture will be denser
4. Half spelt flour + Half all-purpose flour
You will need extra liquid and the texture will not be as dense compare to using all spelt flour
5. How about gluten-free flour?
Sorry, I haven’t experimented with that

How to make super easy no-knead wholemeal/whole wheat bread
1. Put all ingredients, except for water in a large mixing bowl. Whisk to combine.

2. Then add water

3. Use a spatula and stir to mix, don’t use your hands. This is going to be a sticky dough. I found that different brands of flour absorbs water differently, especially with the wholemeal/whole wheat flour . So I start with 240 ml and then I have to add 20 ml extra. The consistency of the dough should be sticky

I decided to add some black sesame seeds last minute 🙂

4. Cover and let it rises until it doubles in size. I put it in the oven and use the “breadproof” function. If you don’t have this function, you can boil about 2 cups of water and then put it at the bottom of the oven and put the dough on few racks above it and let the bread proof in this warm environment

5. Once it has doubled in size, use a spatula again to scrape the dough from the side of the bowl and fold over to form a sticky dough ball. This is also deflating the dough at the same time

6. Lightly flour the prepared baking sheet with some all-purpose flour. Scoop the dough over onto the flour. Sprinkle the top of the dough lightly with a bit more flour

7. Use a dough scraper or rubber spatula to fold the bread over to form a large dough ball. Lightly dust your hands with some flour. The dough should be more manageable now without being too sticky

8. Use your hands to flatten the dough into a rectangle. It doesn’t have to be a perfect rectangle. Then roll it into a Swiss roll and pushing on the dough at the same time to pop any air bubbles. You will get a log shape. Pinch the seam shuts

9. Turn over so the seam side is at the bottom

10. Cover and let it rises again at a warm place until almost doubles in size. When you gently push on the dough it should slowly spring back. If it springs back right away, you need to proof it a bit longer

11. Preheat oven at 375 F (190 C). My oven is a conventional oven with bottom heat, no fan. Sift some all-purpose flour on top of the dough. Use a very sharp knife to make few cuts on top of the dough. This is optional. You can skip if you prefer

12. Put the baking sheet at the middle rack and bake for 25-30 minutes. If you tap at the bottom, it should sound hollow

13. Transfer to a cooling rack to let the bread cools down completely

I love a rustic-looking bread like this and the fact that it requires such minimal effort, makes it tastes even better 🙂

A bread you can bake every day if you want to
This is a kind of bread you can do on a daily basis because it’s so easy and doesn’t require overnight refrigeration like most no-knead bread would. You can have the bread on the same day.

Did you make this no-knead wholemeal/whole wheat artisan bread recipe?
I love it when you guys snap a photo and tag to show me what you’ve made 🙂 Simply tag me @WhatToCookToday #WhatToCookToday on Instagram and I’ll be sure to stop by and take a peek for real!

You may also like these easy bread recipes
The recipe is adapted from here
Very Easy No-Knead Wholemeal /Whole Wheat Artisan Bread
Ingredients
- 150 gr whole wheat flour
- 150 gr all-purpose flour plus more for dusting
- ½ tsp salt
- 1 tsp instant yeast
- 30 gr raisins
- 30 gr walnuts
- 240 ml water or as needed
Instructions
Prepare the dough:
- Put all ingredients, except for water in a large mixing bowl. Whisk to combine. Then add water and use a spatula and stir to mix, don't use your hands. This is going to be a sticky dough. I found that different brands of flour absorbs water differently, especially with the wholemeal/whole wheat flour . So I start with 240 ml and then I have to add 20 ml extra. The consistency of the dough should be sticky
1st proofing:
- Cover and let it rises until it doubles in size. I put it in the oven and use the "breadproof" function. If you don't have this function, you can boil about 2 cups of water and then put it at the bottom of the oven and put the dough on few racks above it and let the bread proof in this warm environment
- Line a large baking sheet with a parchment paper and set aside
- Once it has doubled in size, use a spatula again to scrape the dough from the side of the bowl and fold over to form a sticky dough ball. This is also deflating the dough at the same time
- Lightly flour the prepared baking sheet with some all-purpose flour. Scoop the dough over onto the flour. Sprinkle the top of the dough lightly with a bit more flour. Use a dough scraper or rubber spatula to fold the bread over to form a large dough ball. Lightly dust your hands with some flour. The dough should be more manageable now without being too sticky
Shape the dough:
- Use your hands to flatten the dough into a rectangle. It doesn't have to be a perfect rectangle. Then roll it into a Swiss roll and pushing on the dough at the same time to pop any air bubbles. You will get a log shape. Pinch the seam shuts and turn over so the seam side is at the bottom
2nd proofing:
- Cover and let it rises again at a warm place until almost doubles in size. When you gently push on the dough it should slowly spring back. If it springs back right away, you need to proof it a bit longer
Bake:
- Preheat oven at 375 F (190 C). My oven is conventional oven with bottom heat, no fan. Sift some all-purpose flour on top of the dough. Use a very sharp knife to make few cuts on top of the dough. This is optional. You can skip if you prefer
- Put the baking sheet at the middle rack and bake for 25-30 minutes. If you tap at the bottom, it should sound hollow. Transfer to a cooling rack to let the bread cools down completely
Store:
- Let the bread cools down completely and it can be kept unwrapped at room temperature. The next day, use a foil to wrap it and it can be kept for an additional 2 days if it's not humid where you are. Otherwise freeze the bread for a longer storage. I don't recommend keeping it in the fridge, as it dries up the bread


