This post may contain affiliate links. Please read our disclosure policy.
Soft and fluffy steamed buns are filled with savory and sweet molten lava salted egg yolks custard filling that will gush out as soon as you take that first bite. All the tips you need to know.

Liu Sha Bao has to be one of my ultimate dim sum weaknesses. That moment when you tear open a freshly steamed bun and the golden, gooey custard oozes out—chef’s kiss. It’s rich, buttery, slightly salty, and just sweet enough to keep you coming back for one more bite (or two… okay, maybe three).
I’ve tested this recipe quite a few times to get that luscious lava-like filling just right. This version uses real salted egg yolks for that authentic flavor, but I’ve also included an alternative using Knorr Golden Salted Egg Yolk Powder, which is super convenient and still gives you great results.
What is liu sha bao ?
Liu Sha Bao (流沙包) is a popular Cantonese dim sum bun with a molten salted egg custard filling. “Liu sha” means “flowing sand,” referring to the creamy, oozing center that spills out when you bite into the bun. The texture is soft, fluffy on the outside, rich, and melty on the inside. It’s usually served piping hot in a bamboo steamer.
What Is Salted Egg Yolk?
Salted egg yolks are made by curing duck (or sometimes chicken) eggs in a brine or salted charcoal mixture for several weeks. The yolks become rich, slightly oily, and deeply savory with a subtle sweetness. Once cooked (usually steamed or baked), they develop a crumbly yet creamy texture and a distinctive umami flavor that works beautifully in both sweet and savory dishes—like mooncakes, cookies, pasta, and of course, Liu Sha Bao. You also need to check out this quick method for making salted eggs. I like to use this method because I can use the egg whites for other things and the salted egg yolks for this recipe and many other recipes calling for salted egg yolks.
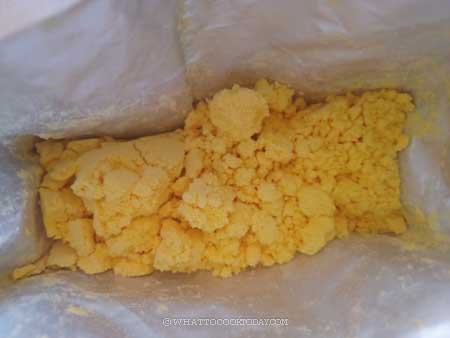
What Is Salted Egg Yolk Powder?
Salted egg yolk powder is a convenient pantry-friendly version of salted egg yolks. It’s made by dehydrating cooked salted egg yolks into a fine powder. I use Knorr Golden Salted Egg Powder, which has a great balance of flavor and color. To use it, you just mix it with a little water to form a paste. It’s perfect when you can’t find whole salted eggs or want a quicker prep option. I got this from Fair Price when I was in Singapore. It is for 5.60 Singapore dollars per pack and it’s 200 grams each pack. I like that the Knorr salted egg yolk powder isn’t too salty but it has nice umami flavor that reminds you of real salted egg yolk. Well, this Knorr salted egg yolk powder is made with 9 real egg yolk in each pack. If you need some ideas of what else you can use salted egg yolk powder for (besides cooking savory salted egg yolk dishes), try out making the filling for liu sha bao using it.

Why You’ll Like This Recipe
1. You get that dreamy molten filling.
2. Option to use real salted egg yolks or powdered version, depending on what you have.
3. The dough is soft, fluffy, and pairs perfectly with the rich custard inside.
4. You can freeze the filling ahead of time and steam whenever a craving hits!
Why I Use Gelatin in the Filling
I like to add just a small amount of gelatin to the filling because it helps the custard firm up when frozen, which makes wrapping the buns way easier. Without it, the filling can be too soft and messy to work with. Don’t worry—it doesn’t make the center rubbery or firm after steaming. It still melts beautifully inside the bun, just with a smoother, silkier texture. And since we use such a tiny amount, the flavor and mouthfeel stay rich and creamy.
Liu Sha Bao (Molten Salted Egg Yolk Steamed Buns)
Ingredients
Option 1:
- 210 g all-purpose flour plus more for dusting as needed
- 42 g Wheat starch or use cornstarch or potato starch (not potato flour)
Option 2:
- 126 g all-purpose flour plus more for dusting
- 126 g cake flour
For both options:
- 3 gr instant yeast about 1 1/4 tsp
- 30 gr sugar about 5 Tbsp
- ¼ tsp salt
- 1 Tbsp cooking oil
- 150 g whole milk or more as needed
Filling if using salted egg yolks (recommended to prepare one day before):
- 45 g salted egg yolks about 4 salted egg yolks.
- 2 g gelatin powder mixed with 1 Tbsp of water
- 45 g unsalted butter melted
- 22 g sugar
- 10 g milk powder
- 4 g custard powder
- 80 g heavy cream
Filling if using salted egg yolk powder (recommended to prepare one day before):
- 4 Tbsp egg yolk powder mixed with 4 tsp of water
- 2 g gelatin powder mixed with 1 Tbsp of water
- 45 g unsalted butter melted
- 22 g sugar
- 10 g milk powder
- 4 g custard powder
- 80 g heavy cream
Instructions
Preparing the filling:
- If using salted egg yolks, steam the egg yolks for about 5 minutes over high heat and then mash with a fork or use a mini food processor to process into a fine paste

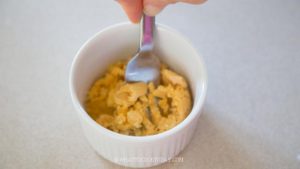
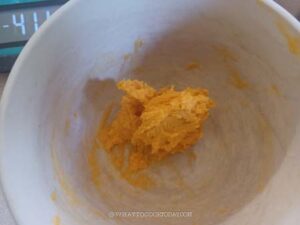
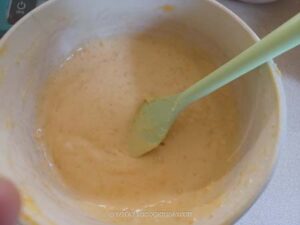
- If using salted egg yolk powder, combine with 4 tsp of water into a thick paste consistency

- Place the gelatin powder and water in a small bowl to let it bloom for 5 minutes
- In a saucepan, add butter and let it melt over medium-low heat. Remove from the heat. Let it cool down to until lukewarm. Add sugar, milk powder, custard powder, and heavy cream. Whisk to combine. Add the mashed salted egg yolks or egg yolk powder paste (depending on which one you use) into the saucepan and whisk to combine.

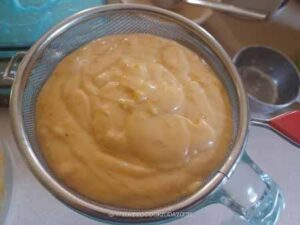
- The mixture will be grainy. Strain the mixture to get a smooth filling

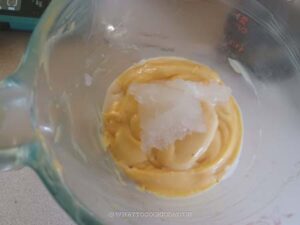
- Add the bloom gelatin to the strained egg yolk mixture.

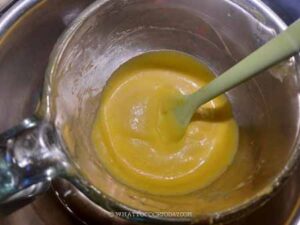
- Place the container in a pot of warm water (not boiling water) to melt the gelatin while stirring it

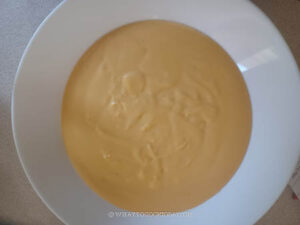
- Transfer the egg yolk mixture to a shallow plate. Cover with a cling wrap and freeze the mixture in the freezer for about 1 hour. This will partially freeze it.

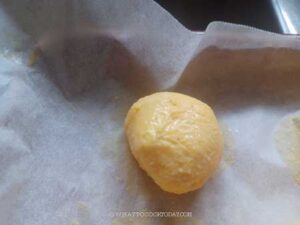
- Scoop and portion into 8 portions (about 30 grams each) and lightly oiled your palms and roll each portion into a round ball. It will still be kinda sticky and that's normal. Place in a container lined with parchment paper. Let them continue freeze overnight in the freezer

Preparing the dough with a machine:
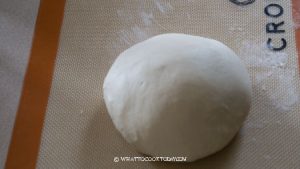
- Place the flour (either option 1 or 2), instant yeast, salt, sugar, and cooking oil in a mixing bowl. If you are using a stand mixer, use a dough hook attachment. Gradually add liquid. If the dough still a bit dry, add a bit of water or milk. Add more teaspoon by teaspoon until the dough comes together and continue to knead for 10-12 minutes, until the dough is smooth and elastic. It feels slightly sticky to touch. It should clear the sides of the bowl but stick to the bottom of the bowl. Oil your hands a bit to help you pick up the dough and to prevent the stickyness

Prepare the dough by hands:
- Place the flour (either option 1 or 2), instant yeast, sugar, and cooking oil in a mixing bowl. Mix everything until you get a rough dough (it's not going to be smooth yet). Cover and rest it for 15 minutes. Then go back and knead it. You'll be surprised by how easier it is to knead it now. Knead until the dough is smooth and pliable, about 15-20 minutes. Add liquid as needed. At any point during kneading, you can always stop and rest the dough if you find it hard to knead. This is to relax the gluten. Then go back to knead again and you'll be surprised by the difference it makes by just resting the dough before kneading again. It's easier for you too
Wrapping:
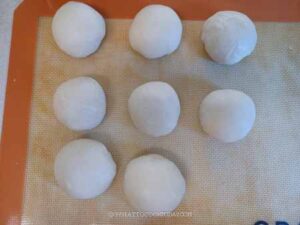
- Place the dough on a lightly floured surface. Divide the dough into 8 equal pieces. Roll each dough into a round dough ball. Keep them covered.

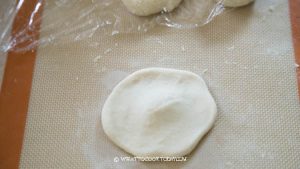
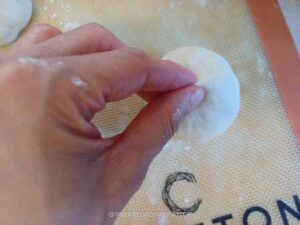
- Flatten the dough with your palm and use a small rolling pin to roll into a circle about 5 inches, slightly thicker on the center. Don't roll the dough out too thin too. This is important because the filling will make the dough "wet" if it's too thin and as a result, your steamed buns will have wrinkly surfaces (wet spots)

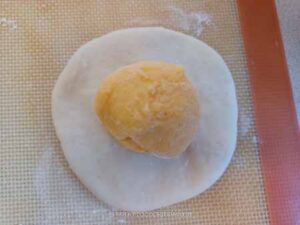
- Place the frozen filling ball in the center of the wrapper

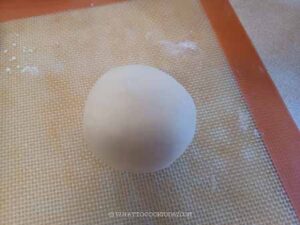
- Gather all the sides to the middle and pinch to seal. Make sure it is sealed tightly to prevent any leaking.

- Roll the dough in between your palm to get a smooth round

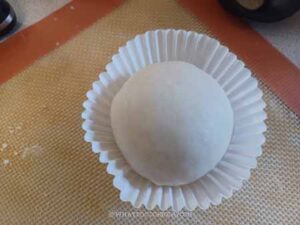
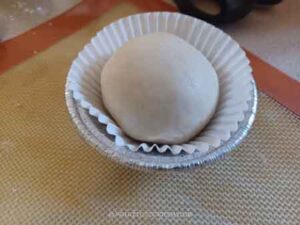
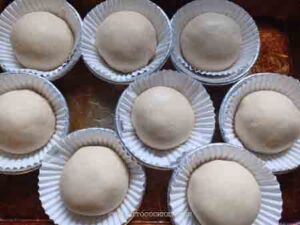
- I place each shaped dough in a muffin paper liner, seam side down.

- Then put it in an individual mini tart pan. This is optional. It helps to keep the dough round and tall. Because the filling softens when you proof the dough later, so the dough may widen to the side without any support. If you don't have such mini tart pan, don't worry about it. The buns will have wider and flatter appearance because of the filling

Proofing:
- Let the dough rise at room temperature or at a warm place (but not too warm that the filling might melt). They won't necessarily double in size, but at least puff up to about 50% of the original size. This may take about 1 hour at a warm temperature. Don't go by the time however. The buns will feel lighter and when you push on them gently with your finger, they will spring back slowly. These buns are ready to be steamed

Steaming:
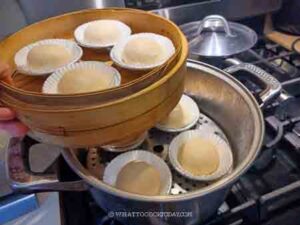
- Bring the water in a steamer to a boil. Wrap the lid with a cloth. This will prevent water dripping from the lid and create burn spots
- LOWER THE HEAT TO MEDIUM. Place the buns in there, leaving about 1-inch space in between. Cover with a lid but leaving it about 1/4-inch gap for some steam to escape. Steam on medium heat for 8 minutes

- Once the buns are done steaming, turn off the heat and wait for 5 minutes before opening the lid so the buns will not collapse or wrinkle due to sudden change in temperature.
Serving:
- They are best when served warm. Warn whoever that is eating this that the filling is HOT and it's thick and flowy, not extremely runny (because of the gelatin). So I find it easier to eat. The filling won't be flowy anymore once it has cooled down. It's just a very soft custard. Simply reheat briefly for that thick lava consistency
- You can read more details on ingredients, substitutions, variations, and other tips in my post that may answer your questions not covered in the recipe card
RECOMMEDED TOOLS
*Nutrition facts are just estimates and calculated using online tools*
Tips to Prevent the Filling from Leaking
One of the most common frustrations with Liu Sha Bao is when the molten filling bursts out during steaming. I’ve been there, so here are some tried-and-true tips to help you avoid that. Of course, there are still a few that may leak out, don’t get frustrated:
1. Freeze the filling solid
Don’t skip this step. The filling should be completely frozen before wrapping. This makes it much easier to seal inside the dough and prevents it from melting too soon during steaming.
2. Don’t roll the dough too thin
Avoid thin spot on the dough. If the dough is too thin, it won’t hold the molten center.
3. Seal the dough well
Make sure you pinch the edges firmly to seal, and try to avoid any thin spots in the dough, especially on top. If the seal is weak, the filling will find a way to escape.
4. Don’t overproof
Let the buns rest just until slightly puffy—about 40 minutes to 1 hour, depending on the room temperature. Overproofed dough becomes too airy and weakens the surface tension, making it easier for the filling to break through.
5. Steam over medium heat
High heat creates too much pressure too quickly, which can cause the buns to burst. Medium to medium-high steam is strong enough to cook the dough evenly without blowing it open.

How to Make Liu Sha Bao Halal
1. Use halal-certified gelatin
Regular gelatin is often made from pork, which isn’t halal. To make the filling halal, just use gelatin made from fish or halal-certified bovine sources. Many brands (like Great Lakes, NOW Foods, or halal-certified gelatin from specialty stores) offer these options.
2. Use halal salted egg yolks or powder
If you’re using whole salted eggs, make sure they’re from halal-certified sources, ideally duck eggs. For powdered versions, check that there are no non-halal ingredients or questionable flavor enhancers. Some salted egg yolk powders are vegetarian-friendly and halal-compliant—just double-check the label. The Knorr salted egg powder I used is certified halal
Storage Tips
1. The buns are best enjoyed warm, right after steaming when the filling is still molten.
2. Leftover buns can be stored in an airtight container in the fridge for up to 3 days. Steam to reheat.
3. You can also freeze cooked steamed buns and steam directly from frozen (just add 1–2 more minutes to the steaming time).
FAQ
1. Can I make the filling ahead of time?
Yes! You can freeze the filling for up to a month. Just portion it out and keep it airtight.
2. Can I skip the gelatin?
You can, but I don’t recommend it. The gelatin helps the filling firm up just enough to wrap easily and gives the custard a smoother texture once steamed. It doesn’t make it stiff—just helps it melt in the right way.
3. Can I make these without custard powder?
Custard powder adds color and a little flavor. If you don’t have it, you can try cornstarch with a splash of vanilla, but the color will be paler.



10 comments
Hi Marv! I tried making this recipe, but the filling didn’t turn out runny unfortunately. After I steamed the buns, the filling was rather chunky. Do you happen to know what I might be able to do to solve this? Thanks!
Hi Jina, the filling is flowy when the buns are still warm. Once the buns cooled down they won’t run anymore because butter is solid at room temperature. Was it not flowy when they were still warm ?
Hi Marv,
Can I substitute the milk powder for some other ingredients? If so, pls provide the amount and ingredients.
Thank you
Hi Elaine, I’m afraid not. The filling won’t be runny enough and won’t be flavorful without the milk powder.
Hi Marv.. I’ve tried it again with milk powder this time and it was super flowy!!! Yum yum! Will definitely make again. Thank you for confirming the recipe – I’m really glad I made this today 😊👍🏻
Thank you Sue! Thanks for trying again! So sorry my mistake have costed you your flowy steamed buns before (I felt really bad for mistyping LOL!). I’m so glad it worked out this time!!!
Hi Marv.. I tried making this today but sadly the filling was not flowy at all – it was actually dry and pasty. Just wanted to confirm if the amount of corn starch to use is 80g and not 8g? Otherwise the bao turned out perfect 👌🏻
Hi Sue, I’m so sorry that the filling wasn’t flowy at all and it was my error. It supposed to be 80 gr of milk powder and not cornstarch (*screaming hysterically*). I had no idea why I typed cornstarch instead of milk powder. That’s why yours didn’t turn out flowy. So sorry for my mistake! arrghh! kicking myself now!
Oh the ooze!!! That ooze looks absolutely perfect! I’m a huge fan of liu sha bao and yours look incredibly delicious!
Hi Jasline,
Thank you so much dear.