This post may contain affiliate links. Please read our disclosure policy.
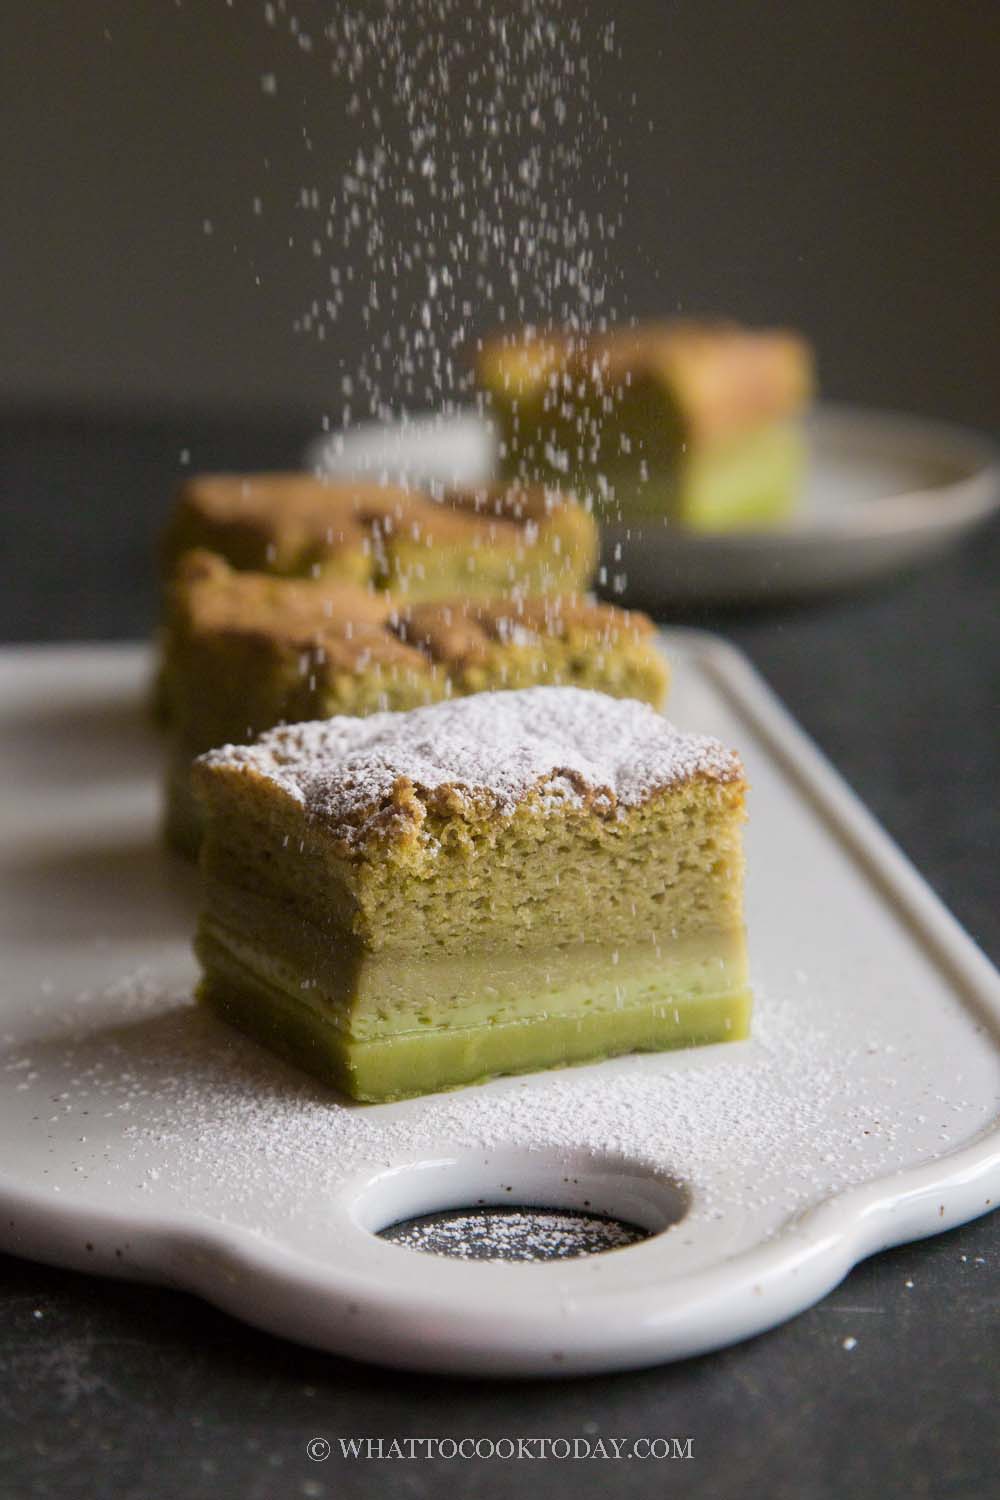
A cake with three different distinct layers: fudge layer, custard layer, and the fluffy sponge layer on top. All done with only preparing one cake batter. It’s truly a magic cake and it’s so delicious! Here is my take on magic custard cake with pandan flavor.
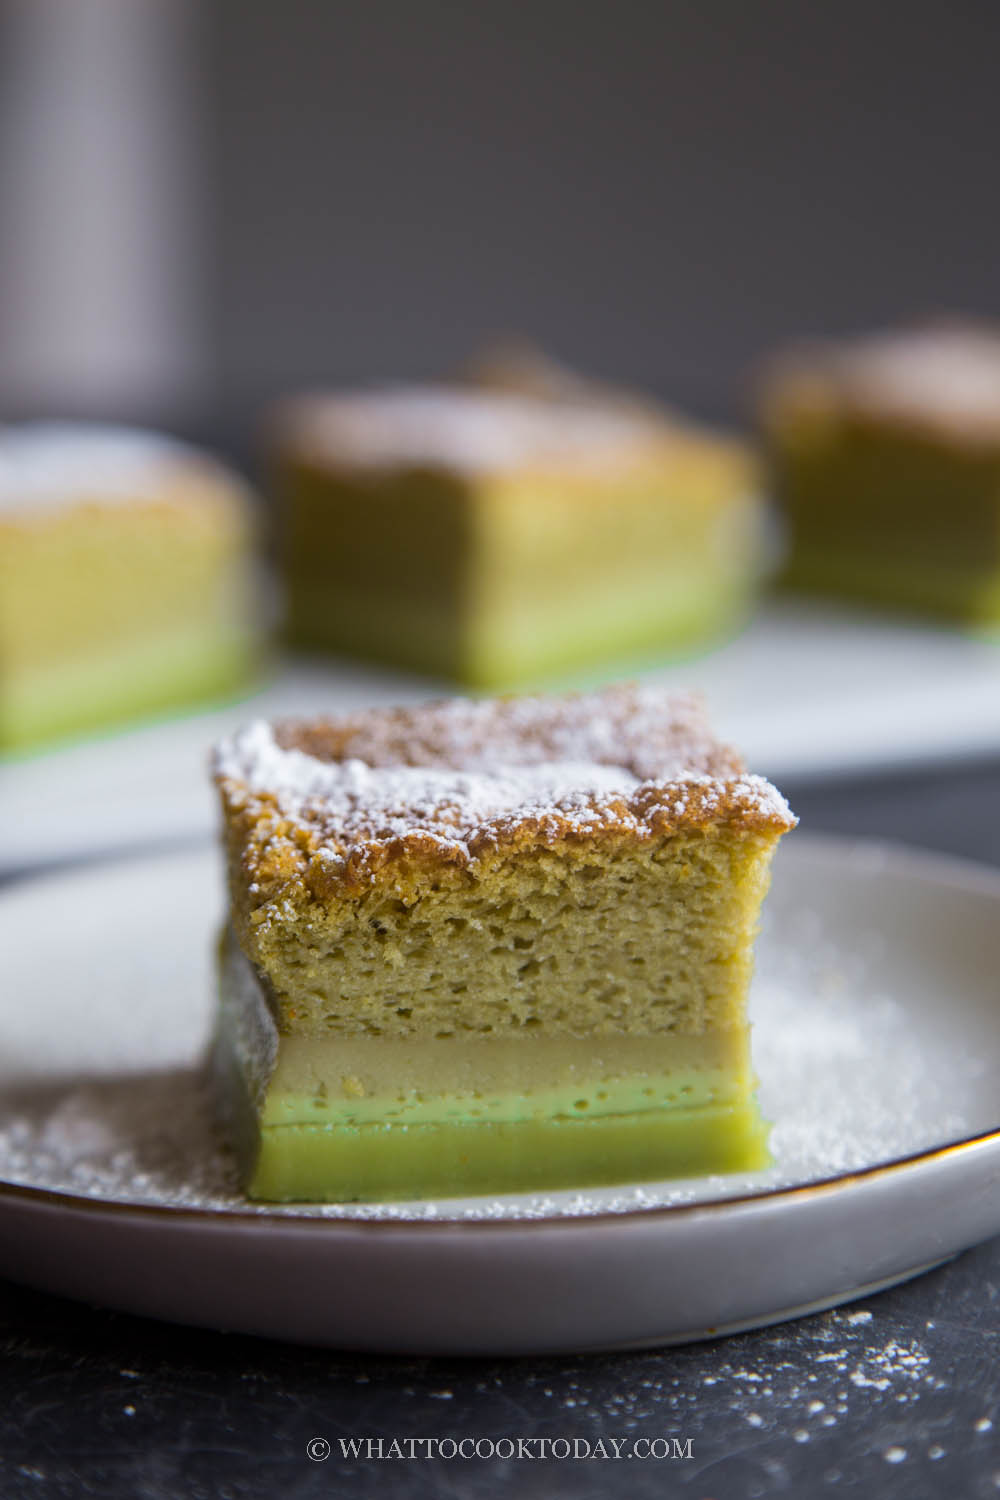
What’s so magical about magic custard cake
Well, typically to have three different distinct layers of texture in one cake, one would need to prepare three different batters, generally speaking! This magic custard cake only uses one cake batter and the magic happens during baking.
I personally call this a “failed” sponge cake 🙂 A failed cake that just tastes so good. So, I just want to share the magic custard cake with pandan flavor! Yup, I pretty much “pandanize” everything I possibly can 🙂
How did the three layers form in magic custard cake?
Magic custard cake calls for ingredients that are similar to making traditional sponge cake. The yolk batter and the egg whites are whipped into a meringue and then fold into the yolk batter and then baked. With magic custard cake, the process is the same, only that the batter is so much runnier, very liquidy. The meringue is also whipped without any sugar or very little sugar, so it’s less stable compared to the proper meringue, which is glossy and stiff in chiffon cake or sponge cake. The cake is also baked at a low temperature. Because of such a liquidy batter combined , low baking temperature, and the different densities of ingredients, the batter slowly separates during the baking process. The bottom layer is the dense part, the second layer is a custardy part and the lightest part, which is the sponge cake part is on the top. It makes sense if you think about it!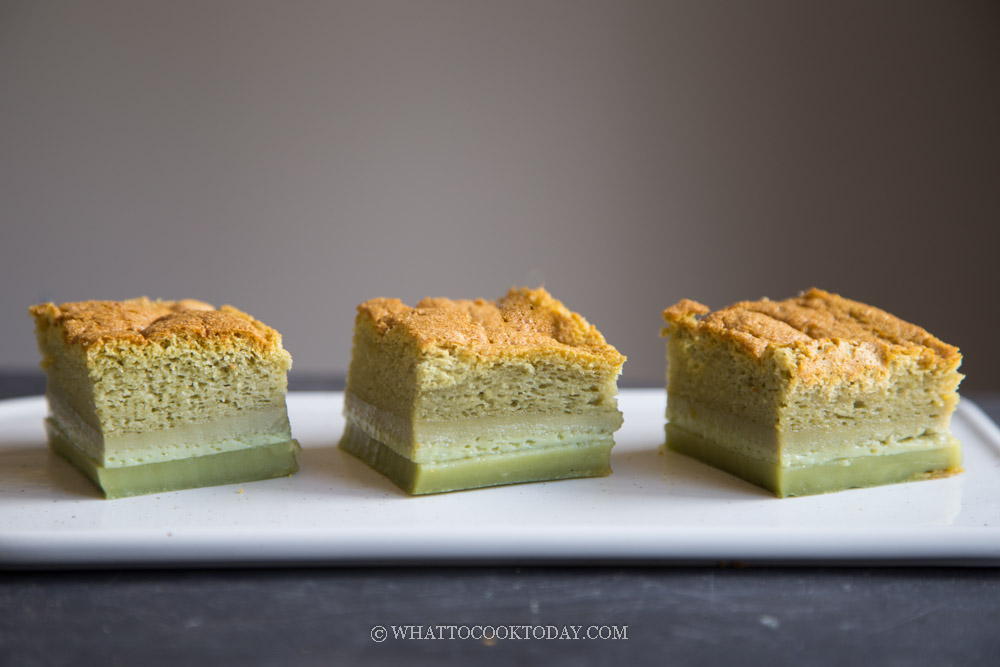
How to make pandan magic custard cake
1. Cream the egg yolks and sugar until pale, creamy, and thick, about 2 minutes

2. Then add the melted butter/oil, pandan essence (if using) and beat for another minute until combined.
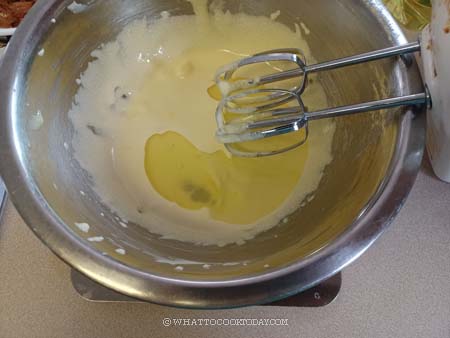
Add the pandan coconut milk mixture gradually, 1/4 at a time while beating at a low speed to prevent splashing all over, this take about 30 seconds or so. You can use a hand whisk too. Sift in the cake flour and salt and stiruntil just combined. Set aside

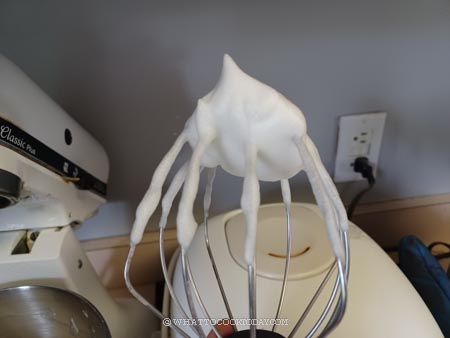
3. Make sure the bowl and the whisk attachments are grease-free. Beat the egg whites with a stand mixer or a hand mixer over medium speed (speed 6 or KA) until stiff. The meringue will not be glossy because there’s no sugar. It will hold its shape but has that “foamy” texture to it (due to the lack of sugar) and this is normal for this recipe

4. Fold the meringue into the cake batter, 1/3 at a time. The meringue and the cake batter appear quite lumpy and you will see some egg white lumps. Totally normal in this case. This is how we want it (for the magic to happen)

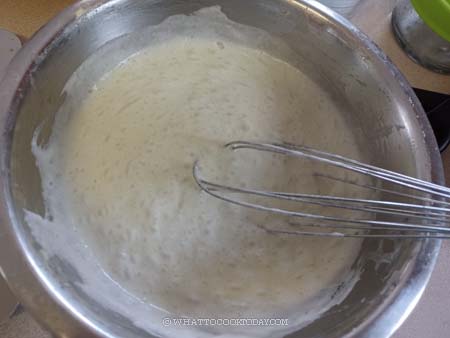
5. The batter is very thin (watery). Don’t be panic. Again, this is how the magic happens later during baking
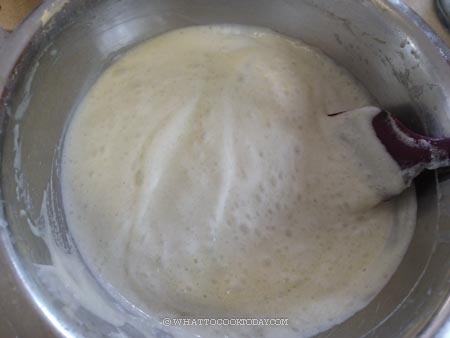
6. Pour the batter into the prepared pan

7. Put the pan in the middle rack and bake for the next 60 minutes. I need about 70 minutes with my oven. You can start checking for doneness at around 45 minutes. If you gently shake the cake pan, it shouldn’t jiggle. If it is, then bake for another 5 minutes and then check again. If the cake gets too brown on top before it cooks through, you can loosely tent it with aluminum foil, shiny side facing up
8. I use a conventional oven (bottom heat only). If you use a convection oven (top and bottom heat), you may not need to bake as long as I did, again, check at around 45 minutes
9. Remove from the oven and let the cake cool down in the pan completely. It will deflate a bit during the cooling down process and that’s normal. Once it has cooled down completely, cover with a cling wrap and chill in the fridge or 4 hours or overnight and serve the next day
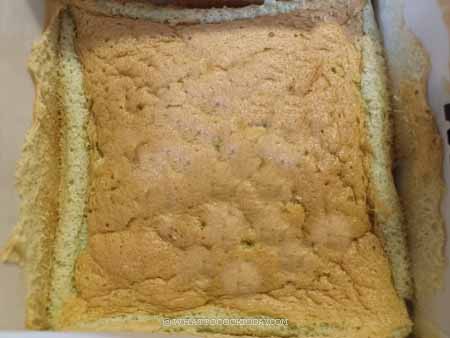
10. Pull the cake out from the pan by grabbing the parchment paper. Gently peel the parchment paper off the sides. You will not see the three layers on all the sides yet. Trim off about 1/2 inch of the edges and you will see the three layers. Dust the top with some icing sugar and cut into serving size
How to store
Keep them in the refrigerator an air-tight container for 3-5 days. I do not recommend freezing in the freezer as that affects the texture of the custard.
Did you make this pandan magic custard cake recipe?
I love it when you guys snap a photo and tag to show me what you’ve made 🙂 Simply tag me @WhatToCookToday #WhatToCookToday on Instagram and I’ll be sure to stop by and take a peek for real!

Pandan Magic Three-Layer Custard Cake (Gâteau Magique)
Ingredients
- 80 gr egg yolks about 4 egg yolks
- 100 gr oil or use melted butter
- 230 ml pandan juice see notes
- 230 ml coconut milk or whole milk (make sure milk is warm)
- 135 gr granulated sugar
- 125 gr cake flour
- ⅛ tsp salt
- ½ tsp pandan essence optional, I didn't use
Meringue:
- 120 gr egg whites about 4 egg whites
For dusting:
Instructions
- Preheat oven to 325 F (160 C) . Spray your cake pan with non-stick spray or brush with some oil. Line a 8 x 8 inch cake pan with parchment paper, overhanging on the sides so you can easily grab the cake out of the pan later. I just use two parchment paper, overlapping each other, like a cross
Prepare the cake batter:
- Melt the butter over medium-low heat and let it cool completely. Combine pandan juice and coconut milk and set aside
- Separate the egg yolk from the whites when they are still cold, it's easier that way. Let them come to a room temperature, about 30 minutes
- Cream the egg yolks and sugar until pale, creamy, and thick, about 2 minutes. Then add oil/ melted butter, pandan essence (if using) and beat for another minute until combined. Add the pandan coconut milk mixture gradually, 1/4 at a time while beating at a low speed to prevent splashing all over, this take about 30 seconds or so. You can just use a hand whisk too
- Sift in the cake flour and salt and stir to combine. Set aside
Prepare the meringue:
- Make sure the bowl and the whisk attachments are grease-free. Beat the egg whites with a stand mixer or a hand mixer over medium speed (speed 6 or KA) until stiff. The meringue will not be glossy because there's no sugar. It will hold its shape but has that "foamy" texture to it (due to the lack of sugar) and this is normal for this recipe
Fold meringue into the cake batter:
- Fold the meringue into the cake batter, 1/3 at a time, using a spatula. The meringue and the cake batter appear quite lumpy and you will see some egg white lumps. They won't be totally incorporated and that's the way we want it. Totally normal in this case. This is how we want it (for the magic to happen). The batter is very thin (watery). Don't panic. Again, this is how the magic happens later during baking
- Pour the batter into the prepared pan
Baking:
- Put the pan in the middle rack and bake for the next 60 minutes. I need about 80 minutes with my oven. Every oven can vary. You can start checking for doneness at around 45 minutes (updated: some people report being done with baking at 45 minutes). If you gently shake the cake pan, it jiggles a little bit but firm to touch. If it jiggle too much, then bake for another 5 minutes and then check again. If the cake gets too brown on top before it cooks through, you can loosely tent it with aluminum foil, shiny side facing up
- I use a conventional oven (bottom heat only). If you use a convection oven (top and bottom heat), you may not need to bake as long as I did, again, check at around 60 minutes
Cooling:
- Remove from the oven and let the cake cool down in the pan completely. It will deflate a bit during the cooling down process and that's normal
- Once it has cooled down completely, cover with a cling wrap and chill in the fridge or 4 hours or overnight and serve the next day
Serving:
- Pull the cake out from the pan by grabbing the parchment paper. Gently peel the parchment paper off the sides. You will not see the three layers on all the sides yet. Trim off about 1/2 inch of the edges and you will see the three layers. Dust the top with some icing sugar and cut into serving size



4 comments
Can you use pandan custard powder to make this cake? What ingredients/instructions should I skip if I can use the powder?
Sarah, I’m sorry I’ve never used pandan custard powder to attempt this magic three-layer cake, so, I’m not sure if it will work or not.
Tried out this recipe and didn’t quite achieve 3 layers, but got the top 2 sorted. Not sure what I did wrong, but I didn’t have pandan juice so used soy milk + essence instead of the juice. Still tasted really good and not too sweet.
Hi Dee, it’s possible that maybe it gets baked a bit too long or the meringue was really well incorporated that the layer didn’t separate.