This post may contain affiliate links. Please read our disclosure policy.
Learn how to make Chinese sweet fermented rice using Chinese wine yeast balls and sticky rice. The result is an amazingly sweet fermented rice that you can use in both sweet and savory dishes. The fermentation can be done using Instant Pot as well.
What is jiu niang/lao zao?
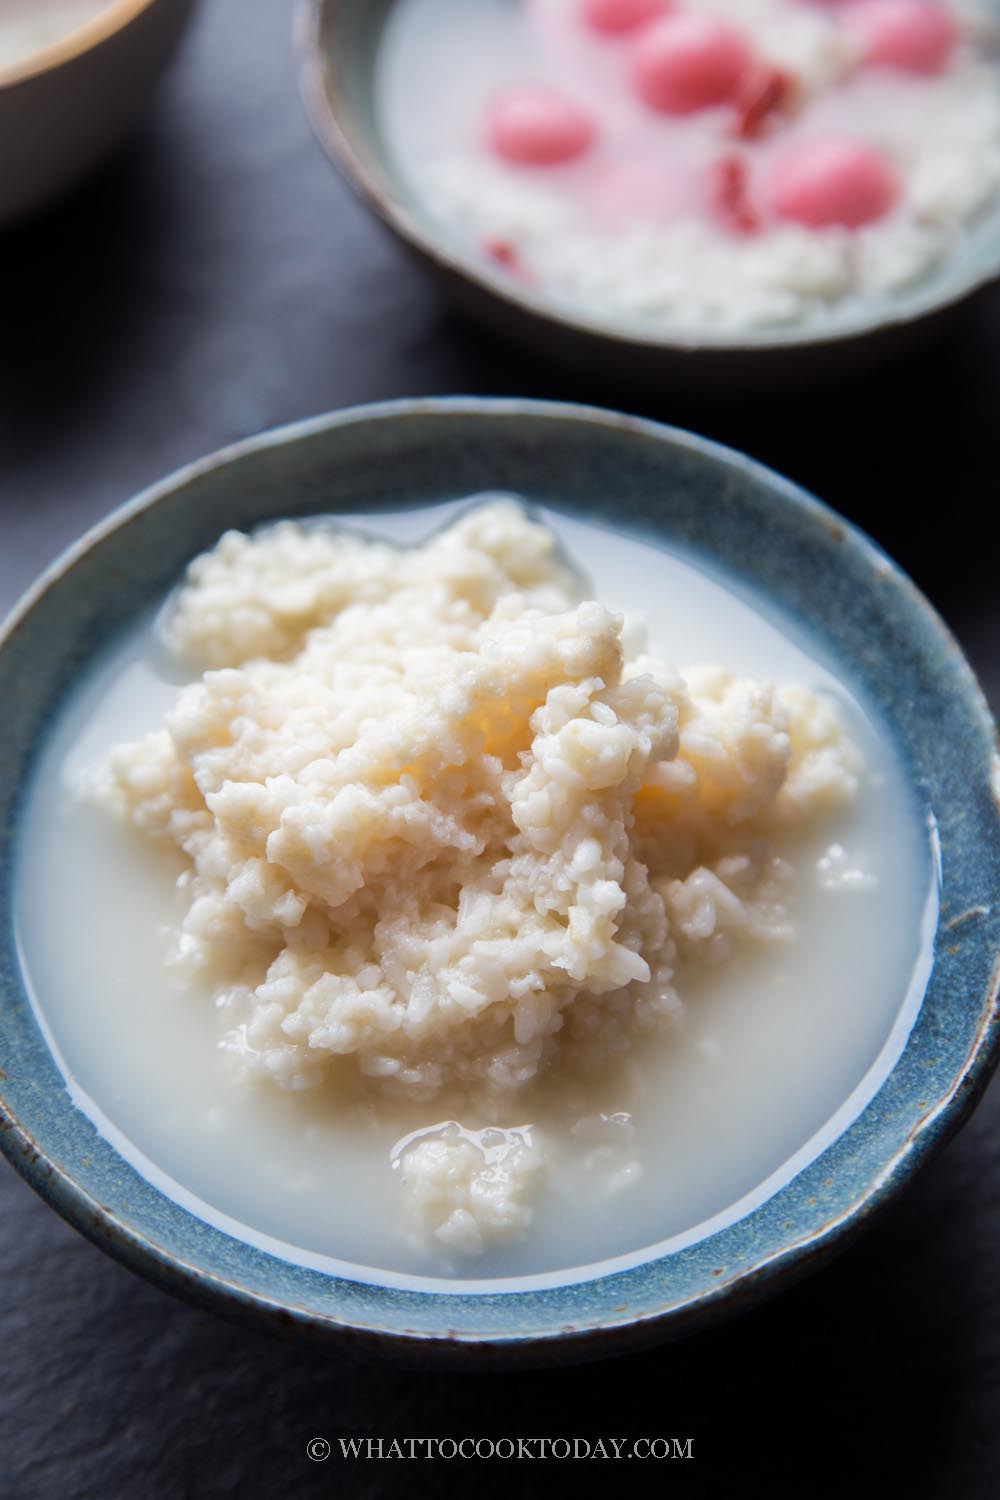
Jiu niang is fermented rice made with glutinous rice and Chinese wine yeast balls. The result is a sweet, porridge-like glutinous rice and some sweet liquid with an aroma of alcohol. Despite the aroma of alcohol, the alcohol content of jiu niang is very low. It’s not exactly a wine we are making here. It’s the fermented rice we are making here. The rice and the liquid are usually consumed and also used in some Chinese desserts and cooking. The process of making jiu niang is actually quite simple and very similar to making Indonesian tape/tapai using cassava roots instead of rice. It uses the same wine yeast balls.
Benefits of jiu niang
Because jiu niang is a fermented food, it is easily digested by our body. Similar to food like yogurt, tempeh, tape, just to mention a few, are all fermented. Fermentation increase the vitamins and minerals in the rice.
What kind of yeast to use
You have to use the right kind of yeast. You will need to get these Chinese wine yeast balls.

Chinese wine yeast balls
What kind of rice to use
You need glutinous rice. This is not the same with sushi rice or other short-grain rice. There are short-grain and long-grain glutinous rice. The short-grain glutinous rice will produce sweeter jiu niang, which is what I use.
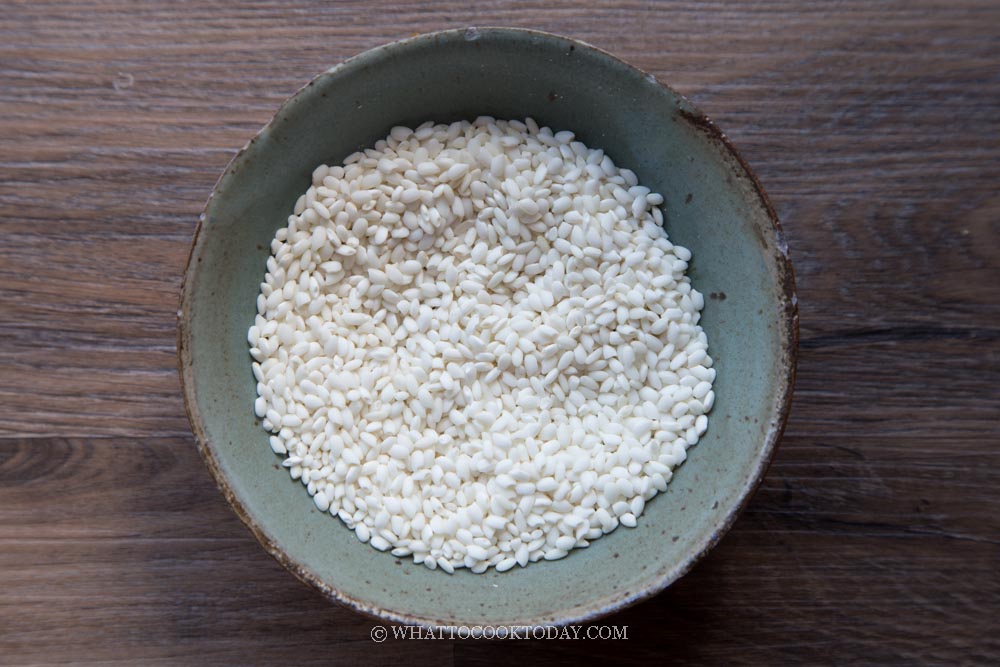
Glutinous rice
How to make jiu niang at home
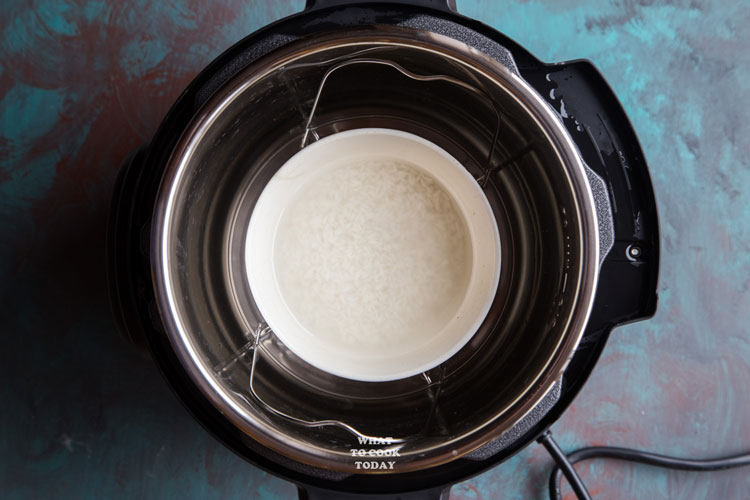
1. I cooked the glutinous rice using Instant Pot pressure cooker, so I didn’t soak the rice. Rinse glutinous rice in several changes of water and drain off the water completely
2. Put the rice in a round cake pan. I use an aluminum pan as it is a good heat conductor. Pour 450 ml of water to cover.
Pour 1 cup of water inside the inner pot of the instant pot. Put the trivet in and place the pan on the trivet. Close the lid and turn the pressure release valve to “sealing”. Set the timer to 20 minutes on “high pressure”. Then do natural release, it will take about 10-15 minutes for the pressure valve to collapse on its own. Unlock the lid. Be careful of the hot steam coming out from the pot. Remove the pan from Instant pot
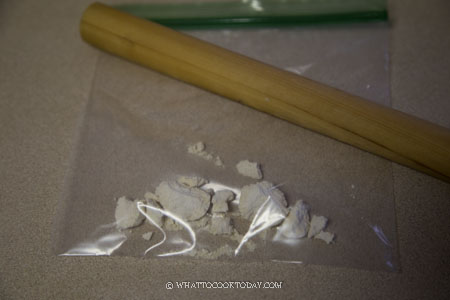
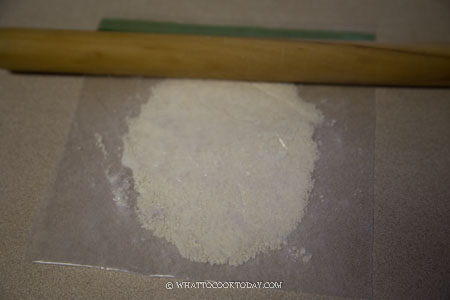
3. Spread the rice on a clean large tray to let the rice cool down completely. Put the yeast balls inside a bag, push the air out and seal. Use a rolling pin or other object to crush the wine yeast starter into very fine powder
4. Use a clean spoon to sprinkle the yeast all over the cooled-down rice. Add 120 ml of pre-boiled water. You can use the clean spoon or clean spatula to mix the rice, the yeast starter, and the water evenly

5. Transfer this to sterilized containers or jars. I recommend using glass or ceramic. Don’t use plastic. It is also best to use several smaller jars or containers so you don’t have to finish all jiu niang in a week time once you open the jar

6. If you use jars, create a “hole” in the middle of the rice using a clean chopstick all the way to the bottom. It’s easier to check on the progress this way. UPDATED: Cover with a cling wrap or the lid of the container but not too tightly to allow some oxygen to encourage fermentation, but don’t allow any obvious gap where bad bacteria or other microorganisms to enter and ruin the batch. Put this at a warm dark place, about 86-95 F degrees. Make sure the temperature is maintained at least 86 F and no more than 95 F. Let it sit in the oven for 3-4 days and check on it daily

7. If you have an Instant Pot, you can also use the yogurt function. Simply put a trivet in there and put the container on top. Close the lid but don’t tighten it to allow some oxygen to encourage fermentation. Let it ferment for 3-4 days and check on the progress daily
8. The first day, the rice may appear dry. Don’t be concerned. Start checking at day 2 again. You may start to see some liquid sipping out. On day 3, have a taste test. The rice should be soft, mushy and sweet and you will smell the alcohol smell. If it doesn’t taste sweet enough for you, let it ferment a bit longer

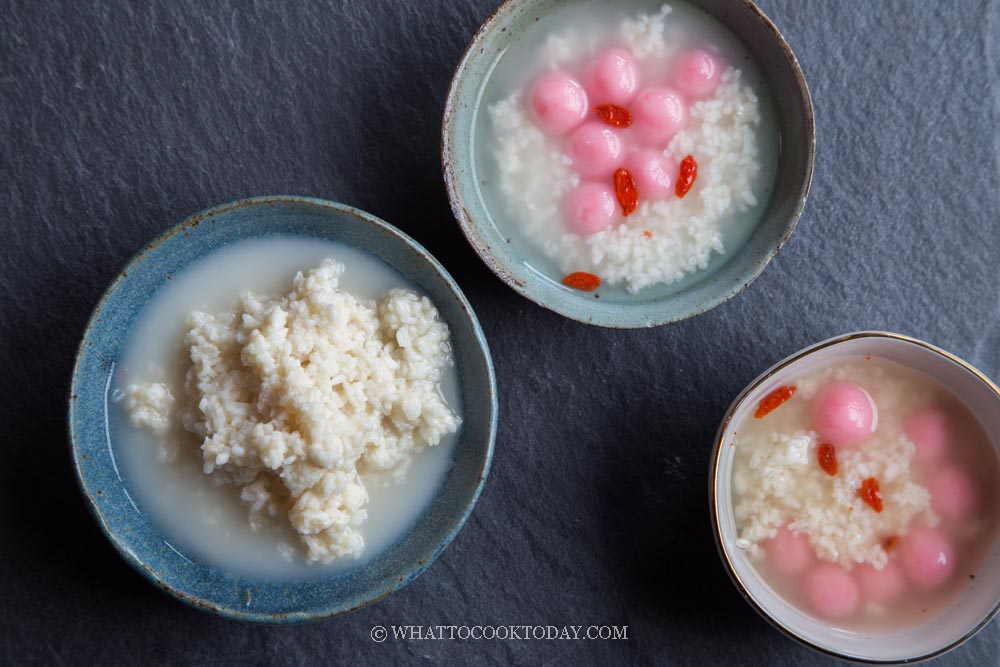
9. By day 4, the rice will float up. There will be quite a bit of liquid inside the container. Have a taste again. It took mine almost 4 days

How to store jiu niang
1. Seal the container/jar well with the lid and store in the fridge. The cold temperature will slow down the fermentation but it doesn’t mean the fermentation has stopped completely because the yeast is still alive. The longer you leave this, the stronger the aroma of alcohol will be
2. Both the rice and the liquid can be consumed and used in dessert and cooking. The sealed jars can be stored in a fridge for about a month if you sterilized your equipment well, but once you open the jar, it is recommended to consume it within 5 days for the best result as the taste may turn sour the longer you let it sit in the fridge. Always use a clean spoon to get the jiu niang to avoid contamination and unwanted bacteria/mold grows in there
3. Freeze for a longer storage
Jiu niang also freezes well. Just make sure that you jars of jiu niang aren’t completely full to the top because frozen thing expand and can crack the glass jars. So keep them in mind. If you freeze them, they can be kept for 3-4 month. Some even keep it for a year. I haven’t tried for that long though
4. Simply thaw in the fridge the night before and you can consume it within 5 days or so once you open the lid
Did you make this jiu niang/lao zao recipe?
I love it when you guys snap a photo and tag to show me what you’ve made 🙂 Simply tag me @WhatToCookToday #WhatToCookToday on Instagram and I’ll be sure to stop by and take a peek for real!
How To Make Jiu Niang (Chinese Sweet Fermented Rice)
Ingredients
- 500 gr short-grain glutinous rice see notes
- 450 ml water
- 15 gr wine yeast starter This cannot be replaced with regular yeast
- 120 ml pre-boiled water
Instructions
- Rinse glutinous rice in several changes of water and drain off the water completely
Cook the glutinous rice using Instant Pot pressure cooker:
- Put the rice in a round cake pan. Aluminum pan as it is a good heat conductor. Pour 450 ml of water to cover. You don't need to soak the rice if using a pressure cooker
- Pour 1 cup of water inside the inner pot of the instant pot. Put the trivet in and place the pan on the trivet. Close the lid and turn the pressure release valve to "sealing". Set the timer to 20 minutes on "high pressure". Then do natural release, it will take about 10-15 minutes for the pressure valve to collapse on its own
- Unlock the lid. Be careful of the hot steam coming out from the pot. Remove the pan from Instant pot
Cook the glutinous rice on the stove:
- Soak the glutinous rice with water for at least 4 hours or overnight. Drain off the soaking water.
- Line your steamer with a clean cloth or cheese cloth. Spread the pre-soaked rice on it. Create an empty spot in the middle so the steam can go through. Steam for about 40 minutes over medium-high heat or until the rice is cooked through. Proceed to the next step
Let the cooked glutinous rice cool down completely:
- Spread the rice on a clean large tray to let the rice cool down completely
Sterilize the container and other things you will use:
- I use glass containers, the lid, spatula, and a spoon (or whatever you will use) and boil them in rolling boil water for about 5 minutes
- Boil about 150 ml of water. I recommend to boil extra because some will evaporate during the boiling process. We will only use 120 ml of this later. Let this water cool down completely before using
Prepare the starter:
- Put the yeast balls inside a bag, push the air out and seal. Use a rolling pin or other object to crush the wine yeast starter into very fine powder
- Use a clean spoon to sprinkle the yeast all over the cooled-down rice. Add 120 ml of pre-boiled and cooled down water. You can use a clean spoon or clean spatula to mix the rice, the yeast starter, and the water evenly. Transfer this to sterilized containers or jars. I recommend using glass or ceramic. Don't use plastic
- It is also best to use several smaller jars or containers so you don't have to finish all jiu niang in a week time
- If you use jars, create a "hole" in the middle of the rice using a clean chopstick all the way to the bottom. It's easier to check on the progress this way
- Cover with the lid but don't tighten it to allow some air to encourage fermentation, but don't allow any obvious gap where bad bacteria or other microorganisms to enter and ruin the batch.
- Put this at a place with a temperature about 75-78 F degrees to get a less sour jiu niang. I do notice the higher temperature makes the jiu niang much more sour
Check on the progress:
- The first day, the rice may appear dry. Don't be concern. Start checking at day 2 again. You may start to see some liquid sipping out. On day 3, have a taste test. The rice should be soft, mushy and sweet and you will smell the alcohol smell. If it doesn't taste sweet enough for you, let it ferment a bit longer. By day 4, the rice will float up. There will be quite a bit of liquid inside the container. Have a taste again. It took mine almost 4 days. It may take longer sometimes.
Storage:
- Seal the container/jar well with the lid and store in the fridge. The cold temperature will slow down the fermentation but it doesn't mean the fermentation has stopped completely because the yeast is still alive. The longer you leave this, the stronger the aroma of alcohol will be
- Both the rice and the liquid can be consumed and used in dessert and cooking. The sealed jars can be stored in a fridge for about a month if you sterilized your equipment well, but once you open the jar, it is recommended to consume it within 5 days for the best result. Always use a clean spoon to get the jiu niang to avoid contamination and unwanted bacteria/mold grows in there


16 comments
Sorry, just read the final recipe and can see how much is used!