This post may contain affiliate links. Please read our disclosure policy.
These meat floss bread rolls are a popular Asian bakery treat made with soft, fluffy milk bread, a savory-sweet mayo spread, and a generous topping of meat floss (abon). This version uses the tangzhong method to ensure the bread stays pillowy and moist, just like the ones you find at bakeries—only better, because you made them yourself.

If you’ve ever walked past an Asian bakery and noticed those soft, pillowy bread rolls coated in fluffy meat floss and a creamy spread, you already know how irresistible they are. These Meat Floss Bread Rolls (also known as roti abon gulung in Indonesia) are a popular bakery staple in Southeast Asia—fluffy, slightly sweet bread layered with a savory mayo spread and topped with a generous layer of meat floss. And the best part? You can absolutely recreate them at home.
What is Meat Floss?
Meat floss, or abon, is a dried, shredded meat product that has a light, fluffy texture—almost like cotton. It’s savory and slightly sweet, and it pairs beautifully with soft bread. Pork and chicken floss are the most common, and you can find them at Asian grocery stores or make your own at home.
Why You’ll Like This Recipe
1. Soft and Fluffy Bread That Stays That Way: The tangzhong method helps keep the bread soft and moist for days without drying out.
2. Bakery-Style Texture at Home: With the right technique, you can achieve that bouncy, pillowy texture you love from Asian bakeries.
3. Versatile Filling and Topping: You can use pork, chicken, or even vegetarian meat floss alternatives. The mayo spread can be customized too.
4. Perfect for Make-Ahead or Sharing: These rolls stay soft the next day and are great for lunchboxes, snacks, or gatherings.

Meat Floss Bread Roll (Roti Abon Gulung)
Ingredients
Tangzhong:
- 25 g bread flour (12.7% protein content)
- 120 g whole milk
For the dough:
- 245 g bread flour (12.7% protein content)
- 5 g instant yeast
- 40 g sugar
- 5 g salt
- 50 g egg from one large egg
- 35 g whole milk
- 70 g unsalted butter (softened)
Egg wash:
- 1 egg yolk
- 1 tsp milk
- 2 Tbsp sesame seeds or more as needed
Topping:
- 2 stalks green onion green part only, finely chopped
- 3 pieces red chili seeded and cut into fine strips
- 80 g mayonnaise
- 40 g condensed milk
- 2 cups meat floss or more as needed
Instructions
Prepare the dough:
- I use 9 1/2 x 13 x 1 inches pans or known as quarter sheet pan here in the U.S.
Prepare tangzhong:
- Place milk and the bread flour in a small saucepan. Whisk until there is no more lumps. Cook this mixture over low-medium heat until it reaches 65 C (149 F) if you have a instant-read digital thermometer. Otherwise, it's about 1 1/2-2 minutes.
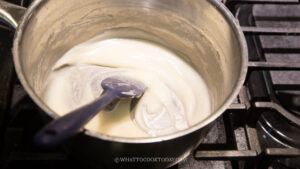
- Remove from the heat and cover with a plastic wrap, touching the tangzhong so the skin won't form. I highly suggest using this the next day instead of using it on the same day. Store this in the fridge
- If you decide to use it on the same day, let it cool down to lukewarm before mixing with the rest of the ingredients
Make the dough:
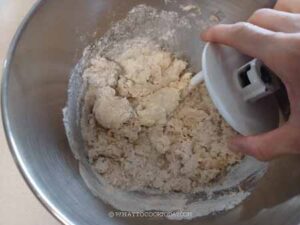
- Add the rest of the ingredients for the dough, except for the butter, into the mixing bowl of a stand mixer fitted with a dough hook attachment. Make a well in the center and pour in the wet ingredients and the tangzhong. Start the machine and knead the dough on speed 2 until the dough starts to come together into one sticky mass, about 3 minutes
- Increase the speed to 4 and continue to knead until the dough is relatively smooth. You need to stop and scrape the dough off the hook and the bowl several times during this process
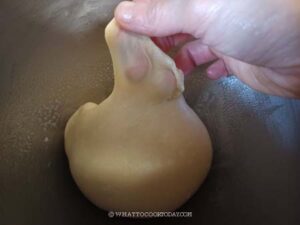
- Gradually add the butter, one pat at a time. It is a REAL sticky mess again because of the butter, just keep kneading and stop halfway and scrape the dough off the hook and bowl again and continue to knead until the butter is absorbed by the dough. Don't add any flour. You will get a shiny smooth dough that is very elastic and sticky. It may take 10-15 minutes of kneading with a machine on speed 4.
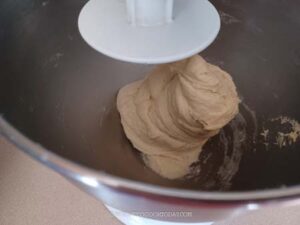
- The dough will clear the sides of the bowl but still stick to the bottom of the bowl and that's ok. If you gently stretch a small amount of the dough slowly, it shouldn't break easily. This shows that the dough has good gluten development already and you can stop kneading
- Proceed to first proofing or if you want to make ahead, proceed to the make ahead step below
To make ahead:
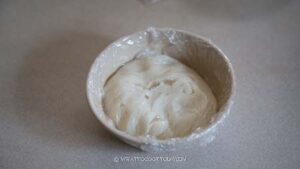
- Round the dough up into a smooth dough ball and place in a large container. Flatten the dough to fill up the container. Mark the side of the container with a marker or a tape, so you can easily see when the dough rises and doubles in volume. Rub the dough with some oil on top and cover with a tight-fitting lid
- Put the container in the fridge to let the dough cold proof in the fridge for up to 24 hours
First proofing:
- Place this dough in a lightly oiled large bowl or container, cover it with a clean and damp tea cloth or plastic wrap and let it rise at a warm place for about 1 hour. The dough will puff up and double in volume.
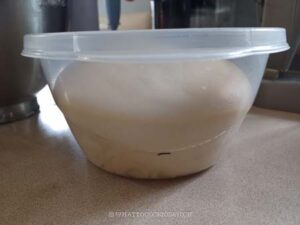
- When you poke your finger into the dough, the indentation stays and the dough won't deflate
Shaping:
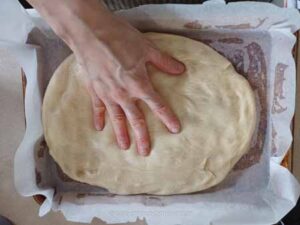
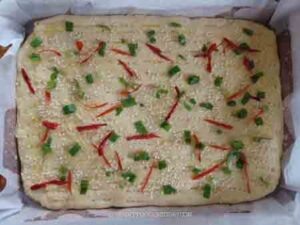
- Lightly oil the pan on all sides and line with a parchment paper. Transfer the dough to the pan and use your hands to deflate the dough by flattening and gently pushing from the center of the dough to spread the dough in the same thickness throughout, to cover the pan, corner to corner
- Use the tines of a fork and gently poke the dough all over the surface to prevent the dough from bubbling up too much
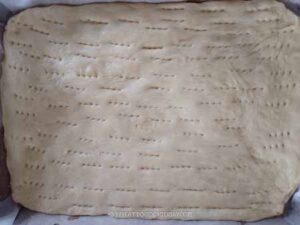
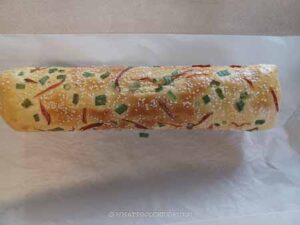
- Prepare the egg wash by mixing the egg yolk with milk. Brush this egg yolk wash on the surface of the dough. Arrange slices of green onion and red chili on top for decoration. Sprinkle with some white sesame seeds
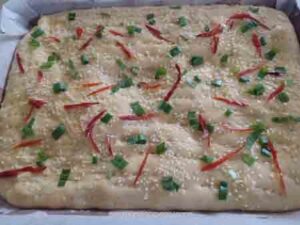
2nd proofing:
- Cover and let the dough proof again in a warm place, until it is puffy. It may take about 50 minutes to 1 hour or a bit longer, depending on the temperature. Preheat the oven to 400 F (200 C) for a conventional oven and 385 F (185 C) for a convection oven, 15 minutes before the end of 2nd proofing
Check on proofing:
- When you gently poke on the dough, it should bounce back very slowly and leave some indentation. The dough is done proofing. If it bounces back immediately, proof it a bit longer
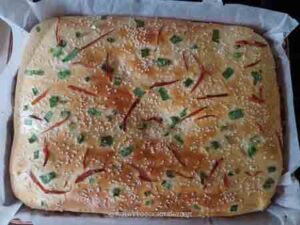
Bake the bread:
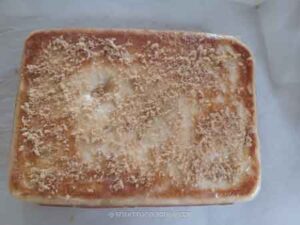
- Place the baking pan on the middle rack and bake for 10-11 minutes. The top should be decently golden brown. Do not overbake the bread
- While the bread is baking combine mayonnaise with condensed milk and set aside
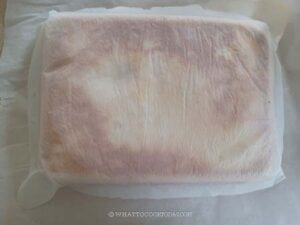
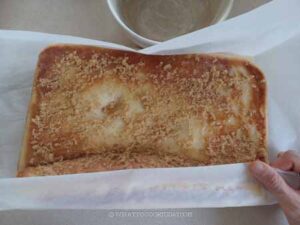
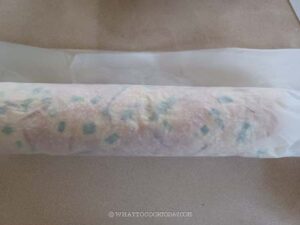
- Remove from the oven and immediately cover the bread with a large piece of parchment paper and then cutting board on top. Flip the bread over and gently peel the parchment paper. Remove the parchment paper and immediately roll the bread up using the towel, like a Swiss roll. Let it stay rolled up in the towel for 10 minutes. This will keep the bread moist and soft, and prevent the bread from cracking when you roll it
- Spread the mayo mixture on the surface of the warm bread. Sprinkle with some of the meat floss on the surface
- Using the help of the parchment paper, roll the bread up on the long side near you while the bread is still warm. This prevents cracking and the bread is easier to roll. If the bread is too warm for your hand, wear an oven mitten or something similar to help you roll the bread. Continue to roll it like a Swiss roll
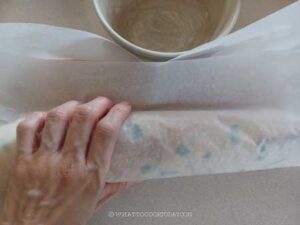
- Use a bench knife to tighten the roll.
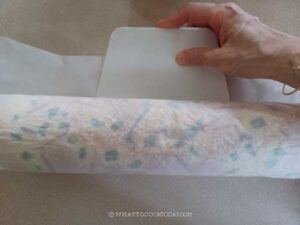
- Let the bread rolled up in this position for 10 minutes
- Remove the parchment paper and the bread roll is ready for assembling
Finish assembling
- Slice the bread into 8 equal slices. Spread the remaining mayo mixture on both sides of the bread and dip each side into a meat floss. The meat floss would stick to the mayo
Serving:
- Serve immediately. This is best on the same day
How to store:
- I suggest only apply the meat floss and mayo on the cut side when you are ready to serve. Let the buns cool down completely and then keep in an air-tight container for a day or two.
- For longer storage, put them in a freezer bag, push all the air out and seal. Keep frozen for one month. Simply thaw at room temperature for 15-20 minutes and then wrap in a foil and reheat in the oven at 350 F for 10 minutes or until just warm and then apply mayo and meat floss on the cut side and serve
RECOMMEDED TOOLS


*Nutrition facts are just estimates and calculated using online tools*

Important tips to prevent cracks when you roll the bread
The idea is like making a Swiss roll, but using
1. You will need a dough that produces soft and fluffy bread that’s for sure
2. Bake at high temperature but for a short period of time
3. DO NOT overbake the bread
Because the dough is baked in flatbread form, it bakes pretty quickly and it’s easy to overbake
4. Roll the bread as soon as it is out of the oven
rolling the baked bread as soon as it is out of the oven helps to prevent cracks. In fact, the only way that works for me with bread roll.
Variations
Spicy Twist: Mix some Sriracha, gochujang, or chili crisp oil into the mayo-condensed milk spread for a spicy kick that pairs beautifully with the savory meat floss.
Herbed Flavor: Add a sprinkle of finely chopped scallions or chives on top of the spread before rolling for a subtle oniony aroma.
Cheesy Topping: Sprinkle a small amount of shredded cheese on top of the bread during the last few minutes of baking for a savory upgrade.

