This post may contain affiliate links. Please read our disclosure policy.
Whether you’re looking for a fun treat or a comforting snack, this potato-shaped bread offers a deliciously playful way to enjoy the simple potato.

Korean bakeries are known for their creativity and love of combining traditional flavors with modern twists; the potato-shaped potato bread is no exception. It reflects Korea’s broader food culture, which embraces playfulness, aesthetics, and the blending of unexpected ingredients. Korean bread and pastries often take inspiration from Western techniques but are adapted with a local twist, creating a unique fusion that appeals to a wide audience. The bread became a hit, especially after gaining popularity through social media platforms, where users marveled at its realistic potato appearance and shared videos of themselves slicing into the bread to reveal the soft, delicious interior. Another more popular potato bread is the sweet potato bread version known as Goguma ppang, which has purple skin on the outside.
What Is Korean Potato-Shaped Potato Bread?
At first glance, this bread could easily be mistaken for a roasted potato. Its irregular, knobbly shape, and slightly crispy exterior covered in a light dusting of potato starch or flour give it a rustic, earthy look that mimics the real thing. But bite into it, and you’re met with a soft, chewy interior that carries potatoes’ rich and subtle flavors. While this bread is a recent addition to Korean bakery culture, it has already gained a reputation for being a satisfying comfort food. Combining traditional bread-making techniques with the subtle sweetness of mashed potatoes, the dough is crafted to give the bread a pillowy texture with a savory undertone. The dough is shaped by hand into small, irregular potato-like forms, then lightly dusted with potato starch or flour to create the illusion of a natural potato skin. Some variations even add small markings or spots to mimic the appearance of “eyes” on a potato.
The Surprise Inside
What truly elevates this bread beyond its quirky shape is its flavor. The combination of the potato-infused dough and its filling makes for a surprising and delightful contrast. I made a savory filling by using boiled potato, ham, and cheese. When the bread is baked, this filling becomes melty and gooey, complementing the soft, tender crumb.

Potato-shaped Potato Bread (Gamja Ppang)
Ingredients
For the dough:
- 350 g bread flour plus more for dusting
- 1 tsp instant yeast
- 20 g sugar
- 56 g unsalted butter softened
- 80 g whole milk plus more as needed
- 50 g eggs
- 5 g salt
For the dough and filling:
- 500 g potatoes divided
Filling:
- 100 g ham diced
- 120 g mozzarella cheese shredded
- 75 g sweet corn thawed if frozen
- 60 g kewpie mayo or regular mayo
- ¼ tsp ground black pepper
- Salt to taste
For coating:
- 120 g soybean flour or oat flour
- small pinch of charcoal powder or finely ground black sesame powder
Instructions
- Get about 500 grams of potato (a little over a pound). Dice them into small pieces
Prepare the potatoes and corn:
- Bring a medium-sized pot of water to a boil. Add the potatoes and cook until they are fork-tender but not mushy, maybe about 5 minutes or less. Drain off the boiling water.
- Mash the potatoes with a fork or potato masher. Get about 140 grams (2/3 cups) for the dough and the rest for the filling. Let it cool down to at least lukewarm before using it to prepare the dough
- I use frozen sweet corn, which I thawed. If you use fresh corn kernels that you shuck on your own, boil them in water for 2-3 minutes and then drain off the cooking water
Prepare the dough:
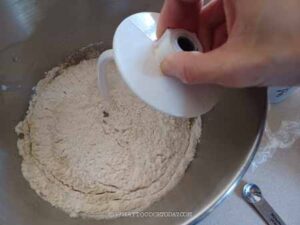
- Put all the ingredients for the dough in a mixing bowl of a standmixer. Add the 140 g (2/3 cups) mashed potatoes. Use a dough hook attachment to stir the mixture a little bit so the dry ingredients won't fly all over when you start the machine

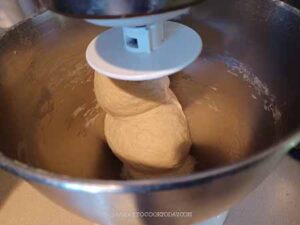
- Start kneading the dough on speed 2 (on KA) for 2 minutes and then increase the speed to 4 and continue to knead until the dough is smooth, another 5 minutes or so. The dough still feel a bit sticky and soft and it will clear the sides of the bowl but still stick to the bottom of the bowl. Use a bench scraper or a sturdy spatula to scrape the sides of the bowl halfway through kneading to make sure all ingredients are kneaded

First proofing:
- Lightly oil a large container and transfer the dough into the container. Cover and let it proof at a warm place (around 82 F/28 C is ideal) for about 1- 1/2 hours, depending on the temperature, until the dough doubles in volume
Prepare the filling:
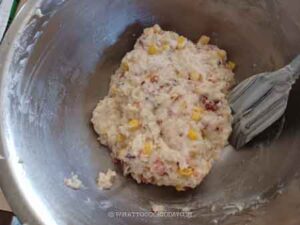
- While the dough is proofing, prepare the filling. Add the rest of the mashed potatoes, corn kernels, kewpie mayo, shredded mozzarella, ground black pepper, diced ham. Stir everything to combine. Have a taste and adjust seasoning by adding more salt and/or pepper if needed. Cover and set aside in the fridge

Prepare the coating:
- I use soybean flour (kinako). If you don't have any, oat flour works too. I just use a high-speed blender to blend roll oats into fine powder form. Mix with a tiny pinch of charcoal powder for a more darker rustic look
Shaping:
- Line 1 large baking sheet with parchment paper. You can use two baking sheets to give you more space too
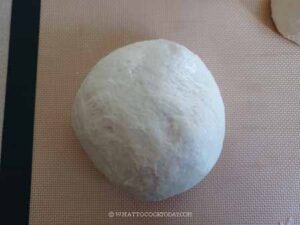
- Deflate the dough, by folding the edge of the dough towards itself until the air is deflated. Transfer to a lightly floured surface.

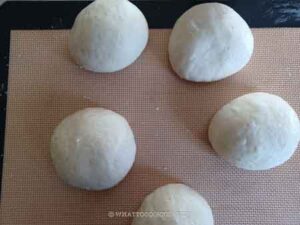
- Divide the dough between 5-10 pieces, depending on how large or small you want the potato bread to be

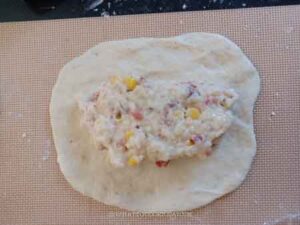
- The dough feels a bit sticky and that's normal. Lightly dust your work surface and your hands and pick up one dough and flatten it into about 5-6 inches roundish or ovalish shape (it doesn't have to be exact). Pile some of the filling onto the center of the dough.

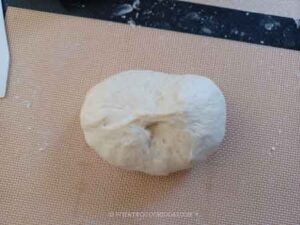
- Gather the edge of the dough towards the center to enclose the filling. Pinch the dough together to seal. Make sure you seal it really well. The shape can be irregular, just like how some potatoes are more roundish, some are more ovalish in shape. No right or wrong here

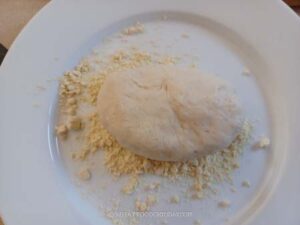
- Roll the dough with the roasted soybean flour to coat the entire dough. Place the dough on a baking sheet, about 2-3 inches apart. Repeat with the rest of the dough

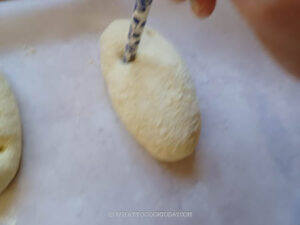
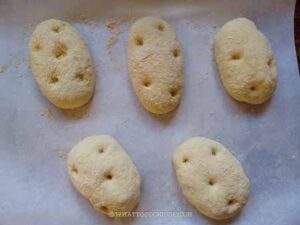
- Use a chopstick or the blunt side of a skewer to create some deep indentation into the dough, some are smalls, some a bit lager. This is to mimic the "eye" on the potato skin

Second proofing:
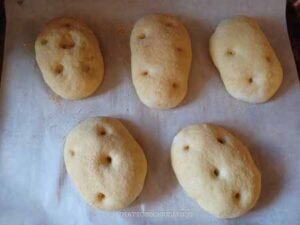
- Cover the dough with a clean kitchen towel and let them proof at a warm place again until they are puffy, about 1 hour or so.

- When you gently press on the dough, it bounces back slowly and leave some indentation. The dough is done proofing. If it bounces back immediately, proof them a bit longer.

Baking:
- 10 minutes before the end of second proofing, preheat the oven to 375 F (190C) for convention oven, 350 F (180 C) for convection oven.
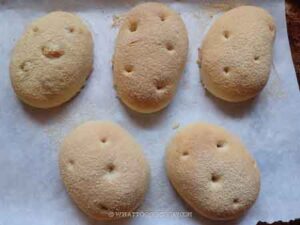
- I recommend baking one tray at a time if you use two baking sheets. Bake for 15-18 minutes or until the bread is lightly golden brown and if you have an instant-read thermometer, it should read at least 190 F (88 C)
Cooling:
- Remove the baking sheet from the oven and place on a cooling rack. Carefully transfer the bread to a cooling rack to let them cool down. You can serve this warm or room-temperature

RECOMMEDED TOOLS
*Nutrition facts are just estimates and calculated using online tools*
How to Enjoy It
The potato-shaped bread can be enjoyed as a snack, a light meal, or even a quirky addition to a dinner spread. Some people like to heat it up slightly, allowing the filling to become extra gooey and comforting, making it an ideal choice for colder months.
How to store and reheat
1. At room temperature: if you plan to eat the bread within a day or two, let the bread cool down completely and then put it in an air-tight container and keep it in a cool dry place
2. In the freezer: I don’t usually store bread in the refrigerator because it dries out the bread, making it stale even faster. I prefer to freeze them. Let the bread cool down completely, and then individually wrap each piece of bread tightly in plastic wrap or aluminum foil to prevent freezer burn. Place the wrapped bread in a freezer-safe resealable bag or container.
3. When you’re ready to eat, thaw it at room temperature or gently reheat it in the oven (around 350 F/180 C) for 10-15 minutes or in the microwave, covered with a damp paper towel, for 30-40 seconds to bring back its soft texture.

