This post may contain affiliate links. Please read our disclosure policy.
These soft pretzels are fluffy, slightly chewy, and golden brown with a classic pretzel flavor—without the hassle of boiling. Perfect for snacking, dipping, or adding your favorite toppings.
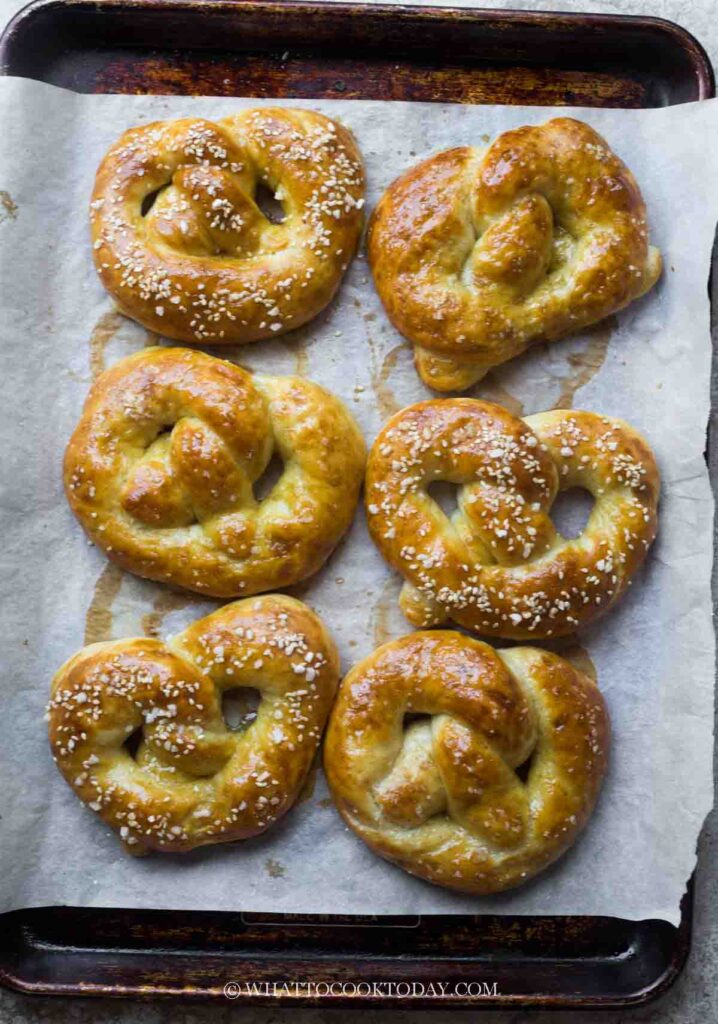
These homemade soft pretzels are soft, fluffy, slightly chewy, and so much easier to make than traditional pretzels because there’s no boiling involved. A baking soda bath gives the pretzels that characteristic pretzel flavor, deep golden-brown color, and shiny crust without having to boil each pretzel individually.
This is one of my favorite soft pretzel recipes, and I keep coming back to it. My family likes their pretzels soft with just a little bit of chew, rather than very chewy and dense. I also love how convenient this recipe is. No giant pot of water, no handling hot water, and no trying to transfer delicate pretzels in and out of a boiling bath.
I know the traditionalists may have something to say about this method (please don’t get mad at me! LOL), but for the kind of soft pretzel we enjoy at home, this recipe works beautifully.
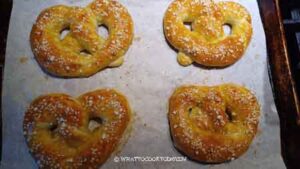
You can keep them simple with coarse salt and sesame seeds, serve them with cheese dip, or turn them into a sweet treat with your favorite toppings.
Why you’ll love this recipe
- No boiling required. The baking soda solution is brushed directly onto the shaped pretzels.
- Easy to make. The dough comes together easily in a stand mixer.
- Soft and slightly chewy. You can adjust the second proofing time depending on how chewy you like your pretzels.
- Great for savory or sweet toppings. Keep them classic with coarse salt or get creative with cinnamon sugar, sesame seeds, or other toppings.
- They’re best fresh and warm. The melted butter brushed over the hot pretzels makes them especially delicious.
Ingredients and substitutions
- Water: Use lukewarm or room-temperature water. It doesn’t need to be hot because instant yeast doesn’t need to be dissolved separately.
- Instant yeast: Instant yeast works directly in the dough. If using active dry yeast, you can still use it, but allow a little extra time for the yeast to become active before kneading.
- Sugar: A small amount of sugar feeds the yeast and gives the pretzels a subtle sweetness. It also helps with browning.
- Oil: I use a neutral-flavored oil such as vegetable, canola, or avocado oil.
- Bread flour: Bread flour gives these pretzels enough gluten structure for a soft but slightly chewy texture. I recommend using bread flour rather than all-purpose flour if possible.
- Salt: Salt seasons the dough and balances the flavor.
- Baking soda: This is mixed with boiling water to make the baking soda bath. Instead of boiling the pretzels in the solution, you’ll brush the solution directly onto the shaped dough.
- Boiling water: Use freshly boiled water to dissolve the baking soda. Let the solution cool completely before using it on the dough.
- Egg: Beat the egg and use it as an egg wash before baking. This gives the pretzels their shiny, deep golden-brown finish.
- Coarse salt: Sprinkle over the pretzels just before baking. Pretzel salt is ideal, but coarse sea salt works too.
- Toasted white sesame seeds (optional): I love adding sesame seeds for a little extra nuttiness and crunch.
- Unsalted butter: Melt the butter and brush it over the hot pretzels immediately after they come out of the oven. This makes the crust wonderfully soft and flavorful.
Tips for making the best soft pretzels
- Let the dough rest before shaping. A short rest after dividing the dough makes the pieces much easier to roll into long ropes without constantly springing back.
- Keep the center of the rope slightly thicker. The thinner ends will bake faster, while a slightly thicker center gives you a more evenly baked pretzel.
- Cool the baking soda solution completely. Don’t brush a hot solution onto the dough. Prepare it while the dough is proofing so it has plenty of time to cool.
- Don’t skip the second brush of baking soda solution. The two applications help give the pretzels good color and that characteristic pretzel flavor.
- Brush with butter while they’re still hot. The butter melts into the warm crust and gives these soft pretzels their delicious, tender finish.
What to serve with soft pretzels
These pretzels are perfect with:
1. Cheese dip
2. Beer cheese dip
3. Mustard
4. Honey mustard
5. Creamy garlic dip
6. Caramel sauce for a sweet version
7. Cinnamon sugar
How to store leftover pretzels
Soft pretzels are best on the day they’re made, especially while they’re still warm. If you have leftovers, let them cool completely and store them in an airtight container at room temperature for up to 2 days.
For the best texture, reheat them before serving. A few minutes in a 350°F (175°C) oven or air fryer will bring back some of their softness and warmth.
You can also freeze the baked pretzels. Let them cool completely, wrap them well, and freeze. Reheat directly from frozen until warmed through.
Frequently asked questions
- Do I have to boil the pretzels?
No. That’s one of the reasons I love this recipe. Instead of boiling the shaped pretzels, you brush them twice with a baking soda solution before the second proof. It is much easier and less messy. - Does the baking soda bath still make them taste like pretzels?
Yes. The baking soda solution helps create the characteristic pretzel flavor, color, and crust. They won’t be exactly the same as pretzels treated with a traditional lye bath, but they’re delicious and much more convenient to make. - Can I use all-purpose flour instead of bread flour?
You can, but I prefer bread flour for this recipe. It gives the pretzels better structure and contributes to the slightly chewy texture. - Why are my pretzels not brown enough?
Make sure you’re brushing them thoroughly with the baking soda solution and using an egg wash before baking. The combination helps create that deep golden-brown pretzel color. - Why did my pretzels turn out too hard?
They may have been rolled too thin, overbaked, or underproofed. Make sure the ropes aren’t too thin and watch them closely toward the end of baking. - Can I make the pretzels more chewy?
Yes. Keep the second proofing relatively short. The less the shaped pretzels proof, the more chew they’ll retain. - Can I make the dough ahead of time?
Yes. You can prepare the dough and refrigerate it for a longer, slower first rise. Bring it back toward room temperature before shaping so the dough is easier to work with. - Can I freeze soft pretzels?
Yes. Cool the baked pretzels completely, wrap them well, and freeze. Reheat them in the oven or air fryer until warm. - Can I use other toppings?
Definitely. Coarse salt is the classic choice, but sesame seeds, everything bagel seasoning, cinnamon sugar, or other toppings can work beautifully. - Can I make smaller pretzels?
Yes. Divide the dough into more pieces to make smaller pretzels. Just keep an eye on the baking time because smaller pretzels may bake quicker
My final thoughts
Traditional pretzels have their place, and I certainly appreciate the technique behind a proper Bavarian pretzel. But when I’m making pretzels at home, I’m usually looking for something soft, slightly chewy, easy to make, and family-friendly. That’s exactly what these pretzels give me
I love that I don’t have to boil them, and I can still get that unmistakable pretzel flavor and beautiful golden-brown finish. They’re especially good warm from the oven with melted butter, but they’re also great with cheese dip or transformed into a sweet pretzel with your favorite toppings. This is one of those recipes I keep coming back to—and if you like your soft pretzels on the softer side with just a little chew, I think you might enjoy this one too!
Soft Pretzels (No Boil, No Lye)
Ingredients
For the dough:
- 254 g water
- 2 tsp instant yeast
- 1 Tbsp sugar
- 42 g oil
- 448 g bread flour
- 1 tsp salt
Baking soda bath:
- ½ cup boiling water
- 1 Tbsp baking soda
For egg wash:
- 1 large egg beaten
For topping:
- Coarse salt for sprinkling
- Toasted white sesame seeds optional
For brushing:
- 1 Tbsp unsalted butter melted
Instructions
Knead the dough :
- Put all ingredients for the dough in a mixing bowl of a stand mixer fitted with a dough hook attachment
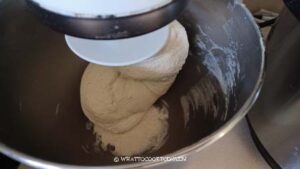
- Mix on the lowest speed for about 1 minute and then increase the speed to medium and knead until the dough is soft and elastic, about 6 to 7 minutes. You may need to scrape the side of the bowl several times during the kneading.
- The dough will clear the sides of the bowl but will still stick to the bottom of the bowl
First proofing:
- Oil a large container and give the dough a few kneading and round it up into a round dough ball and put into the container.
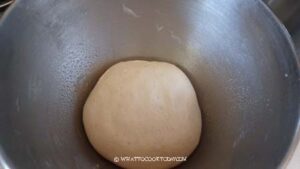
- Let it proof until it doubles in volume. This may take about 1 hour, depending on the room temperature
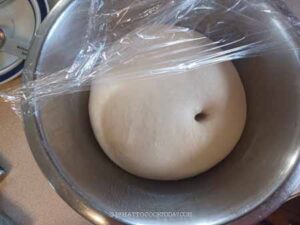
Prepare the baking soda bath:
- While the dough is proofing, combine baking soda with a boiling water and let it cool down completely
Shaping:
- Once the dough has doubled, gently deflate it and divide into 9 equal pieces. Cover and let them rest for 5 minutes
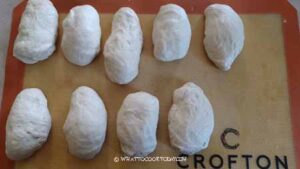
- Work with one dough at a time. Starting from the center and working outward. Aim for about 16–18 inches long, with the middle slightly thicker than the ends.
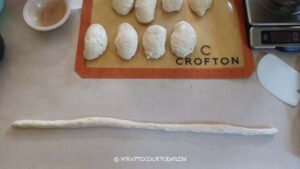
- Form a U shape, with the two ends pointing upward.
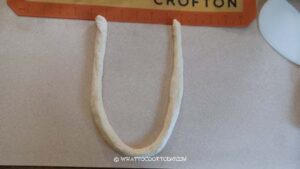
- Cross the two ends once, about 2 inches from the tips. So you have a twist
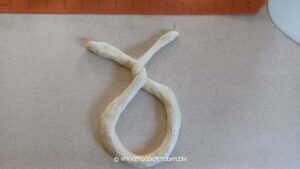
- Fold the twisted ends downward toward and tuck them to the bottom of the U.
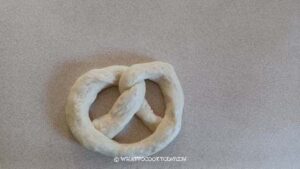
- Press the ends onto the inside bottom curve of the pretzel. Gently pinch them down so they stay attached during baking.
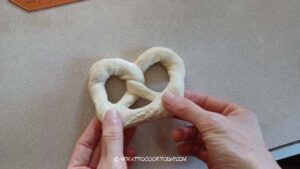
- Place on parchment, leaving plenty of space between pretzels. Gently stretch the pretzel to open up the center holes and even out the shape. Don't make the rope too thin at the center, or that part can become overly crisp.
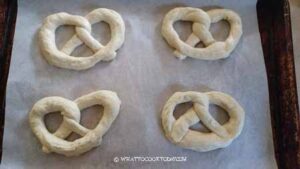
- Brush them with the baking soda solution. Let them dry for a few minutes and then brush them for the second time
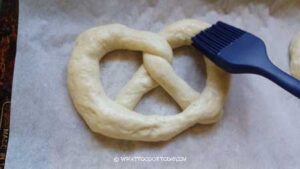
Second proofing:
- Position the oven racks, 3rd from the top and 3rd from the bottom. Start preheating oven to 450 F (230 C). Line two large baking sheets with parchment paper
- Let the pretzels proof until they are about 50% puffy, which takes about 30-45 minutes (or longer), depending on room temperature
- If you prefer a chewier texture, you don't have to proof as long, just let them proof as you are waiting for the oven to heat up
Baking:
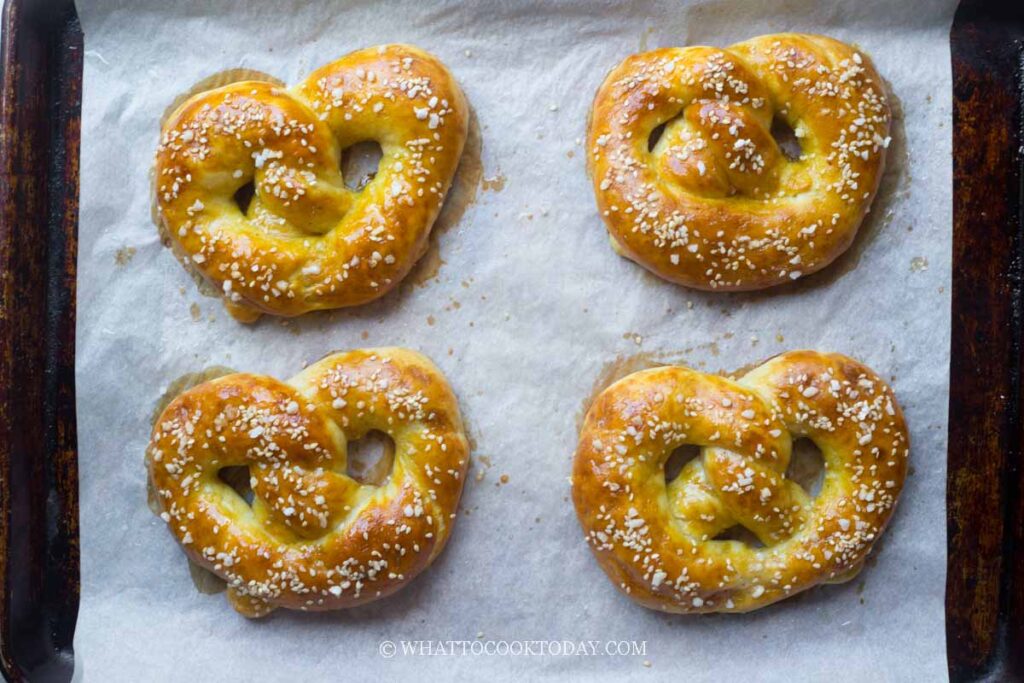
- Brush the dough with egg wash and sprinkle with some salt
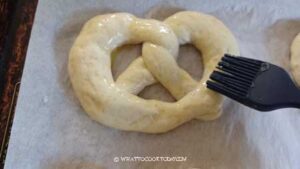
- Sprinkle with some salt and/or sesame seeds if you choose to
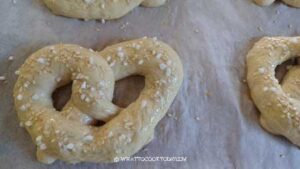
- Bake for 12-13 minutes or until they are deep golden brown and shiny. When they are out of the oven, brush with melted butter
To serve:
- Serve them warm or at room temperature