This post may contain affiliate links. Please read our disclosure policy.
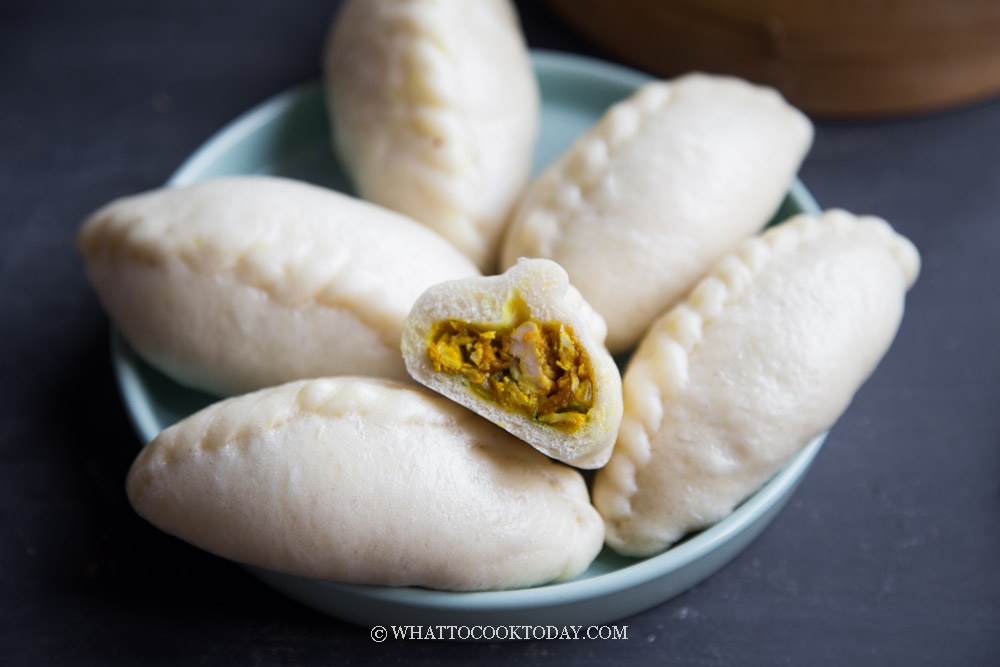
Soft pillowy steamed buns are filled with curry chicken filling. They are shaped like the traditional curry puff pastry. The puff pastry shell is replaced with soft and pillowy steamed buns/bao zi.
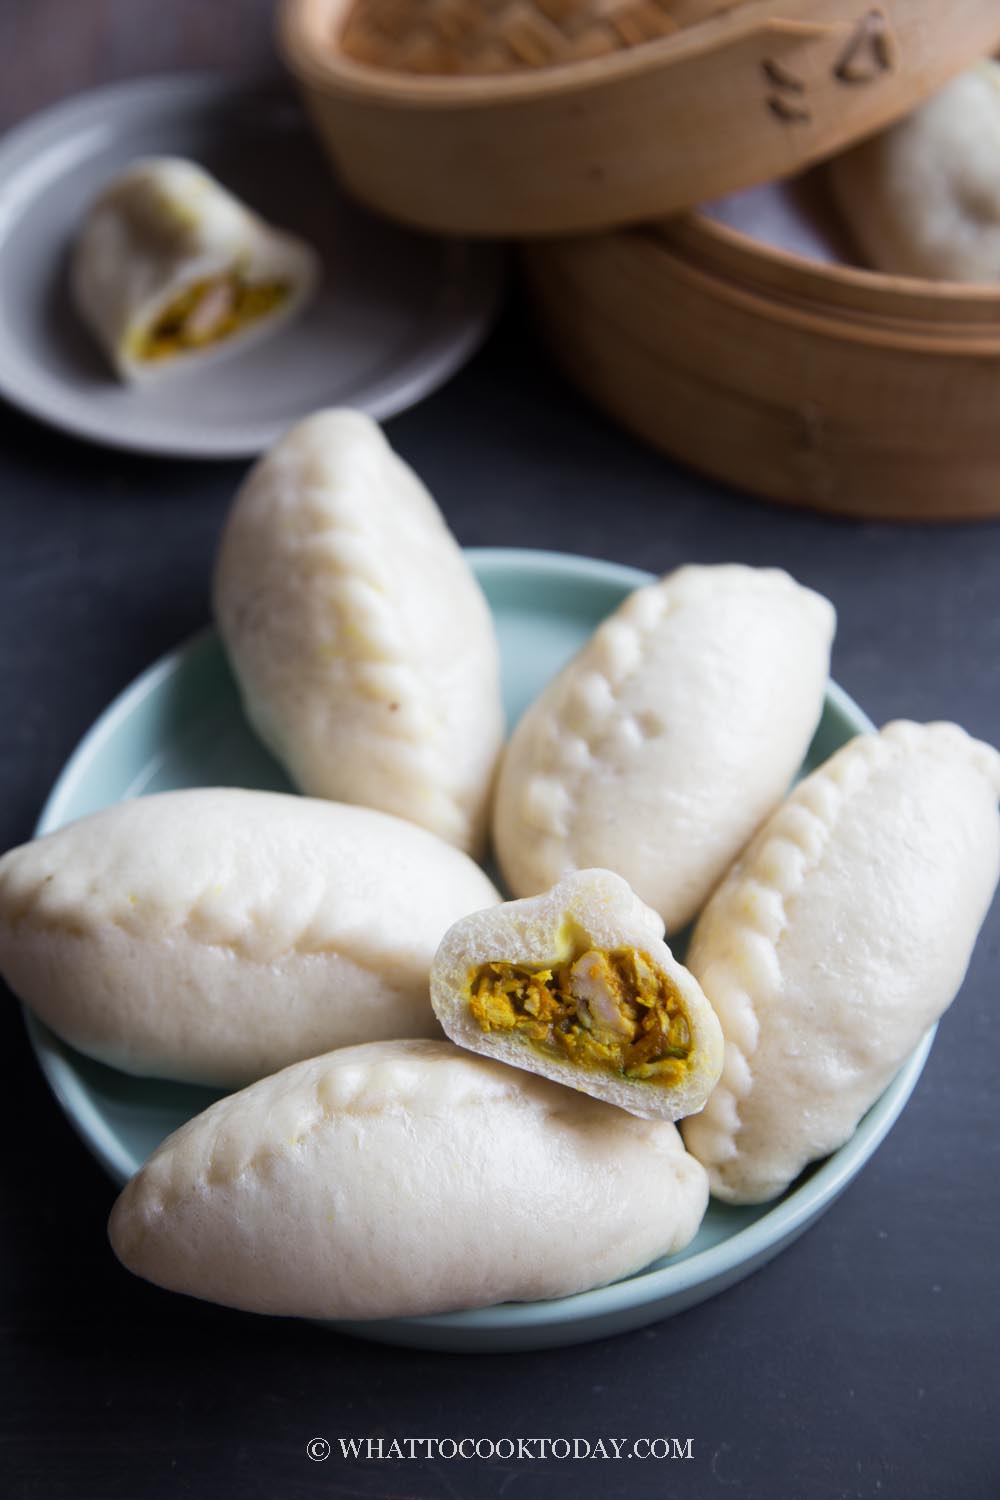
This steamed curry chicken bao is inspired by Old Chang Kee’s steamed curry chicken bao. The bao version is definitely less calories compared to the fried curry puff, though I’m not gonna deny that I would happily eat the fried curry puff too 🙂
I used my basic bao recipe and the same filling I used to make spiral curry puff (karipap pusing)
How to make steamed curry chicken bao
1. You can prepare the filling followed the step-by-step photos if you need to
2. I use my basic steamed buns recipe. You can refer to the step-by-step photos and video on how to prepare the dough with a machine
3. Once you get a smooth dough, divide the dough into 8 equal portions. Keep the dough balls covered to prevent drying out. Work with one dough at a time
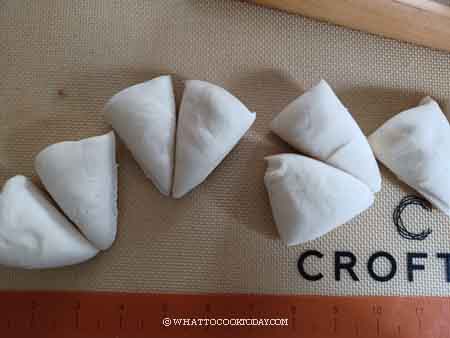
5. Pull and tuck the dough from top to bottom so the seams are at the bottom and the surface is relatively smooth. Repeat with the rest of the dough. Cover and let them rest for 15 minutes before rolling them out. This is to relax the gluten
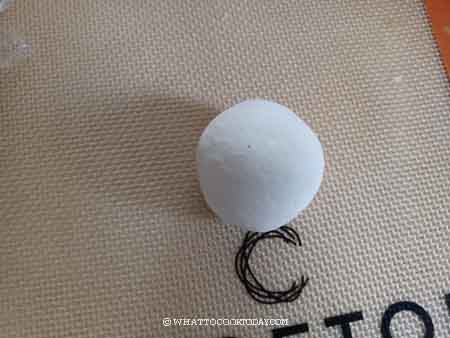
6. Take one dough and flatten it slightly with your palm. Use a rolling pin and roll it out into a 5-inch round, about 1/4-inch thick. Don’t roll it too thin as the filling can sip through and this will create wet spots on the buns when you steam
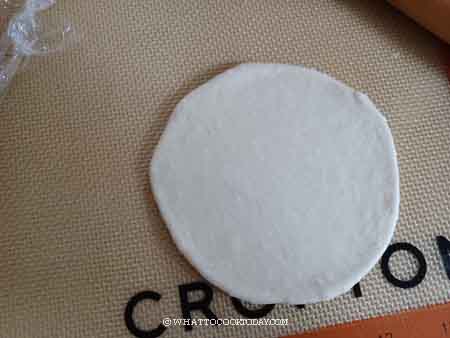
7. Scoop about 2-3 tablespoons of the filling in the middle
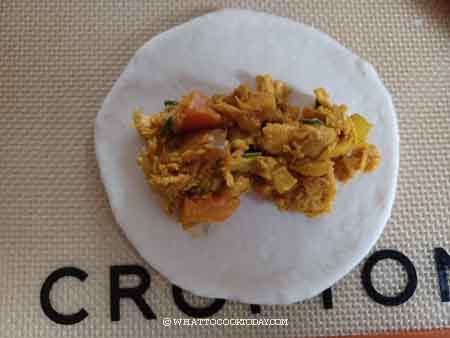
8. Fold the dough over to form a half-circle and then pinch to seal
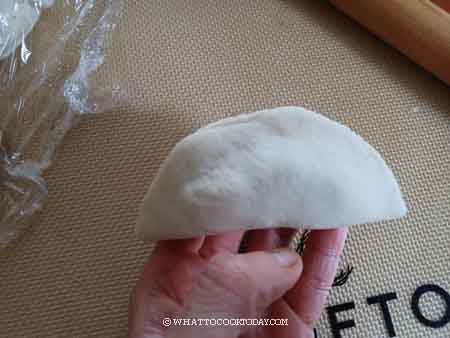
9. Starting from one corner, pinch to flatten the dough and then fold over to create a pattern along the edges
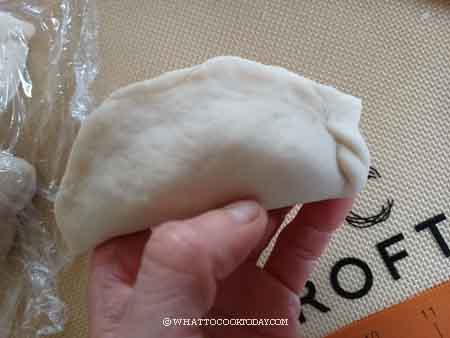
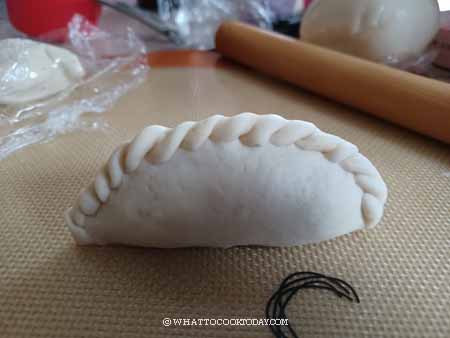
10. Place the shaped and filled dough on a piece of 10 x 10 cm of parchment paper and put them on a baking tray. Cover and put them at a warm place to let them proof for another 45 minutes to 1 hour or until they are puffy and 50% bigger than their original sizes and feel light. When you gently press on the dough, it gradually bounces back. If you have all these, the buns are done proofing

11. Wrap the lid of your steamer with a kitchen towel to prevent moisture dripping back on the steamed buns as this will create “burn” spots . If you use a bamboo basket, you don’t have to do this. The bamboo can “absorb” moisture. Put water inside your steamer. Don’t turn on the heat yet. Arrange the proofed buns in the steamer, give them about 1-inch space for expansion during steaming
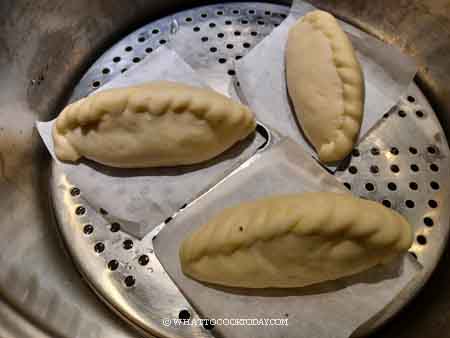
12. Turn the heat on to medium, when the water comes to a simmer, start the time and open the lid about 1/2 inch to allow some steam to escape. Your steamed buns won’t wrinkle when you steam this way. Steam for 10 minutes over medium heat
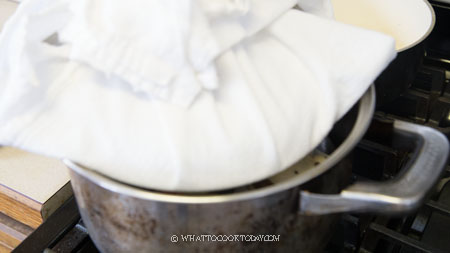
13. After 10 minutes, turn off the heat. DO NOT OPEN THE LID of the steamer. Let the buns sit there for 3 minutes like this. The buns will not sink or wrinkle due to the sudden change in temperature

14. Then transfer to a cooling rack immediately to prevent the bottom of the buns from getting soggy due to condensation trapped at the bottom. Refill steaming water if needed and let it come back to a simmer over medium heat and continue steaming, leaving 1/4-1/2 inch gap to allow steam to escape
How to store
Short-term storage: Let the buns cool down completely. Store them in air-tight container. I actually put them in a zipper plastic bag, push all the air out and then store inside a large container. They can be kept at room temperature for 2-3 days if it’s not humid
Long-term storage: I suggest freezing them. Arrange them on a baking sheet, not touching each other and then let them freeze for about 1 hour. Transfer to a freezer bag, push all the air out and then seal. If you can put into another freezer bag, that will ensure the buns won’t get freezer burn. Keep in freezer for one month max for the best result
How to reheat
My favorite way of reheating steamed buns would be using a moist heat, such as using a steamer. Just a quick steaming, 2-3 minutes over medium heat will restore its soft and fluffy texture. If they are frozen, you can steamed straight from the freezer. Steam over medium heat for 5-8 minutes or until they are heated through.
You can also use a microwave. Wet a paper towel and then squeeze the water out and let it just damp enough, but not dripping and cover on top of the buns and microwave on high for 10 seconds and then check. Reheat until they are warm. If they are frozen, you will need longer time obviously.
Did you make this steamed curry chicken bao recipe?
I love it when you guys snap a photo and tag to show me what you’ve made 🙂 Simply tag me @WhatToCookToday #WhatToCookToday on Instagram and I’ll be sure to stop by and take a peek for real!
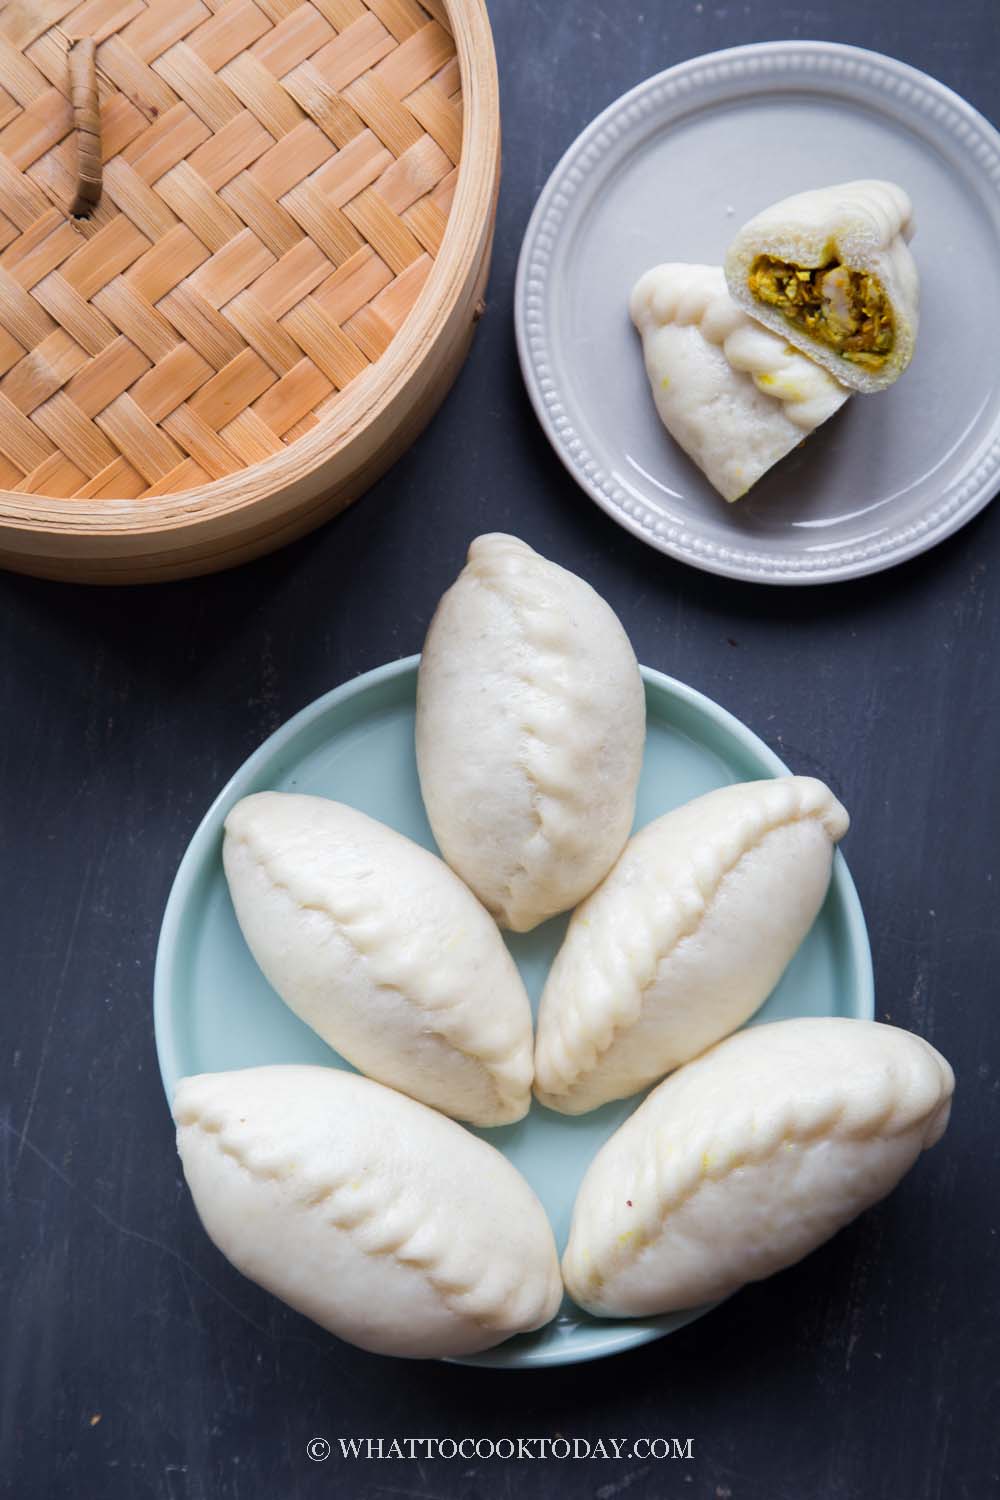
Steamed Curry Chicken Bao
Ingredients
For the dough:
- 180 gr all-purpose flour plus more for dusting
- 180 gr cake flour
- 30 gr sugar
- 4 gr instant yeast
- ¼ tsp salt
- 1 Tbsp cooking oil
- 180 ml milk to start with
For the filling:
- 2 Tbsp cooking oil
- 350 gr potatoes peeled and cut into 1/2-inch cubes
- 200 gr boneless skinless chicken meat diced
- 100 gr mixed veggies thawed if frozen
- 1 large onion diced
- 2 Tbsp curry powder adjust to your preference
- 1 Tbsp chili powder adjust to your preference
- ¼ cup chicken broth
- ¼ tsp sugar
- Salt to taste
- 2 Tbsp all-purpose flour
- 2 hard-boiled eggs optional cut into 10 portions
Instructions
Prepare the filling: (can be done few days before):
- Heat skillet/wok with oil. Saute onion until soft, about 3-4 minutes. Add chicken pieces and stir-fried until they turn color. Add potatoes, curry powder, chili powder and continue to cook for about 5 minutes. Add water or chicken broth, cover with a lid and let it simmer for about 10 minutes until the potatoes are soft. Uncover the lid and continue to cook until the liquid has evaporated
- Sprinkle in the flour and continue to stir fry until the mixture sort of more "glue" together because of the flour. It is easier to wrap it later. Have a taste and adjust seasoning as needed. Remove from the heat and let it cools down completely before wrapping. If you are preparing few days before, keep it in the refrigerator
Prepare the dough by machine:
- Place the flour/starch combination (either option 1 or 2), instant yeast, sugar, salt in a mixing bowl and stir to combine. Add milk and oil in a mixing bowl. If you are using a stand mixer, use a dough hook attachment. You may or may not need more liquid. With option 1 I use close to 200 ml and with option 2 I need about 180 ml. This is just for your reference, you may need more or less
- Turn on the mixer at the lowest speed to prevent flour from flying all over the place. Continue to knead at low speed (speed 2 on KA) for 12-15 minutes (updated for the best result) or until the dough is smooth, silky and elastic. When you stretch the dough thinly, it won't tear (windowpane stage)
Prepare the dough by hands:
- Place the flour combination, instant yeast, sugar in a mixing bowl. Mix until you get a rough dough (it's not going to be smooth yet). Cover and rest it for 15 minutes. Then go back and knead it. You'll be surprised by how easier it is to knead it now. Knead until the dough is smooth and pliable, about 15-20 minutes. At any point during kneading, you can always stop and rest the dough if you find it hard to knead. This is to relax the gluten. Then go back to knead again and you'll be surprised by the difference it makes by just resting the dough before kneading again. It's easier for you too. You want to knead until the dough is really smooth and stretchy. A lot of elbow grease I must warn you!
Resting the dough:
- Divide the dough into 8-10 equal portions. Flatten and gather the edge to round them up into dough balls. Cover and rest the dough for 15 minutes. This is not to proof the dough. It shouldn't double in size. This is to relax the gluten for easier shaping and rolling the dough, then proceed to next step that's applicable to you
Wrapping:
- Lightly dust the work surface with some flour. Work with one dough at a time. Flatten the dough with your palm and then use a rolling pin to roll it out to form a circle about 4-5 inches, with a slightly thicker middle part. This is to support the weight of the filling. Don't roll the dough too thin. If you roll the dough too thin, the filling might make the steamed buns "wrinkle" later when you steam
- Place about 2 tbsp of filling at the center and fold the dough over to form a half-circle. Starting from one corner, pinch to flatten the dough and then fold over to create a pattern along the edges. Put on a piece of parchment paper and put on a large baking sheet
- Repeat with the rest of the dough and filling. Cover with a clean kitchen towel and proceed to proofing
Proofing:
- Put them at a warm place to let them proof for another 45 minutes to 1 hour or until they are puffy and 50% bigger than their original sizes and feel light. When you gently press on the dough, it gradually bounces back. If you have all these, the buns are done proofing
Steaming:
- Wrap the lid of your steamer with a kitchen towel to prevent moisture dripping back on the steamed buns as this will create "burn" spots . If you use a bamboo basket, you don't have to do this. The bamboo can "absorb" moisture. Put water inside your steamer. Don't turn on the heat yet. Arrange the proofed buns in the steamer, give them about 2-inch space for expansion during steaming. Turn the heat on to medium, when the water comes to a simmer, start the time and open the lid about 1/2 inch to allow some steam to escape. Your steamed buns won't wrinkle when you steam this way. Steam for 10 minutes over medium heat
- After 10 minutes, turn off the heat. DO NOT OPEN THE LID of the steamer. Let the buns sit there for 3 minutes like this. The buns will not sink or wrinkle due to the sudden change in temperature
- Refill steaming water if needed. Put the next batch in the steamer and let the water come back to a simmer over medium heat and continue steaming, leaving 1/2 inch gap to allow steam to escape
Serving:
- Serve warm or transfer to a cooling rack immediately to prevent the bottom of the buns from getting soggy due to condensation trapped at the bottom. Let them cool down completely before storing in an air-tight container


