This post may contain affiliate links. Please read our disclosure policy.
If you are looking for a really good homemade bagels recipe that is soft and chewy, you gotta try this recipe out. They can be boiled or steamed before baking the bagels. The bagels can be made with leftover yogurt whey too if you are looking for ideas to use up your yogurt whey from making Greek yogurt.
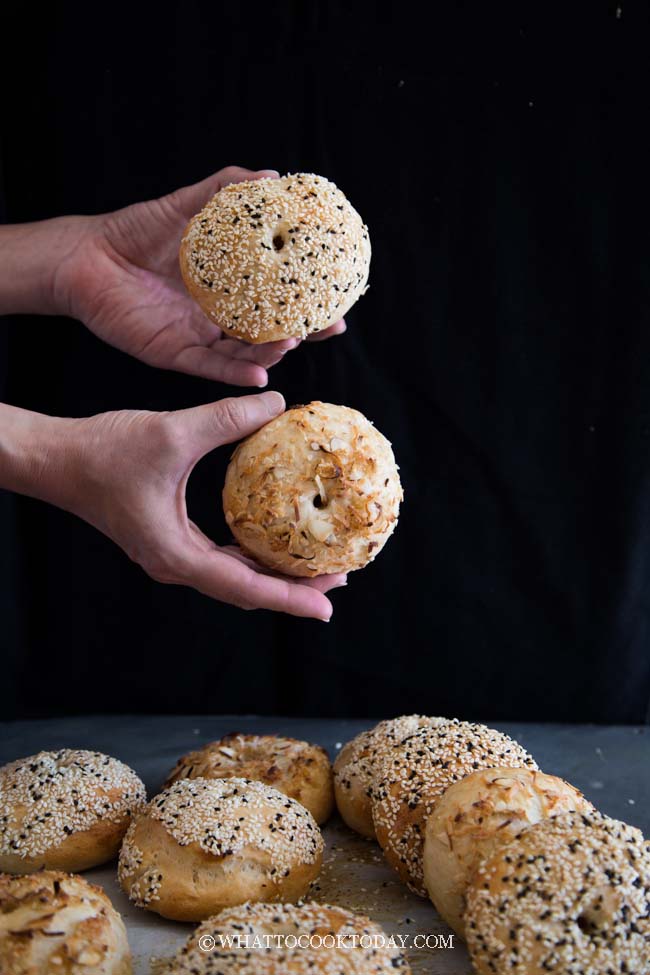
I know..I know..I’ve been on a baking spree almost every other day for real. Ever since my mom comes, I’ve been baking lots of bread, bagels, muffins, you name it. She likes homemade bread and alike! I love soft and chewy bagels and this recipe really does it for me. Nothing beats good homemade bagels like this.
My successes in making my own Instant Pot Greek yogurt don’t help much with baking more bread because I want to use up the leftover yogurt whey (the yellowish cloudy liquid) from straining Greek yogurt. It’s all good. No regrets! Read on people 😉 Using the acid whey gives the bagels a bit of that “tang” as if you are using buttermilk in the recipe.
Read this Easy Thick Creamy Instant Pot Greek Yogurt post for more ideas on using leftover yogurt whey.

Related Post: Easy Guang Bing / Foochow Bagel / Kompia (Oven or Air-Fryer)
The Best Homemade Soft and Chewy Bagels (Boiled or Steamed)
Ingredients
- 500 g bread flour plus more as needed
- 40 g sugar
- 9 g instant yeast
- 300 g water or liquid whey. Add more as needed. See notes
- 6 g fine sea salt
- 30 g cooking oil
For boiling bagels (option 1):
- 2 litre water
- 60 g honey or barley malt syrup
For boiling bagels (option 2):
- 2 litre water
- 20 g non-diastatic malt powder
- 15 g sugar
Egg wash: (optional- the topping sticks better)
- 1 egg beaten
Ideas for toppings:
- White sesame seeds
- Black sesame seeds
- poppy seeds
- coarse salt
Instructions
Make the dough:
- Place all ingredients in a large bowl of a stand mixer fitted with dough-hook attachment. Knead the dough at low speed for 8 minutes. You may need to stop and reposition the dough several times.

- Knead until the dough is smooth and stretchy. Add more liquid if it's too dry or add more flour if it's too wet. Bagels dough are usually at a stiffer side compared to regular bread dough, but shouldn't feel dry

Do a windowpane test:
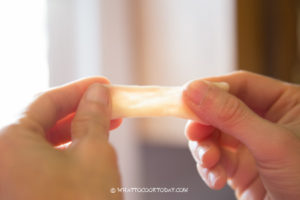
- Pinch off a small amount of dough and then slightly flatten and very gently try to stretch the dough. If it's stretched and light can go through the stretch, the dough is done kneading. If the dough tears when you stretch, you need to knead the dough a bit more in the mixer. A well-developed gluten will also produced chewier bagels

Proof the dough:
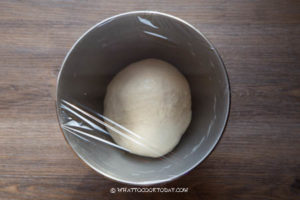
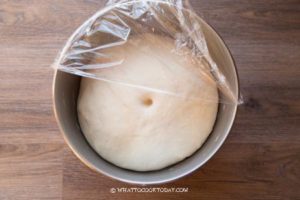
- Lightly oil the bowl. Cover with a plastic wrap coated with cooking spray and let it proof at a warm place until it doubles in size, about 1 hour or longer depending on the temperature.

- Once the dough is done proofing, preheat oven to 425 F (220 C) for conventional oven, 400 F (200 C) for convection oven

Two ways to shape the bagel:
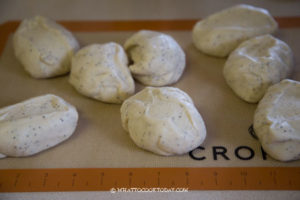
- Method 1: Punch the dough down and divide into 8 equal pieces (roughly about 4 oz each).

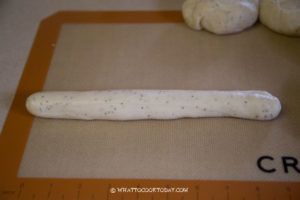
- Pat the dough out into a 1/4-inch thick rectangle and starting from the long end, roll up into a tight log and then roll back and forth to lengthen the dough into about 14 inches long

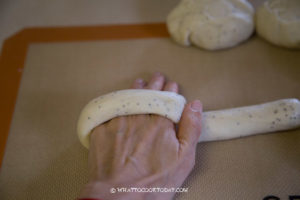
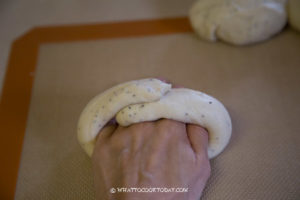
- Hold 1 end of the log in your palm and then loop the other end around your hand, overlapping by about 2 inches.

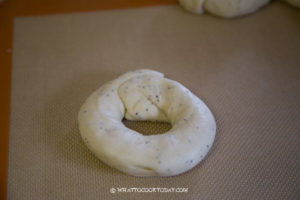
- Press and roll onto the work surface to seal. This is important or your bagel will "unroll" when you boil them later.

- Reposition the bagel so the seams side is on the bottom of the dough is evenly distributed in a circle. Repeat with the remaining dough

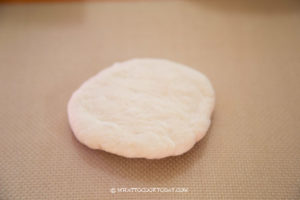
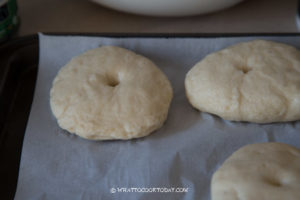
- Method 2 (lazy method-I prefer this method): Punch the dough down and divide into 8 equal pieces (roughly about 4 oz each). Pat the dough with your palm and then pull the edge towards center to form a dough ball. Repeat with the rest of the dough.

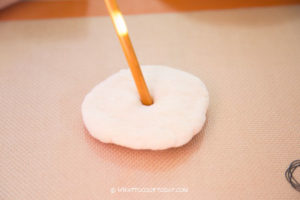
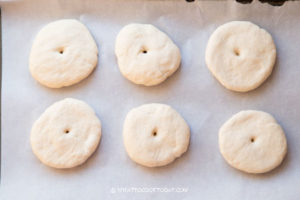
- Use a chopstick or your thumb to punch through the middle of the dough to make a hole and gently stretch it to resemble a bagel. Repeat with the remaining dough balls

Rest the bagels:
- Lined a large baking pan with a parchment paper. Lightly oiled the surface and place the shaped bagels on top and let them rest for 15-20 minutes at a warm place while you prepare the water bath or the steamer

Option 1: Boil the bagels:
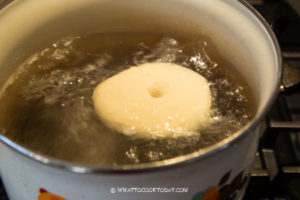
- Bring about 2 quarts of water to a boil in a shallow pot, at least about 1 1/2-inch deep. Add honey for option 1 or non-diastatic malt powder and sugar if doing option 2. This helps to brown the bagels nicely when you bake them.

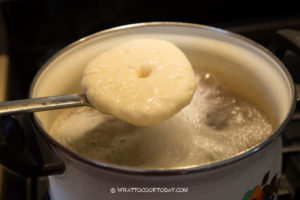
- I lightly oiled my fingers and then gently pick up the bagel and lower it to the boiling water. Boil 2-3 bagels at a time (they expand) for about 60 seconds on each side. If you like the bagels really chewy, boil for 2 minutes on each side.

- Remove the bagels with a slotted spoon and transfer to a baking sheet lined with parchment paper, seam sides down.

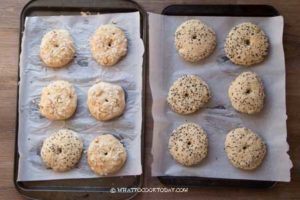
- Sprinkle the wet bagels with desired toppings immediately so they stick to the bagels. If you wish to do the egg wash, follow the instruction on how to do the egg wash below

Option 2 : Steam the bagels
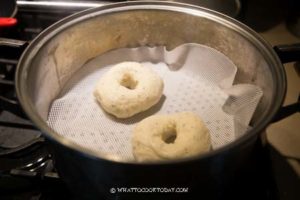
- Bring the water in a steamer to a boil over high heat. Wrap the lid with a cloth to prevent water condensation dripping back to the bagels creating “burn” spots. Line the steamer with a parchment paper or silicone mat. Lower the heat to medium and steam for about 2 minutes. Remove the bagels from the steamer and place it back on a baking sheet. If you want to add toppings, proceed to the egg wash step, otherwise, proceed to baking step

If you choose to do egg wash:
- Brush the bagel with egg wash and then sprinkle with toppings. I prefer this method now because the toppings do not come off after baking

Baking:
- Baked in a preheated oven for 20-25 minutes or until golden brown
Cooling:
- Remove from the oven and let them cool on a cooling rack
RECOMMEDED TOOLS
Marv’s Recipe Notes
*Nutrition facts are just estimates and calculated using online tools*

TO BOIL OR STEAM THE BAGELS BEFORE BAKING
When you boil the bagels before baking, it gives the bagels a nice chewy texture that most people like in bagels. A friend asked me about steaming the bagels instead of boiling before baking and I was intrigued to try it out. Here’s what I’ve noticed:
Boiled bagels are more “wrinkly” compared to the steamed bagels.After baking, the steamed bagels have more shines and smoother too.
Taste and texture-wise, the steamed bagels seems chewier compared to the boiled version, but that could be because I didn’t boil mine for too long, only about 20-30 seconds. The boiled bagels seem to expand a bit bigger than the steamed bagels.
If you want shinier and smoother bagels, try steaming them instead of boiling. Actually, steaming the bagels makes them even chewier (if that’s what you like)


USEFUL TIPS TO MAKE GOOD SOFT CHEWY BAGELS
1. USE BREAD FLOUR
Bread flour is high in gluten and it is highly recommended to make bread and bagels. It gives you a nice chewy texture.
2. GOOD KNEADING
I recommend using a stand mixer with a dough hook to knead the dough. I feel like it’s a lot of work trying to knead the dough to a windowpane stage manually by hand.
3. BOIL OR STEAM THE BAGEL
-Boiling/steaming the bagels will give you a nice chewy outer crust. Steaming seems to produce a chewier bagel
-Steaming the bagels gives the bagel that nice shine to the bagels. Steaming makes the bagels less “wrinkle”
-Boiling/steaming the bagels also helps to maintain the bagel’s shape when you bake them.
MAKE-AHEAD BAGELS (FREEZE NOW, BAKE LATER)
1. Follow the recipe directions below until boiling/steaming the bagels
2. Line a baking sheet with a parchment paper. Place the boiled/steamed bagels on top, not touching each other and freeze until firm, about 1 hour, it won’t be completely frozen yet
3. Transfer to a freezer-safe bag and they can be kept frozen for up to 2 months
4. When ready to bake, thaw bagel in a baking sheet lined with parchment paper inside the refrigerator the day before you plan to bake, about 24 hours
5. On the day of baking, remove from the fridge and let stand for about 15 minutes and then add sprinkle and bake as directed in the recipe card.

HOW TO STORE HOMEMADE BAGELS
Make sure the bagels have completely cooled down before you store them with any of the methods below.
ROOM TEMPERATURE: Store them in an air-tight container or individually wrap them with cling wrap and put in the bread box if you have one and they can be kept for about 3 days.
REFRIGERATOR: Wrap them individually and can be kept in the fridge for up to one week.
FREEZER: Keep them in a freezer bag and they can be kept for 3 months.
HOW TO REHEAT FROZEN BAGELS
You don’t need to thaw the bagels. Turn on oven to 400 F. Lightly wet the bagels with some water. Wrap the bagel in a foil, with a small vent, place the frozen bagels on a baking sheet and put inside the cold oven and bake for 15-20 minutes. This time is just a guide, it depends on your oven. You need to experiment with the time. You will have a fresh bagel with a crispy crust.

These bagels are chewy and have that subtle sweetness that everyone loves in a really good bagel. The family highly approves of this bagel. You gotta try it out for sure!
DID YOU MAKE THIS HOMEMADE SOFT CHEWY BAGEL RECIPE?
I love it when you guys snap a photo and tag to show me what you’ve made 🙂 Simply tag me @WhatToCookToday #WhatToCookToday on Instagram and I’ll be sure to stop by and take a peek for real!



8 comments
This is a great recipe! Made them using whey water after I made cream cheese. I also didnt have a stand mixer and couldnt knead for as long as I would have liked to (thanks to my very needy baby) but they still turned out amazing. I only baked them for 13 minutes – maybe because I placed them a bit too high in the oven? They taste great, and I cant wait to make them again.
Hi Natasha, I’m so glad the recipe still worked out for you and boy I know how that’s like with a needy baby AND you still managed to make bagels! *thumbs up* THank you for taking the time to report back 🙂
These are unreal!! The best bagel I’ve ever eaten. My old bagel recipe went in the garbage so fast! I ended up putting a bit too much water so I had to add flour, in the end I had a total of 675g or flour vs 500g. And it made 10 bagels because of it. Everything else I followed to weight and they were SO soft and SO plump and beautiful.
Hi Jenna! I’m so glad the recipe still worked out for you in the end! It’s a good thing that at least you have 10 bagels that you enjoyed 🙂 Thank you for trying and for your feedback!
I made this recipe. I am a 20 year retired Navy cook. This recipe is so simple but it has made the best bagels from any recipe I have tried. I put an “everything” topping on them. My son aged 11, tells me he wants them every weekend. What I love most about this recipe is that everything goes in the bowl at once then mix 8 minutes on low speed (I did the window test and I ran it for an extra 2 minutes. And got a really good stretch). I also put the honey and sugar in the boiled water, but bagels didn’t brown that dark, which I like, cause if anything is too golden brown the kids call it burnt lol. Thanks again for this great recipe. I will be passing this on in the family cookbook. =)
Hi Anthony, I’m so glad you find it easy enough. I hear you, my kids are the same way, anything golden brown or a tad more is considered burnt 🙂
Did this recipe just get updated? I don’t remember the odd measurement amounts and I thought the baking time used to be only 14 minutes?
Hi Alaine, the recipe actually is still the same. It’s the conversion from metric to cups that were different (different software!) But anyway, I have fixed that so the number shouldn’t be that odd anymore! I did update the boiling time for the chewier option and the baking time. You definitely do what works best for you and you’ll know your oven better. The baking time can range from 15-20 minutes or longer in some oven.