This post may contain affiliate links. Please read our disclosure policy.
Learn how to make the best kuih bangkit using tapioca flour and coconut cream. I’m sharing all the tips that will for sure yield that melt-in-the-mouth kuih bangkit you are longing for!
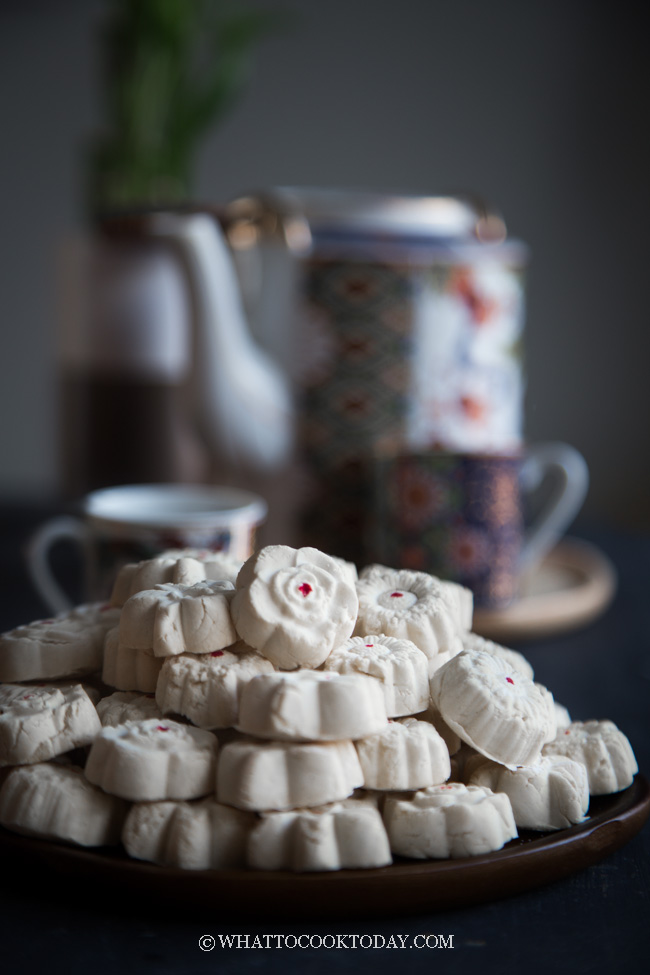
The Best Kue Bangkit Santan (the only recipe you ever need!)
KUIH BANGKIT (TAPIOCA COCONUT COOKIES)
I dared myself to make these kue bangkit or in Indonesian Chinese we call it kue bangkek or in Malay kuih bangkit this year. Some Indonesian Chinese population speaks dialects like Hokkian, Teochew, Hakka, and Cantonese. But mainly Hokkian, Teochew, and Hakka. Bang (or phang) in Hokkian dialect means aromatic/flavorful. Kek means cakes though some use it interchangeably to translate cookies/biscuits. Kue bangkek is named as such because it is a very flavorful cookie. The coconut milk makes the cookies smell super heavenly.
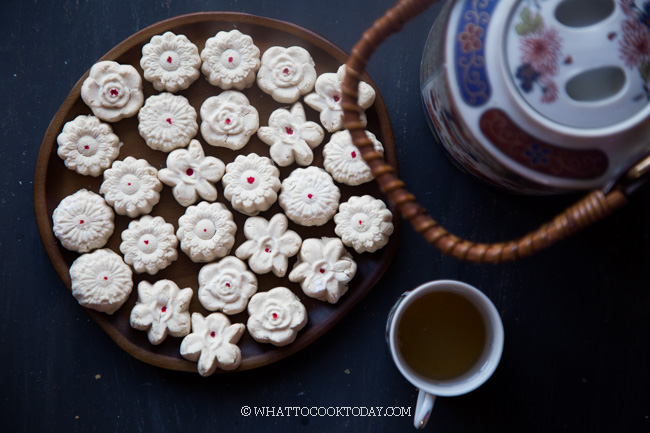
THIS IS THE BEST MELT-IN-THE-MOUTH KUE BANGKIT (NOT JOKING!)
I had made probably at least 8 batches of kue bangkit for the past 2 weeks trying to nail that melt-in-the-mouth texture, which is the most important characteristic of these cookies. My mom handed me my aunt’s best kue bangkit recipe and I still failed to make it right. What do I consider as melt-in-the-mouth? When you pop the cookie inside your mouth without biting, you push the cookie with your tongue and it melts when it comes into contact with your saliva. That’s my definition of melt-in-the-mouth for kue bangkit and that’s exactly what you get with this recipe!
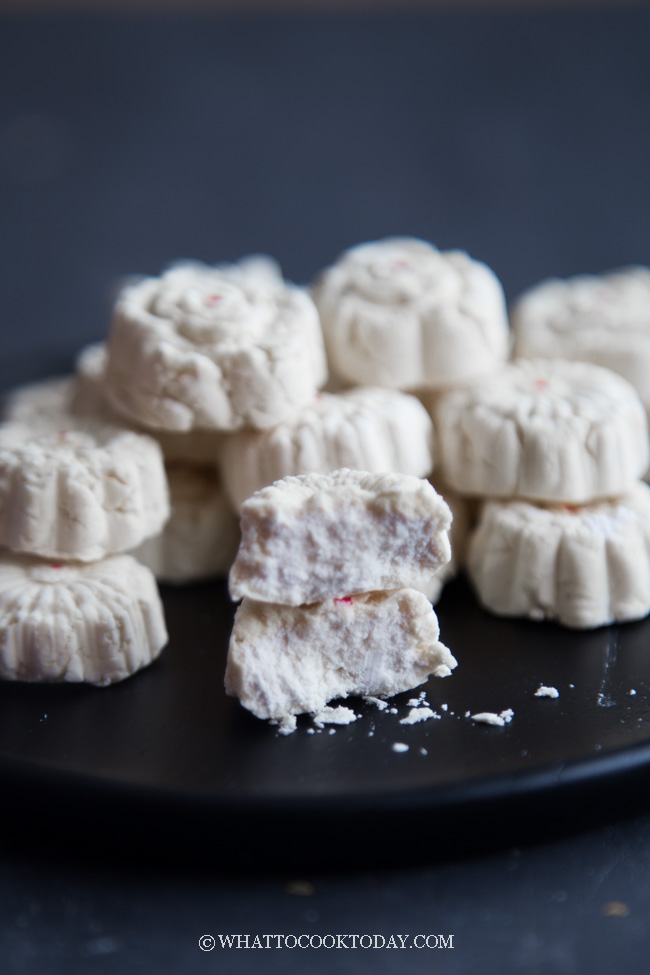
Look at that!!!
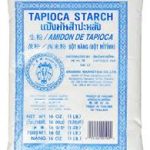
IS TAPIOCA FLOUR AND TAPIOCA STARCH THE SAME?
This is a question that is often asked especially if you are not familiar with Asian ingredients. Flour and starch are used interchangeably here in the U.S. So, the answer is yes, tapioca flour and tapioca starch are the same thing. When you go to Asian store, you will see them labeled as tapioca starch. But American’s company such as Bob’s Red Mill will label theirs as tapioca flour. I have made kue bangkit with both tapioca flour and tapioca starch and they yield the same melt-in-the-mouth texture. Please note that I’ll be using the term flour and starch in this post and they mean the same thing 🙂
WAIT, THEY SAY YOU NEED SAGO FLOUR TO MAKE THE BEST KUE BANGKIT
After making batches and batches of failed kue bangkit and finally some really good ones, I can tell you the answer is NO! You don’t need sago flour to make melt-in-the-mouth kue bangkit. I know..I know…the experts out there say so! But I can tell you again, no, you don’t! Trust me on this one 😉 You also don’t need a combination of sago and tapioca, or sago, tapioca, and rice flour, etc. Just tapioca flour/starch. In Medan, we usually make kue bangkit using tapioca starch. There are some people who make kue bangkit with sago flour too, but it’s rare. Sago flour is not common in Medan where I grew up. My aunt who makes one of the best kue bangkit (which recipe I’m sharing with you here) makes it with tapioca starch/flour and it’s AMAZING!
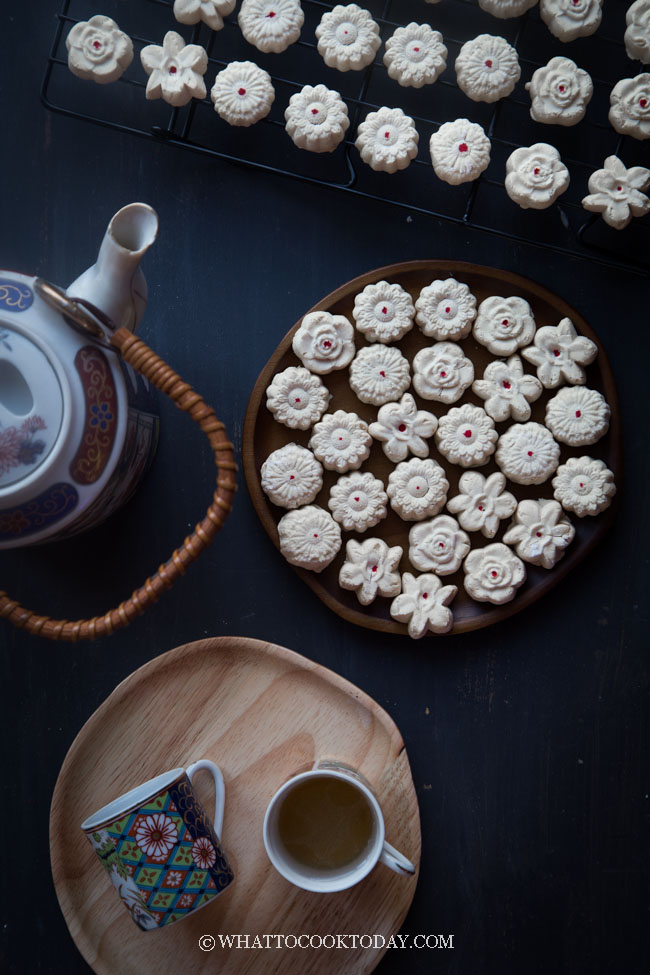
WHY YOU WILL LIKE THIS KUE BANGKIT RECIPE
1. Tapioca flour is baked in the oven
I make the recipe more convenient and less “scary” than you think. The one thing that I hate the most when it comes to making kue bangkit is stir-frying the flour for one hour. It’s a mess because the flour gets lighter and fly all over when you stir fry them. So, instead, I bake the tapioca flour at 300F (150 C) for 2 hours. I set the timer in the oven and when I came back home, it was done in the oven.
2. No fancy schmancy ingredients
You only need tapioca flour/starch, icing sugar (confectioner’s sugar), eggs, and coconut cream. That’s it!
2. Melt-in-the-mouth texture
I think I have mentioned that lots of times, but yes, this recipe really gives you that melt-in-the-mouth texture. Just like the way I remember it when I ate them as a kid!
TOP TIPS YOU NEED TO KNOW
1. Precooking the flour
Precooking the flour is to remove the moisture from the flour and also to get rid of the raw taste of flour. It also increases kue bangkit’s shelf life
2. The dough consistency
It’s a bit tricky trying to explain what kind of consistency you need to get for the dough. I’ll elaborate later below with images
3. Add the coconut cream a bit by bit (which goes back to the dough consistency)
The amount of coconut cream called for in the recipe is just an estimate. There’s no way to give you the exact amount because it depends on how dry or wet your tapioca flour/starch is. You need to add it a bit by bit
4. The baking temperature
Kue bangkit needs to bake at low temperature and slow. I’ve made several mistakes baking them at a higher temperature and I got crispy cookies outside and wet rubbery texture inside
5. The coconut cream itself
The best creamiest coconut cream will give you that amazing aroma. Hands down!
PREPARE THE TAPIOCA STARCH
It is important to precook the tapioca starch before it can be used for kue bangkit. The traditional way of doing this is to stir-fry the starch on a dry wok for 1 hour until the starch is light because most moisture has been removed. The precooked starch is cooled down and can only be used the next day. BUT WE ARE GOING TO DO THIS THE EASY YET EFFECTIVE WAY! NO STIR-FRYING AND MESSY HOUSE LOOKING LIKE SNOW STORM HAS JUST PASSED THROUGH!
Put the tapioca starch along with pandan leaves in a large roasting pan or any pan deep enough so you can layer the tapioca starch as thinly as you can. Bake at 300 F for 2 hours and you stir it once or twice if you can, halfway thoughout baking time. The weight of the cooked starch should decrease by 13-14% after baking or stir-frying it. For example, if you start out with 350 grams of flour, you should end up with about 300 grams (or somewhere close to that). This means the flour is dry enough now and ready to be used.
Once it has cooled down completely, you can use it on the same day as long as you are very sure the starch has cooled down completely. I usually bake the flour the day before and keep it in an air-tight container for up to 7 days.
HOW TO GET THE CREAMIEST COCONUT CREAM
If you want to freshly squeeze your own coconut milk and cream, be my guest. It’s hard to be consistent when it comes to that and I don’t want to mess with that. I prefer to use canned coconut cream. I suggest getting the Asian brands canned coconut cream like Chaokoh or Aroy-D (or other brands you know). And again, you need to get COCONUT CREAM and NOT coconut milk.
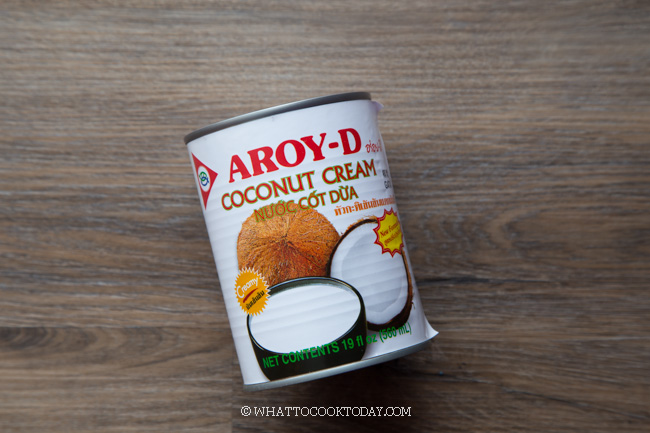
Here’s what you need to do:
1. DO NOT SHAKE THE CANNED COCONUT CREAM
The creamiest part usually floats on the top and the bottom is more of the watery coconut milk
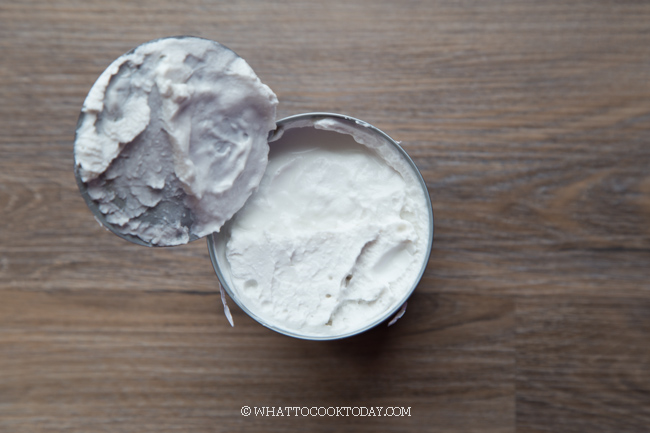
2. SCOOP THE CREAM OUT
Use a spoon to gently scoop the cream out as much as you can until you start to see some liquid at the bottom. Stop right there. Save the watery coconut milk for other uses. The cream is what you need to make kue bangkit with an amazing aroma
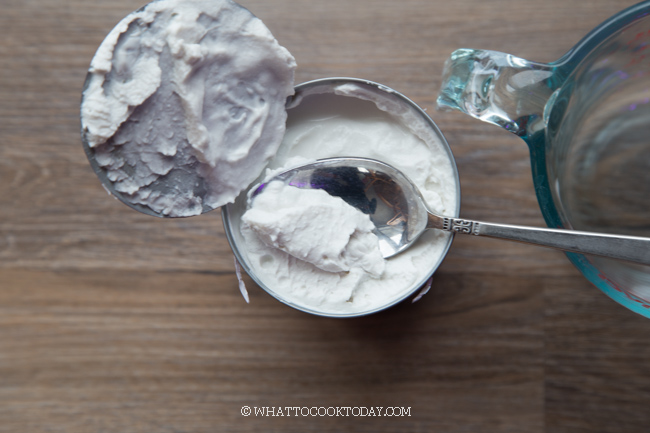
THE RIGHT KUE BANGKIT DOUGH CONSISTENCY FOR THAT MELT-IN-THE-MOUTH TEXTURE (GUARANTEED!)
I can tell you that many of my failed batches of kue bangkit were caused by this point right here! the wrong consistency for the dough. Many recipes out there do not really tell you what the dough is supposed to be like. Some even say that the dough needs to be smooth. NO! The dough cannot be smooth and shiny. When you have a smooth shiny dough, you might as well toss that dough in the trash! I’m not kidding! The last two recipes I tried with smooth shiny dough give me rubbery wet kue bangkit! HORRIBLE! That means you’ve added way too much coconut cream!
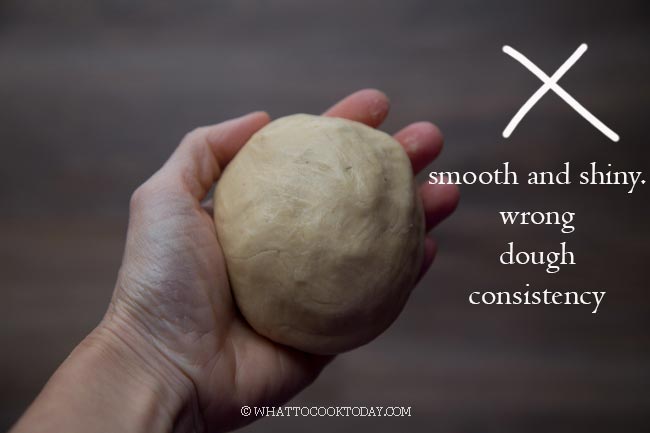
So, tell me woman, how is it supposed to be like!! Here, let me show you:
This is after I mix the flour, eggs, and icing sugar and then add the coconut cream bit by bit. The amount of coconut cream in the recipe is just to give you an idea of how much you may need. You may not even need all of them or you may need to add more. You should continue to knead the dough while adding coconut cream bit by a bit until when you press the dough with your palm, it stays, but if you push the dough with your fingers, it crumbles! When you have the urge to add a bit more coconut cream so that it comes together easier, DON’T! That’s exactly where you should stop. The dough is on the dry side for sure! But can come together when you press it into the mould! Get it?
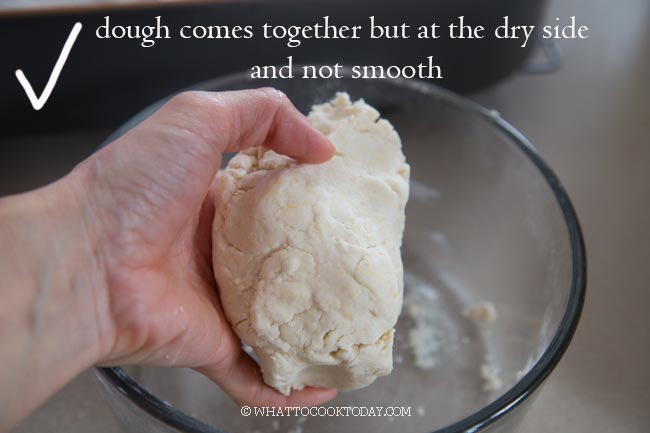
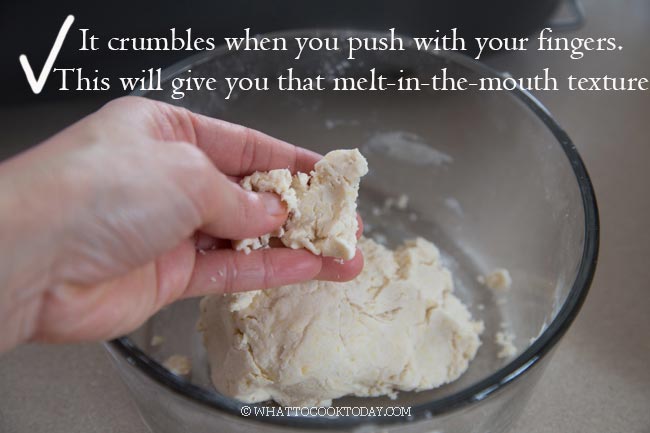
You can pinch the dough to press into the mould, but as you can see, the big dough doesn’t stay in one round piece, there are little crumbles as you pinch the dough.
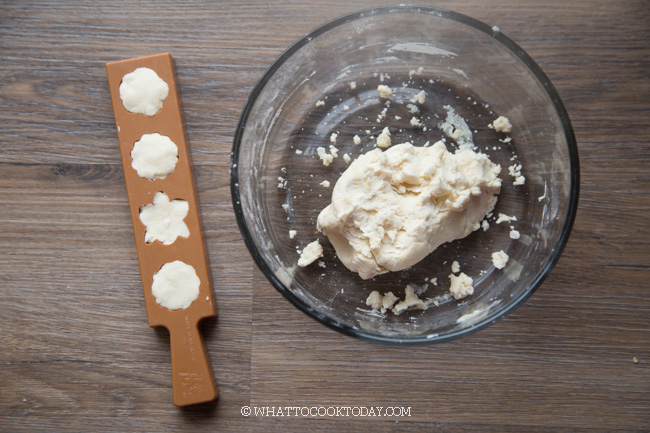
So, the dough consistency is basically exactly like how the melt-in-the-mouth texture is inside your mouth. If you have this, you’ve nailed it!
EGGS IN KUE BANGKIT RECIPE
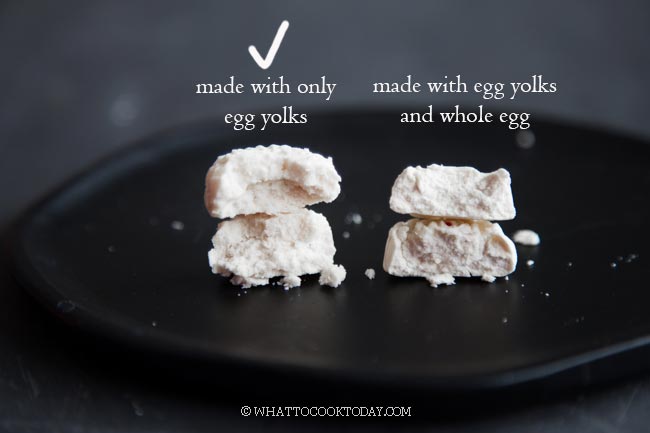
My aunt’s recipe only calls for egg yolks. I’ve tried several recipes that used both egg yolks and whole eggs (both whites and yolks) and while both give that melt-in-the-mouth texture. Here’s what I found:
Use only egg yolks: It’s much softer and literally melt-in-the-mouth when you pop the kue bangkit in and push it with your tongue slightly and gradually melt when it comes in contact with your saliva!
Use both egg yolks and whole eggs: It requires several pushes with your tongue before it starts to melt in the mouth
In conclusion: the one uses only egg yolks definitely wins when it comes to melt-in-the-mouth category
KUE BANGKIT MOULD
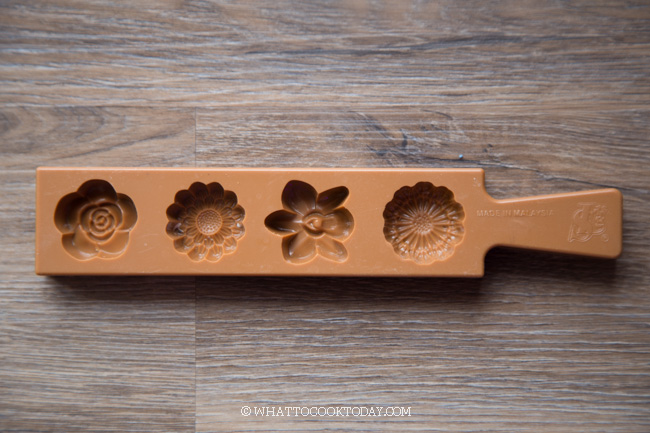
I love the traditional wooden kue bangkit mould. I don’t have one! (but I will soon when mom’s here 🙂 ). I bought this super over-priced plastic mould from Amazon two years ago (shipped from Malaysia!) out of desperation! Oh well! BUT, the good thing about plastic mould is, I actually don’t have to dust the mould as much compared to a wooden mould, which I heard can be pretty sticky and more difficult to work with. But wooden mould has much prettier prints and shapes 🙂
CAN I USE COOKIE CUTTER TO SHAPE KUE BANGKIT?
I won’t say it’s impossible, but it will be pretty tough to roll out the cookie dough because of its crumbly nature. Of course you can make the dough more smooth and moist so you can roll it out, but get ready to say bye-bye to that melt-in-the-mouth texture! I won’t recommend doing that! My suggestion is if you don’t have kue bangkit mould, you can just shape the cookie into a ball and gently press it down with the palm of your hand. There will be not much shape, but they will still be good kue bangkit that melts in your mouth
DECORATE WITH RED DOTS
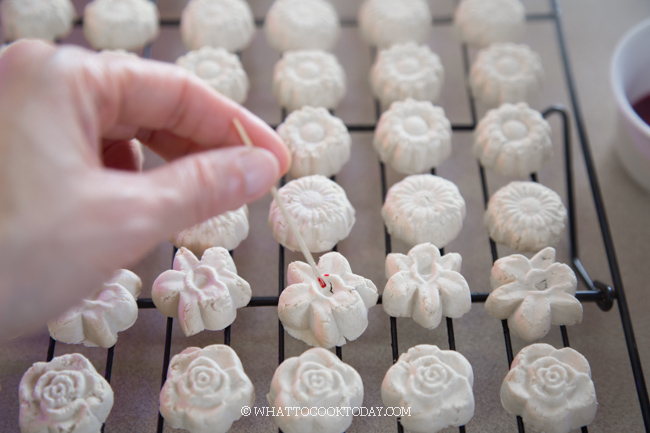
Traditionally, the kue bangkit is dotted with red food coloring. The kue bangkit are pale and white in color and so the red dot adds a nice contrast and besides, the Chinese love red color when it comes to celebrating Chinese New Year 🙂
All you need is a toothpick and a red food coloring (not gel) and use the tip of the toothpick to dot
BAKING TEMPERATURE
The size of the cookie, baking temperature, time, and the material of the pan affect the outcome of the kueh bangkit.
Conventional oven (bottom heat, no fan, middle rack, baked on aluminum pan): This is the usual mode I use for all my cookie and cake baking on this site unless otherwise stated
Size of cookie 6 grams
300 F (150 C) for 15 minutes: melt in the mouth
300 F (150 C) for 20 minutes: slightly crispier crust and take a bit longer to melt in the mouth (because of the crispier outside crust)
Convection oven (bottom and top heat, NO fan, middle rack, baked on aluminum pan)
275 F (135 C) for 10 minutes
Convection oven (bottom and top heat, fan on, middle rack, baked on aluminum pan) – NOT recommended but if you can’t turn off the fan:
Size of cookie 6 grams
250 F (120 C) for 8 minutes: crispier crust and take a bit longer to melt in the mouth
If the size of your cookie is smaller or larger, you may need to increase the baking time by a minute or two. This is something you need to experiment on to get that melt-in-the-mouth texture.
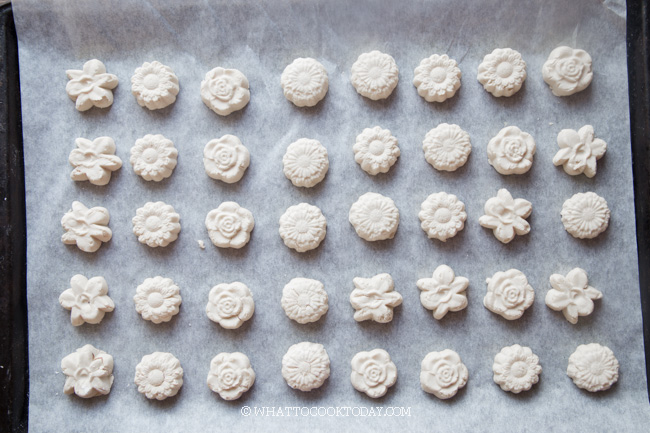
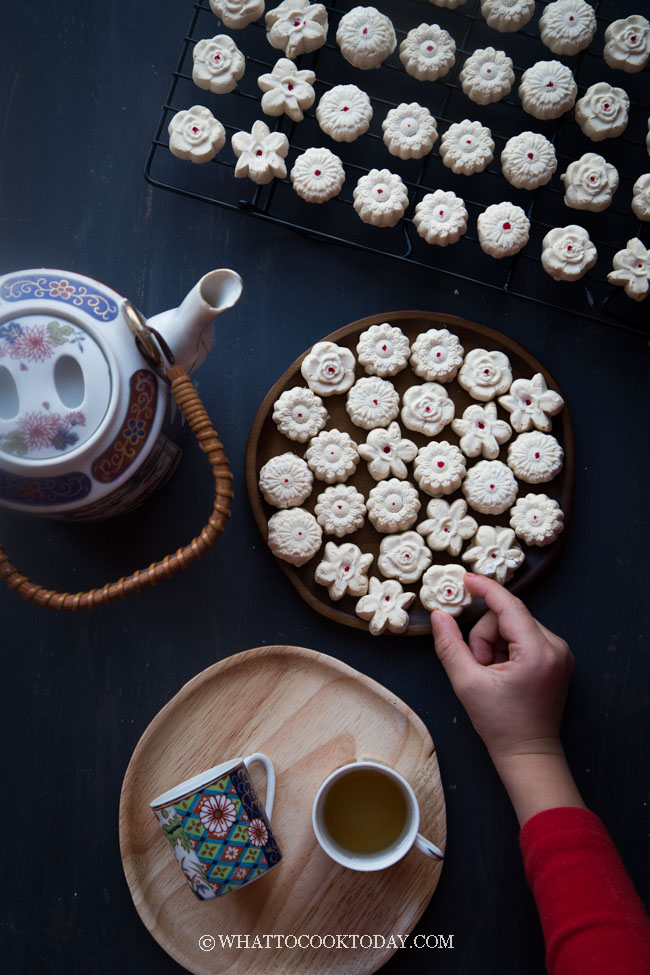
CONCLUSION ON BAKING TEMPERATURE: I recommend 300 F (150 C) for 15 minutes for 6 grams cookie placed on the middle rack with a conventional oven (bottom heat, no fan). This creates the best melt-in-the-mouth texture without the crispy crust outside.
TROUBLESHOOTING
If you don’t get the melt-in-the-mouth texture, one or more of these could be the cause:
1. The tapioca starch/flour is not dry enough. Please refer to the above on how to cook the tapioca starch
2. You add too much coconut cream that the dough is too wet. The dough is more on the dry side. You may think it’s wrong to be so dry, but don’t be tempted to add too much coconut cream. Add a bit by a bit until you can press the dough with your palm and it stays but crumble if you push with your fingers
3. Baking temperature is too high. The cookies bake too quickly that the outer crust turns crispy even though the inside could be melt in the mouth. It’s challenging trying to find that temperature with your oven because your oven and my oven may not be the same. I use a conventional oven with bottom heat (no fan) and you may have convection or another type. So, this is something that is worth experimenting on your part to figure out. The time I listed is for your reference
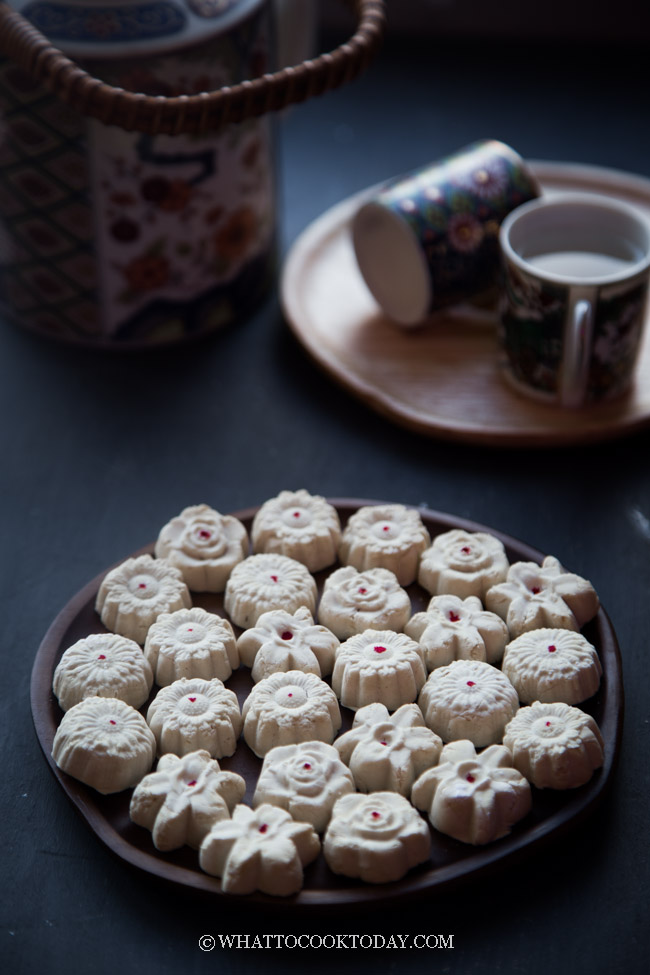
Did you make this kue bangkit recipe?
I love it when you guys snap a photo and tag to show me what you’ve made 🙂 Simply tag me @WhatToCookToday #WhatToCookToday on Instagram and I’ll be sure to stop by and take a peek for real!
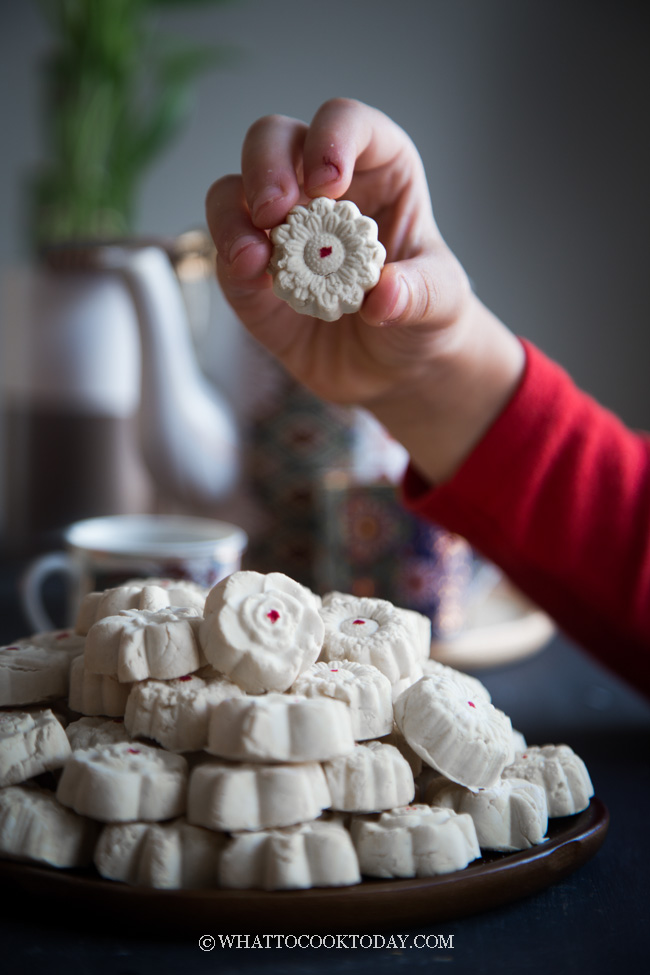 *Recipe was originally published in 2016 and now has been updated with new photos, lots of details, and pointers to make sure you can achieve the same result on July 31, 2021 to scale down the recipe.* Please read my post above before attempting to make kue bangkit. It will give you a better understanding of how to get that melt-in-the-mouth texture!
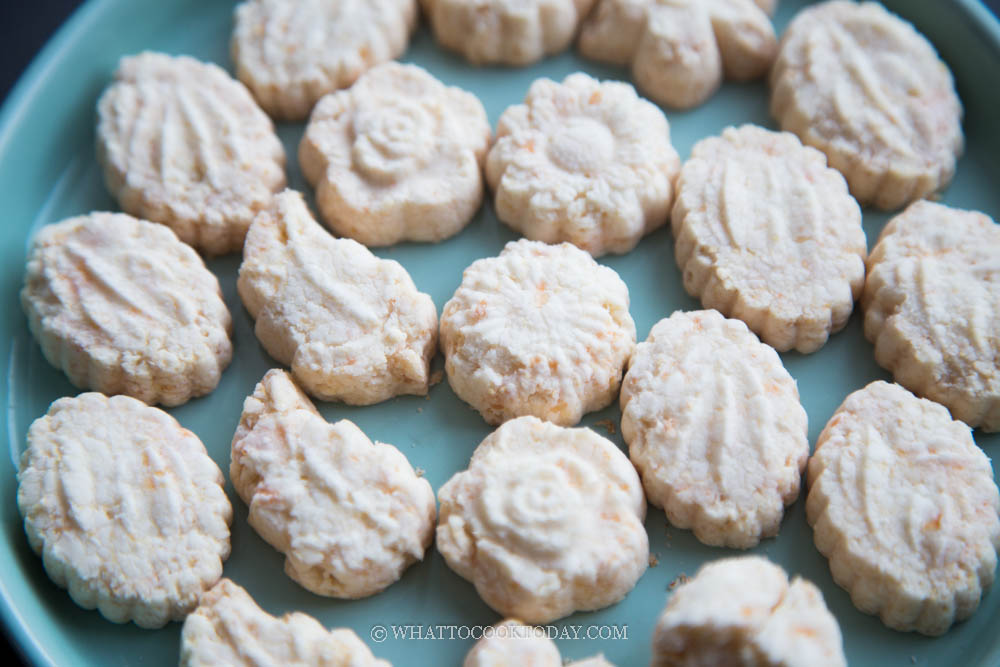
You may also like this cheese bangkit (sagu keju)
The Best Kuih Bangkit Santan (the only recipe you ever need!)
Ingredients
- 250 gr pre-cooked tapioca flour/starch Get at least 350 gr
- 5 pandan leaves cut into 3-4 inch pieces
- 100 ml coconut cream plus more as needed. Do not shake the can. See notes
- 20 gr egg yolk about 1 large egg yolk
- 70 gr icing sugar
- ⅛ tsp salt optional, it does bring out flavor of the cookie
- Red coloring optional
Instructions
Get the coconut cream:
- Please note that you CANNOT have any water/liquid in kuih bangkit so it's important to use coconut cream. If you use coconut milk (which have water in it) your kuih bangkit texture won't turn out right
- It's important not to shake the canned coconut cream. You can also chill the coconut cream in the fridge to help separate the cream from the water. I scoop up the cream on top. The watery bottom can be saved for other use in other recipes
Cook the tapioca flour (you can prepare few days ahead):
- If you want to use the stir-fry method: Stir fry the flour with pandan leaves over low-medium heat on a dry wok without oil for about 1 hour. The flour will get lighter and lighter as you cook them. Remove the pandan leaves. Shake off any excess that clings on the leaves. Let them cool down completely and then store in an air-tight container until the next day if not using on the same day
- Baking method (highly recommend): place the flour in a pan lined with some parchment paper.Bake at 300 F for 2 hours. Stir it twice halfway
- Whether you are doing the stir-frying or baking the tapioca flour, the weight of the flour should be decreased by 13-14%, indicating your flour is "dry" enough now to be used for kueh bangkit. So if you bake 350 grams, it should be about 300 grams or close to that when it's done baking. Reserve some to dust your mold and the baking sheets
Making the dough (Very important part, please read my post above too!):
- Let the tapioca starch cools down in the oven so it won't collect any moisture. Then store it in an air-tight container for up to 7 days. I recommend using it the next day especially if it's humid where you are
- Place the eggs yolk and icing sugar in a mixing bowl. Kinda mix them together a little bit with the whisk attachment from your mixer. Start at low speed and start to mix. It may appear to be dry at first, then turn to medium speed and the sugar will start to melt. Increase the speed to high and beat until it turns pale, creamy and thick, about 3-4 minutes. You can also use a balloon whisk to manually whisk the yolks and sugar until pale and creamy
- Sift in the tapioca starch into the egg yolk mixture. Don't shake the sifter as the tapioca starch will fly everywhere. Use a rubber spatula to gently run the flour mixture through the sift. It won't come together yet. Add about 70 ml of the coconut cream first and then knead the dough with your clean hand. Most likely it will still be too dry to come together, add a bit more, tablespoon by tablespoon and continue to knead. Do this until you come to the point when you get a dry hard dough that is not smooth
Test the texture and consistency of the dough:
- Pinch off a small amount and press the dough with your palm and when you let go, it holds the shape but when you press the dough with your fingers, it will crumble. This is the consistency we want to get that melt-in-mouth texture.
Shaping:
- Preheat oven at 300 F / 150 C (I updated this since some of you need to bake for a long time). I have a conventional oven (with heating elements at the bottom). Put some extra tapioca starch in a spice bag, it's easier to dust using this. Dust the baking sheets (I use an aluminum pan for best heat transfer) with some extra tapioca starch to prevent sticking. I find this works better than lining the pan with parchment paper. Dust the cookie mould with the extra cooked tapioca flour you made earlier. Shake off excess flour
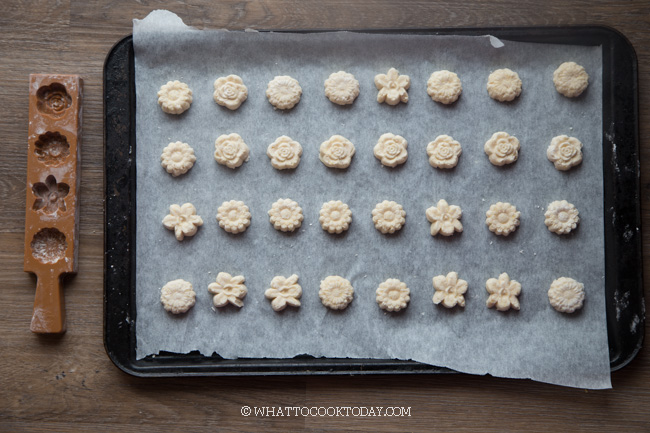
- Pinch off one dough and press it firmly into the mould. Keeping the rest of the dough covered. Use a sharp paring knife to trim off excess dough on the top. I found that I don't need to dust the mould much because mine is made of plastic. Flip the mould over and firmly tap the mould to release the shaped dough. You shouldn't have difficulty if the mould is nicely coated with flour. Place them on the baking sheet, about 1/2 inch apart. The cookies do not expand much at all. Repeat with the rest of the dough
- If the dough gets dry as you are working on shaping the cookies, you can add a bit of the extra coconut cream you have earlier and mix it again to make the dough less dry, but I don't have to do this
Baking (see my post above for more details with type of oven and baking temperature):
- My oven uses bottom heat only. See the above post under "baking temperature" if your oven is different. Place them inside the oven 3rd rack from the top (or middle of the oven) and bake for 15 minutes (for 5 gr cookies). The bottom should be just very lightly golden brown and the top is pale white. You may need to experiment with your oven in the temperature and time as each oven is different
Dot with red food coloring (optional):
- Use a toothpick and dot the tip of the toothpick on red food coloring and dot on top of the cookie. This is totally optional
Storing:
- Store in an air-tight container once they've cooled down completely and they will last for 1 month at room temperature. It tastes the best the first week you made them
RECOMMEDED TOOLS
Marv's Recipe Notes
- You may not need all of the coconut cream. It really depends on the tapioca starch you are using. The amount is just to let you know how much to have on hand
- Do not shake the can before opening because we want to scoop the cream that rises on top of the can. The water is beneath the cream, so we don't want to get the water. Scoop the cream out with spoon as much as you can and try not to get any of the water


146 comments
Yummy! Love love love kuih bangkit. Melt in the mouth literally!!! Santan’s the best ingredient in the whole world. Lol.
I agree totally !!! Southeast Asian cooking and dessert depend pretty heavily on Santan !!
wow! these look so good! Almost looks like marshmallows so white and crumbly looking. Wish I could taste it!
Thanks Mabel !! they are pretty crumbly and I wish I can share the taste too 😉
The cookies are gorgeous, Marvelina! Like clouds with a little red center. I really enjoyed reading about the various types of coconut milk/cream. I’ve always carefully scraped the thick cream that rises to the top of the can of coconut milk and had no idea it could be made-to-order in southeast Asian – how cool… and convenient! Happy New Year 🙂
Thanks Kathleen. That’s the beauty of the wet market we have in Asia. I used to complain a lot when mom asked me to go with her, now I wish I could go there and do my grocery !!!
Awwww…I love these cookies and it’s hard to stop at just one bite…errr, one bag 🙂 Thanks for sharing this recipe. Can’t wait to give this a try…or do you deliver? 🙂
Thanks Linda. I have to hide them from my kids 🙂
Oh Marvellina, I know what you mean about using the creamiest santan to make kuih bangkit (spelled slightly differently in Malaysia, but we know we are talking about the same heavenly cookies!). The melt-in-your-mouth taste of coconut milk is really out of this world, isn’t it? 🙂
If only I’m allowed to drink coconut milk/cream daily!!!!!