This post may contain affiliate links. Please read our disclosure policy.
This recipe is a showcase of how a bread dough and a cake batter are baked together in one loaf to give you a two-layer loaf. The lower half of the loaf is a bread and the top half is a genoise sponge cake. This old-school combination of bread and cake is such a visual delight and it sure is an unusual loaf of bread and cake. It is known as roti cake in Southeast Asia.
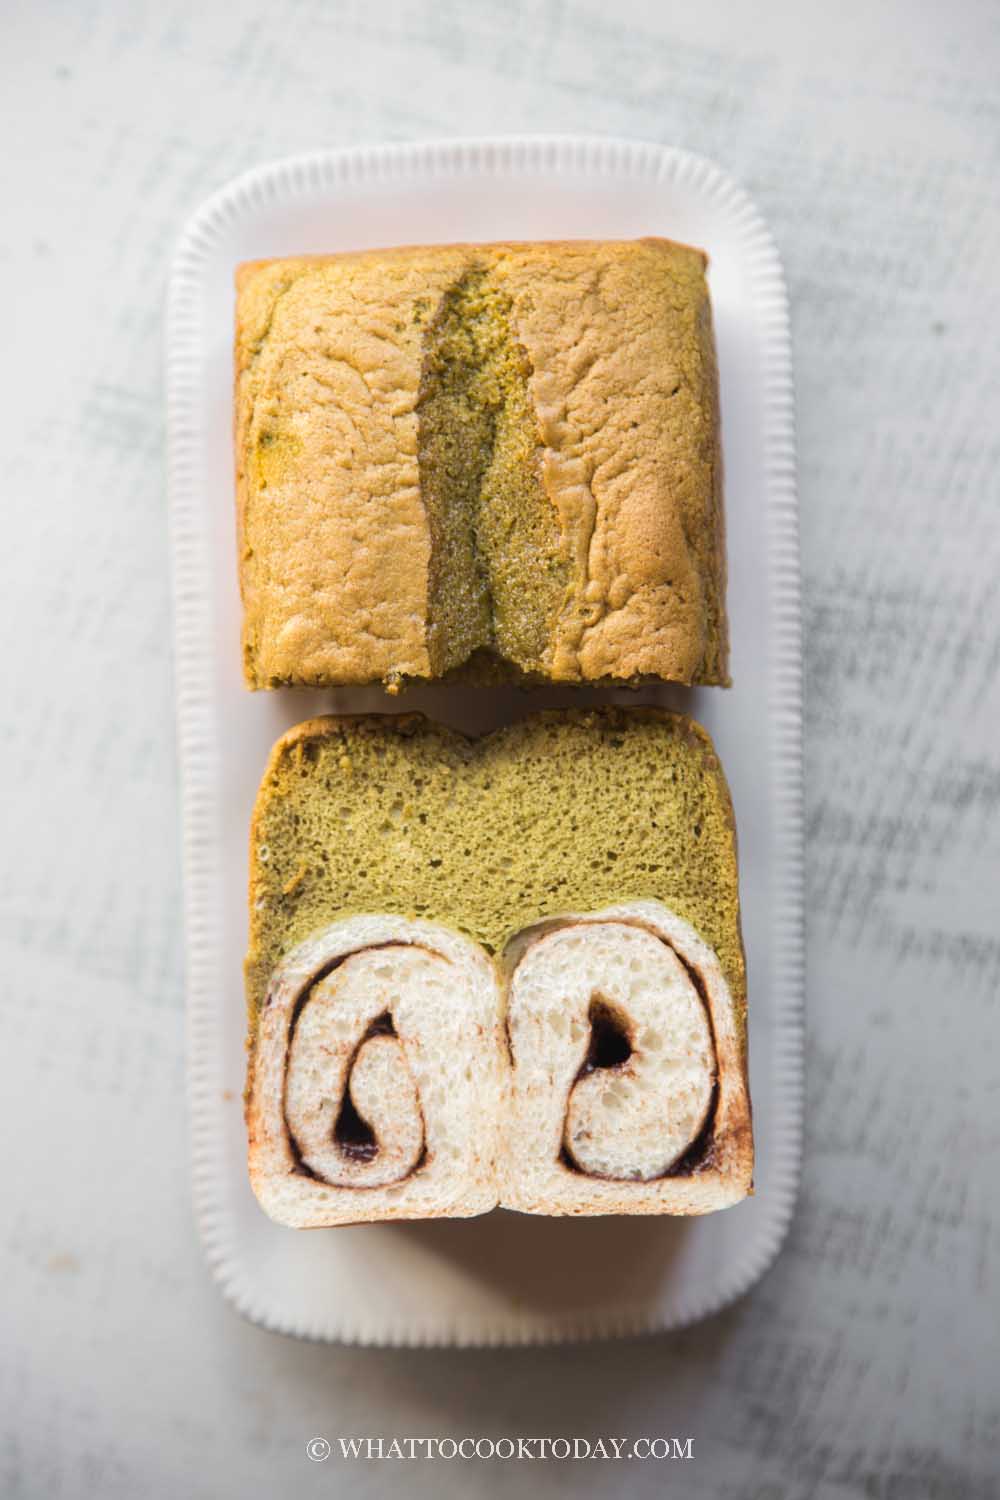
What is bread cake or roti cake?
No, it’s not a cake made with leftover bread slices, nor is it a cake that tastes like bread! It is basically a loaf of bread and a genoise sponge cake made separately and then baked together in one loaf pan. I hope I haven’t lost you there! So you have two layers here. The bottom portion is a bread and the top portion is a sponge cake. This is my favorite type of bread or I should say cake? or geez..I don’t know..it’s both!! I grew up with this as a kid. I supposed it was very popular back in the 80s! You hardly see this type of cake anymore but lately it’s kinda resurfacing in the social media and the moment I saw it, I know I have to make it! I have missed it so much!
No Sour Sourdough Bread
This recipe will give you sourdough bread that doesn’t taste sour. Why? Because we use a Sweet Stiff Levain, which is built from regular 100% hydration sourdough starter. I don’t maintain stiff starter. I build it whenever I need it. I love baking enriched bread/buns and steamed buns using sweet stiff starter.
How to make matcha Nutella bread cake/roti cake
1. If using a sourdough starter, about 8-10 hours before you plan to make the bread, combine all ingredients for the stiff starter in a bowl. Stir a bit to roughly combine and then use your clean hand to knead it. This is a stiff starter, it’s like dough. Make sure no pockets of dry flour are visible. Transfer to a large see-through container (plastic or glass is fine, preferably wide-mouth so you can get it out easier later). Loosely cover with the lid and let it ferment until triple in size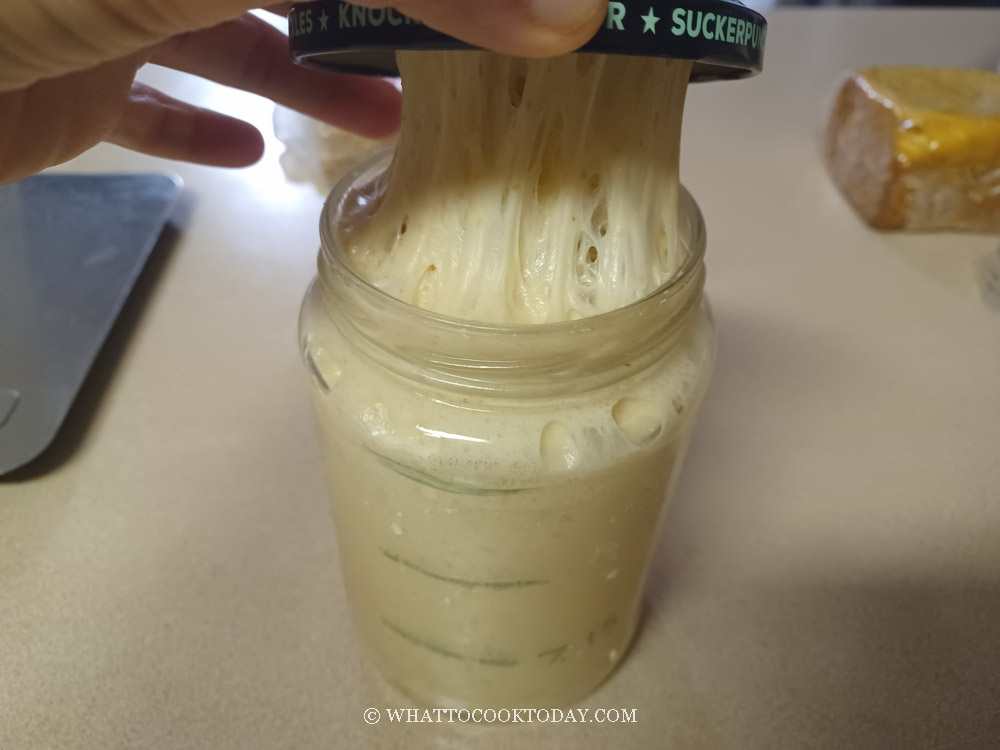
2. Place all ingredients (except for butter), including all of the stiff starter for sourdough option, in a mixing bowl of a stand mixer fitted with a dough hook attachment. Use the hook to stir everything around a bit so when you turn the machine on, the flour won’t fly around and wet ingredients won’t splash (it happened to me before!)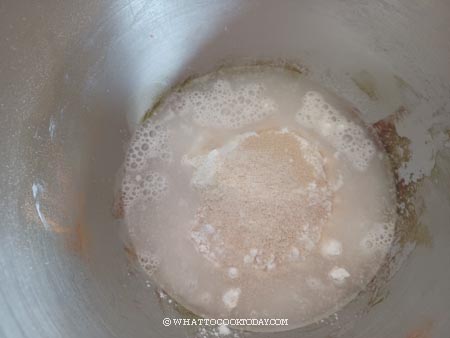
3. Start with the lowest speed to mix things up and then increase to speed 2 and knead for about 5 minutes or until it forms a dough. If the dough too dry to come together, you can add a bit of milk one teaspoon at a time. Don’t add too much as we haven’t added butter yet
4. Then add softened butter, in 3-4 batches. The dough will turn into a complete mess again because of the butter, but don’t worry, it will get absorbed by the dough as it knead. Knead at speed 4 for about 10 minutes or until dough is smooth and elastic.
5. If you slowly stretch a small amount of dough, it will not break and light can pass through, like a window pane. Proceed to first proofing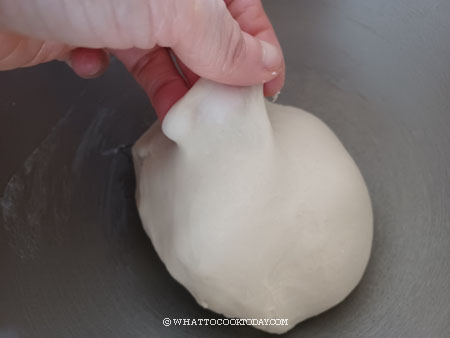
6. Transfer to a lightly oiled bowl, cover, and proof at a warm place until double in size. If you use commercial yeast, this may take about 1-2 hours. If you use a sourdough starter, this may take about 2-3 hours at 78-80 F (26-28 C), depending on the strength of your starter and temperature. When you poke the dough with your lightly-floured finger, the indentation stays and the dough has clearly almost doubled or doubled in size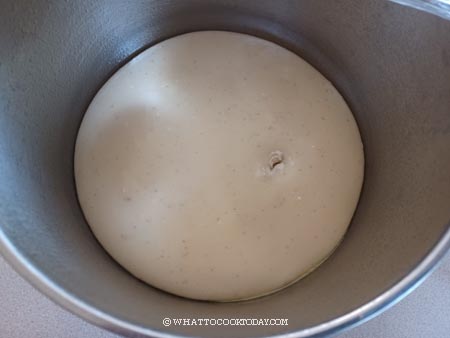
7. Degas the dough and push out any air bubbles. Divide the dough equally by weight into 4 portions. Round them up into dough balls. Cover and let them rest for 15 minutes
8. Prepare two loaf pans. The pan I use is 7.7″ x 4.4″ x 4.2″. You can use a slightly larger pan like 8 1/2 x 4 1/2 but not smaller than that. This will yield slightly shorter loaves. Brush the pan with some oil and then line with parchment paper one horizontally and one vertically, so kinda overlapping each other. It’s easier to remove the roti cake from the pan later
9. Back to the dough. Work with one dough at a time. Roll it out into a rectangle, about the length of the loaf pan you have, roll it out into 8 x 6 inches.
10. Then spread with some Nutella, leaving a space about 1/4 inch on the border. Roll it up tightly into a Swiss roll-like. Pinch the seam to seal.

11. Place this inside one of the pan. Repeat with the second dough and put this next to the other dough inside the pan. Do the same with another set of dough for the second loaf
12. Cover and let them proof until almost double in size. The dough only fills up about 30% of the pan’s height. This may take about 1 hour with commercial yeast and about 3-4 hours at 78 F (25 C) with a sourdough starter. It may take longer depending on the strength of your starter. Preheat oven to 350 F (180 C) for a conventional oven. For convection oven, lower the temperature by about 15-20 degrees. I position the rack, 3rd from the top. About 10 minutes before the end of 2nd proofing, when you poke your finger into the dough gently, it will very slowly bounce back and leave a bit of indentation on the dough. It’s done with final proofing. If it bounces back immediately, leave it for another 15 minutes and try again. Don’t prepare the cake batter yet until you know the dough is almost done proofing or done with proofing
13. Make sure the eggs are at room temperature. Warm up the milk on the stove until just come to simmer. Add the matcha powder and whisk to combine. Add oil and whisk to combine. They may not combine thoroughly because of the nature of liquid and oil, that’s fine
14. Whisk cake flour and salt to combine and set aside
In a bowl of a stand mixer fitted with a whisk attachment, add eggs and sugar. Put eggs, sugar, and vanilla extract in a mixing bowl. Beat on medium speed (speed 4 on KA) for 1 minute using a whisk attachment and then increase to high speed (speed 8). Beat until the mixture is thick, creamy, and pale. When you lift the batter with the whisk, the batter that drops down will leave a trail that remains visible for about a minute before slowly disappearing. You have to beat it to this ribbon stage or the cake will not turn out right
15. Once it has reached the ribbon stage, turn the mixer down to low. Add 1/3 of the flour mixture alternating with the milk mixture. Continue until you run out of both

16. You may still see some flour mixture on the sides of the bowl, that’s okay. Turn off the mixer and use a rubber spatula to fold in the flour mixture. Make sure you don’t see anymore pockets of flour


17. Pour 1/2 of the cake batter into one of the loaf pan and the other 1/2 to another loaf pan. Don’t bang the pan on the counter like we usually would to pop air bubbles. Use a skewer to draw a zig zag on the cake batter, being careful not to poke the bread dough at the bottom

18. Bake both pan side by side for 15 minutes and then remove them from the oven and use a very sharp knife to make a slit in the middle. Wipe the knife and make another slit on the other loaf. This will give you a controlled crack on the loaf. Try to accomplish this in 1 minute. Return the cake to the oven and continue baking for the next 35 minutes or until a cake tester comes out clean with just a few moist crumb is okay
19. Remove the cake from the oven and remove the loaf from the pan by pulling on the parchment paper. Gently peel off the parchment paper and let it cool down on the cooling rack completely. The cake will shrink a little bit, probably about 1/2 an inch, as it cools down and that’s normal
20. Let them cool down completely before slicing. This may take 2-3 hours
Variations
1. You can change the flavor of the cake
Instead of matcha powder, you can use cocoa powder or other powder flavoring like purple sweet potato powder, blueberry powder, etc. You get the idea. You can also use pandan juice and/or pandan essence.
2. You can use different filling for the bread
Besides Nutella, you can also use other spread such as Lotus biscoff, peanut butter, fruit jams, kaya jam
Did you make this matcha Nutella roti cake recipe?
I love it when you guys snap a photo and tag to show me what you’ve made 🙂 Simply tag me @WhatToCookToday #WhatToCookToday on Instagram and I’ll be sure to stop by and take a peek for real!
Matcha Nutella Bread Cake (Roti Cake) - with Sourdough Option
Ingredients
If using commercial yeast:
- 315 gr bread flour
- 5 gr instant yeast
- 40 gr sugar
- ¼ tsp salt
- 165 gr whole milk
- 50 gr egg
- 20 gr unsalted butter softened
If using sourdough starter:
Prepare stiff levain:
- 30 gr active starter (100% hydration)
- 90 gr bread flour
- 40 gr water
- 15 gr sugar
For the dough:
- 210 gr bread flour
- 40 gr sugar
- ¼ tsp salt
- 113 gr whole milk
- 50 gr egg
- 20 gr unsalted butter softened
For matcha sponge cake:
- 300 gr eggs (room temperature) about 6 large eggs
- 120 gr sugar
- 120 gr cake flour
- ¼ tsp salt
- 12 gr matcha powder
- 54 gr oil
- 84 gr whole milk (room temperature)
Filling:
- Nutella spread
Instructions
- This recipe makes two loaves
If using commercial yeast:
- Place all ingredients in a mixing bowl of a stand mixer fitted with a dough hook attachment. Use the hook to stir everything around a bit so when you turn the machine on, the flour won't fly around and wet ingredients won't splash (it happened to me before!). Start with the lowest speed to mix things up and then increase to speed 2 and knead for about 5 minutes or until it forms a dough. If the dough too dry to come together, you can add a bit of milk one teaspoon at a time. Don't add too much as we haven't added butter yet
- Then add softened butter, in 3-4 batches. The dough will turn into a complete mess again because of the butter, but don't worry, it will get absorbed by the dough as it kneads. Knead at speed 4 for about 10 minutes or until dough is smooth and elastic. If you slowly stretch a small amount of dough, it will not break and light can pass through, like a window pane. Proceed to first proofing
If using sourdough:
- This recipe will give you sourdough bread that doesn't taste sour. Why? Because we use a Sweet Stiff Levain, which is built from regular 100% hydration sourdough starter. I don't maintain stiff starter. I build it whenever I need it. I love baking enriched bread/buns and steamed buns using sweet stiff starter.
- I recommend using a starter that is at least one month old and consistently doubles or triples in 4-6 hours when you feed it at 1:1:1 ratio. Young starter will not give the best result. If your starter is young (less than one month old), consider adding 1/2 teaspoon of instant yeast to help with the heavy lifting!
- About 8-10 hours before you plan to make the bread, combine all ingredients for the stiff starter in a bowl. Stir a bit to roughly combine and then use your clean hand to knead it. This is a stiff starter, it's like a dough. Make sure no pockets of dry flour are visible. Transfer to a large see-through container (plastic or glass is fine, preferably wide-mouth so you can get it out easier later). Loosely cover with the lid and let it ferment until triple in size
- Place all ingredients (except for butter), including all of the stiff starter, in a mixing bowl of a stand mixer fitted with a dough hook attachment. Use the hook to stir everything around a bit so when you turn the machine on, the flour won't fly around and wet ingredients won't splash (it happened to me before!). Start with the lowest speed to mix things up and then increase to speed 2 and knead for about 5 minutes or until it forms a dough. If the dough too dry to come together, you can add a bit of milk one teaspoon at a time. Don't add too much as we haven't added butter yet
- Then add softened butter, in 3-4 batches. The dough will turn into a complete mess again because of the butter, but don't worry, it will get absorbed by the dough as it knead. Knead at speed 4 for about 10 minutes or until dough is smooth and elastic. If you slowly stretch a small amount of dough, it will not break and light can pass through, like a window pane. Proceed to first proofing
First proofing:
- Transfer to a lightly oiled bowl, cover, and proof at a warm place until double in size. If you use commercial yeast, this may take about 1-2 hours. If you use a sourdough starter, this may take about 2-3 hours at 78-80 F (26-28 C), depending on the strength of your starter and temperature. When you poke the dough with your lightly-floured finger, the indentation stays and the dough has clearly almost doubled or doubled in size
Shape the dough:
- Degas the dough and push out any air bubbles. Divide the dough equally by weight into 4 portions. Round them up into dough balls. Cover and let them rest for 15 minutes
- Prepare two loaf pans. The pan I use is 7.7" x 4.4" x 4.2". You can use a slightly larger pan like 8 1/2 x 4 1/2 but NOT smaller than that as you are risking overflowed cake batter during baking. This will yield slightly shorter loaves. Brush the pan with some oil and then line with parchment paper one horizontally and one vertically, so kinda overlapping each other. It's easier to remove the roti cake from the pan later
- Back to the dough. Work with one dough at a time. Roll it out into a rectangle, about the length of the loaf pan you have, roll it out into 8 x 6 inches. Then spread with some Nutella, leaving a space about 1/4 inch on the border. Roll it up tightly into a Swiss roll-like. Pinch the seam to seal. Place this inside one of the pan. Repeat with the second dough and put this next to the other dough inside the pan. Do the same with another set of dough for the second loaf
2nd proofing:
- Cover and let them proof until almost double in size. The dough only fills up about 30% of the pan's height. This may take about 1 hour with commercial yeast and about 3-4 hours at 78 F (25 C) with a sourdough starter. It may take longer depending on the strength of your starter
Test the dough:
- Preheat oven to 350 F (180 C) for a conventional oven. For convection oven, lower the temperature by about 15-20 degrees. I position the rack, 3rd from the top
- About 10 minutes before the end of 2nd proofing, when you poke your finger into the dough gently, it will very slowly bounce back and leave a bit of indentation on the dough. It's done with final proofing. If it bounces back immediately, leave it for another 15 minutes and try again. Don't prepare the cake batter yet until you know the dough is almost done proofing or done with proofing
Prepare the cake batter:
- Make sure the eggs are at room temperature. Warm up the milk on the stove until just come to simmer. Add the matcha powder and whisk to combine. Add oil and whisk to combine. They may not combine thoroughly because of the nature of liquid and oil, that's fine
- Whisk cake flour and salt to combine and set aside
- In a bowl of a stand mixer fitted with a whisk attachment, add eggs and sugar. Put eggs, sugar, and vanilla extract in a mixing bowl. Beat on medium speed (speed 4 on KA) for 1 minute using a whisk attachment and then increase to high speed (speed 8). Beat until the mixture is thick, creamy, and pale. When you lift the batter with the whisk, the batter that drops down will leave a trail that remains visible for about a minute before slowly disappearing. You have to beat it to this ribbon stage or the cake will not turn out right
- Once it has reached the ribbon stage, turn the mixer down to low. Add 1/3 of the flour mixture alternating with the milk mixture. Continue until you run out of both
- Once you no longer see any loose flour in the batter, scoop out about 1/3 cup of the batter into a different bowl. Add oil and milk mixture and stir to combine thoroughly. Pour this mixture gently over the batter and use a spatula to fold again until combined. Make sure they are thoroughly combined into the batter or your cake will have separate layers later
Pour cake batter into the loaf pan:
- Pour 1/2 of the cake batter into one of the loaf pan and the other 1/2 to another loaf pan. Don't bang the pan on the counter like we usually would to pop air bubbles. Use a skewer to draw a zig zag on the cake batter, being careful not to poke the bread dough at the bottom
Baking:
- Bake both pan side by side for 15 minutes and then remove them from the oven and use a very sharp knife to make a slit in the middle. Wipe the knife and make another slit on the other loaf. This will give you a controlled crack on the loaf. Try to accomplish this in 1 minute. Return the cake to the oven and continue baking for the next 35 minutes or until a cake tester comes out clean with just a few moist crumb is okay
Cooling:
- Remove the cake from the oven and remove the loaf from the pan by pulling on the parchment paper. Gently peel off the parchment paper and let it cool down on the cooling rack completely. The cake will shrink a little bit, probably about 1/2 an inch, as it cools down and that's normal
- Let them cool down completely before slicing. This may take 2-3 hours
Storing:
- You can keep the loaves at room temperature for 2-3 days in air-tight container. For longer storage, I suggest freezing them (read below)
- Once they have cooled down completely, you can wrap it up with a cling wrap and freeze one of the loaves. You can also cut it into half loaf and freeze so you don't have to thaw the entire loaf. Put the wrapped loaf inside a freezer bag, push all the air out and seal. Keep frozen for no more than one month for the best resulg Simply thaw at room temperature before slicing and serve


2 comments
this is such a nostalgia!! i loved this too as a kid 😀 have forgotten all about it until i see this post!
I know right? This roti cake is almost forgotten!!! I love this a lot as a kid too 🙂