This post may contain affiliate links. Please read our disclosure policy.
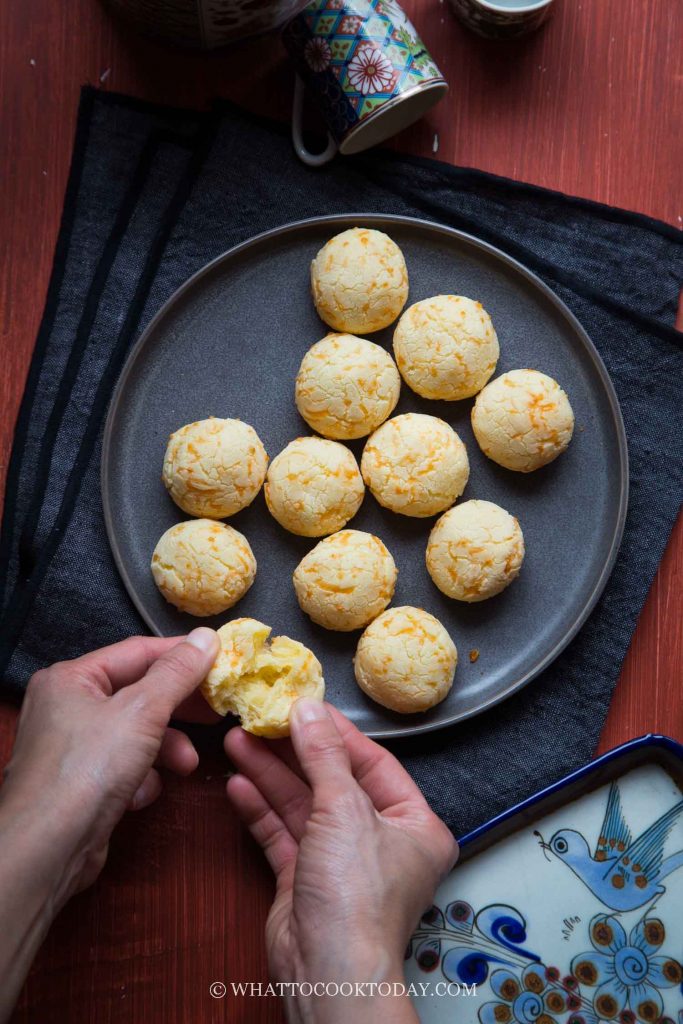
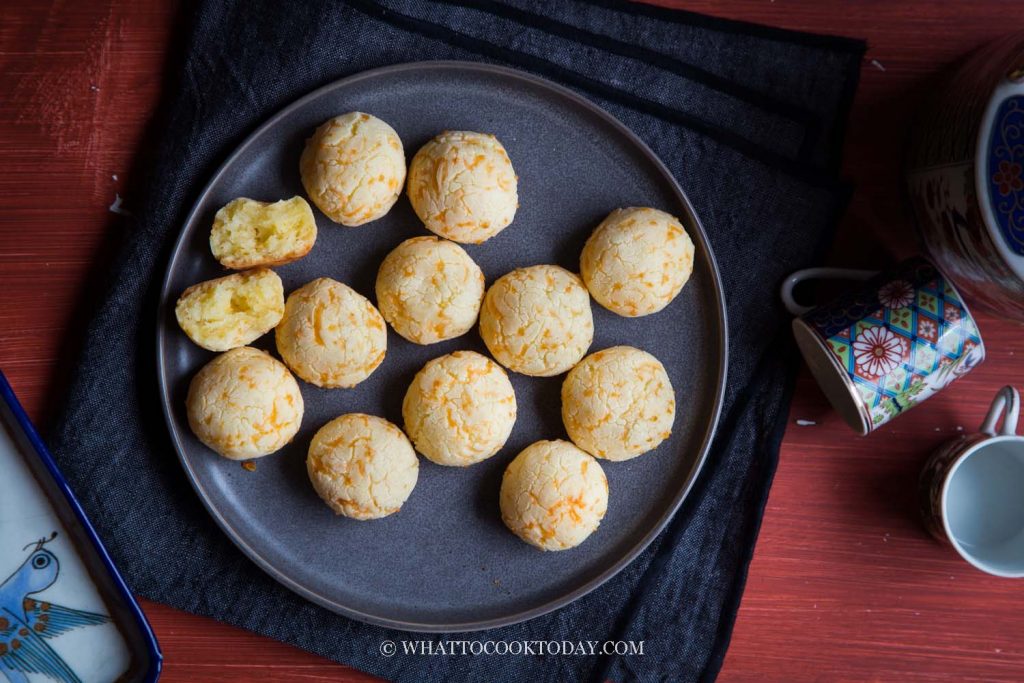
These mini cheddar mochi breads are chewy, cheesy, and gluten-free! No yeast required—perfect as a quick savory snack or side dish.

What Is Mochi Bread?
Mochi bread is a chewy, gluten-free bread made using glutinous rice flour (also known as sweet rice flour or mochiko). When baked, it develops a crisp crust while maintaining a soft, elastic interior. This texture is reminiscent of Brazilian Pão de Queijo, which is made with tapioca flour and also Korean mochi bread, which is made with regular all-purpose flour and tapioca flour. Our version combines glutinous rice flour and tapioca flour for that perfect chew and it’s totally gluten-free.
Why You’ll Like This Recipe
1. No yeast or kneading required – You can whip up the dough and bake right away, no proofing time needed.
2. Incredibly chewy and cheesy – The texture is crisp outside, soft and stretchy inside—perfect if you love mochi or Brazilian cheese bread.
3. Naturally gluten-free – No need for special flours or substitutions. Glutinous rice flour and tapioca flour do all the work.
4. Versatile and customizable – Try different cheeses, toss in herbs, or make them spicy with chili flakes or pepper jack.
5. Freezer-friendly – Great for meal prep. Reheat in minutes for a quick savory snack or lunchbox treat.

Super Easy No-Yeast Mini Cheddar Mochi Bread
Ingredients
Dry ingredients:
- 110 gr glutinous rice flour or mochiko flour
- 15 gr tapioca flour
- 1 tsp baking powder
- ¼ tsp salt
- 45 gr shredded cheddar cheese
Wet ingredients:
- 1 large egg beaten
- 35 gr unsalted butter melted
- 60 g whole milk
Instructions
Prepare the dough:
- Whisk all the dry ingredients together in a mixing bowl. In another mixing bowl, whisk together the wet ingredients. Gradually fold in the dry ingredients until you can form a dough. It will be slightly sticky to touch but you should be able to form a dough
Shaping:
- Preheat oven to 350 F (180 C) for conventional oven. If you have convection oven, lower the temperature by 20 F or 15 C. Line baking sheet with parchment paper or silicon mat. Divide the dough into 12 equal pieces and roll into roughly about 1.5 inch size smooth ball. Place on the baking sheet about at least 1-inch apart
Baking:
- Spray some mist of water on top of the ball and place in the oven, 3rd rack from the top and bake for about 25 minutes (about 30 minutes in my oven) until the bread is crusty on the outside, but soft and no longer wet inside.
- Remove from the oven and let stand for about 5 minutes and then serve them warm. They are best eaten when fresh. Once cooled down, the inside remains moist and the crust is a bit harder, but still taste great
Storage and reheating:
- Store them in an air-tight container at room temperature for up to 2-3 days (they don’t last that long at our house). Wrap them in plastic wrap and then freeze if you want to store them longer. Thaw in the refrigerator before reheating
- To reheat in oven or toaster oven, spray with some mist of water and then wrap them in aluminum foil and then bake at 350 for 5 minutes. To reheat in microwave, cover the bread with some moist clean kitchen towel or paper towel and heat for about 1 minute or less
- You can read more details on ingredients, substitutions, variations, and other tips in my post that may answer your questions not covered in the recipe card
*Nutrition facts are just estimates and calculated using online tools*
Ingredients and Substitutions
1. Glutinous Rice Flour (a.k.a. Mochiko or Sweet Rice Flour): This is the key to the mochi-like chewy texture.
Don’t substitute with regular rice flour—it won’t work. If you’re outside the U.S., look for brands like “Shiratamako” (Japan) or “Erawan” (Thailand) labeled “glutinous rice flour.”
Substitute: For a slightly different flavor and elasticity, you can try half glutinous rice flour and half tapioca flour, but the texture will be softer and more bouncy. My kids actually prefer it when I use more glutinous rice flour than tapioca flour (as written in the recipe)
2. Tapioca Flour/Starch: This enhances chewiness and creates that classic pull-apart texture.
Substitute: You can try arrowroot starch, but it won’t give quite the same stretch or crisp edges.
3. Cheddar Cheese: Sharp cheddar gives a strong savory flavor and browns beautifully.
Substitute: Mozzarella (for a milder pull), Gouda (my favorite), Gruyere, Monterey Jack, or even pepper jack for a spicy twist. You can also do a combo of any!
4. Egg: Helps bind the dough and gives it richness.
Substitute: A flax egg (1 tbsp flax meal + 3 tbsp water) might work but I haven’t tried it myself, most likely the texture will be less fluffy and much more denser.
5. Milk: Adds moisture and richness.
Substitute: You can use non-dairy milk like unsweetened almond, oat, or soy milk. Just avoid anything sweetened or flavored.
6. Butter or Coconut Oil: This gives moisture and flavor.
Substitute: Any neutral oil (like avocado oil) will work. Coconut oil adds a subtle aroma.
Tips for Success
1. Measure by weight if possible: Especially with gluten-free baking, weight is more reliable than volume. Use a digital scale for accuracy.
2. Lightly mist before baking: Spritzing water over the shaped dough before baking helps develop a crisp crust.
3. Use room-temperature ingredients: Cold milk or eggs can make the batter lumpy or tighten the fats.
4. Double the batch and freeze: These freeze beautifully. Just thaw and reheat as needed.
Variations
1. Add-ins: Incorporate chopped green onions, garlic powder, or onion powder for extra flavor.
2. Serving Suggestions: These mochi breads pair wonderfully with soups, salads, or as a standalone snack.
How to store and reheat
Like other breads, mochi bread tastes best when it’s fresh. If you make a big batch and try not to eat all of them at once, here’s how:
STORING – After the cool down completely, store them in an air-tight container at room temperature for up to 2-3 days (they don’t last that long at our house). Wrap them in plastic wrap and then freeze if you want to store them longer. Thaw in the refrigerator before reheating
REHEATING – To reheat in oven or toaster oven, spray with some mist of water and then wrap them in aluminum foil and then bake at 350 for 5 minutes. To reheat in the microwave, cover the bread with some moist clean kitchen towel or paper towel and heat for about 1 minute or less
This super easy mini cheddar mochi bread is seriously super easy to make. No kneading, no waiting time, no rising, and no yeast! They are perfect as snacks or appetizers.
You may also like these
EASY NO-YEAST GLUTEN-FREE ARTISAN MOCHI BREAD

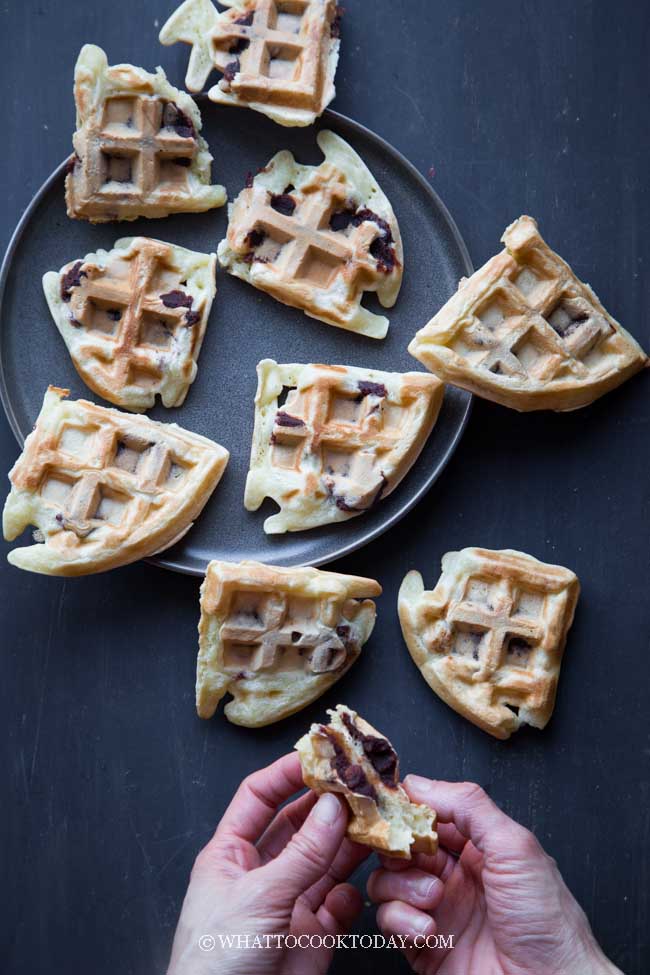
EASY SWEET RED BEAN MOCHI WAFFLES

36 comments
I just made it and it was great! Thanks always for all the recipes and inspiration 🙂
Thank you Magda, for your feedback and supports always 🙂
Guess what Marv… I found out that I had used another rice flour instead of glutinous rice flour! OMG the perils of late night baking. Tried it again with the correct flour, fingers crossed! Dough was still a tad too wet, and I used 2 spoons to shape it instead. Looks promising at this point in the oven…
Oh okay, you probably had used the regular rice flour instead of glutinous rice flour. That explains the powdery top 🙂 Trust me, it happened to me before with late night baking. I made a chiffon cake before and forgot to put in flour! LOL! no-flour chiffon cake! no fun! ha..ha..! I hope it turns out for you? keep me posted 🙂
My mochi bread came out powdery on top, not very chewy and not crispy. Wasn’t sure if it’s due to the uneven sprinkling of water (no spray bottle for misting), not kneading it enough, or inaccurate measurements. Got to try again..
Hi Jill, it shouldn’t be powdery on top. Were you able to mix the dough evenly. You don’t need a whole lot of kneading like regular bread dough, just need to get a uniform dough that comes together. The dough shouldn’t be dry, and just slightly sticky, just slightly. Are you weighing ingredients or using cup measurement ? I do provide cup measurement but it’s not as accurate compared to weighing with scale
I managed to roll it into round balls, but it always get melted down and gotten flat when I put it in the oven. I wonder where did I do it wrong
Hi Evon, did you roll the dough a bit larger? gluten-free bread tends to be at a “flat” side and it’s quite normal actually. If you happened to watch the video, you will see that the larger size bread is flatter compared to the one that I made smaller. How’s the texture? was it soft and chewy inside?
Hi!
If my dough turned out too sticky, is the solution to add more glutinous rice flour? hah maybe I’m doing something wrong but it’s impossible for me to form them into balls.
Hi Kaylee, if the dough is too sticky, yes, you can add a bit more glutinous rice flour to make it easier to handle. Try not to add too much at one time, just add enough so you can handle and form them into balls.