This post may contain affiliate links. Please read our disclosure policy.
These soft and fluffy yogurt steamed buns are made with Greek yogurt for a subtle tang and extra tenderness. Perfect plain or filled with sweet or savory fillings.
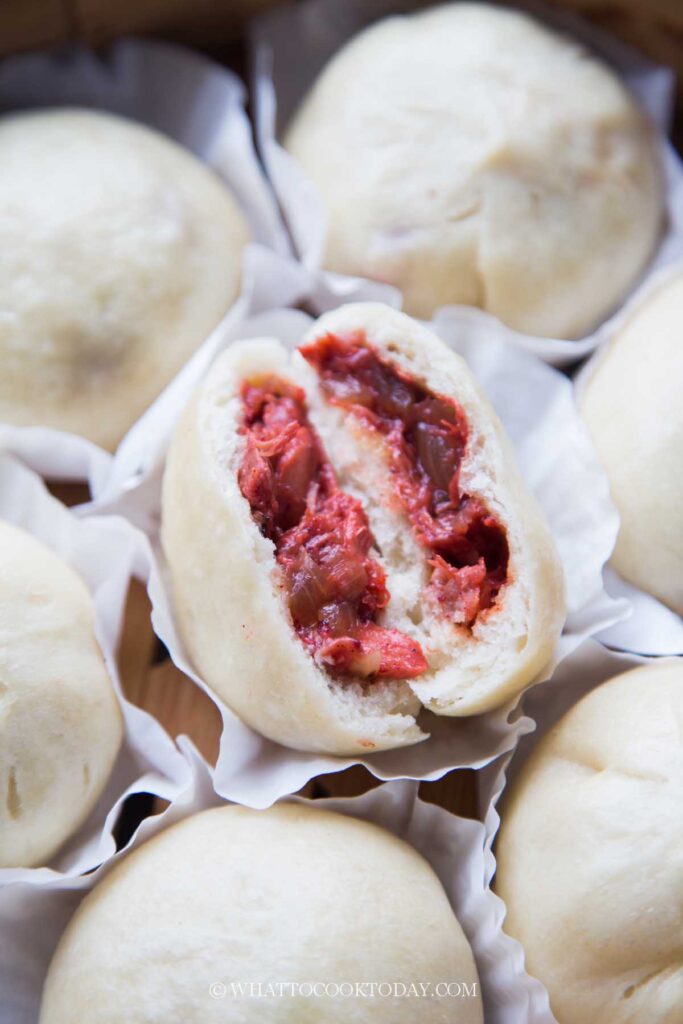
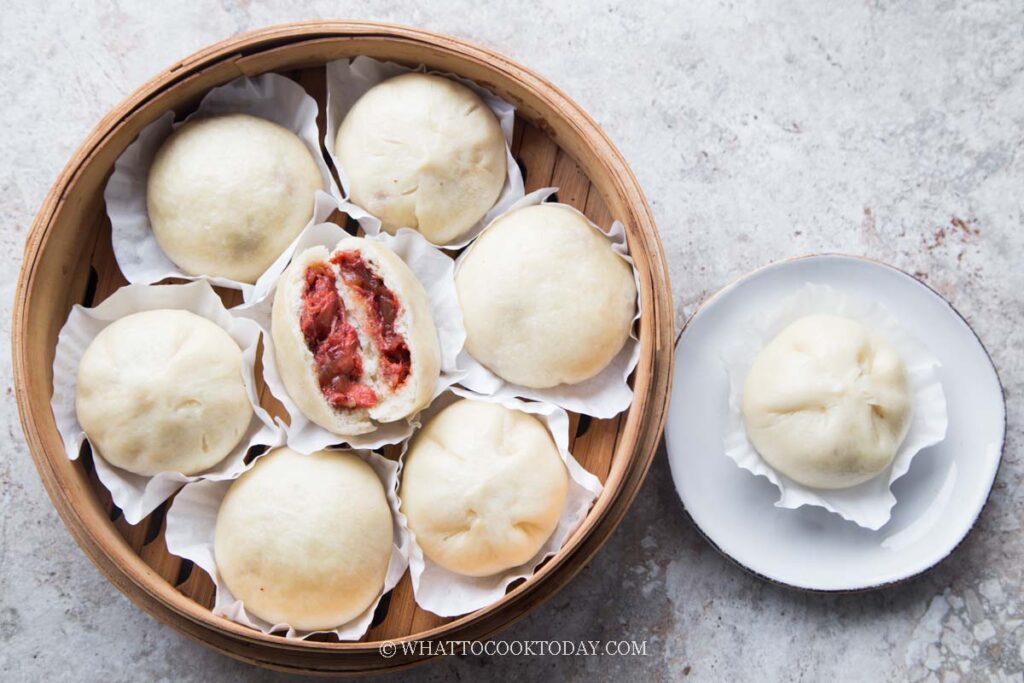
I’ve baked plenty of breads and cakes with yogurt over the years, and one day it hit me—why not steamed buns? Greek yogurt adds a gentle tang (nothing overpowering) and makes the dough incredibly soft and fluffy. These yogurt steamed buns are adapted from my popular basic soft and fluffy steamed buns recipe, with yogurt taking center stage. You can keep them plain or fill them with your favorite sweet or savory fillings. I went with char siu this time, and they were gone fast.
Why You’ll Like This Recipe
- Greek yogurt makes the buns extra soft, fluffy, and moist.
- The slight tang balances sweet or savory fillings beautifully.
- The dough is easy to work with and very forgiving.
- Works well for plain buns or filled buns.
- Adapted from my popular tried-and-true steamed buns recipe.
Ingredients and Substitutions
- All-purpose flour – can be replaced with low-protein flour for even softer buns.
- Wheat starch – cornstarch works as a substitute.
- Plain Greek yogurt – whole milk Greek yogurt gives the softest result, but low-fat works too.
- Milk – dairy-free milk can be used if needed.
- Baking powder – helps with extra fluffiness.
- Instant yeast – active dry yeast can be used but may need a longer proofing time.
- Salt – balances sweetness and enhances flavor.
- Sugar – adjust slightly depending on filling choice.
- Filling of choice – char siu, pork bao buns, sausage steamed buns, red bean paste, lotus paste, or any sweet or savory filling you like.
Storage & Reheating
- Store leftover buns in an airtight container in the fridge for up to 3 days.
- Freeze fully cooled buns for up to 1 month.
- Reheat refrigerated or frozen buns by steaming until heated through
What to Serve This With
- Chili oil or sambal for savory buns.
- Light soy sauce or sweet soy sauce.
- Hot tea or soy milk.
- A simple stir-fried vegetable dish.
Frequently Asked Questions
- Can I use regular yogurt instead of Greek yogurt? Yes, but reduce the milk to about 30 grams and go from there because regular yogurt is thinner.
- Are these buns sour? No, the yogurt adds a mild tang that’s very subtle. Nobody can really tell unless you tell them that the dough is made with yogurt.
- Can I make these buns without filling? Absolutely, they’re delicious plain.
- Why are my buns dense after steaming? They are likely under-proofed.
If you already love baking with yogurt, these yogurt steamed buns are a fun and delicious next step. The dough is soft, fluffy, and just a little tangy, making it perfect for both sweet and savory fillings. Once you try this version, you may find yourself reaching for yogurt more often when making steamed buns at home.
Yogurt Steamed Buns (Soft & Fluffy Bao with Greek Yogurt)
Ingredients
- 300 g all-purpose flour
- 60 g wheat starch or use cornstarch
- 200 g whole milk plain Greek yogurt you can use low fat Greek yogurt too
- 100 g milk plus more as needed
- 1 tsp baking powder
- 4 g instant yeast
- 5 g salt
- 30 g sugar
Instructions
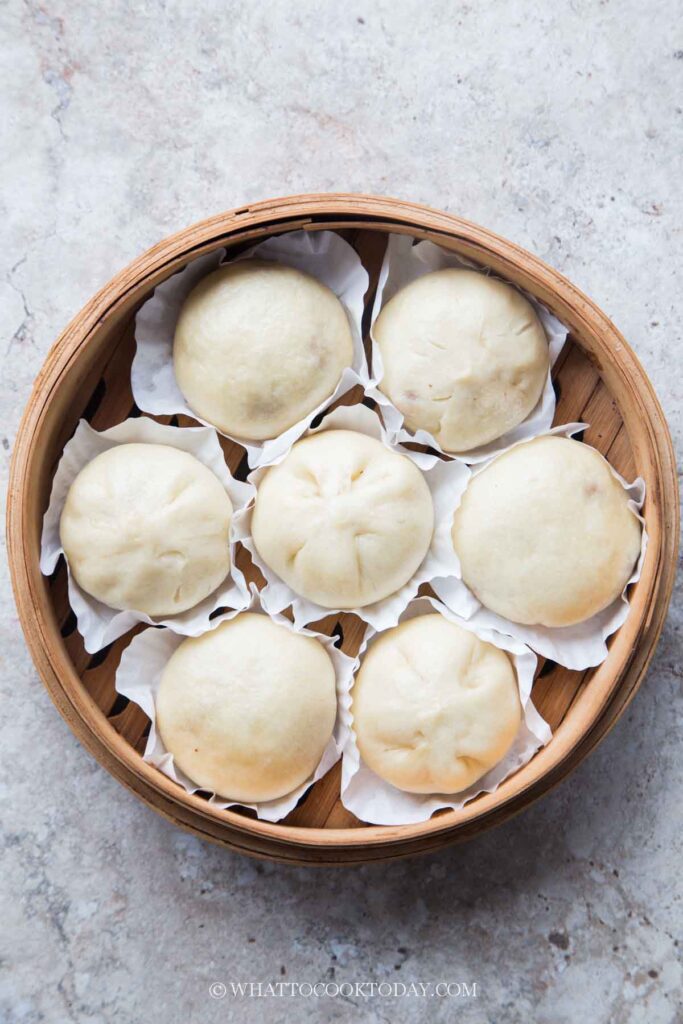
- You can make plain steamed buns or fill them up with sweet or savory filling of your choice. I used char siu as a filling. Read my post above for more ideas
- Place the flour and starch, instant yeast, Greek yogurt, milk, sugar, salt, baking powder in a mixing bowl of a stand mixer fitted with a dough hook attachment. Give it a stir using the hook to roughly combine so the dry ingredients won't "fly" all over the place when you start the machine

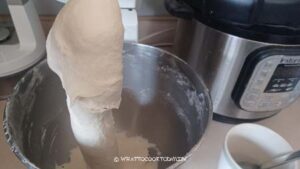
- You may or may not need more liquid. If the dough feels dry and stiff, add a bit more milk, one teaspoon at a time. Continue to knead at low speed (speed 2 on KA) for 12-15 minutes or until the dough is smooth and elastic. The dough clears the side of the bowl but still stick to the bottom and that's okay.
- Oil your hands a bit to help you pick up the dough and to prevent stickiness

Shape the dough:
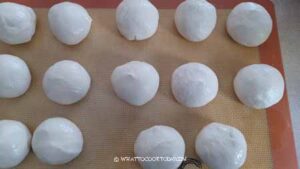
- Lightly dust your work surface with a bit of flour. Don't use too much flour as it dries out the dough, making them tougher. Divide the dough into 16 equal portions. If you want to make larger buns, simply divide them into the amount you like
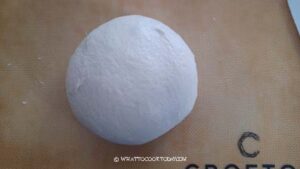
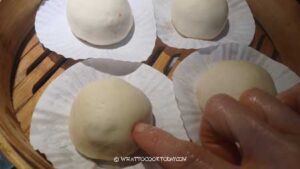
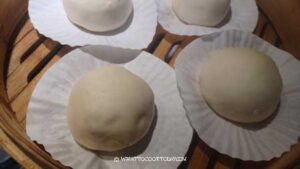
- To make plain yogurt steamed buns: Flatten and gather the edges to round them up into dough balls. Roll the dough into a smooth round ball in between the palm of your hand
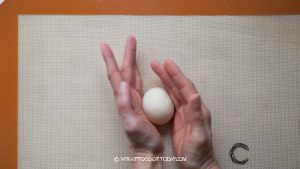
- Cup the dough with both palms and move the dough in a circular motion to shape it taller. This part is important so your steamed buns come out tall instead of spreading to the side after steaming
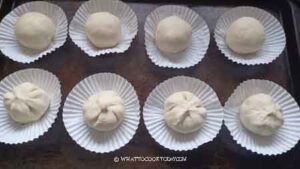
- Place on a piece of parchment paper. Lightly dab the surface of the bun with some milk using your finger to smooth the surface. You can also mist with some water using a spray bottle. Loosely cover with a clean kitchen towel to prevent drying. Work with another dough and do the same. Proceed to proofing after that
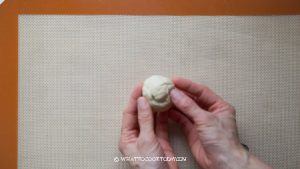
- To add filling to the buns: Flatten and gather the edges to round them up into dough balls. Roll the dough into a smooth round ball in between the palm of your hand
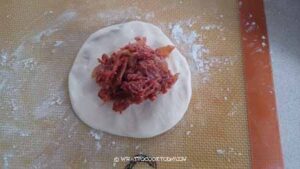
- Flatten the dough with your palm and then use a rolling pin to roll it out to form a circle about 4-5 inches, with a slightly thicker middle part. This is to support the weight of the filling. Don't roll the dough too thin. If you roll the dough too thin, the filling might make the steamed buns "wrinkle" later when you steam. Place the filling at the center
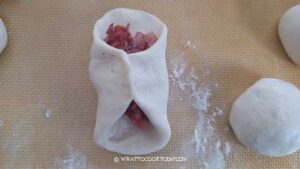
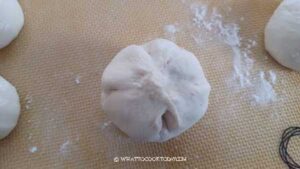
- Gather the sides to enclose the bun and pinch to seal.
- Flip the bun so the seam side is down now and you have a smooth top or leave the seam up for some pleats. Repeat with the rest of the dough. Cover with a clean kitchen towel and proceed to proofing

Proofing:
- Let the dough rise at room temperature or at a warm place. If it's winter where you are, you can use your oven "bread proof" function to let them proof in there, or simply turn on your oven to the lowest temperature and then turn off and after 15 minutes, place the shaped buns in there to let them proof. They won't necessarily double in size, but at least puff up to about 50% of the original size. This may take about 1 hour or longer at a warm temperature. If your dough has been in the fridge, it will take much longer to proof the dough. Don't go by the time however. Observe the dough instead!
- For active dry yeast and fresh yeast, you may need a bit longer for it to proof compare to instant yeast. If you use more sugar in the recipe, you may need to proof a bit longer too. Do not overproof your dough however
- How do you know if your buns have proofed ? They will be about 50% bigger than their original size AND when you lift them up, they should feel significantly lighter. If not, let them proof a bit longer. They may not visually look bigger.
- Use a finger test too. Gently push on the dough with your finger
- It will leave an indentation but it will spring back slowly. This dough is perfectly proofed. If it springs back right away, it needs to be proofed a bit longer. If it never springs back, then you have over-proofed the dough. Loosely cover them with plastic wrap and put the over-proofed buns in the fridge to slow down the proofing while waiting for the steamer
- An under proofed buns will be very dense and have bumpy surface after steaming. An over proofed buns may widen to the side and much flatter, but they shouldn't be dense and heavy. So, overproof may still be a bit "safer" compared to the buns not sufficiently proofed. Ideally, we want it to be perfectly proofed of course
Steaming:
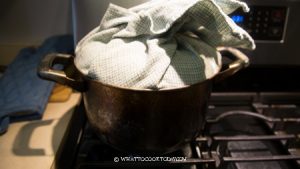
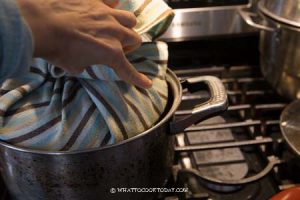
- Fill up the steamer with water but do not turn on the stove yet. Carefully arrange the proofed buns in the steamer, giving about 2 inches of space in between as they will expand quite a bit. Cover with a lid wrapped with a cloth to prevent condensation from dropping on the surface of the buns. If you use a bamboo steamer, you don't need to wrap the lid as bamboo steamer absorbs liquid
- Please note that I use the largest burner on my stove. Different sizes of burners will produce different amount of heat, so use your largest burner. TURN THE HEAT TO MEDIUM (6/10)
- When the water comes to a simmer, crack the lid open about 1/2 inch gap and start the timer. Steam with the lid cracked open like that for 10 minutes

- After steaming, turn off the heat. DO NOT OPEN THE LID of the steamer. Let the buns sit there for 3 minutes. The buns will not sink or wrinkle due to the sudden change in temperature
- Proceed with the next batch and steam with the same method and setting as I mentioned above. You don't have to wait for the water in the steamer to cool down to start. Just turn on the stove to medium heat, crack the lid open immediately and the time starts when water is back to a simmer again
To serve:
- Serve them warm
