This post may contain affiliate links. Please read our disclosure policy.
Super soft milk buns filled with whipped cream and coconut flakes are one of Chinese/Asian bakery classics. You will absolutely love this recipe. The recipe is also available using a sourdough starter.

Going to a Chinese or pretty much any Asian bakery store makes me feel like a little kid at a candy store. I feel giddy and too excited! I love the creativity of all the savory and sweet buns and bread, cakes, and pastries I am surrounded with. It’s just amazing. This coconut cream bun is one of my favorites!
What is a Chinese bakery coconut cream bun?
It is a delicious treat commonly found in Chinese bakeries or dim sum restaurants. It is basically a soft baked milk bun filled with lightly sweetened whipped cream and dusted with coconut flakes on top. The bun is typically shaped into hotdog buns with a slit in the middle for the whipped cream. Don’t be mistaken with these cocktail buns . Cocktail buns do not have cream and are usually filled with sweet coconut filling on the inside.
For the sourdough bakers out there: I like baking enriched bread using sweet stiff starter
Stiff starter usually has 50% hydration or less and it has a consistency like a dough basically! (hence the name!). I do not maintain a stiff starter separately. I use my regular 100% hydration starter to build a stiff starter whenever I need it (that’s the beauty of it!). I love using a stiff starter in an enriched dough like this. The bread doesn’t taste as sour or not sour at all and stiff starter works much faster and therefore more suitable to be used in the enriched dough. Regular 100% hydration starter will take so much longer to ferment because of the added fat, sugar, and other ingredients.
How to bake Chinese bakery coconut cream buns
1. If you plan to bake with sourdough starter, about 4-5 hours before you plan to make the bread, combine all ingredients for the stiff starter in a bowl. Stir a bit to roughly combine and then use your clean hand to knead it. This is a stiff starter, it’s like a dough. Make sure no pockets of dry flour are visible. Transfer to a large see-through container (plastic or glass is fine, preferably wide-mouth so you can get it out easier later). Loosely cover with the lid and let it ferment until triple in size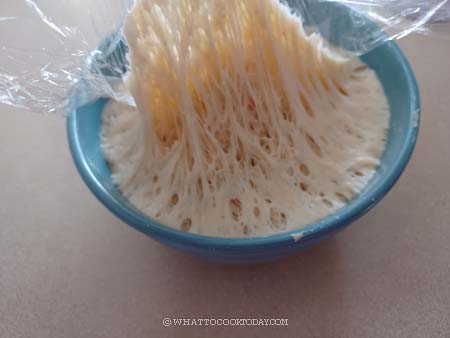
2. Mix all the dry ingredients together in a mixing bowl. Make a well in the center and pour in the wet ingredients and the stiff starter for sourdough version. Cut into little pieces when it is ready to be used. It mixes more easily into the dough. 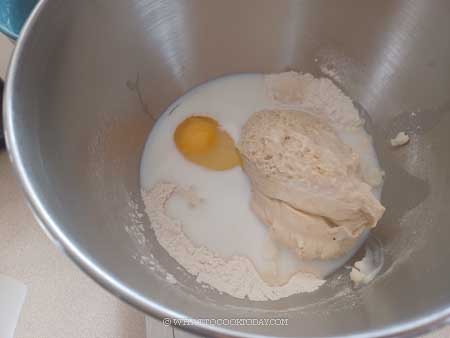
3. Use a dough hook attachment to knead the dough on speed 2 until all the crumbly dough starts to come together into one mass, it may take about 2-3 minutes for this to happen. Don’t be tempted to add any liquid. You may need to stop halfway and scrape the dough off the hook and the sides of the bowl and knead again for another 3 minutes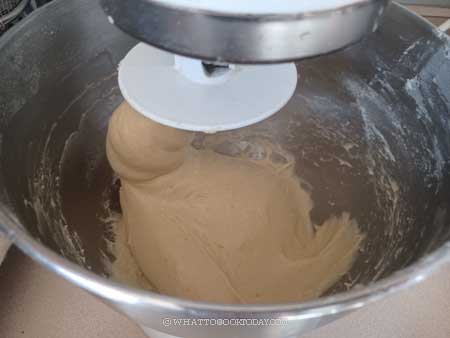
4. Gradually add in the softened butter bit by bit. The dough will turn into a sticky mess again because of the butter, just keep kneading and stop halfway and scrape the dough off the hook and bowl again and continue to knead until the butter is absorbed by the dough. IT WILL HAPPEN, don’t worry! DO NOT be tempted to add any extra flour. You will get a shiny smooth dough that is very elastic. This may take about 5-8 minutes on speed 4, depending on your mixer too. The dough must pass a windowpane test, meaning, when you stretch a small amount of dough thinly, it won’t break and a light can pass through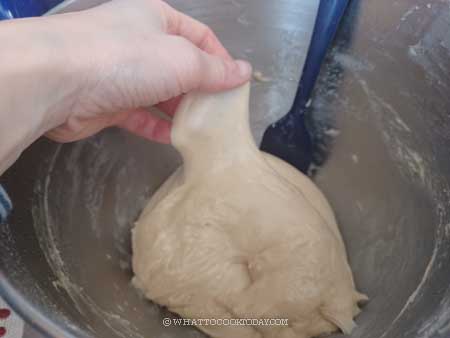
5. Place it in a lightly oiled bowl and let it rise in a warm place for about 1 hour or longer depending on the temperature. It will double in size. In wintertime, I use my oven bread proof function to do this.
6. Place this dough in a lightly oiled large bowl, cover it with a clean and damp tea cloth or plastic wrap and let it rise at a warm place. If you use commercial yeast, this may take about 1 hour or longer depending on temperature. If you use a sourdough starter, proof for 2 hours. The dough will not double for sourdough version. If you use commercial yeast, the dough has clearly almost doubled or doubled in size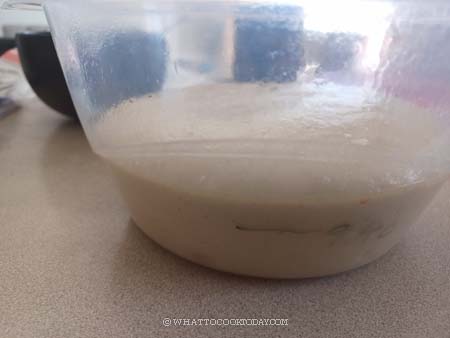
7. Line a large baking pan with parchment paper. Degas the dough by punching it down and then divide into 8 buns, roughly the same size or weight. Round each one into a dough ball. Keep them covered and rest for 5 minutes to relax the gluten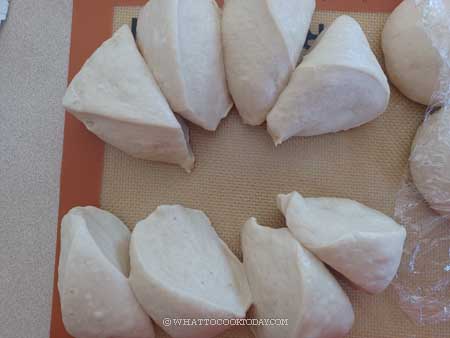
8. Work with one dough at a time, use a rolling pin to flatten the dough into an oval shape, about 4-5 inches long and 3 inches wide. 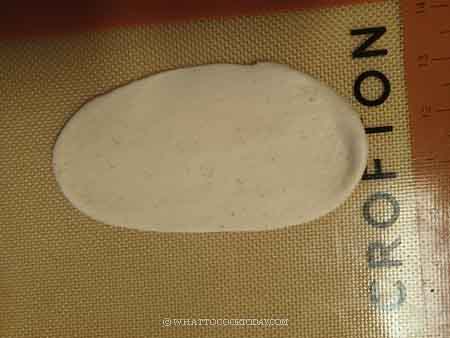
9. Roll from the long side to form a log. Pinch the seam side to seal. 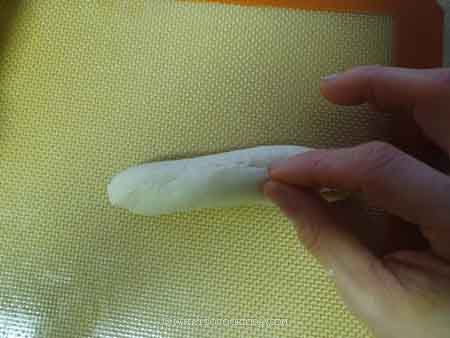
10. Place the seam side down on the baking pan. Repeat with the rest of the dough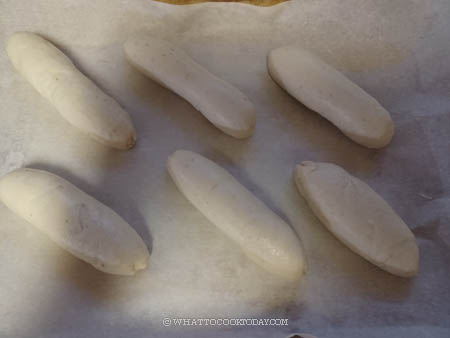
11. Let them proof again for another 40 minutes or until they are about 80% puffy. If you use a sourdough starter, this may take about 2 1/2 -3 hours or longer, depending on temperature and the strength of your starter. Final proofing usually takes much longer for sourdough. 10 minutes before the end of proofing, preheat the oven to 375 F (190 C). If you gently press on the dough, it will bounce back very slowly and leave an indentation. If it bounces back right away, proof a bit longer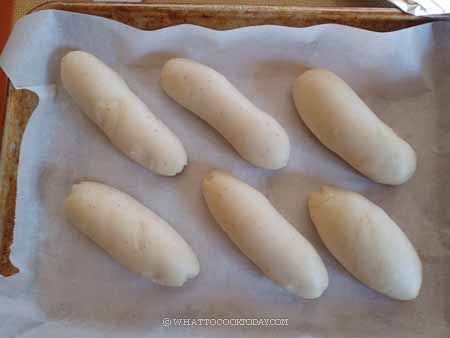
12. Combine egg with milk to make the egg wash. Make sure you whisk the egg really well. Brush on top of the bun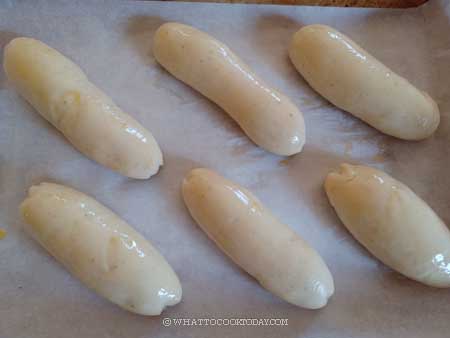
13. Place the pan on the middle rack and bake for 15 minutes or until golden brown or the inner temperature in the center is 190 F. Do not overbake as it will dry out the crumbs and the bread won’t stay soft the next day. I highly recommend a digital thermometer if you bake often as it helps to clear out that doubt whether the bread is baked through or not. Remove from the oven and let them cool down on cooling rack. Prepare a honey syrup by combining honey with hot water. Once the bread has cooled down completely, use a pastry brush to apply the syrup on the surface of the bun. 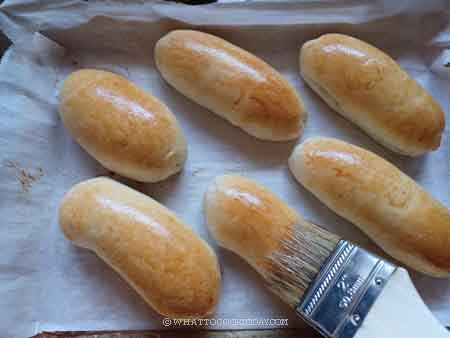
14. Dip the bun into a plate filled with desiccated coconut.
15. Use a serrated knife to make a cut on the center of each bun, taking care not to cut through the bun though.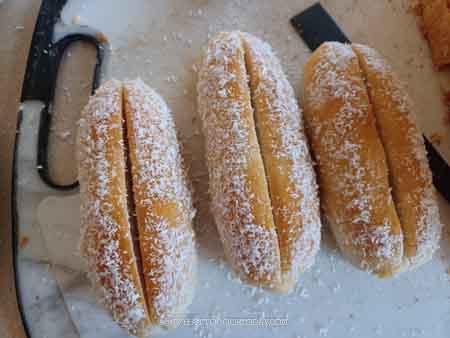
16. Prepare whip cream by whipping the heavy cream with icing sugar and milk powder on medium speed until it thickens and hold its peak. Make sure not to overwhip though, the cream turns grainy when it is overwhipped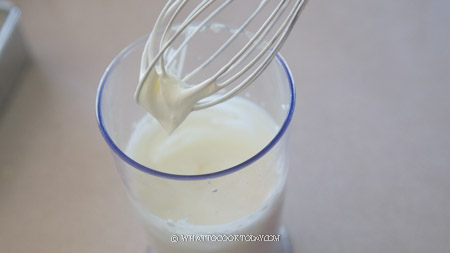
17. Transfer to a piping bag fitted with a star nozzle. Pipe the cream in the middle of the cut you make on the buns earlier. This is best served immediately and only fill the bread with cream when you are ready to serve them

Did you make this Chinese bakery coconut cream buns recipe?
I love it when you guys snap a photo and tag it to show me what you’ve made. Simply tag me @WhatToCookToday #WhatToCookToday on Instagram and I’ll be sure to stop by and take a peek for real!

Chinese Bakery Coconut Cream Buns (奶油包)
Ingredients
Dry ingredients:
- 250 g bread flour (12.7% protein content)
- 4 g instant yeast
- 40 g sugar
- 10 g milk powder
- 3 g salt
Wet ingredients:
- 50 g egg 1 large egg
- 80 g whole milk add as needed, 1 teaspoon at a time
- 40 g unsalted butter softened
If using sourdough starter:
Prepare sweet stiff starter (SSS): (peak in 4-5 hours)
- 95 g active starter (100% hydration)
- 95 g bread flour (12.7% protein content)
- 30 g water
- 20 g sugar
Dough if using sourdough:
- 108 g bread flour (12.7% protein content)
- 40 g sugar
- 50 g egg
- 20 g milk powder
- 40 g unsalted butter softened
- 3 g salt
- whole milk as needed
Egg wash:
- 1 egg
- 1 tsp milk
Whipped cream:
- 250 g heavy cream
- 20 g powdered sugar or more as needed
- 7 g non-fat milk powder
Honey glaze:
- 1 tsp honey
- 1 tsp hot water
Topping:
- 30 g desiccated coconut or more as needed
Instructions
Prepare sweet stiff starter for sourdough version:
- About 4-5 hours before you plan to make the bread, combine all ingredients for the stiff starter in a bowl. Stir a bit to roughly combine and then use your clean hand to knead it. This is a stiff starter, it's like a dough. Make sure no pockets of dry flour are visible. Transfer to a large see-through container (plastic or glass is fine, preferably wide-mouth so you can get it out easier later). Loosely cover with the lid and let it ferment until triple in size
- Cut into little pieces when it is ready to be use. It mixes more easily into the dough
Prepare the dough:
- Mix all the dry ingredients together in a mixing bowl. Make a well in the center and pour in the wet ingredients and the stiff starter for sourdough version. Use a dough hook attachment to knead the dough on speed 2 until all the crumbly dough starts to come together into one mass, it may take about 2-3 minutes for this to happen. Don't be tempted to add any liquid. You may need to stop halfway and scrape the dough off the hook and the sides of the bowl and knead again for another 3 minutes
- Gradually add in the softened butter bit by bit. The dough will turn into a sticky mess again because of the butter, just keep kneading and stop halfway and scrape the dough off the hook and bowl again and continue to knead until the butter is absorbed by the dough. IT WILL HAPPEN, don't worry! DO NOT be tempted to add any extra flour. You will get a shiny smooth dough that is very elastic. This may take about 5-8 minutes on speed 4, depending on your mixer too. The dough must pass a windowpane test, meaning, when you stretch a small amount of dough thinly, it won't break and a light can pass through
1st proofing:
- Place it in a lightly oiled bowl and let it rise in a warm place for about 1 hour or longer depending on the temperature. It will double in size. In wintertime, I use my oven bread proof function to do this.
- Place this dough in a lightly oiled large bowl, cover it with a clean and damp tea cloth or plastic wrap and let it rise at a warm place. If you use commercial yeast, this may take about 1 hour or longer depending on temperature. If you use a sourdough starter, proof for 2 hours. The dough will not double for sourdough version. If you use commercial yeast, the dough has clearly almost doubled or doubled in size
- When you poke the dough with your lightly-floured finger, the indentation stays.
Shape:
- Line a large baking pan with parchment paper
- Degas the dough by punching it down and then divide into 8 buns, roughly the same size or weight. Round each one into a dough ball. Keep them covered and rest for 5 minutes to relax the gluten
- Work with one dough at a time, use a rolling pin to flatten the dough into an oval shape, about 4-5 inches long and 3 inches wide. Roll from the long side to form a log. Pinch the seam side to seal. Place the seam side down on the baking pan
- Repeat with the rest of the dough
Final proofing:
- Let them proof again for another 40 minutes or until they are about 80% puffy. If you use a sourdough starter, this may take about 2 1/2 -3 hours or longer, depending on temperature and the strength of your starter. Final proofing usually takes much longer for sourdough. 10 minutes before the end of proofing, preheat the oven to 375 F (190 C)
- If you gently press on the dough, it will bounce back very slowly and leave an indentation. If it bounces back right away, proof a bit longer
- Combine egg with milk to make the egg wash. Make sure you whisk the egg really well. Brush on top of the bun
Baking:
- Place the pan on the middle rack and bake for 15 minutes or until golden brown or the inner temperature in the center is 190 F. Do not overbake as it will dry out the crumbs and the bread won't stay soft the next day. I highly recommend a digital thermometer if you bake often as it helps to clear out that doubt whether the bread is baked through or not
- Remove from the oven and let them cool down on cooling rack
Assembling:
- Prepare a honey syrup by combining honey with hot water. Once the bread has cooled down completely, use a pastry brush to apply the syrup on the surface of the bun. Dip the bun into a plate filled with desiccated coconut. Use a serrated knife to make a cut on the center of each bun, taking care not to cut through the bun though.
- Prepare whip cream by whipping the heavy cream with icing sugar and milk powder on medium speed until it thickens and hold its peak. Make sure not to overwhip though, the cream turns grainy when it is overwhipped
- Transfer to a piping bag fitted with a star nozzle. Pipe the cream in the middle of the slit you make on the buns earlier
Serving:
- This is best served immediately and only fill the bread with cream when you are ready to serve them
Storing suggestions:
- You can keep the stabilized whipped cream in the fridge for 2-3 days max. Store the baked buns in an air-tight container without the cream. We don't want to store the buns in the fridge as the buns will dry out. Only fill the buns when you are ready to eat them


