This post may contain affiliate links. Please read our disclosure policy.
Melt-in-mouth German potato cookies with a fun tiger shape (or Tigger from Winnie The Pooh to be exact) to celebrate the upcoming Chinese New Year.

So I try to make the Chinese zodiac steamed buns or cookies every Chinese New Year. So far, I have made dragon cookies, piggie steamed buns, the year of rat steamed buns, the year of ox steamed buns . This year I decided to do cookies instead of steamed buns. I used my basic German potato cookies recipe to make this recipe.
Why you’ll love these Tiger German Potato Cookies
1. Taste: It is lightly sweetened and buttery
2. Texture: It has that signature melt-in-mouth
3. Easy design: You don’t need to deal with super tiny details like rolling the super tiny dough to make the whiskers, eyes, and brows. I find most people do not have the time and/or patience to do that. My goal is to make things more doable

How to make tiger (Tigger) German potato cookies.
1. You are welcome to use a mixer but I don’t feel like it’s necessary to use one. Make sure the butter is soft. You can easily mash with a spatula. I took the butter out from the fridge and cut it up into smaller pieces and they are soft in about 30 minutes or less. It may not even take that long if it’s warm where you are. You don’t want the butter to melt, just soft

2. Combine the potato starch, cake flour, milk powder, and salt and set aside. Mash the butter with a spatula. Add icing sugar and mix to combine

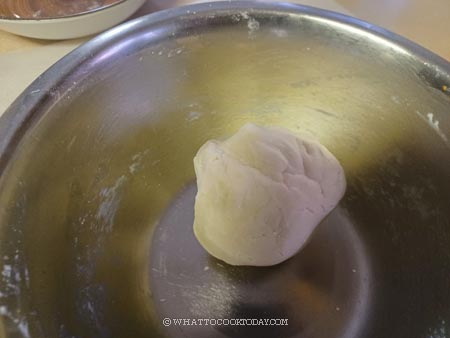
3. Sift in the dry ingredients and mix into a dough ball


4. Pinch off about 40 grams of dough (for the face) and about 20 grams of dough for the nose.
Put a few drops of orange food coloring (I use a gel type) on the main large dough. Fold and knead to distribute the color evenly. Leave the dough for the face uncolored. Drop a tiny drop of red color to the smallest dough, this will turn into pink (hopefully, if you don’t put too much). Keep each dough covered with cling wrap to prevent them from drying

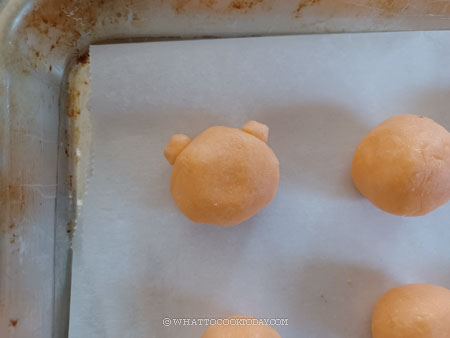
5. Line two large baking sheets with parchment paper. Roll the orange dough into a long log and cut into 26 equal pieces. If you want them smaller, you can cut them into about 30 pieces. From this orange dough, pinch a tiny amount to make 2 ears from each orange dough ball. Roll them into round smooth balls. Attach the two ears. Keep them covered with a cling wrap


6. Divide the white dough into 26 equal pieces and the same thing for the pink dough. It’s easier to shape the white dough for the face by dividing the dough into half and then flattening each one of them, top one a bit wider and the second one not as wide. Press these on the orange dough to form the face

7. Roll the tiny pink dough round and attach it to the face as a nose

8. You can use black sesame seeds as their eyes. You can also just use a black edible marker to draw the eyes if it makes your life easier

9. I use an edible marker to draw the eyebrows and the whiskers.

10. I did an experiment on using chocolate sprinkles as whiskers and they work and did not melt in the oven. It is cuter when you add more elements using edible food items instead of drawing them, but it’s up to you what you want to do. Whatever is easier for you. We are pretty much done here

11. Put the whole trays in the fridge to let them chill for about 15-20 minutes. While waiting, preheat your oven to 325 F (163 C). Position the racks, third from the top and another one third from the bottom
12. Bake the cookies for 20 minutes. Rotate the baking trays, front to back and top to bottom halfway through baking so they bake evenly
The cookies shouldn’t brown at all and will only expand a bit. Let the cookies cool on the baking sheet for 5 minutes and then gently remove to let them cool down on the cooling rack completely

How to make ahead
1. You can prepare up to the point before baking and freeze the unbaked cookies. Simply put the whole trays in the freezer for about 10 minutes. They will harden but not completely frozen. Then gently transfer to a freezer bag, push all the air out, and seal the bag. Put this inside a freezer-friendly container to avoid crushing the cookies. They can go straight from the freezer to baking as directed
2. You can also freeze the baked cookies by doing the same step as above. Just make sure to let the baked cookies cool down completely before doing so. Freeze the baked cookies can be kept for about one month for the best result. Simply thaw at room temperature for 10-15 minutes before serving
Did you make this Tiger German Potato Cookies recipe?
I love it when you guys snap a photo and tag to show me what you’ve made 🙂 Simply tag me @WhatToCookToday #WhatToCookToday on Instagram and I’ll be sure to stop by and take a peek for real!

Easy Year of Tiger Cookies
Ingredients
- 130 gr butter unsalted, softened
- 60 gr icing sugar
- 130 gr potato starch
- 85 gr cake flour
- 20 gr milk powder
- ⅛ tsp salt
Food coloring:
- Red
- Orange
To design the face:
Instructions
Prepare the dough:
- You are welcome to use a mixer but I don't feel like it's necessary to use one. Make sure the butter is soft. You can easily mash with a spatula. I took the butter out from the fridge and cut it up into smaller pieces and they are soft in about 30 minutes or less. It may not even take that long if it's warm where you are. You don't want the butter to melt, just soft
- Combine the potato starch, cake flour, milk powder, and salt and set aside. Mash the butter with a spatula. Add icing sugar and mix to combine. Sift in the dry ingredients and mix into a dough ball
Color the dough:
- Pinch off about 40 grams of dough (for the face) and about 20 grams of dough for the nose.
- Put a few drops of orange food coloring (I use a gel type) on the main large dough. Fold and knead to distribute the color evenly. Leave the dough for the face uncolored. Drop a tiny drop of red color to the smallest dough, this will turn into pink (hopefully, if you don't put too much)
- Keep each dough covered with cling wrap to prevent them from drying
Shape the dough:
- Line two large baking sheets with parchment paper. Roll the orange dough into a long log and cut into 26 equal pieces. If you want them smaller, you can cut them into about 30 pieces. From this orange dough, pinch a tiny amount to make 2 ears from each orange dough ball. Roll them into round smooth balls. Attach the two ears. Keep them covered with a cling wrap
- Divide the white dough into 26 equal pieces and the same thing for the pink dough
- It's easier to shape the white dough for the face by dividing the dough into half and then flattening each one of them, top one a bit wider and the second one not as wide. Press these on the orange dough to form the face. Roll the tiny pink dough round and attach it to the face as a nose
- You can use black sesame seeds as their eyes. You can also just use a black edible marker to draw the eyes if it makes your life easier. I use an edible marker to draw the eyebrows and the whiskers. I did an experiment on using chocolate sprinkles as whiskers and they work and did not melt in the oven. It is cuter when you add more elements using edible food items instead of drawing them, but it's up to you what you want to do. Whatever is easier for you. We are pretty much done here
Chill the cookie dough:
- Put the whole trays in the fridge to let them chill for about 15-20 minutes. While waiting, preheat your oven to 325 F (163 C) for a conventional oven. For a convection oven, please lower the temperature by 20 degrees. Position the racks, third from the top and another one third from the bottom
Bake the cookies:
- Bake the cookies for 20 minutes. Rotate the baking trays, front to back and top to bottom halfway through baking so they bake evenly
- The cookies shouldn't brown at all and will only expand a bit
Cooling down:
- Let the cookies cool on the baking sheet for 5 minutes and then gently remove to let them cool down on the cooling rack completely
Storing:
- Once they cool down completely, you can transfer to an air-tight jar or container. They can be kept for 2-3 weeks or so. The baked cookies can be kept frozen. Place them in a freezer bag, push all the air out. I put them in another freezer bag after that. They can be kept frozen for about 1 month for the best result. Simply thaw at the counter until they are soft

4 comments
These are so adorable! Do you think it would work if instead of tigers, I split the dough in two, added color to one half and then made yin and yang cookies? Also, would a small amount freeze dried fruit powder work ok as a flavor?
Hi Stephanie, absolutely! You can do other design and use a fruit powder for flavor. I believe it should work!
There is no measurement for salt in the recipe?
It’s only a small pinch, about 1/8 tsp of salt. I have added it in the recipe.