This post may contain affiliate links. Please read our disclosure policy.
How to make the best garlic naan bread that is so soft, stretchy, slightly chewy, and garlicky that you will love tearing and can’t stop eating these naans. You can make overnight naan bread with this recipe too.

I know to say “the best garlic naan bread ever” is a huge statement. There are lots of naan bread recipes out there. I love this garlic naan bread recipe and many of you who have tried it have also told me the same (THANK YOU!). I have modified the recipe to use both all-purpose flour and bread flour, which gives the best soft yet slightly chewy texture.
WHY YEASTED NAAN BREAD IS SO GOOD
I would choose yeasted naan bread any day!! It’s not as quick as the no-yeast version of naan bread, but it’s so worth it! I love the good ol’ yeast versus just leavening the bread with baking powder. The yeast does a great job making the bread so light and fluffy. I’m telling you, my kids literally fought over the last piece! (and I thought I made too much!)
The Best Garlic Naan Bread Ever!
Ingredients
Wet ingredients:
- 130 g water
- 4 cloves garlic peeled and grated
- 70 g plain Greek yogurt
Dry ingredients:
- 1 tsp instant yeast see notes if using active dry yeast
- 180 g all-purpose flour
- 120 g bread flour (12.7% protein content)
- ¾ tsp salt
- 1 tsp sugar
- ¾ tsp baking powder
Brush with:
- 2 Tbsp melted ghee or use butter, more as needed
- 2 cloves grated garlic
Instructions
- Mix the melted ghee/butter with grated garlic for brushing the naan later. Set aside
Making the dough:
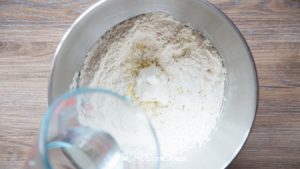
- In a mixing bowl, combine the flour, salt, and baking powder. Make a well in the center and add yeast, garlic, water, and yogurt

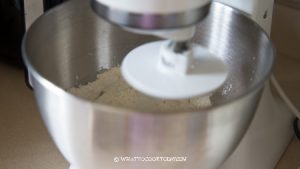
If kneading with stand mixer:
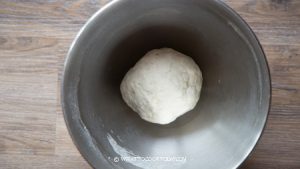
- Attach the dough hook and let it knead on low speed for about 5 minutes or until the dough comes into a mass and clears the side of the bowl. The dough should feel a bit sticky to the touch, but I know when this is the case, the bread will come out soft
If kneading by hand:
- Stir all the ingredients together with a spatula. Make sure all the flour is hydrated. Cover and let it rest for about 30 minutes and then go back and give it a knead until the dough is smooth and just slightly sticky to the touch.
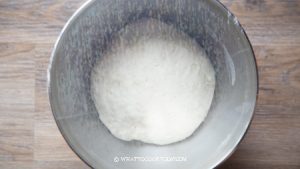
Resting:
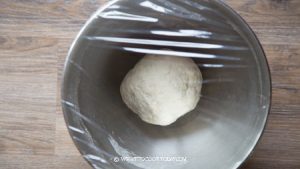
- Lightly oil the bowl and then cover and let it rises in a warm place until doubled in size (45minutes to 1 hour)
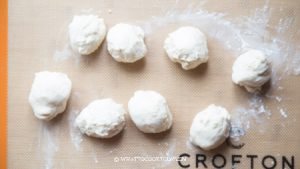
Shaping:
- Lightly dust your working surface and your hands with flour.Deflate the dough by folding the edge towards center. Divide into 8 pieces of dough. Keep them covered and let them rest for 20 minutes.
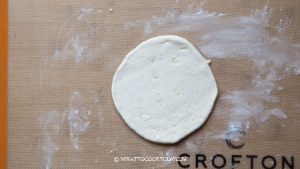
- Work with one dough at a time. Roll the dough out into about 6 inches oval shape. Roll it slightly thicker at the edge
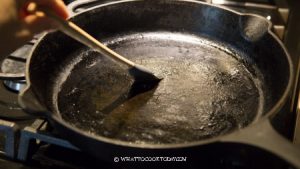
Cooking on stove-top:
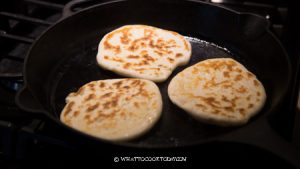
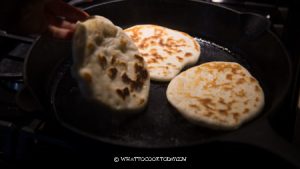
- Preheat your non-stick pan or cast-iron skillet (if you have one). Brush the skillet with some melted ghee.
- Place the naan on the skillet and let it cook until the naan start to puff up and you see light brown spots (my favorite parts) about 1-2 minutes.
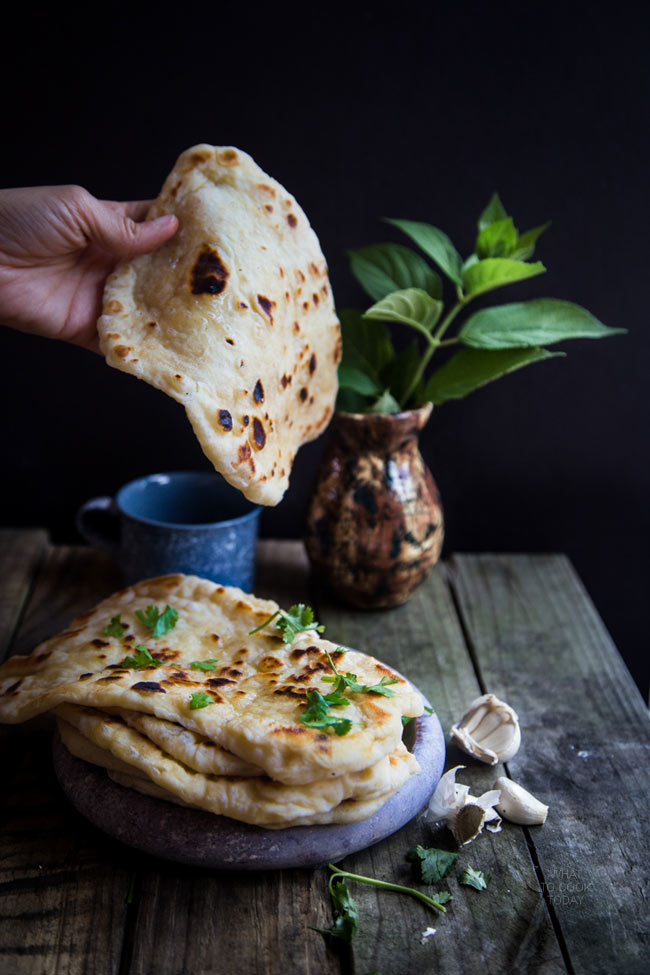
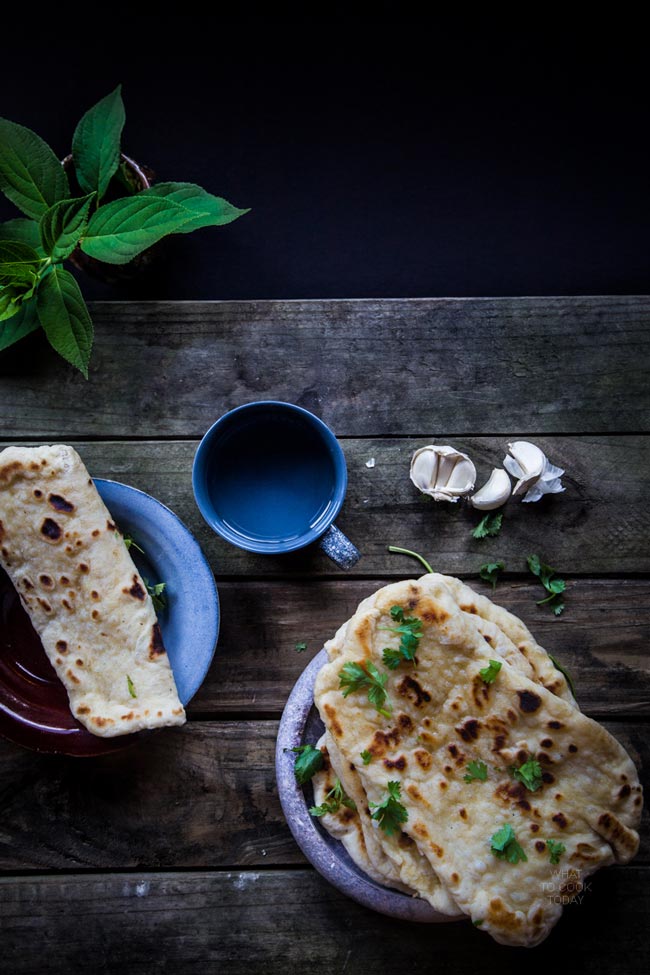
- Brush with some ghee/butter and flip to the other sides and cook for another 1 minute or less. Remove from the heat and brush with more melted ghee and garlic combo if you wish. Continue with the rest of the dough and stack them up as you cook them. Serve warm with some fresh cilantro leaves or other dishes
Cooking naan in the oven:
- Preheat your oven to 500 F with a baking stone or baking steel in there. Make sure there are no little bits of food from previous cooking in there or your oven will be smoky. Place 2-3 pieces of your naan bread on the stone and bake for about 8 minutes or until cooked, and then switch to high broil and then just broil quickly to get that nice brown spots. The longer you bake the naan, the crispier the naan gets, you don't want crispy naan!
RECOMMEDED TOOLS


Marv’s Recipe Notes
*Nutrition facts are just estimates and calculated using online tools*
HOMEMADE GARLIC NAAN BREAD FAQ
1. What kind of flour to use?
Traditional naan bread is typically made using all-purpose flour, but variations can include other types of flour for different textures and flavors. Here are some options:
All-Purpose Flour: the most common flour used for making naan. It gives a soft and just slightly chewy texture
Bread Flour: because bread flour contains higher gluten, the texture will be chewier in texture
Whole Wheat Flour: You can use whole wheat flour or a mix of whole wheat and all-purpose flour for a healthier version. This will give the naan a denser texture and a nuttier flavor.
This recipe combines both all-purpose flour and bread flour. It gives a perfect balance of softness with that slightly chewy texture that is so perfect for tearing
2. Why is there baking powder in the recipe
Yes, the recipe uses both yeast and baking powder. Baking powder provides an extra boost of leavening. This can result in a lighter and fluffier texture, especially useful for breads like naan that are intended to be soft and airy. Using both can act as a kind of insurance. If the yeast is not as active or the environment is not optimal for yeast fermentation, the baking powder ensures that the dough still rises adequately.
3. How to make ahead
Allow the dough to go through its first rise at room temperature until it has doubled in size. Then deflate the dough to release air and then round it up into a dough ball and transfer the dough to a container with a lid or a large zip lock bag you have sprayed with cooking spray or simply smear some cooking oil inside of the bag. The dough can be refrigerated for up to 24-48 hours. When ready to cook/bake, remove the dough from the refrigerator and let it come to room temperature for about 1 hour. Divide, shape, and cook the naan as per the recipe.
4. How to store naan bread
Once the naan bread is cooked, let them cool down completely, and then keep them in an air-tight container at room temperature for 2-3 days. For longer storage, I recommend freezing them. Wrap each piece with a cling wrap and then put them in a freezer bag, push all the air out, and seal. They can be kept frozen for up to one month
5. How to reheat naan bread
You can reheat naan bread in the microwave, oven, or on the stove. If the naan bread is frozen, thaw overnight in the fridge or on the counter and then reheat. Here’s how:
Microwave: Wrap the naan in a damp paper towel and then microwave on high power for 20-30 seconds or until warm
Oven: Place the naan bread on a baking sheet and bake in the preheated oven at 350 F (180 C) for 5-8 minutes
Stovetop: Preheat the pan over medium heat. Place the naan bread in the skillet and heat for about 1-2 minutes on each side
POSSIBLE NAAN BREAD VARIATIONS
1. Make it an entree. Instead of serving naan bread as a side, I’ve used naan to make: Naan pizza, Naanwich (Naan Sandwich) to replace the bread, Naan Taco (replaces the corn/flour tortilla), Naan Quesadilla, Naan burger. Those are just a few ideas I’ve explored. I’m sure you would come up with something creative too. You just need to adjust the size and the thickness of the naan bread to suit your recipe. It’s really fun and it keeps the same old ideas fresh again!
2. Dairy-free Naan Bread
You can use non-dairy yogurt. I like having yogurt in there for that hint of tang.
3. Omit the garlic
My kids sometimes request plain naan bread that they can eat for breakfast with some fruit spread and/or peanut butter 🙂 So, I omit the garlic when I do that
4. Add seeds
You can add sesame seeds or nigella seeds after you’ve flattened and shaped the dough. Gently press the seeds onto the dough and cook. Some seeds may get burned easily, so be careful when you cook them.
5. Cheesy garlic naan bread
You can add grated/shredded mozzarella or other favorite cheese of yours on top of the naan bread after cooking the first side and cook until the cheese is melted and gooey

You may also like these naan dippers


37 comments
Hi there
Love your recipe. Pushed for time today and have the dough made but will the dough keep without cooking?
Thanks Z
Hello Z,
You can punch the dough down and wrap them in the plastic wrapper and it will keep for 3 days. I’ve read somewhere people freeze the dough, I haven’t tried this myself, and let it thaw in the refrigerator before using.
This recipe is called ‘seriously good’ for a reason… these are amazing!!
I halved the recipe and it still made 4 large naan breads which were happily devoured by my family.
Thanks for the great recipe ⭐️⭐️⭐️⭐️⭐️
Hi Cindy,
I’m glad you think that it’s seriously good too 🙂 I just made this myself two days ago 🙂 Thank you so much for your feedback!
Try baking them with cast iron skillet if you have it… Better than using “non-stick” coated pan in my humble opinion.
Totally agree! I love using cast iron skillet to cook them. Perfect!
Perfect, thanks for such a quick response. I did end up adding about a TBSP of oil and they turned out really yummy. So much delicious garlic. Next time I will try without.
Your naan recipe says to add the cooking oil but there is no amount of cooking oil listed. I’m not sure how much to add.
Otherwise it looks delicious.
Hi S,
So sorry for the typo. There shouldn’t be any oil for the dough. I’ve fixed the recipe. Only melted ghee/butter to brush the naan later after cooking.