This post may contain affiliate links. Please read our disclosure policy.
Soft and fluffy steamed buns are shaped into rabbits to usher in the year of the rabbit in the Chinese zodiac. The recipe can be made with a sourdough sweet stiff starter as well.

I guess I can say that it’s a little tradition of mine for making Chinese New Year Zodiac steamed buns for the past 3 years. I’m not sure if I will get all of them because some are more complicated to make than others LOL! If you like cute edible food or kawaii food, you will probably have fun making this. My kids don’t think that they look like rabbits. They think they look more like mice ha.ha..!! Well, I have to admit that I’m not the most detailed-oriented person when it comes to making kawaii food like this, but, the whole point is to just have fun making it.
I use my basic steamed bun recipe as usual. If you are not into kneading or you don’t have a stand mixer to knead, you can use this easy no-knead steamed bun recipe.

How to make the year of rabbit steamed buns
1. About 8-10 hours before you plan to make the steamed buns, combine all ingredients for the stiff starter in a bowl. Stir a bit to roughly combine and then use your clean hand to knead it. This is a stiff starter, it’s like dough. Make sure no pockets of dry flour are visible. Transfer to a large see-through container (plastic or glass is fine, preferably wide-mouth so you can get it out easier later). Loosely cover with the lid and let it ferment until triple in size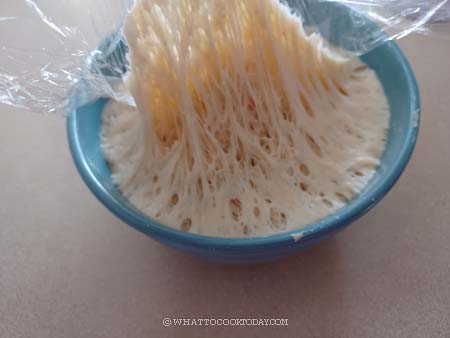
2. Place the flour combination, salt, baking powder, and sugar. Whisk to combine. Add the yeast or all of the sweet stiff starter (tear into smaller pieces), and oil in the mixing bowl. Start on the lowest speed and gradually add the milk and knead until you get a rough dough, adding milk as needed if the dough is too dry and won’t come together. Continue to knead for 10-12 minutes on speed 2 until the dough is smooth. There’s no need to reach a windowpane stage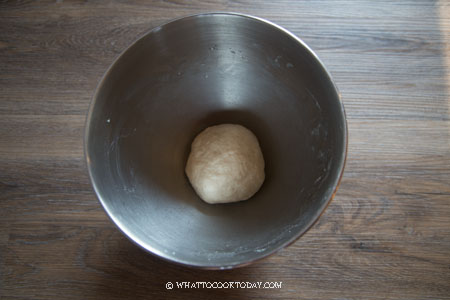
3. Pinch off about 80 grams from the main dough to make ears, tails, and eyes. Pinch off another 50 grams from the main dough to make carrots. This amount is just an estimate. Sorry I didn’t really measure them out exactly.
4. Divide the rest of the dough into 10 equal portions and round them up into dough balls. Cover and rest the dough for 15 minutes. This is not to proof the dough. They shouldn’t double in size. This is to relax the gluten for easier shaping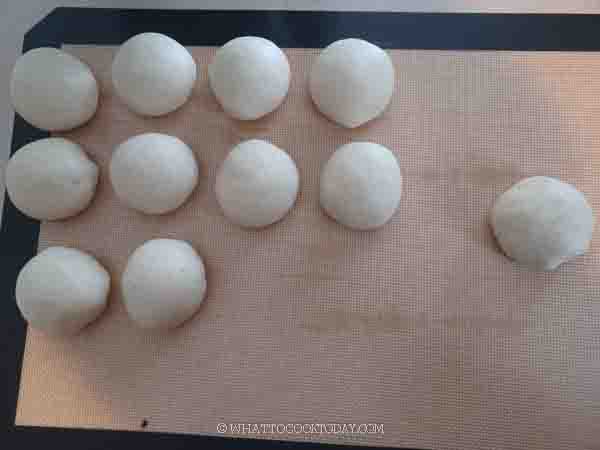
5. For carrot: While waiting, pinch off about 10 grams of dough from the 50-gram dough to make small leaves for the carrots. I colored that light green. For the rest, I colored it orange to make the carrots. You will need 10 carrots and 10 leaves. Shape them into a carrot shape and attach the leaf. You can use a bit of water to help glue them together
6. For ears, tails, and eyes: I pinch off a tiny amount of dough from the 80-gram dough for the eyes, you don’t need much. I use a small amount of charcoal to color the eyes black. You can use cocoa powder too if you don’t have black. The rest I color it pink to make the ears and tails. You will need 20 ears, 10 tails, and 20 eyes
7. Let’s go back to the main dough. Work with one dough at a time and keep the rest covered so they won’t dry out. I didn’t put any filling inside, but you can if you want. It can be sweet or savory filling. Flatten and gather the edge to round them up into dough balls. Pinch to seal. Roll the dough into a smooth round ball in between the palm of your hand. Place the seam side down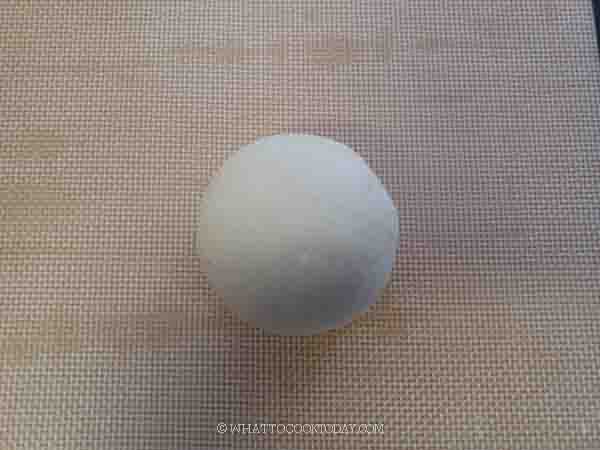
8. Attach the two ears, the tail, and the eyes accordingly. Put the rabbit on top of the parchment paper. Place the carrot near the face. Continue with the rest of the dough. Place them on parchment paper on a baking tray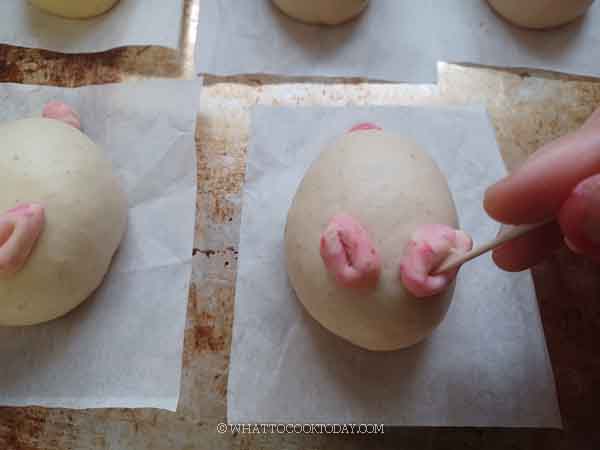
9. Keep them in a warm place for proofing. If you use a sourdough starter, the dough may be sufficiently proofed in about 2- 2 1/2 hours. It took me 2 1/2 hours at 79 F (26 C). Don’t watch the time, watch the dough and test it to make sure they are sufficiently proofed. How do you know if your buns have proofed ? They will be about 50% bigger than their original size AND when you lift them up, they should feel significantly lighter. If not, let them proof a bit longer. Use a finger test too. When you gently push on the dough, it will leave an indentation but it will spring back slowly. 
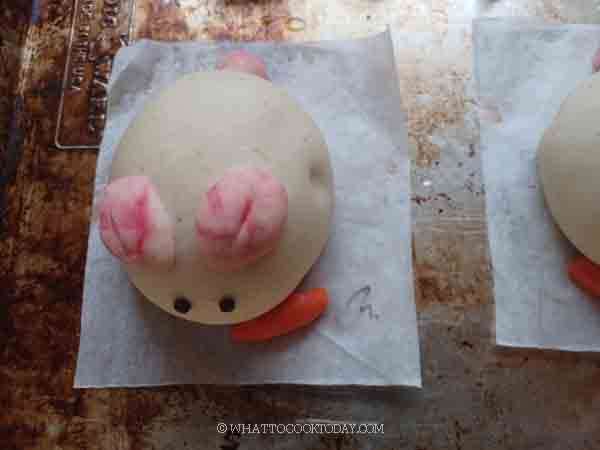
10. Fill up the steamer with water but do not turn on the stove yet. Carefully arrange the proofed buns in the steamer, giving about 2 inches of space in between as they will expand quite a bit. Cover with a lid wrapped with a cloth to prevent condensation from dropping on the surface of the buns. If you use a bamboo steamer, you don’t need to wrap the lid as bamboo steamer absorbs liquid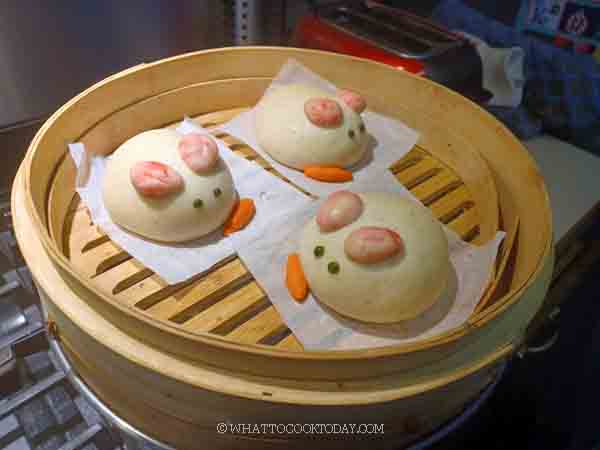
11. When the water comes to a simmer, crack the lid open about 1/2 inch gap and start the timer. Steam with the lid cracked open like that for 10 minutes
12. After steaming, turn off the heat. DO NOT OPEN THE LID of the steamer. Let the buns sit there for 3 minutes. The buns will not sink or wrinkle due to the sudden change in temperature. Proceed with the next batch and steam with the same method and setting as I mentioned above. You don’t have to wait for the water in the steamer to cool down to start. Just turn on the stove to medium heat, crack the lid open immediately and the time starts when the water is back to a simmer again
How to store
They are best served when they are still warm. If you make extra and plan to store them, let the already steamed buns cool down completely and then place them on a baking sheet, not touching each other, and then put the entire tray inside the freezer for about 1 hour. They will harden, but not completely frozen yet. Transfer to a freezer bag and they will not stick to each other anymore. Try not to keep them for more than 1 month

Did you make this Year of Rabbit Steamed Buns recipe?
I love it when you guys snap a photo and tag it to show me what you’ve made. Simply tag me @WhatToCookToday #WhatToCookToday on Instagram and I’ll be sure to stop by and take a peek for real!

The Year of Rabbit Steamed Buns / Baozi
Ingredients
If using yeast:
- 300 g all-purpose flour plus more for dusting
- 60 g wheat starch or use cornstarch or potato starch
- 40 g sugar you can cut down on the sugar or add more to your taste
- 4 g instant yeast
- ¼ tsp salt
- 1 tsp baking powder
- 2 Tbsp cooking oil
- 200 g milk or more as needed
If using sourdough starter:
Prepare sweet stiff starter:
- 55 g active starter (100% hydration)
- 165 g all-purpose flour see notes
- 80 g water
- 25 g sugar
The dough:
- 108 g all-purpose flour
- 60 g wheat starch or use cornstarch or potato starch
- 40 g sugar
- ¼ tsp salt
- 2 Tbsp cooking oil
- 92 g milk or more as needed
Instructions
If using sourdough starter:
- About 8-10 hours before you plan to make the steamed buns, combine all ingredients for the stiff starter in a bowl. Stir a bit to roughly combine and then use your clean hand to knead it. This is a stiff starter, it's like dough. Make sure no pockets of dry flour are visible. Transfer to a large see-through container (plastic or glass is fine, preferably wide-mouth so you can get it out easier later). Loosely cover with the lid and let it ferment until triple in size
Prepare the dough:
- Place the flour combination, salt, and sugar. Whisk to combine. Add the yeast or all of the sweet stiff starter (tear into smaller pieces), and oil in the mixing bowl. Start on the lowest speed and gradually add the milk and knead until you get a rough dough, adding milk as needed if the dough is too dry and won't come together. Continue to knead for 10-12 minutes on speed 2 until the dough is smooth. There's no need to reach a windowpane stage
Resting the dough:
- Pinch off about 80 grams from the main dough to make ears, tails, and eyes. Pinch off another 50 grams from the main dough to make carrots. This amount is just an estimate. Sorry I didn't really measure them out exactly
- Divide the rest of the dough into 10 equal portions and round them up into dough balls. Cover and rest the dough for 15 minutes. This is not to proof the dough. They shouldn't double in size. This is to relax the gluten for easier shaping
For carrot:
- While waiting, pinch off about 10 grams of dough from the 50-gram dough to make small leaves for the carrots. I colored that light green. The rest I colored it orange to make the carrots.
- You will need 10 carrots and 10 leaves. Shape them into a carrot shape and attach the leaf. You can use a bit of water to help glue them together
For ears, tails, and eyes:
- I pinch off a tiny amount of dough from the 80-gram dough for the eyes, you don't need much. I use a small amount of charcoal to color the eyes black. You can use cocoa powder too if you don't have black. The rest I color it pink to make the ears and tails
- You will need 20 ears, 10 tails, and 20 eyes
Assembling:
- Let's go back to the main dough. Work with one dough at a time and keep the rest covered so they won't dry out. I didn't put any filling inside, but you can if you want. It can be sweet or savory filling. Flatten and gather the edge to round them up into dough balls. Pinch to seal. Roll the dough into a smooth round ball in between the palm of your hand. Place the seam side down
- Attach the two ears, the tail, the eyes accordingly. Put the rabbit on top of the parchment paper. Place the carrot near the face. Continue with the rest of the doughs. Place them on a parchment paper on a baking tray.
Proofing:
- Keep them in a warm place for proofing. If you use a sourdough starter, the dough may be sufficiently proofed in about 2- 2 1/2 hours. It took me 2 1/2 hours at 79 F (26 C). Don't watch the time, watch the dough and test it to make sure they are sufficiently proofed
- How do you know if your buns have proofed ? They will be about 50% bigger than their original size AND when you lift them up, they should feel significantly lighter. If not, let them proof a bit longer. Use a finger test too. When you gently push on the dough, it will leave an indentation but it will spring back slowly. This dough is perfectly proofed. If it springs back right away, it needs to be proofed a bit longer. If it never springs back, then you have over-proofed the dough. Loosely cover them with plastic wrap and put the over-proofed buns in the fridge to slow down the proofing while waiting for the steamer
- An under proofed buns will be very dense and have bumpy surface after steaming. An over proofed buns may widen to the side and much flatter, but they shouldn't be dense and heavy. So, overproof may still be a bit "safer" compared to the buns not sufficiently proofed. Ideally, we want it to be perfectly proofed of course
Steaming:
- Fill up the steamer with water but do not turn on the stove yet. Carefully arrange the proofed buns in the steamer, giving about 2 inches of space in between as they will expand quite a bit. Cover with a lid wrapped with a cloth to prevent condensation from dropping on the surface of the buns. If you use a bamboo steamer, you don't need to wrap the lid as bamboo steamer absorbs liquid
- Please note that I use the largest burner on my stove. Different sizes of burners will produce different amounts of heat, so use your largest burner. TURN THE HEAT TO MEDIUM (6/10)
- When the water comes to a simmer, crack the lid open about 1/2 inch gap and start the timer. Steam with the lid cracked open like that for 10 minutes
- After steaming, turn off the heat. DO NOT OPEN THE LID of the steamer. Let the buns sit there for 3 minutes. The buns will not sink or wrinkle due to the sudden change in temperature
- Proceed with the next batch and steam with the same method and setting as I mentioned above. You don't have to wait for the water in the steamer to cool down to start. Just turn on the stove to medium heat, crack the lid open immediately and the time starts when water is back to a simmer again
Serve warm:
- Serve them warm or immediately remove the buns to wire rack to let them cool down. This is to ensure the bottom of the steamed buns will not be wet and soggy
Storing:
- If you make extra and plan to store them, let the already steamed buns cooled down completely and then place them on a baking sheet, not touching each other, and then put the entire tray inside the freezer for about 1 hour. They will harden, but not completely frozen yet. Transfer to a freezer bag and they will not stick to each other anymore. Try not to keep for more than 1 month


