This post may contain affiliate links. Please read our disclosure policy.
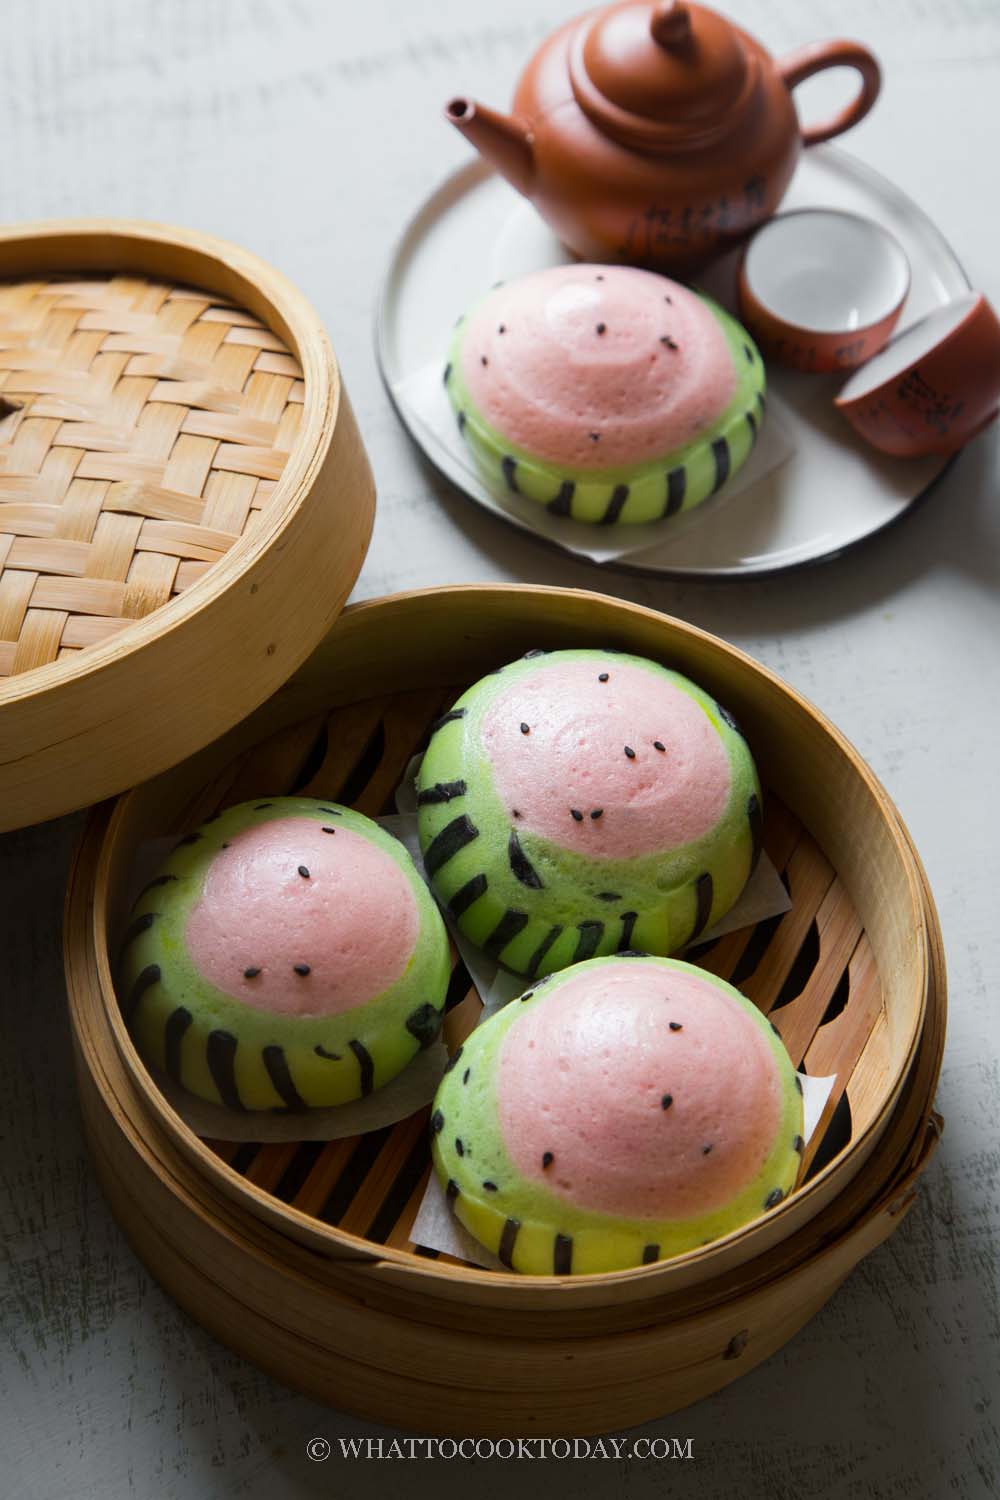
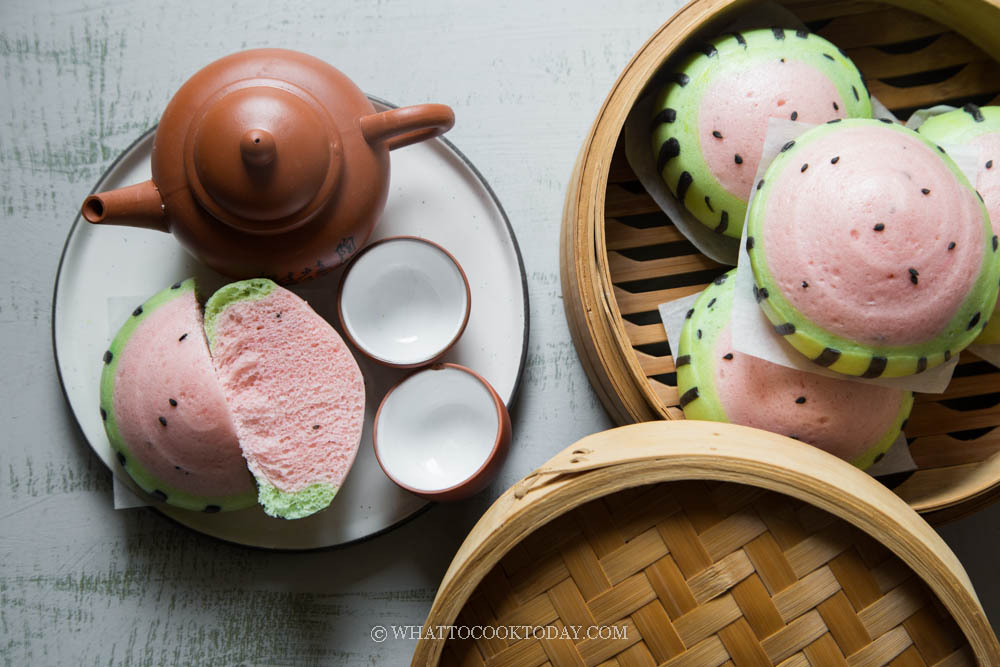
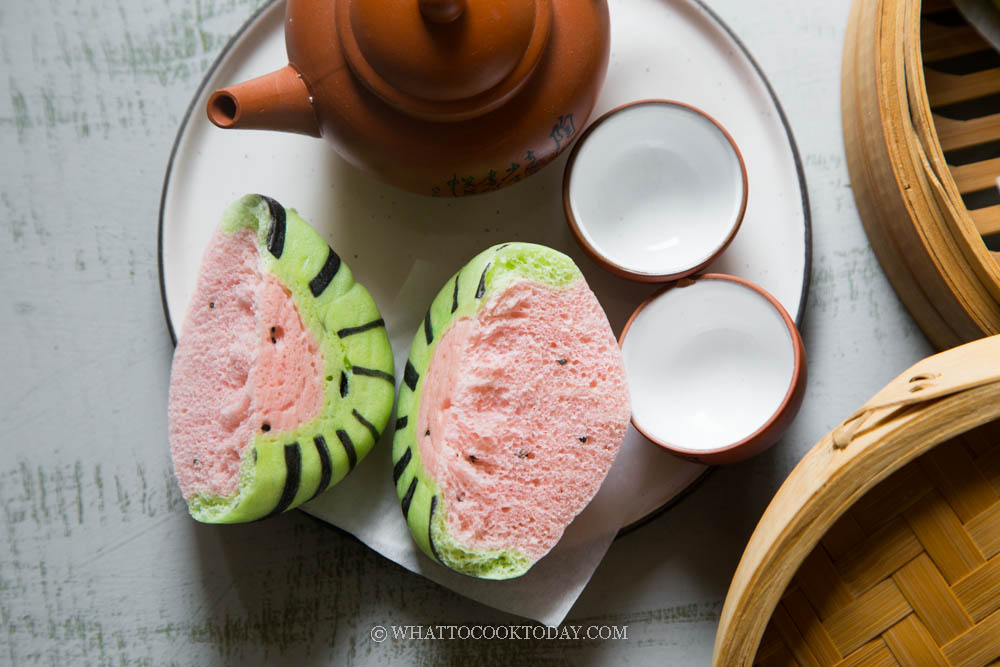
Learn how to make this adorable, soft, and fluffy mantou in the shape of a watermelon.
I have been wanting to make this watermelon mantou for a while but didn’t get to it until now. It seems harder than it is actually. In the past, I have made The Year of Ox Steamed Buns (Baozi), Chinese Golden Ingot Steamed Buns (Jin Yuanbao Baozi), Chinese New Year The Year of Rat Steamed Buns, Pillow-Soft Piggy Steamed Buns (Mantou/Baozi), Chinese Golden Ingot Steamed Buns (Jin Yuanbao Baozi). They are mostly Chinese New Year-related. I saw Reese made this watermelon mantou and I couldn’t wait to try it out. It was so much fun to make it. I used my own soft and fluffy mantou/steamed buns recipe to make this watermelon mantou.
How to make watermelon mantou
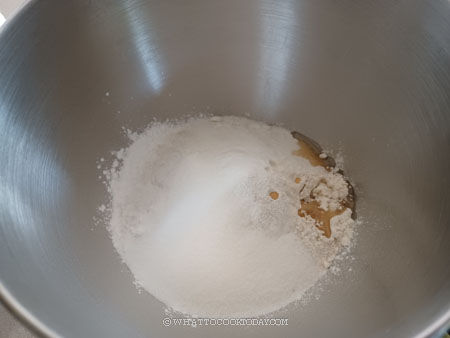
1. Place the flour/starch combination, instant yeast, sugar, salt, and oil in a mixing bowl. If you are using a stand mixer, use a dough hook attachment. Add cold milk or room temperature water.
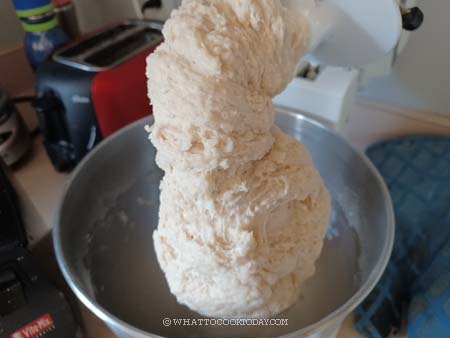
2. Start with 180 ml and add more until you can form a dough. You will most likely need to add more milk/water if the dough is still a bit dry. I would rather you start with the lowest amount of liquid and add more teaspoon by teaspoon until it comes into a rough dough
2. Divide the dough into three portions. First portion will be for the red flesh, I portioned out about 450 gr for this, 165 gr for the peel, and about 20 grams for the stripes. The amount doesn’t have to be exact

3. I put the 450 gr of the dough back into the standmixer, added few drops of natural food coloring (or red yeast rice powder if that’s what you are using) and black sesame seeds and continue to knead for about 5 minutes. I did the same thing for the green dough. I added about 1/2 tsp of pandan essence for the green color and knead it by hands into a dough since the amount is too small to be kneaded in the stand mixer. Knead until it is smooth. I added the charcoal powder to the small dough and knead until the color is even. Cover and let them rest for 15 minutes to relax the gluten

4. Lightly dust your working surface and rolling pin with some flour. Roll the red dough out into about 10 x 6 inches rectangle. You can add more black sesame seeds if you don’t think there are enough on the dough

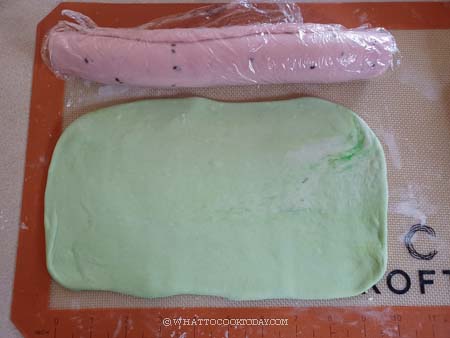
5. Starting from the side near you, roll the dough up into a Swiss roll-like. Cover with a cling wrap

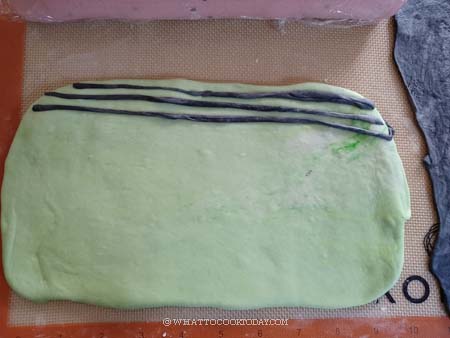
6. Lightly dust another working surface with some flour. Roll the green dough out into about the same length as the red dough, about 10 inches and 3 1/2 to 4 inches width. Cover with a cling wrap
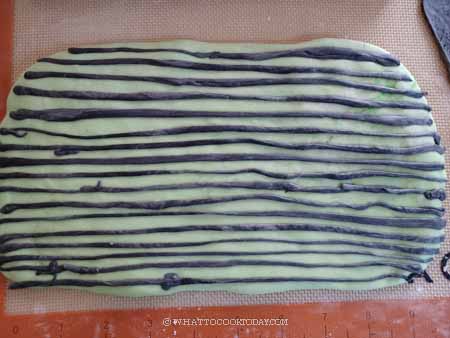
7. Roll out the black dough into about 10 inches long to and use a pizza cutter or a knife to cut into 1/4-inch strips. They don’t have to be exact

8. Place these strips on top of the green dough
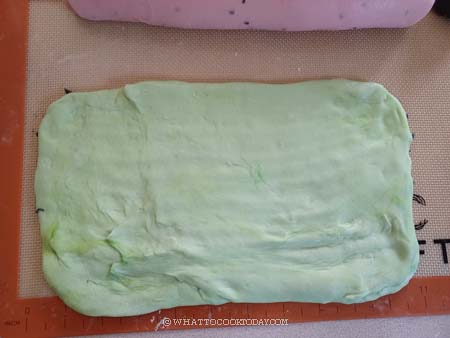
9. Gently flip the green dough over
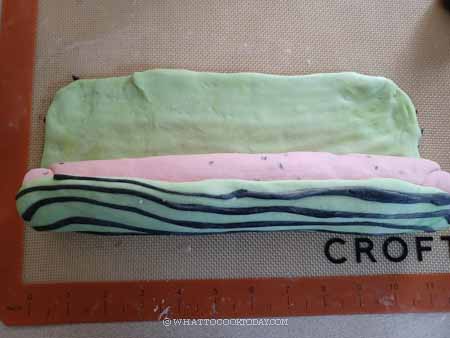
10. Place the red dough on one of the long side near you. Roll the two doughs up together and then seal the green dough

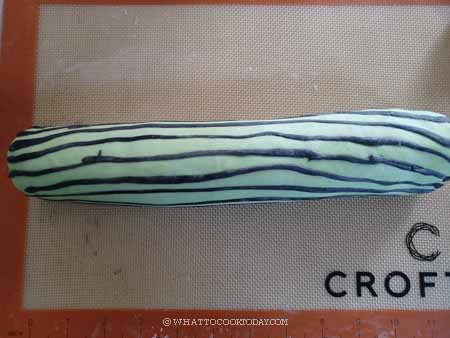
11. Gently roll the dough back and forth to stretch it into about 14-15 inches long log

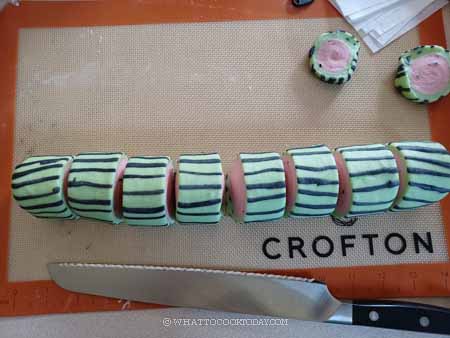
12. Use a serrated knife to trim the two edges and then cut into 8 equal size for large mantou or 12-16 small mantou
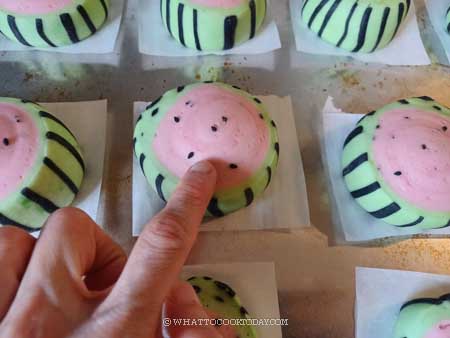
13. Place them on parchment paper and then place on top of a baking sheet covered with a clean cloth

14. Place them at a warm place to let the shaped buns proof until they are about 50% larger than original size. You gently push on the dough, it will slowly bounce back. When you lift the bun up, it should feel much lighter too. These are the signs that your shaped buns are sufficiently proofed
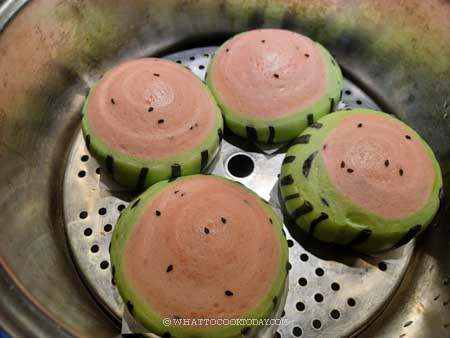
15. Fill you steamer with room temperature water. Place the proofed buns in the steamer.

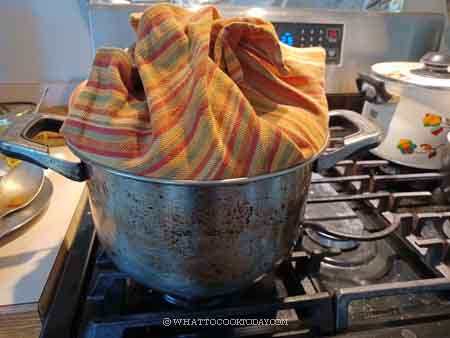
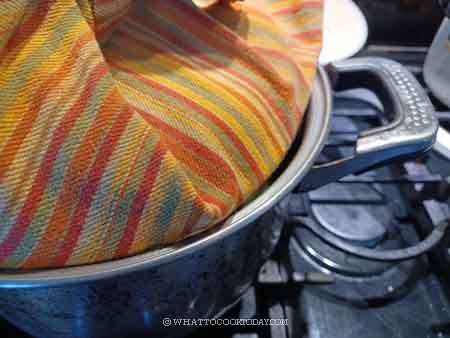
16. Wrap the lid with a cloth to prevent condensation from dripping on the buns. If you use a bamboo steamer, you don’t need to wrap the lid. Turn the stove to medium heat. When the water comes to simmer, this is when you start counting the time. Steam over medium heat for 12 minutes for large buns and 8-10 minutes for smaller buns. When they are done, let them cool inside the steamer for 1 minute and then gently open the lid to let the steam out and remove the buns to cooling rack to prevent the bottom from getting soggy

17. If you have the next batch to steam, do the same thing. The water in the steamer should be still warm, but that’s ok. Put the next batch in and turn on the stove to medium. When it comes to a gentle simmer, crack open the lid a little bit this time to let the steam escapes. This helps to prevent wrinkle on the steamed buns
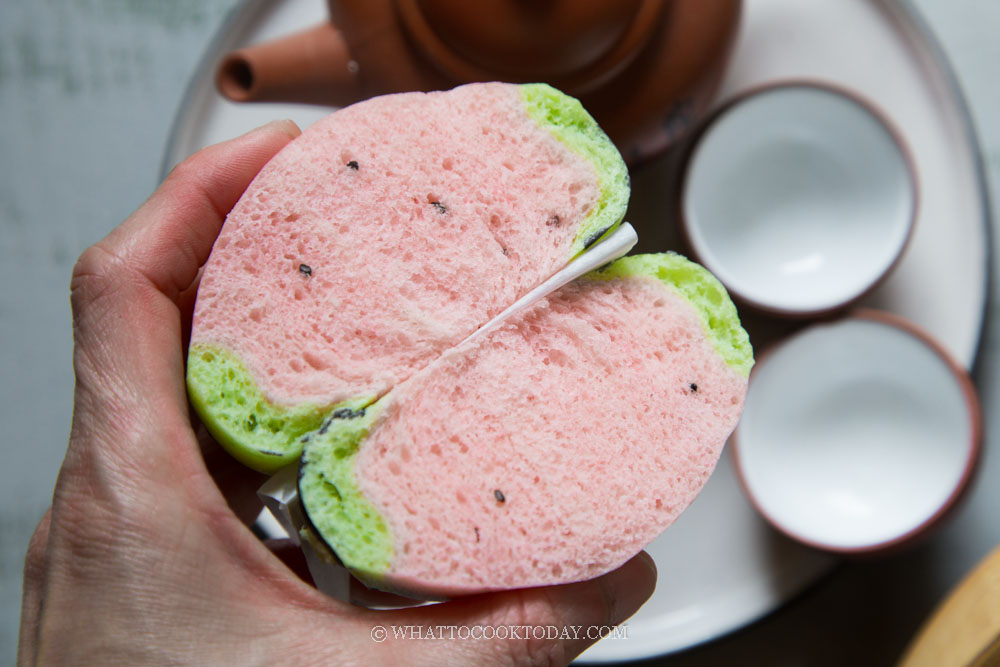
Overall, this was fun to make and not awfully difficult I don’t think. The mantou is also very soft and fluffy with nice pastel color.
How to store
1. Let the mantou cools down completely
2. Individually wrap in a cling wrap and put inside them inside a freezer bag, push all the air out and seal the bag
3. They can be kept frozen for up to one month
4. When ready to serve, you can thaw them overnight in the fridge and then reheat them in the steamer or the microwave. They can also go straight from freezer to steamer
Did you make this soft fluffy watermelon mantou recipe?
I love it when you guys snap a photo and tag to show me what you’ve made 🙂 Simply tag me @WhatToCookToday #WhatToCookToday on Instagram and I’ll be sure to stop by and take a peek for real!
Soft Fluffy Watermelon Mantou (Steamed Buns/Baozi)
Ingredients
For the dough:
- 300 gr all-purpose flour plus more for dusting
- 60 gr Wheat starch see notes 1
- 4 gr Instant yeast About 1 1/4 tsp, see notes 2,3,4
- 60 gr sugar
- 1 Tbsp cooking oil
- ½ tsp salt
- 180 ml cold milk plus more as needed, see notes 5
Coloring options:
For the watermelon flesh (red):
- Few drops red food coloring or use red yeast rice powder
For the watermelon peel (green with stripes):
- Few drops green food coloring or pandan essence
- 1 tsp charcoal powder
For the seeds:
- 1 Tbsp Black sesame seeds or more as needed
Instructions
Prepare the main dough:
- Place the flour/starch combination, instant yeast, sugar, salt, and oil in a mixing bowl. If you are using a stand mixer, use a dough hook attachment. Add cold milk or room temperature water. Start with 180 ml and add more until you can form a dough. You will most likely need to add more milk/water if the dough is still a bit dry. I would rather you start with the lowest amount of liquid and add more teaspoon by teaspoon until it comes into a rough dough
- Divide the dough into three portions. First portion will be for the red flesh, I portioned out about 450 gr for this, 165 gr for the peel, and about 20 grams for the stripes
- Alternatively, you can just knead one big dough for 10-12 minutes until they dough is smooth and no longer sticky. Then separate into 3 portions as I mentioned above and add the color to each dough and knead into the dough until the colors are even
Color the doughs:
- I put the 450 gr of the dough back into the standmixer, added few drops of natural food coloring (or red yeast rice powder if that's what you are using) and black sesame seeds and continue to knead for about 5 minutes
- I did the same thing for the green dough. I added about 1/2 tsp of pandan essence for the green color and knead it by hands into a dough since the amount is too small to be kneaded in the standmixer. Knead until it is smooth. I added the charcoal powder to the small dough and knead until the color is even. Cover and let them rest for 15 minutes to relax the gluten
Shape into watermelon:
- Lightly dust your working surface and rolling pin with some flour. Roll the red dough out into about 10 x 6 inches rectangle. You can add more black sesame seeds if you don't think there are enough on the dough. Starting from the side near you, roll the dough up into a Swiss roll-like. Cover with a cling wrap
- Lightly dust another working surface with some flour. Roll the green dough out into about the same length as the red dough, about 10 inches and 3 1/2 to 4 inches width. Cover with a cling wrap
- Roll out the black dough into about 10 inches long to and use a pizza cutter or a knife to cut into 1/4-inch strips. They don't have to be exact
- Place these strips on top of the green dough. Gently flip the green dough over. Place the red dough on one of the long side near you. Roll the two doughs up together and then seal the green dough
- Gently roll the dough back and forth to stretch it into about 14-15 inches long log
- Use a serrated knife to trim the two edges and then cut into 8 equal size for large mantou or 12-16 small mantou. Place them on parchment paper and then place on top of a baking sheet covered with a clean cloth
Proof the dough:
- Place them at a warm place to let the shaped buns proof until they are about 50% larger than original size. You gently push on the dough, it will slowly bounce back. When you lift the bun up, it should feel much lighter too. These are the signs that your shaped buns are sufficiently proofed
Steam the buns:
- Fill you steamer with room temperature water. Place the proofed buns in the steamer. Wrap the lid with a cloth to prevent condensation from dripping on the buns. If you use a bamboo steamer, you don't need to wrap the lid. Turn the stove to medium heat. When the water comes to simmer, this is when you start counting the time. Steam over medium heat for 12 minutes for large buns and 8-10 minutes for smaller buns. When they are done, let them cool inside the steamer for 1 minute and then gently open the lid to let the steam out and remove the buns to cooling rack to prevent the bottom from getting soggy
- If you have a next batch to steam, do the same thing. The water in the steamer should be still warm, but that's ok. Put the next batch in and turn on the stove to medium. When it comes to gentle simmer, crack open the lid a little bit this time to let the steam escapes. This helps to prevent wrinkle on the steamed buns
Serve:
- They can be served plain or with some of your favorite spreads/jam
Storing:
- If you make extra and plan to store them, let the already steamed buns cooled down completely and then place them on a baking sheet, not touching each other, and then put the entire tray inside the freezer for about 1 hour. They will harden, but not completely frozen yet. Transfer to a freezer bag and they will not stick to each other anymore. Try not to keep for more than 1 month
- They can go straight from freezer to steamer when you ready to eat them. Steam on high heat for 5 minutes and they are as good as new
RECOMMEDED TOOLS


Marv's Recipe Notes
- Use potato starch (not potato flour) if you cannot find wheat starch. If you can't find potato starch, you can use cornstarch, though I highly recommend potato starch instead of cornstarch
- You can use active dry yeast, but make sure to rehydrate the yeast in water or milk with 1 tsp of sugar. It will dissolve and be all foamy, about 10 minutes. If it's not, your yeast is no longer good. You can add the rest of the sugar into the dough later
- You can also use fresh yeast, the amount would be 4 x the amount of instant yeast. So you'll need 16 grams of fresh yeast
- I highly recommend testing the yeast for activity before starting to work on this recipe. You don't want to wait for hours only to find out your yeast is no longer good. Here's how:Add 1 teaspoon of sugar and 2 1/4 teaspoons of yeast (one envelope) to 1/4 cup of warm water. Wait for 10 minutes and if you see foams and bubbles and you smell that yeast aroma, your yeast is still good to go. If not, then you need to get fresh yeast.
- I recommend to start with a small amount of liquid and add more as you go because it really depends on the type of flour you use (they absorb liquid differently) and that's why I can't give you an exact amount but 150 ml is a good start and add as you go.
