This post may contain affiliate links. Please read our disclosure policy.
Learn how to make squishy and rich bika Ambon honeycomb cake with this easy, no-fuss recipe that gives you an amazing honeycomb texture. All the tips you need to know to make bika Ambon successfully in the oven or on the stove.
WHY IT’S CALLED BIKA AMBON
Bika Ambon is one of the very popular cakes that originated in my hometown Medan. Why is not called bika Medan then you would ask. LOL. There are a few speculations. One of them is because bika ambon was first sold at the intersection of Ambon street and Sei Kera street. The other is because it was brought by the Ambonese people to Medan and the Medanese loved the cake and started making and selling it.
It is actually considered a delicacy. It is made famous by this one shop that started selling only Bika Ambon cake and a few years later, the whole street of Mojopahit is filled with other shops selling Bika Ambon too. Those shops are especially busy during the holiday season like Chinese new year, Eid al Fitr, Christmas, I mean..you name it, any occasion. People purchase them mainly for gifting. You will see people packing tens of boxes of these cakes to bring back home all across Indonesia and overseas too.
HOW BIKA AMBON IS TRADITIONALLY MADE IN INDONESIA
I haven’t had Bika Ambon for a really long time. I always thought it was difficult to make. In Medan, Bika Ambon is traditionally made using Palm Wine (Tuak in Indonesian) instead of yeast. Palm wine is an alcoholic beverage made from the sap of palm tree (according to wikipedia) and it is used in many other cakes back in the old days. I saw my grandma used tuak often in her other baking. Here in Minnesota (or perhaps in the U.S. I must say), I don’t have access to Palm Wine and so yeast is used. The result is still really good.
BIKA AMBON IS THE MOST DIFFICULT CAKE TO BAKE
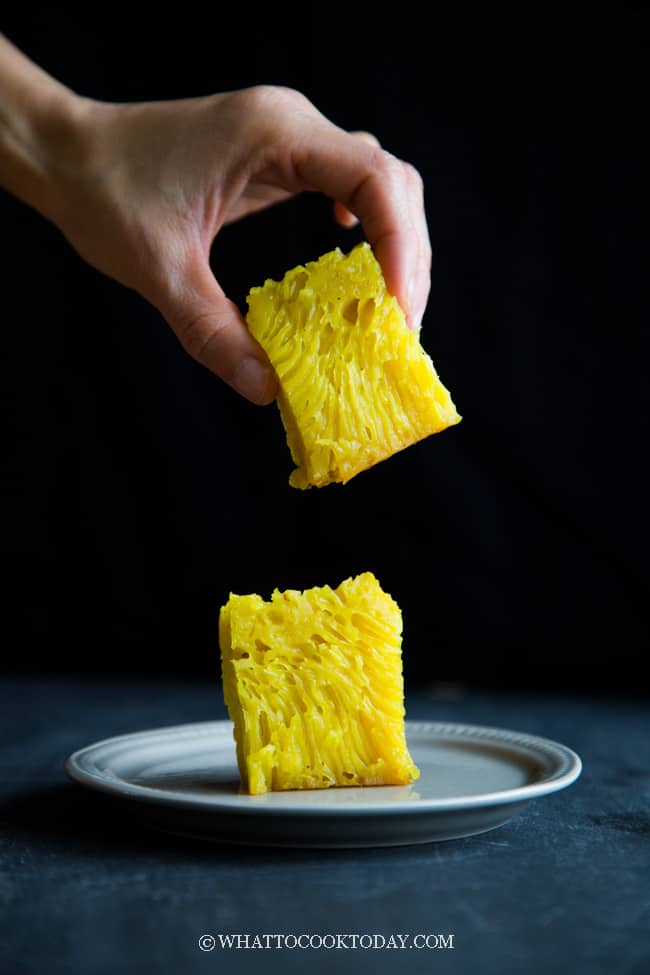
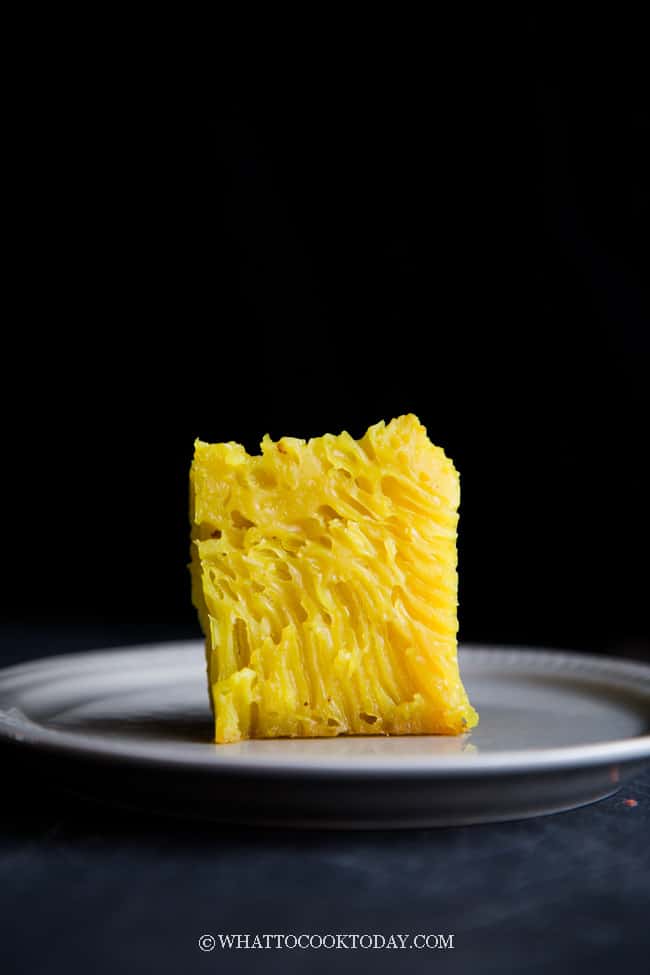
At least that’s how I feel! The cake itself doesn’t require fancy ingredients or complicated techniques, BUT, getting a consistent straight honeycomb texture that extends from the bottom all the way to the top of the cake is very challenging. When you cook it on the stove, it is actually easier to achieve this straight honeycomb texture because the heat comes from the bottom.
Using an oven to bake bika ambon is challenging to be honest with you. I try my best to describe how I bake it in my oven and on the stove. Perhaps you can replicate the same, but perhaps you need a modification in temperature or setting of your own too because every oven is different. If you fail the first time in achieving the honeycomb texture, don’t give up! Pay attention to what you have done every time you make it so you know what you can try to do differently next.
WHY YOU WILL LIKE THIS RECIPE
1. HEALTHIER VERSION
The recipe uses fewer eggs and uses whole eggs. The cake still tastes really yummy with a great texture despite using fewer eggs and egg yolks
2. NO FANCY EQUIPMENT NEEDED OR DIFFICULT-TO-FIND INGREDIENTS
All the ingredients can be easily sourced. You may need to get kaffir lime leaves from the Asian store, but if you are lazy, you can always get it from Amazon. You don’t need to do fancy setup to bake the cake either. Just need your oven to bake the bika ambon. That’s it.
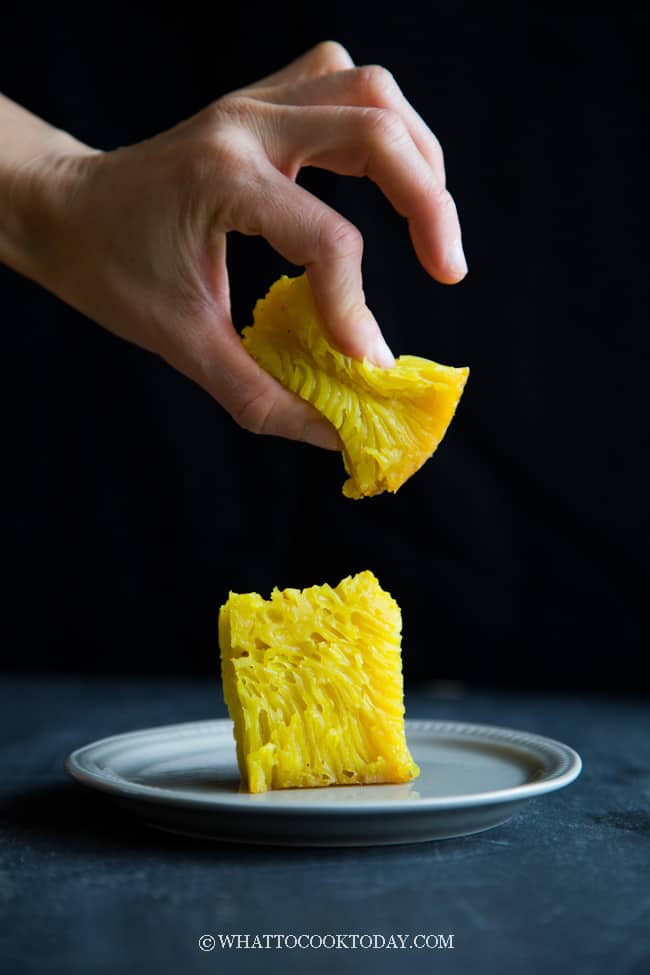
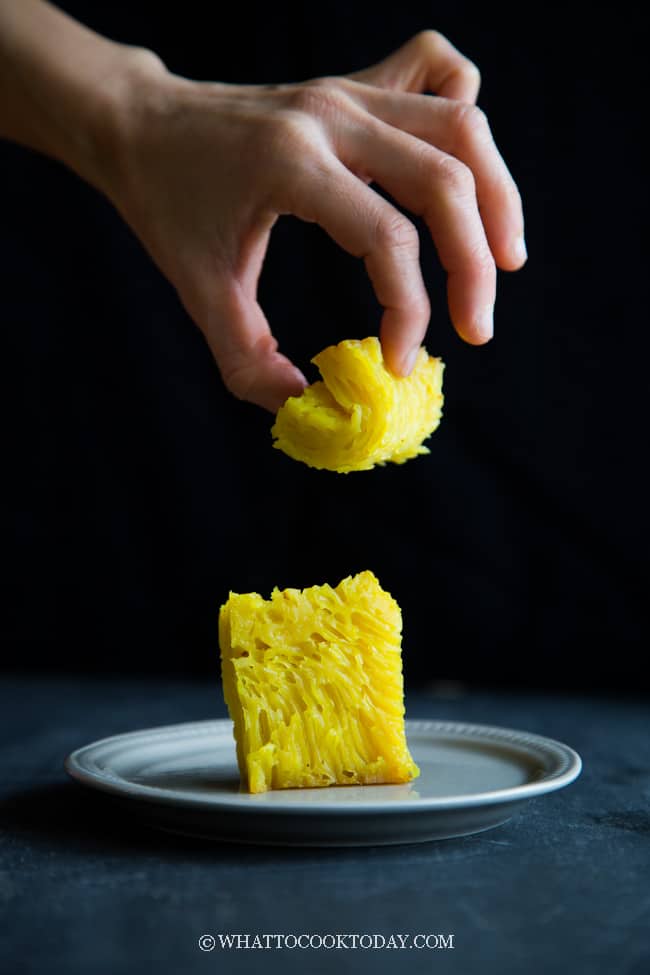
3. GREAT HONEYCOMB TEXTURE
Seeing those tubes running from top to bottom just made my day. In Indonesia we call this bika ambon bersarang. Bersarang means honeycomb-like.
4. NO MIXER IS NEEDED
You don’t need a mixer. Only a whisk or spatula to whisk the ingredients
5. NICE NATURAL COLORS FROM YOLKS AND TURMERIC
Since we use whole eggs, turmeric is added for a more intense yellow that usually comes from a recipe that uses only yolks
CAN I COOK BIKA AMBON ON THE STOVE IF I DON’T HAVE AN OVEN?
Yes, you can. I have experimented A LOT trying to cook bika ambon on the stove lately. Traditional bika ambon is baked not using the oven but on a grill using a tin. I have to admit that the one baked on the stove has a straighter honeycomb texture because cooking on the stove is mainly using bottom heat, which is what this cake needs. I have details on how to bake on the stove in the recipe card below.
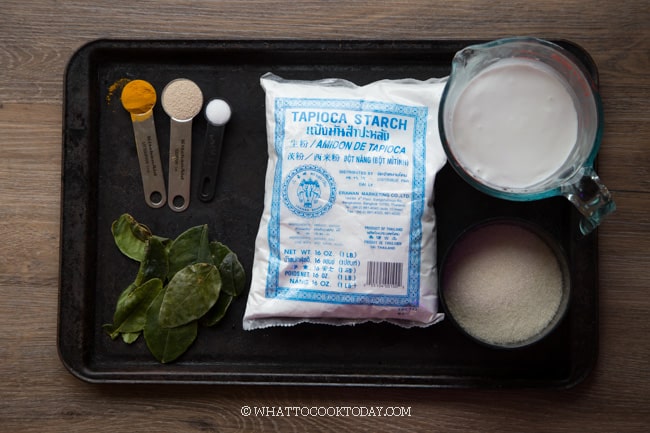
INGREDIENTS
This recipe uses pretty common ingredients with the exception on kaffir lime leaves, which you may need to find at the Asian grocery store or get it online from Amazon. (affiliate links)
Tapioca flour
Turmeric powder
Lemongrass stalk
Instant yeast (my favorite instant yeast) or Active dry yeast would work
Eggs
Coconut Milk
Kaffir Lime Leaves
Sugar
Salt
WHAT PAN TO USE
I recommend using metal square or round cake pan to bake bika ambon because it’s a good heat conductor. You can use 6 x 6 inches square pan, 7-inch round pan, 7 1/2 x 4 1/2 loaf pan, or 8-inch tube pan but make sure it doesn’t have a removable base becaues the batter will leak out. These pan sizes give you a bika ambon with reasonable height. You can use a larger pan, the cake will be shorter
HOW TO BAKE BIKA AMBON IN THE OVEN
1. Prepare starter (biang)
Place flour, sugar, and yeast in a bowl. Stir to mix. Cover and let it rest for 15 minutes.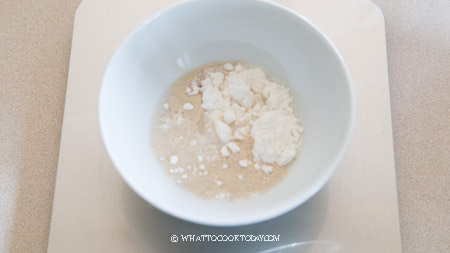
2. The starter will double in size and foamy. If it doesn’t, the yeast is no longer good. Do not proceed with the recipe until you get a new yeast
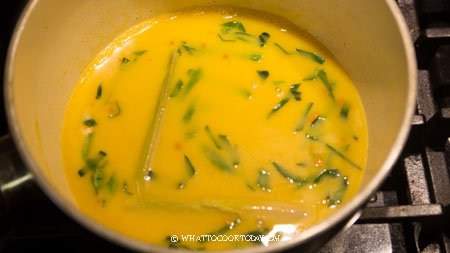
3. Place the coconut milk, salt, sugar, turmeric powder, lemongrass stalk,kaffir lime leaves in a saucepan. Cook on low heat until sugar melts and do not let the coconut milk to boil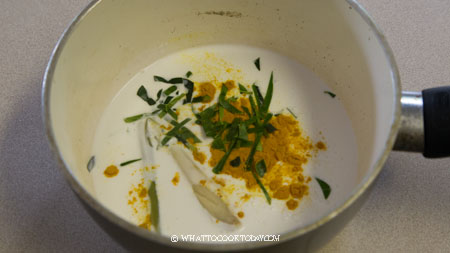
4. If you have a thermometer, check to make sure it is between 105-115 F (40-46 C). This is a lukewarm temperature for the yeast. If you don’t have a thermometer just dip your clean finger in there and it should be comfortably warm. We don’t want to kill the yeast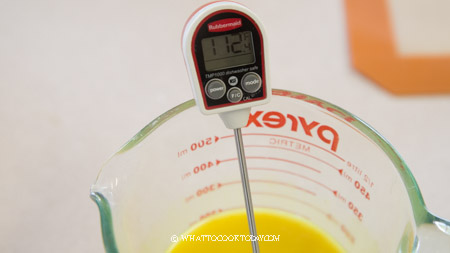
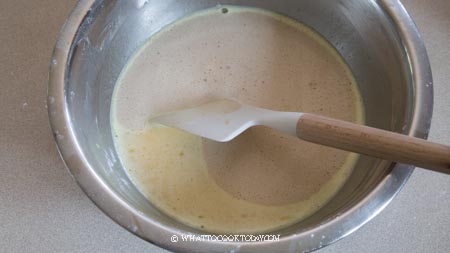
5. Mix tapioca starch with salt, crack in 3 eggs and whisk to combine. Add the coconut milk mixture and stir until combined. Stir in the starter and whisk to combine. Strain this mixture to get rid of lumps


6. Cover with a plastic wrap and let it sit at a warm place (about 30-32 C/86-90 F degrees) for 3 hours. Since it is winter here when I made this, I use my oven “breadproof” function and let the batter sit in there. It helps to speed up the fermentation
7. The batter will have lots of bubbles and foamy because of the yeast activity. It should also have a pleasant aroma from the yeast fermentation. 30 minutes before the end of fermentation, preheat your oven to 330 F (160 C), bottom heat only, which is what most conventional oven is. If you use a convection oven make sure it’s only bottom heat turned on.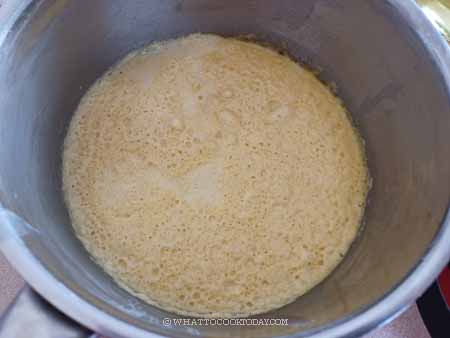
7. Give the batter a really good stir as the tapioca flour tends to settle at the bottom. Stir in all the bubbles gently. Make sure everything is mixed in. 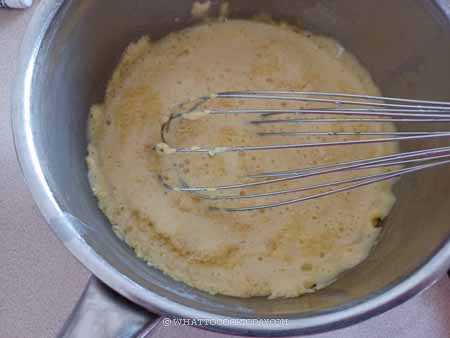
8. Stir in the melted butter and salt and make sure it’s thoroughly combined
9. When the oven is done preheating, quickly brush the bottom of the pan with some oil to prevent sticking. Pour the batter into the preheated pan quickly while the pan is still hot. You should hear a “sizzling” sound.
10. Bake for 45-50 minutes on the lowest rack with the oven door slightly cracked open. I used a wooden spatula to keep it slightly opened. You will see lots of bubbles start to rise 10 minutes into baking. This is a good sign. Let it continue to bake until all the bubbles have “broken” 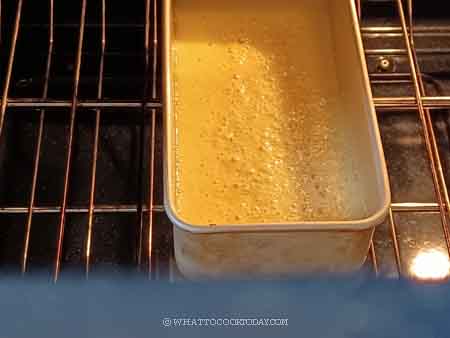
11. The surface of the cake is dry to the touch and springs back. If you insert a toothpick it should come out clean. If you insert a toothpick it should come out clean with a bit of sticky crumbs is okay . If it’s not, continue to bake for another 5 minutes and check again. Remove from the oven for now
12. Increase oven temperature to 400 F (200 C). Put the pan on the middle rack and continue baking with the oven door closed for another 5-10 minutes or until the top is lightly golden brown. Remove from the oven and let it cools down completely inside the pan placed on a cooling rack. This may take 3-4 hours
HOW TO BAKE BIKA AMBON ON THE STOVE
Follow all the same steps above. Instead of preheating the pan in the oven, these are what you are going to do:
1. You need a cast iron pan because it is thick and distributes heat evenly. Place your baking pan on top of the cast iron pan and preheat over medium heat. If you have an infrared thermometer the pan should be around 300-320 F (150-160 C). I highly recommend you getting one. I use infrared thermometer a lot because I bake lots of artisan bread and I check surface temperature of my baking pan/pot, oil, etc quite often. It’s an inexpensive investment I think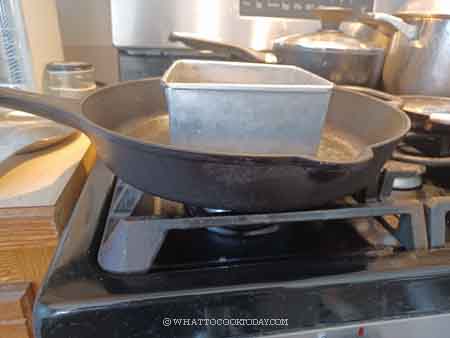
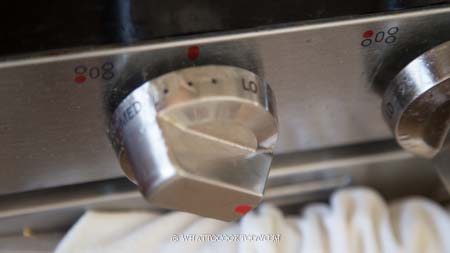
2. When the pan is hot enough, brush with some oil on the bottom. Pour the batter into the pan and it should sizzle. Maintain heat between medium and low at this point. 
3. 10 minutes into baking, you will see lots of bubbles on the surface. This is a good sign. If you don’t see much bubbles, you need to increase the heat a bit.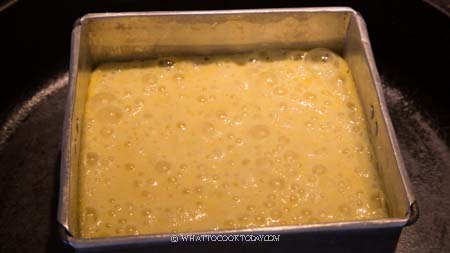
4. Continue to bake for the next 30 minutes or until the surface of the cake is dry to the touch and the cake bounce back when you gently press on it, and all bubbles have broken through and you see lots of poke holes on the surface (that’s your honeycomb pattern extending all the way up)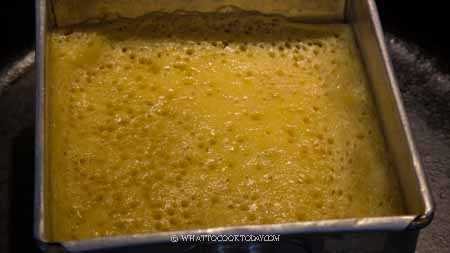
5. Cover the pan with aluminum foil and lower the heat a bit and let it continue cooking for the next 10 minutes. Check with a toothpick to see if it comes out clean with a bit of sticky crumbs is okay. If it’s wet, bake for another 5 minutes and check again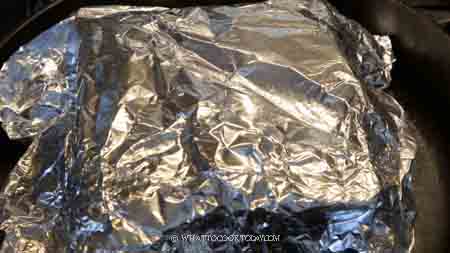
6. Optional step (to brown the surface): The surface won’t be golden brown because there’s no top heat. You can put it in the oven and broil it with top heat on high until golden brown, about 2-3 minutes. DO NOT walk away as it gets burned quickly when you use a broiler
You will not be disappointed with the result. The texture and taste are just spot on! The cake is soft and you can bend it without tearing the cake. The squishiest ever too!
TROUBLESHOOTING
1. No bubbles after 3-5 hours of resting the batter
This could be caused by:
-The yeast is no longer active
-The coconut milk mixture is too hot and the yeast is killed when you mix it in
2. No honeycomb texture
This could be caused by:
–The yeast is no longer active and you don’t get many bubbles after fermentation but you bake the cake anyway
–The baking pan is NOT hot enough
–The top heat is hotter than the bottom
Oven temperature is very crucial when it comes to baking bika ambon. Too hot and the honeycomb won’t form. Not hot enough the starch will separate from the eggs and your bika ambon turns into custard
3. The cake is dense
-The baking pan is not hot enough and the honeycomb texture doesn’t extend all the way to the top, making the cake dense
-The top heat is hotter than the bottom so the cake cooks faster on the top than the bottom, so it is important to make sure only bottom heat is used for initial baking
4. The cake collapses
The batter could be too watery. Make sure you measure the ingredients correctly with a scale if possible. OR The cake is not cooked through and it will collapse when you pull it out from the oven. Another high possibility is the oven temperature is too high. You really need to know your oven and make sure your oven temperature is accurate too
HOW TO STORE
STORING: Bika Ambon can be stored in the refrigerator for up to a week max. They do tend to harden once it is refrigerated.
REHEATING: Simply steam them over high heat for 1 minute and they are as good as new or you can microwave them by placing them on a plate and then cover with a damped paper towel and microwave on high for a minute or until heated through and soften.
Bika Ambon Panggang (with honeycomb texture)
Ingredients
For 6 or 7 inch square cake:
Starter (biang):
- 4 g instant yeast
- 15 g all-purpose flour
- 15 g sugar
- 30 g warm water
Coconut milk mixture:
- 300 g coconut milk
- 150 g sugar
- ½ tsp turmeric powder
- 10 kaffir lime leaves cut into strips
- 2 stalks lemongrass bruise to release flavor
Cake batter:
- 150 g tapioca starch
- 150 g eggs weight of 3 large eggs without the shells
To add last:
- 30 g melted butter
- ½ tsp salt
Instructions
Prepare starter:
- Place all ingredients for the starter in a bowl. Stir to mix. Cover and let it rests for 15 minutes. The starter will double in size and foamy. If it doesn't, your yeast is no longer good. Do not proceed with the recipe until you get a new yeast
Prepare the coconut milk mixture:
- I use canned coconut milk. Shake the can before opening because the water separates from the milk. Place the coconut milk, salt, sugar, turmeric powder, kaffir lime leaves, lemongrass in a sauce pan. Cook on low heat until sugar melts and the mixture is warm but do not let the coconut milk to boil. Remove from the heat and discard the leaves after that and make sure the mixture is warm and not hot (we don't want to kill the yeast later)
- If you have a thermometer, check to make sure it is between 105-115 F (40-46 C). This is a lukewarm temperature for the yeast. If you don't have a thermometer just dip your clean finger in there and it should be comfortably warm
Prepare the batter:
- Mix tapioca starch with salt, crack in eggs and whisk to combine. Add the coconut milk mixture and stir until combine. Stir in the starter and whisk to combine. Strain this mixture to get rid of lumps
Let the batter ferment:
- Cover with a plastic wrap and let it sit at a warm place (about 30-32 C/86-90 F degrees) for 3 hours. Since it is winter here when I made this, I use my oven "breadproof" function and let the batter sit in there. It helps to speed up the fermentation
- The batter will have lots of bubbles and foamy because of the yeast activity. It should also has a pleasant aroma from the yeast fermentation.
- Give the batter a really good stir as the tapioca flour tends to settle at the bottom. Stir in all the bubbles gently. Make sure everything is mixed in. Stir in the melted butter and salt and make sure it's thoroughly combined
To bake in the oven:
Preheat empty pan in the oven:
- 30 minutes before the end of fermentation, preheat your oven to 330 F (160 C), bottom heat only, which is what most conventional oven is. If you use a convection oven make sure it's only bottom heat. Put your empty baking pan on the lowest rack and preheat it together with the oven. Make sure the pan is preheated for at least 30 minutes. The pan needs to be hot when the batter hits the pan. You can test the pan by sprinkling some water on it. If you hear a sizzling sound, the pan is hot enough. If not, preheat the pan another 5-10 minutes.
- When the oven is done preheating, quickly brush the bottom of the pan with some oil to prevent sticking. Pour the batter into the preheated pan quickly while the pan is still hot. You should hear a "sizzling" sound.
- Bake for 45-50 minutes on the lowest rack with the oven door slightly cracked open. I used a wooden spatula to keep it slightly opened.
- You will see lots of bubbles start to rise 10 minutes into baking. This is a good sign. Let it continue to bake until all the bubbles has "broken" and the surface of the cake is dry to the touch and springs back. If you insert a toothpick it should come out clean with a bit of sticky crumbs is okay, as long as it's not wet. If it's not, continue to bake for another 5 minutes and check again. Remove from the oven for now
- Increase oven temperature to 400 F (200 C). Put the pan on the middle rack and continue baking with the oven door closed for another 5-10 minutes or until the top is lightly golden brown
To bake on the stove:
Preheat the pan on top of a cast-iron pan:
- You need a cast iron pan because it is thick and distributes heat evenly. Place your baking pan on top of the cast iron pan and preheat over medium heat. If you have an infrared thermometer the pan should be around 300-320 F (150-160 C). I highly recommend you to get one. I use infrared thermometer a lot because I bake lots of artisan bread and I check surface temperature of my baking pan/pot, oil, etc quite often. It's an inexpensive investment I think
- Make sure the baking pan sizzles if you splash some water on it
- When the pan is hot enough, brush with some oil on the bottom. Pour the batter into the pan and it should sizzle. Maintain heat between medium and low at this point. 10 minutes into baking, you will see lots of bubbles on the surface. This is a good sign. If you don't see much bubbles, you need to increase the heat a bit.
- Continue to bake for the next 30 minutes or until the surface of the cake is dry to the touch and the cake bounce back when you gently press on it, and all bubbles have broken through and you see lots of poke holes on the surface (that's your honeycomb pattern extending all the way up)
- Cover the pan with aluminum foil and lower the heat a bit and let it continue cooking for the next 10 minutes. Check with a toothpick to see if it comes out clean with a bit of sticky crumbs is okay. If it's wet, bake for another 5 minutes and check again
- Optional step (to brown the surface): The surface won't be golden brown because there's no top heat. You can put it in the oven and broil it with top heat on high until golden brown, about 2-3 minutes. DO NOT walk away as it gets burn quickly when you use a broiler
How to check if the cake is done: (for both methods)
- The cake should be no longer wet on top and springs back when you touch it. Use a toothpick and insert into the middle of the cake and it should come out clean with a bit of sticky crumb is fine, but it shouldn't be wet. If it's still wet after the instructed baking time, bake a bit longer in a 5 -minute increment. Check again
Cooling down:
- Remove from the oven and let it cools down completely inside the pan placed on a cooling rack. This may take 3-4 hours
Unmoulding cake from the pan:
- Run a plastic knife around the edges to loosen the cake and you can gently peel the cake off the pan without much problem. The texture of the cake is very resilient and bouncy
Serve:
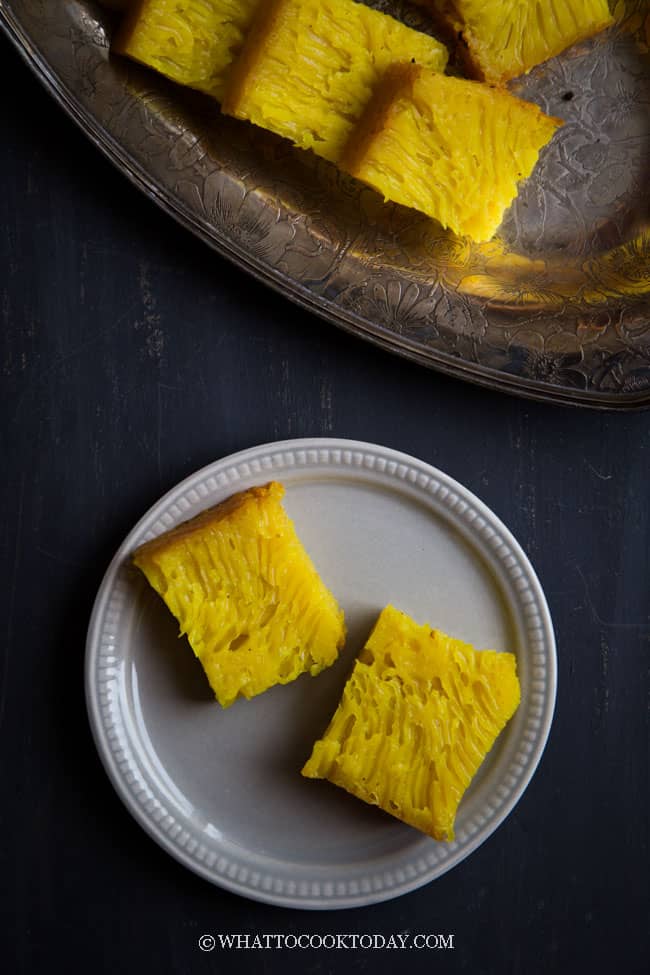
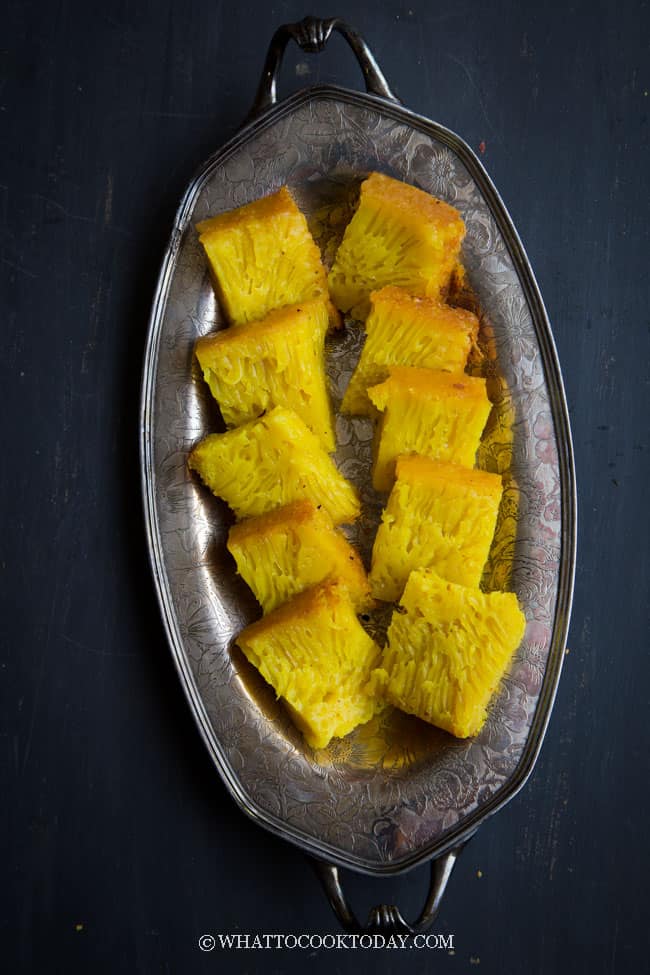
- Trim the 4 edges of the cake. The honeycomb texture is most obvious towards the middle of the cake. So don't be disappointed when you don't see much honeycomb texture on the edge of the cake when you trim the edges.
- Slice the cake with an oiled knife to the desired size. Cake can be stored at room temperature for up to 3 days. After that, store in the refrigerator. They may harden because there's coconut oil, which will harden at a cold temperature just like butter. You can reheat it in the microwave for 10 seconds or so or until just warm or use a steamer to heat it up until just warm


114 comments
This looks great! I’ve never worked with tapioca flour and your recipe gives me a good excuse to try. 🙂
Hi Ann,
Thank you so much. Many of the Indonesian recipes or I can probably say other Southeast Asia countries like Vietnam, Malaysia, Singapore, and Thai do use tapioca flour too.
Thank you for introducing such a wonderful cake! LOVED reading the traditions
Thank you so much Maria.
The texture looks amazing! I love your photos too 🙂 Happy lunar new year!
Thank you Betty. You are too kind. I love your baking and photos too! Happy Lunar New Year to you too
Great job Marv! You made Medanese proud.
Thanks Vivi 🙂
Marvellina, this looks amazing! I love this cake but have never tried making it. Excited to give this recipe a try. Thank you for sharing, and Gong Xi Fa Cai!